


Ensure the water intake is free from debris. A common culprit behind uneven flow is a clogged inlet filter. Regularly inspecting and cleaning this component can make a significant difference. During one of my service calls, I encountered a unit that struggled with pressure due to a simple blockage at the intake. A quick rinse of the filter and the performance improved dramatically.
Next, examine the hose for kinks or damage. A compromised hose can restrict water flow, leading to fluctuating pressure. I once had a client who was frustrated with their machine’s performance, only to discover that a small kink in the hose was the issue. Replacing the damaged section restored the device to its optimal state.
Check the pump’s operation. If the device cycles on and off unexpectedly, it might be due to air entering the system. Bleeding the pump to remove any trapped air can resolve this. I recall a scenario where a simple procedure of releasing air from the system transformed a user’s experience, bringing back the consistent power they expected.

Lastly, ensure that all connections are tight and secure. Loose fittings can allow air to infiltrate, causing irregular operation. I’ve seen machines that seemed faulty merely due to a poorly connected nozzle or trigger gun. A quick inspection and snugging up those connections usually does the trick.
Identifying the Symptoms of a Pulsing Pressure Washer
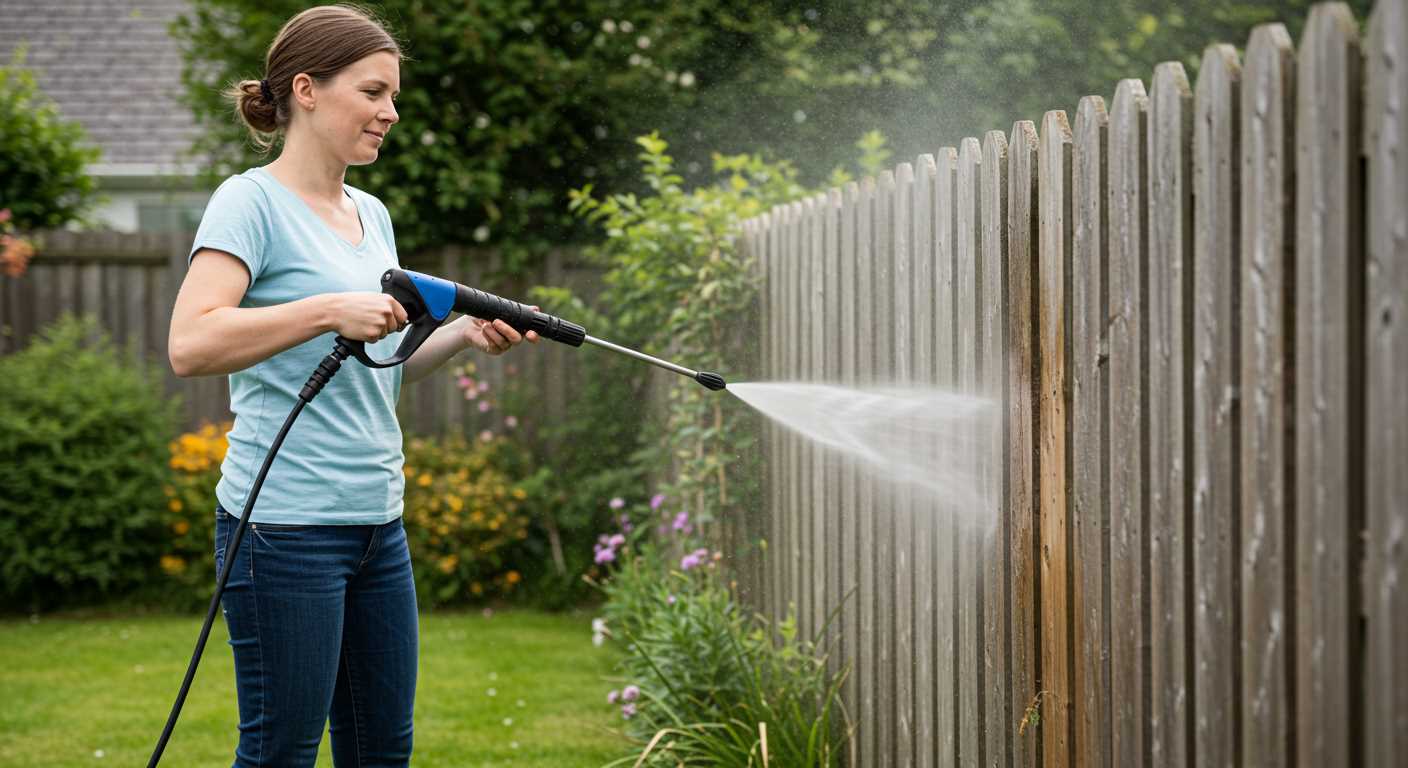
One of the first signs that something is off with your cleaning machine is an inconsistent stream of water. Instead of a steady jet, you might notice it starts and stops abruptly. This can be quite frustrating, especially when you’re in the middle of a task. Pay attention to how the spray is behaving; if you see it fluctuating in intensity, that’s a clear indicator of an underlying issue.
Unusual Noise Patterns
Another telltale symptom is noise. A well-functioning unit typically hums along quietly, but if you hear a high-pitched whine or a sputtering sound, it’s worth investigating further. These sounds can indicate a problem with the pump or air getting into the system. I’ve encountered this many times, and it’s often a simple fix once you pinpoint the noise source.
Pressure Fluctuations
Variability in pressure is another significant clue. If you feel the force of the water changing as you work, it can lead to uneven cleaning results. In my experience, this often relates to issues with the intake or a blockage within the hose. Regularly checking these components has saved me time and effort on numerous occasions, ensuring a smooth operation every time I pull the trigger.
Checking the Water Supply and Inlet Filter
First, ensure that the water source is adequate. A low supply can lead to inconsistent performance. I’ve seen units struggle simply because the tap was partially closed. Open it fully and check if the flow is steady and strong.
Next, inspect the inlet filter. It’s often located at the point where the hose connects to the machine. Remove it carefully and clean out any debris. I recall a time when a customer was baffled by erratic behaviour, only to discover a clogged filter. A simple rinse under running water solved the issue and restored full functionality.
While you’re at it, examine the hose for kinks or damage. A compromised hose can restrict water flow, mimicking symptoms of other issues. If you notice any cracks or wear, replacing the hose might be necessary.
Once everything is checked and cleaned, reconnect the hose and run the unit for a few minutes. Monitor the water flow and ensure it’s consistent. This step is crucial; it can save you from diving deeper into more complex repairs.
Inspecting the Hose and Connections for Leaks
Begin with a thorough examination of the hose and its connections. A small leak can cause significant issues, leading to inconsistent performance. Look for visible signs of wear, such as cracks or abrasions. Pay special attention to the areas where the hose connects to the machine and the nozzle.
Steps to Inspect

1. Visual Check: Run your fingers along the length of the hose. If you feel any bumps or soft spots, these may indicate damage.
2. Connection Tightness: Ensure that all connections are snug. Loose fittings can lead to water escaping, which impacts pressure. Use a wrench to tighten any fittings that seem loose.
3. Pressure Test: If everything appears intact, perform a pressure test. With the machine running, observe the hose for any signs of leaking water. A steady stream or spray indicates a problem.
Common Issues
| Issue | Solution |
|---|---|
| Cracked Hose | Replace the hose with a compatible model. |
| Loose Connections | Tighten connections using appropriate tools. |
| Worn Out Fittings | Replace any damaged fittings to ensure a proper seal. |
After addressing any issues, reassemble the connections and run the unit again. Monitor for any changes in performance. If the problem persists, further investigation may be necessary. Trust me, a well-maintained hose can make all the difference in the effectiveness of your cleaning tasks.
Examining the Pressure Regulator for Malfunctions
Start by isolating the pressure regulator from the rest of the unit. This component plays a critical role in maintaining consistent output. Often, issues originate from the regulator itself, so thorough inspection is necessary.
Visual Inspection
Begin with a detailed visual check. Look for signs of wear or damage:
- Cracks in the casing
- Corrosion around fittings
- Any loose connections
These can affect performance, leading to erratic water flow. If any damage is spotted, replacement may be required.
Testing the Regulator
After visual checks, conduct a functional test:
- Reconnect the regulator and power on the unit.
- Observe the water output. It should remain steady without fluctuations.
- Listen for unusual sounds, such as hissing or rattling, which might indicate internal issues.
If inconsistencies persist, consider disassembly. Carefully open the regulator and inspect for debris or blockages inside. A clean and unobstructed pathway is essential for smooth operation. If you find sediment buildup, clean it thoroughly; if components are damaged, replacement is the only option.
In my experience, many issues stem from improper assembly after maintenance. Ensure all parts are correctly reassembled and secured. Misalignment can lead to operational failures.
Always refer to the manufacturer’s guidelines for specific details, as different models may have unique requirements. Keeping the regulator in optimal condition is key to maintaining performance.
Testing the Nozzle and Spray Gun for Blockages
Check the nozzle and spray gun for blockages by first detaching the nozzle from the lance. Inspect the nozzle orifice closely for any debris or mineral build-up. A simple way to clear it is by soaking the nozzle in a mixture of vinegar and water for about 30 minutes, then rinsing thoroughly. If the blockage persists, use a thin wire or needle to gently poke through the orifice while being careful not to damage it.
Inspecting the Spray Gun
Next, examine the spray gun itself. Remove the nozzle and trigger to access the internal components. Look for any signs of dirt or damage that could impede water flow. Cleaning the interior with a soft brush can help remove any accumulated grime. If you notice any wear on the seals or O-rings, replace them to ensure a proper seal, which is crucial for maintaining consistent pressure.
Reassembling and Testing
Once cleaned, reassemble the components, ensuring everything is tightly secured. Turn on the water supply and run the unit briefly to check for consistent spray output. If the issue persists, it might be worth considering other components, but often, a blocked nozzle or spray gun is the root cause. For those interested in practical applications of high-pressure systems, I recommend checking out this link on how to can fish with a pressure cooker.
Evaluating the Pump for Wear and Tear
Begin by examining the pump housing for signs of damage. Look for cracks, leaks, or any visible wear that might indicate a problem. I once encountered a unit where the casing had small fractures, leading to a significant drop in performance. Replacing the pump resolved the issue entirely.
Next, check the pump’s seals and O-rings. Over time, these components can degrade due to heat and pressure. I remember a situation where a simple seal replacement restored functionality to an otherwise fine machine. Inspect them closely for any signs of wear, such as cracking or brittleness.
Listen carefully to the pump while it’s operating. An unusual noise, like a grinding or rattling sound, can indicate internal damage. I had a case where a worn bearing caused a noticeable noise, and replacing it brought the unit back to life.
Additionally, assess the pressure output. If it fluctuates significantly, it could signal internal wear. Use a pressure gauge to measure the output against the manufacturer’s specifications. I’ve seen many situations where the pump’s efficiency was compromised due to internal wear, leading to inconsistent performance.
Lastly, consider the age of the pump. Regular maintenance can extend its life, but after a certain point, wear is inevitable. I once advised a client to replace an old pump that had served well for over a decade. It was a tough decision, but the improvement in performance was immediate and noticeable.
Resetting the System and Performing Routine Maintenance
Start with turning off the unit and disconnecting it from the power supply. This ensures safety during maintenance. Locate the reset button on the machine, usually found near the power switch. Press and hold this button for a few seconds until you hear a click, indicating that the system has been reset.
Routine Maintenance Steps
Regular upkeep can prevent many issues:
- Clean the filters: Periodically check and clean the inlet filter and any other filters present in the system. Clogged filters can restrict water flow, leading to performance issues.
- Inspect hoses: Look for signs of wear, such as cracks or bulges. Replace any damaged hoses to maintain optimal water pressure.
- Check connections: Ensure that all connections are tight and free from leaks. Loose fittings can cause pressure drops.
- Lubricate moving parts: Apply a suitable lubricant to the pump and any moving components to ensure smooth operation.
Frequency of Maintenance
Establish a routine based on usage. For heavy users, inspect your equipment every month; for occasional users, every three months is sufficient. Keeping a maintenance log can help track when each task was last completed.
For those in need of a reliable cleaning solution for specific tasks, consider exploring options like a pressure washer for mobile valeting. Quality equipment enhances efficiency and effectiveness.
FAQ:
What causes a Karcher pressure washer to pulse?
A Karcher pressure washer may pulse due to several reasons. One common cause is a clogged filter or nozzle, which restricts water flow and leads to pressure fluctuations. Another possibility is air trapped in the system; this can happen if the washer hasn’t been used for a while. Additionally, issues with the water supply, such as inadequate pressure or flow rate, can also result in pulsing. Lastly, a malfunctioning pump or internal components may cause this problem, requiring inspection or replacement.
How can I check for a clogged filter in my pressure washer?
To check for a clogged filter, first, turn off the pressure washer and disconnect it from the power supply. Locate the water inlet filter, usually found where the hose connects to the unit. Remove the filter and inspect it for debris or buildup. You can clean it with water or a soft brush. If it appears damaged or excessively dirty, consider replacing it. After cleaning or replacing the filter, reassemble the components and test the washer to see if the pulsing issue is resolved.
What steps should I take to purge air from my Karcher pressure washer?
To remove air from your pressure washer, follow these steps: First, ensure the unit is turned off and unplugged. Connect the water supply hose and turn on the water. Next, turn on the pressure washer without engaging the trigger. Allow it to run for a few moments until a steady stream of water flows from the gun. Once you see a consistent flow, you can then engage the trigger to release any remaining air. This process should help eliminate pulsing caused by trapped air.
Could low water supply affect the performance of my pressure washer?
Yes, low water supply can significantly impact the performance of a Karcher pressure washer. If the water flow is insufficient, the pump will struggle to maintain consistent pressure, leading to pulsing or fluctuations during operation. It’s important to ensure that the water supply meets the manufacturer’s requirements, which typically includes a minimum flow rate and pressure. Checking hoses for kinks and ensuring the water source is fully open can help improve performance.
What should I do if the pump of my pressure washer is malfunctioning?
If you suspect that the pump is malfunctioning, start by checking for any visible leaks or damage. You may also want to listen for unusual noises while the unit is operating. If you notice any issues, it’s advisable to consult the user manual for troubleshooting tips. In some cases, the pump may need to be repaired or replaced, especially if it shows signs of wear or internal damage. If you’re not comfortable handling repairs yourself, seeking help from a professional technician is recommended.
What are the common causes of a Karcher pressure washer pulsing?
A pulsing Karcher pressure washer can be caused by several factors. One of the most common reasons is a blockage in the water supply, which can restrict the flow of water. This can happen due to debris or sediment in the hose or the filter. Another potential cause is an issue with the pump itself, such as wear and tear or a damaged component. Additionally, if the nozzle is not properly attached or if it is the wrong size for the pressure washer, this can also lead to a pulsing effect. Checking these areas can help identify the root cause of the problem.
How can I troubleshoot and fix the pulsing issue in my Karcher pressure washer?
To troubleshoot a pulsing Karcher pressure washer, first, check the water supply. Ensure that the hose is free of kinks and that the inlet filter is clean. If there’s any debris, remove it and try running the washer again. Next, inspect the nozzle to confirm it is the right type for your machine and is securely attached. If the problem persists, examine the pump. Look for any signs of leaks or damage. You may need to consult your user manual for guidance on pump maintenance. If you’re not comfortable with these checks, consider contacting a professional for assistance.

.jpg)


