
.jpg)


.jpg "How to join pressure washer hose")
For a seamless assembly, ensure the fitting on both ends of the cleaning tube matches the specifications of your equipment. I recall my early days in the industry when I struggled to connect incompatible parts, leading to leaks and frustration. Investing in a reliable connector can save you time and hassle, allowing for a secure attachment that withstands high pressure without fail.
Check Compatibility: Before you begin, identify the thread type and diameter of your existing fittings. Most units use either M22 or 3/8-inch connectors. I often recommend carrying a thread gauge in your toolkit; it’s a small investment that pays off by ensuring you avoid mismatches.

Step-by-Step Assembly: Start by cleaning the threads on both the hose and the machine to remove any debris. Apply a small amount of thread seal tape to prevent leaks. Then, screw the ends together by hand until snug, followed by a gentle tightening with a wrench. I’ve seen too many people overtighten and damage the fittings, leading to costly repairs down the line.
Troubleshooting: If you encounter any leaks after assembly, don’t panic. First, check if the tape is applied correctly and whether the threads are fully engaged. If issues persist, inspect for any signs of wear or damage on the fittings themselves. I’ve learned that a proactive approach to maintenance can save a lot of headaches in the long run.
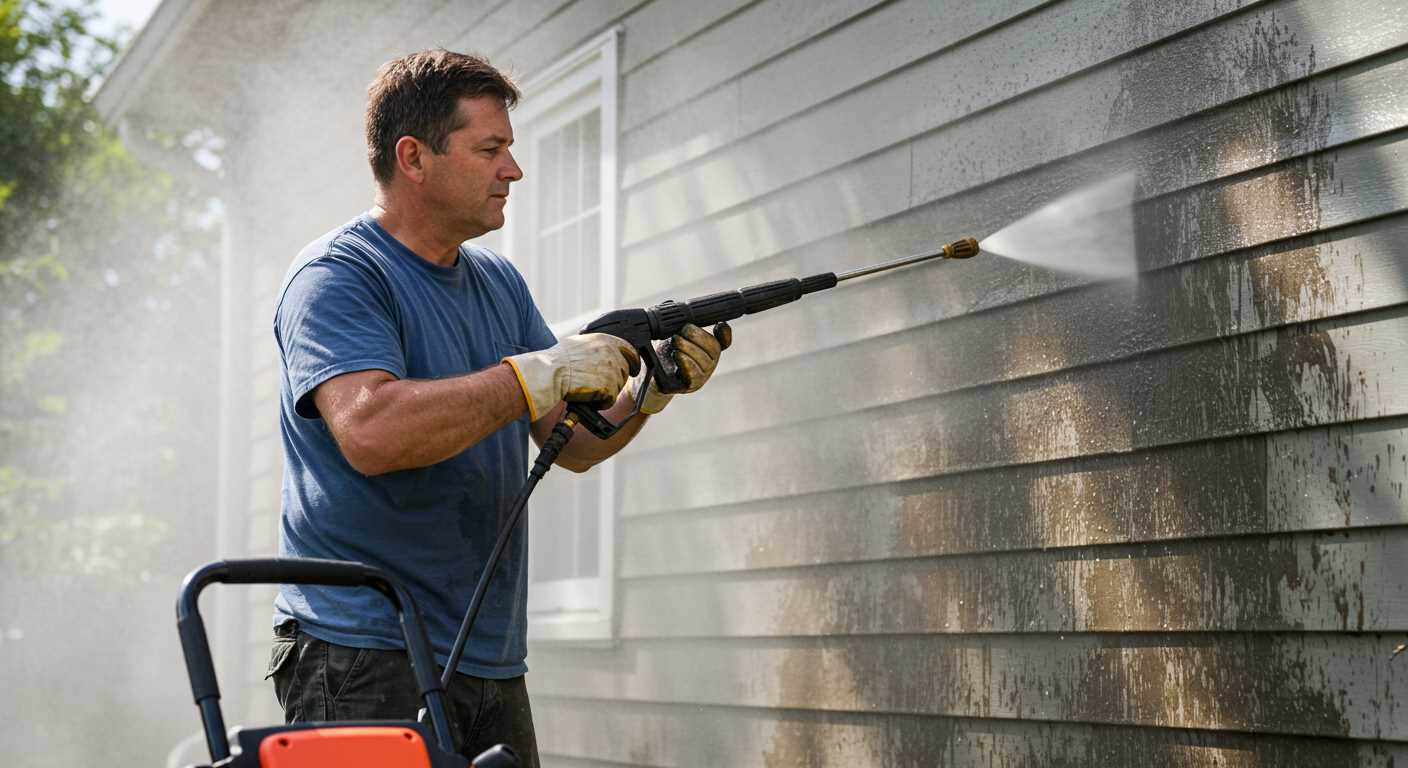
Joining High-Pressure Equipment Tubing

First, ensure you have the right connectors. I’ve found that a quick-connect fitting system is the easiest and most reliable way to link these lengths. Look for fittings that match the diameter of your tubing, typically either 1/4-inch or 3/8-inch. Don’t forget to check if your connectors are compatible with the manufacturer’s specifications.
Preparing the Ends
Before connecting, inspect the ends of the tubes. Cut any frayed edges with a sharp utility knife for a clean fit. Deburr the cut edges to avoid damage to the connector and ensure a tight seal. I’ve seen too many people skip this step, leading to leaks and inefficiency. If necessary, use a hose clamp or a similar device to reinforce the connection; it can make a significant difference in durability.
Securing the Connection
Once aligned, push the ends into the fittings until you hear a click. This sound indicates that the connection is secure. For added security, tighten any screws or clamps with a wrench. In my experience, a little extra care during this phase saves a lot of trouble later on. Always test the connection by running water through it before using it under pressure. This simple check can prevent unexpected surprises during your cleaning tasks.
Selecting the Right Hose Connector
To ensure a reliable connection, opt for connectors made from durable materials like brass or stainless steel. These materials withstand high pressure and resist corrosion, providing longevity and performance.
Types of Connectors
- Quick Connect: These are convenient for easy attachment and detachment. Look for models with a secure locking mechanism to prevent accidental separation during use.
- Screw-On: Reliable and often leak-proof, screw-on connectors require threading. Ensure compatibility with your existing equipment for a snug fit.
- Barb Connectors: Ideal for flexible tubing, these connectors grip the hose tightly. A hose clamp is recommended for added security.
Compatibility and Size
Check the diameter of your equipment’s outlet and the connector. Common sizes include 1/4″, 3/8″, and 1/2″. Using the appropriate size prevents leaks and optimises performance.
Look for connectors with standard thread patterns, like M22 or 3/8″ NPT, to ensure a proper fit with various brands. Always double-check specifications before purchasing.
From my experience, using mismatched connectors leads to frustration and wasted time. I once tried to connect a high-pressure system with the wrong size, resulting in leaks that ruined my day. Choosing the right connector not only saves hassle but also enhances overall cleaning efficiency.
Finally, consider additional features like swivel capabilities to reduce kinking and improve manoeuvrability. Investing in quality connectors pays off in the long run, ensuring your equipment operates at its best.
Preparing the Hose Ends for Connection
Start by ensuring that the ends of the tubing are clean and free from debris. Any dirt or grime can interfere with a tight seal and lead to leaks during operation. I’ve seen many users overlook this step, only to face frustrating issues later.
Cutting the Ends
If the ends of your tubing are frayed or damaged, it’s best to cut them straight across. I recommend using a sharp utility knife for a clean cut. This will not only enhance the connection but also extend the life of the fittings.
Deburring
After cutting, check for any sharp edges or burrs. These can cause wear on the connectors and lead to leaks. A simple deburring tool or even sandpaper can smooth out any rough spots. This small step can save you from future headaches.
For added versatility, consider investing in a pressure washer telescoping extension wand. It allows for greater reach and flexibility while using your system.
Finally, ensure that the connectors you plan to use are compatible with your equipment. A snug fit is critical; this is not the time to take chances. Following these steps will ensure a reliable and efficient connection, ready for any task.
Utilising Hose Clamps for a Secure Fit
For a reliable connection, I recommend using hose clamps. They provide a strong grip, ensuring that your tubing remains intact during operation. After testing various fittings, I’ve found that stainless steel clamps outperform plastic ones in both durability and resistance to corrosion.
When applying clamps, position them at least 2 inches from the end of the tube to avoid cutting into the material. Tighten them securely but avoid over-tightening, which can lead to damage. A good rule of thumb is to tighten until you feel resistance and then give it a quarter turn more. This ensures the connection is firm without compromising the integrity of the tubing.
Consider using a torque wrench for more precision, especially if you’re working with multiple clamps. Consistency is key in achieving reliable connections. During my years in the field, I’ve seen too many setups fail due to improperly secured connectors. Always double-check your work before starting your equipment.
For those who care about keeping their equipment in top shape, using the right soap can enhance your cleaning results. If you’re interested, check out the best car wash soap for electric pressure washer for optimal performance.
Testing for Leaks After Joining
After completing the connection, the next step is to ensure everything is watertight. I recommend using a simple method: turn on the water supply and inspect for any signs of leakage at the joints. It’s best to do this in an area where you can easily observe any drips or sprays.
Visual Inspection
Check around each connection for moisture or water pooling. If you see wetness forming, it’s a clear indication that something isn’t sealed properly. Pay close attention to the points where the connector meets the tubing, as these are common leak areas.
Using Soap Solution
If you want a more thorough test, mix a few drops of dish soap with water in a spray bottle. Spray the solution on the joints. If bubbles appear, you’ve identified a leak. This method is particularly useful for pinpointing minor leaks that might otherwise go unnoticed.
Address any detected issues immediately. Tightening the connectors or adjusting the clamps can often resolve small leaks. If problems persist, consider replacing any faulty components. Regular testing after any adjustments will help maintain a reliable setup for your cleaning tasks.
Maintaining Your Pressure Washer Hose Connections
Check connections regularly to avoid unexpected leaks. In my years of experience, I’ve seen too many users neglect this simple yet critical aspect. A quick inspection once a month can save you from larger problems down the line.

After making a connection, it’s wise to apply some thread seal tape to the threads of the fittings. This tape acts as a barrier against water escaping, ensuring a tight seal. I often do this as a part of routine maintenance, especially if the fittings are frequently removed and reattached.
Keep the areas around the joints clean and free from debris. Dirt can compromise seals, leading to wear and tear over time. I recall a time when I didn’t pay attention to this, and it resulted in a frustrating leak that could have been easily avoided with a little diligence.
Always store your equipment properly. When not in use, ensure that the connections are not under tension. I’ve seen hoses twisted and damaged because they were stored improperly. Use hooks or reels to keep everything organised and prevent unnecessary strain on the connections.
Monitor the condition of the seals. If you notice any signs of wear, such as cracking or hardening, replace them promptly. I learned the hard way that ignoring a small issue can lead to a complete failure of the connection during a job.
Finally, keep your equipment clean. After use, rinse off any soap or debris from the connections. This simple step helps to prolong the life of the fittings and maintain a secure connection. I’ve always found that a little upkeep goes a long way in ensuring reliability.
Replacing Damaged Hose Sections Safely
First, ensure the power source is disconnected. This prevents any accidental activation while you are working on the equipment. I’ve seen too many near misses due to simple oversights. Always treat these devices with respect.
Next, assess the extent of the damage. If the wear is localised to a small section, it may be possible to cut out the damaged area and replace it with a new segment. Measure the length accurately to avoid any issues with fitting. A common mistake is to underestimate how much needs to be removed.
Once you have your replacement piece, ensure it matches the specifications of the existing line. Different types can affect performance, leading to inefficiency. I recall a situation where a mismatched connector led to pressure loss, causing frustration during a critical job.
Prepare the ends of both the existing and new sections for a solid connection. Clean the surfaces thoroughly, removing any debris or corrosion. This step is crucial as contaminants can compromise the integrity of the joint. I always use a wire brush and some mild detergent for this task.
After ensuring a clean fit, it’s time to secure the joint. A combination of connectors and clamps is often the best approach. Ensure the clamps are tightened evenly; uneven pressure can lead to leaks. If you’re unsure about the tightness, it’s wise to double-check. I’ve had to redo connections in the past simply because I assumed it was tight enough.
Before putting the equipment back into service, conduct a thorough leak test. Reconnect everything and turn on the water supply without activating the motor. Check for any signs of leakage around the newly fitted section. I usually keep a towel handy to dry any excess water. If any drips appear, don’t hesitate to tighten those clamps further.
Lastly, make it a habit to inspect your connections regularly. Incorporating this into your maintenance routine can save you from unexpected issues down the line. I’ve learned through experience that a small check can prevent a major headache later.
| Step | Description |
|---|---|
| Disconnect Power | Ensure the machine is off to prevent accidental activation. |
| Assess Damage | Determine if the damage is localised and measure the area. |
| Match Specifications | Ensure the replacement segment matches the existing line. |
| Prepare Ends | Clean the ends thoroughly to ensure a solid connection. |
| Secure Connection | Use clamps and connectors, tightening them evenly. |
| Leak Test | Check for leaks before using the equipment again. |
| Regular Inspections | Incorporate checks into your maintenance routine. |
FAQ:
What tools do I need to join a pressure washer hose?
To join a pressure washer hose, you’ll typically need a few basic tools. A pair of pliers can help you tighten or loosen fittings, while a wrench may be necessary for more secure connections. Additionally, having some Teflon tape on hand can assist with sealing threads to prevent leaks. Ensure you have the correct fittings for your specific hose and pressure washer model, as compatibility is key for a successful connection.
Can I join different brands of pressure washer hoses?
Joining different brands of pressure washer hoses is possible, but it depends on the fittings. Most hoses come with standard connections, but variations exist between manufacturers. Check the diameter and thread type of both hoses to ensure they match. If they don’t, you may need an adapter to facilitate the connection. Always consult your pressure washer’s manual for guidance on compatibility to avoid potential damage or leaks.
What should I do if the hose connection is leaking?
If you notice a leak at the hose connection, your first step should be to turn off the pressure washer and relieve any pressure in the system. Check the fittings to ensure they are tight; sometimes, a simple adjustment can solve the issue. If the leak persists, inspect the O-ring or washer inside the fitting, as it may be worn out or damaged and require replacement. Using Teflon tape on threaded connections can also provide a better seal and help eliminate leaks.
How do I determine the right size hose for my pressure washer?
To find the right size hose for your pressure washer, refer to the manufacturer’s specifications found in your user manual. Measure the diameter of the existing hose or the fitting on your pressure washer, which is typically either 1/4 inch or 3/8 inch. Additionally, consider the length you need based on your working area. Choosing a hose that matches the pressure washer’s PSI and GPM ratings will ensure optimal performance and prevent any potential issues during use.
Is it safe to use an extension hose with my pressure washer?
Using an extension hose with your pressure washer can be safe, provided you choose the right type. Ensure the extension hose is rated for the same PSI and GPM as your pressure washer to maintain efficiency and prevent damage. Look for hoses specifically designed for pressure washers, as they can handle the high pressure. Always check for compatibility with your existing hose and fittings before making a connection to ensure a proper seal and reduce the risk of leaks.
How do I connect a pressure washer hose to the machine?
To connect a pressure washer hose to the machine, first, ensure that the power is off and the machine is cool. Locate the high-pressure outlet on your pressure washer, which is usually found on the front or side of the unit. Take the end of your pressure washer hose and align it with the outlet. Push the hose connector firmly into the outlet and then turn it clockwise until it clicks into place. Make sure it is secure to avoid any leaks during operation. If your model has a quick-connect feature, simply push the hose into the connection until it locks. Always double-check that the connection is tight before starting the machine to ensure safety and proper functionality.

.jpg)


