


First, gather the necessary components: a robust nozzle, a standard adapter, and a connector that fits your water source. These items are vital for creating a powerful cleaning apparatus from a basic tube. The right nozzle enhances water flow and pressure, ensuring a thorough clean.
In my experience, choosing a nozzle with adjustable settings can make a significant difference. I once used a multi-functional nozzle that allowed me to switch between a fine mist and a concentrated jet. This versatility proved invaluable for various tasks, from washing vehicles to tackling stubborn grime on outdoor surfaces.

Next, ensure all connections are secure to prevent leaks. I recall a time when I overlooked this detail, resulting in a frustrating mess during a cleaning session. A good seal not only maintains pressure but also saves water, making your efforts more effective.
Finally, test your setup before diving into extensive cleaning. A quick trial run helps identify any issues, allowing for adjustments. I’ve saved myself countless hours by taking this simple step. Trust me, a few minutes spent on preparation can lead to impressive results.
Choosing the Right Nozzle for Your Hose
Selecting an appropriate attachment can greatly enhance cleaning performance. I’ve often experimented with various nozzles, and I’ve found that the choice significantly impacts the outcome of outdoor tasks. For general cleaning, a fan spray nozzle is versatile, providing even distribution of water over a large area, making it ideal for patios and driveways.
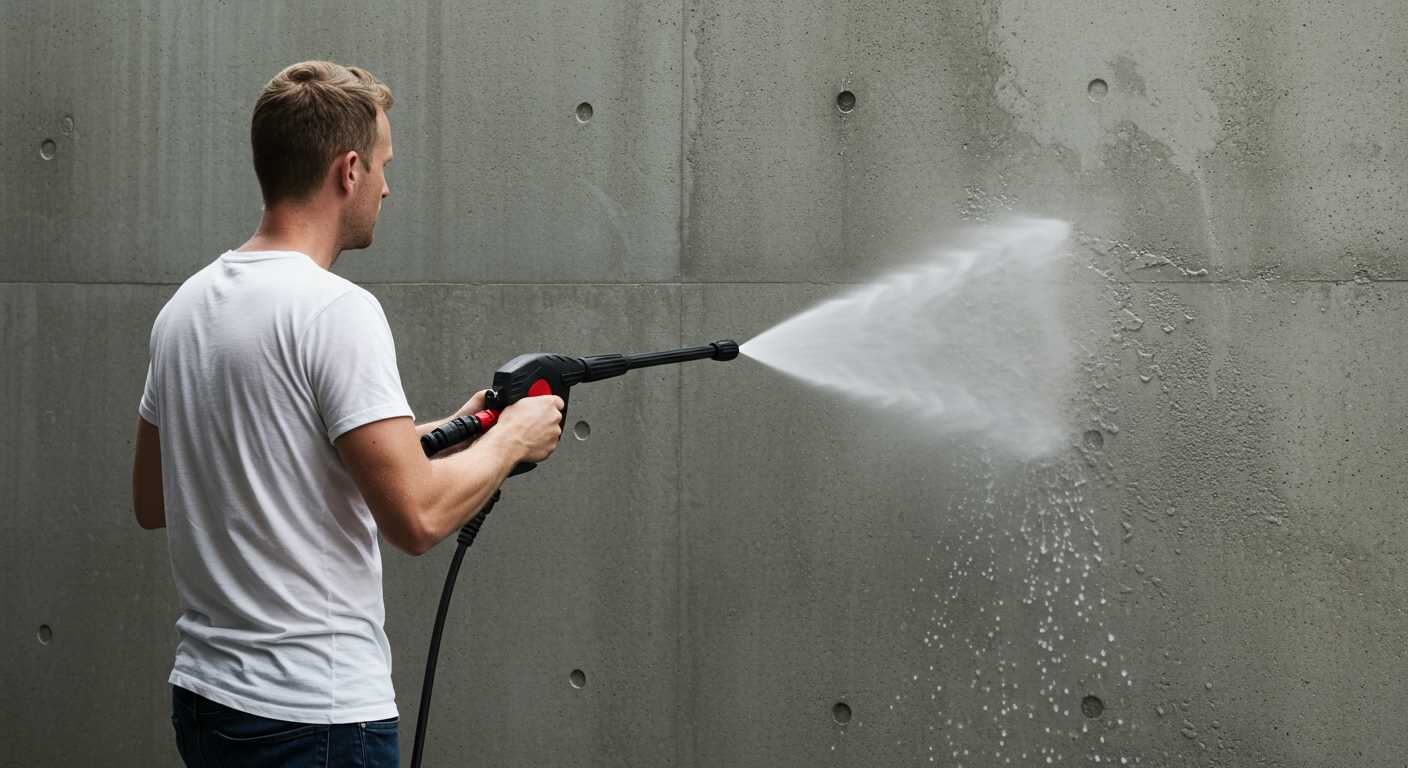
Understanding Nozzle Angles
Each nozzle typically comes with a specific angle that dictates the spray pattern. A 40-degree nozzle offers a gentle mist, perfect for delicate surfaces like cars or painted furniture. On the other hand, a 0-degree nozzle produces a concentrated stream, suitable for tough stains on concrete. I remember tackling a particularly stubborn oil stain on a garage floor with a 0-degree attachment; the results were impressive, but caution is necessary to avoid damage to softer materials.
Material and Compatibility
Pay attention to the material of the nozzle. Brass nozzles are durable and resist corrosion, while plastic ones are lighter and less expensive. Ensure that the attachment fits securely with your equipment to prevent leaks. I once encountered a situation where an improperly fitting nozzle caused water pressure to drop drastically, leading to a frustrating experience. Always check compatibility before starting your cleaning project.
Experimenting with different nozzles can lead to discovering the perfect one for your specific needs, making the task not only easier but also more enjoyable.
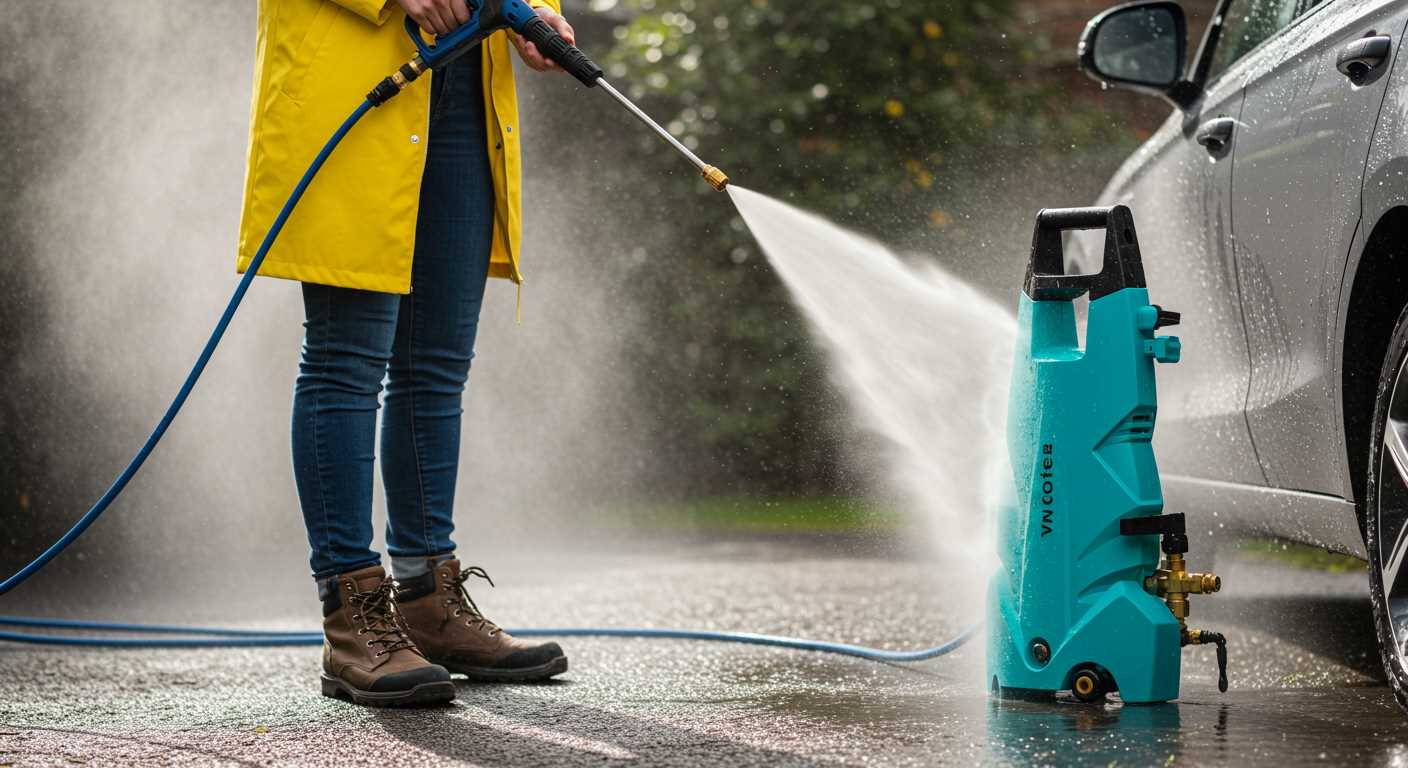
Connecting Your Hose to a Water Source
Begin by selecting a suitable tap or water supply for your setup. Outdoor taps are typically the best choice, as they provide a direct and powerful flow. Use a standard threaded connector that fits your tap securely. If your water source lacks a threaded fitting, consider using an adapter to ensure a tight connection.
Before attaching your tubing, check for any leaks or damage in the fittings. A leak can significantly reduce the effectiveness of your cleaning efforts. Once secured, turn on the water supply gradually to prevent sudden bursts that could damage the connections.
For optimal performance, ensure that your water source can handle high flow rates. A supply capable of delivering at least 150 bar will enhance your cleaning power, making it easier to tackle stubborn dirt and grime. To learn more about suitable models, visit 150 bar.
Next, maintain a steady pressure by monitoring the tap’s flow. If you experience fluctuations, check for kinks or blockages in your tubing. Adjusting the tap to achieve a consistent flow will make a significant difference in your cleaning results.
Lastly, always keep the connection clean and free from debris. A dirty fitting can lead to reduced water flow and, consequently, less effective cleaning. Regular maintenance will ensure that your setup remains efficient and reliable.
Selecting a Suitable Pump for Pressure Generation
For optimal results, a high-quality pump is non-negotiable. I recommend looking for a diaphragm or piston pump, as these types are designed to deliver the necessary pressure while maintaining water flow. A good starting point is a pump that can generate at least 1000 PSI. It’s a balance between power and efficiency that you’ll appreciate during rigorous tasks.
Key Specifications to Consider
When you’re evaluating pumps, focus on these specifications:
| Specification | Recommended Value |
|---|---|
| Pressure Output | 1000-2500 PSI |
| Flow Rate | 1.5-2.5 GPM |
| Power Source | Electric or Gas |
| Weight | Lightweight for portability |
Personal Experience with Pumps
Once, I tested a diaphragm pump that was surprisingly compact yet powerful. It delivered a steady 1500 PSI, which was perfect for cleaning stubborn surfaces like driveways and patios. I was amazed at how well it handled various tasks without losing pressure. Choosing a pump with adjustable pressure settings can also be beneficial, as it provides versatility for different cleaning jobs.
Don’t overlook maintenance. Regular checks can prolong the life of the pump and ensure it operates at peak performance. If you’re also looking for tools to complement your setup, I found the best budget garden leaf blower and vacuum to be a fantastic addition for clearing debris and enhancing your cleaning efficiency.
Attaching the Hose to the Pump Securely
Utilising the right connector is paramount for a firm attachment between the flexible tubing and the pump. I always opt for quick-connect fittings, as they allow for easy connection while ensuring a tight seal. When I was working on my own setup, I found that even the slightest leak can reduce efficiency significantly.
Ensure the threads are compatible; mismatched sizes can lead to leaks or damage. I remember a time when I used an adapter that was just a bit too small, and it created a frustrating leak that I had to troubleshoot. Always check the diameter of the fittings before making a purchase.
Once you have the correct fittings, apply Teflon tape to the threads. This simple addition can make a world of difference by sealing the connection and preventing leaks. I’ve seen many setups ruined because someone skipped this step, thinking it wasn’t necessary. Trust me, it is.
Next, tighten the connection securely but avoid over-tightening, which can cause damage to the threads. A firm grip is all you need. During my time with cleaning equipment, I often encountered pumps with stripped threads due to excessive force. A good rule of thumb is to tighten until you feel resistance and then give it a slight additional turn.
Finally, always conduct a leak test before putting the system into full operation. I’ve learned the hard way that a quick check can save time and hassle later. Turn on the pump without any attachments first, and inspect for any signs of leaking at the connection. If everything looks good, you’re ready to switch on the system and begin your task.
Testing Pressure Levels and Adjustments
Start by using a pressure gauge to measure the force generated by your setup. Attach the gauge to the nozzle, ensuring a tight seal. This step is crucial to determine if the output meets your cleaning needs.
Steps to Test Pressure Levels
- Turn on the water supply and the pump.
- Check the gauge reading; it should provide a clear indication of the pressure level.
- Adjust the pump settings if the pressure is too low or too high by following the manufacturer’s instructions.
Making Adjustments
If the output is less than desired, consider the following:
- Inspect the connections for leaks that could reduce pressure.
- Switch out the nozzle for one with a narrower spray pattern, which can increase pressure.
- Alter the pump speed, if adjustable, to enhance pressure generation.
For high-pressure needs, ensure that the water source can supply sufficient volume. A low flow rate can impede performance. Similarly, if pressure exceeds safe limits, this could damage components, so frequent checks are wise.
From my experience, once I had a setup that seemed perfect, but I overlooked checking the gauge. It resulted in inadequate performance during a crucial job. After adjustments and testing, I realised how vital those initial checks are. It transformed my approach to every project thereafter.
Maintaining Your DIY Pressure Washer for Longevity
Regularly inspecting connections is crucial. Ensure all fittings are tight to prevent leaks. I’ve encountered numerous cases where a simple tightening resolved issues that seemed major. Check for any signs of wear or damage on hoses and connectors; replace anything that looks compromised.
Flushing your setup after each use can greatly extend its life. Run clean water through the system to remove any detergent residues or debris. I usually do this for a few minutes, ensuring all components are cleared. This small step prevents clogs that could cause significant problems down the line.
Storing the unit properly is equally important. Keep it in a cool, dry place away from direct sunlight and extreme temperatures. I learned the hard way that leaving equipment exposed can lead to cracks and degradation. Consider coiling hoses loosely to avoid kinks, which can lead to weak spots.
Lubrication plays a key role in maintaining moving parts. I recommend using silicone spray or a similar product on any mechanical components. It not only keeps things moving smoothly but also protects against rust and corrosion. I’ve seen many devices fail prematurely simply because they were neglected in this regard.
Lastly, keep an eye on the pump. Regular checks for leaks or unusual noises can save you from costly repairs. If you notice any changes, address them immediately. I once ignored a small leak, thinking it was insignificant, and ended up needing a complete pump replacement. Prevention is far easier than repair.
FAQ:
What materials do I need to convert a garden hose into a pressure washer?
To turn your garden hose into a pressure washer, you will need a few key materials. Firstly, you will require a pressure washer attachment that fits onto your hose. This attachment typically includes a nozzle that can create a high-pressure jet of water. Additionally, you may want a hose connector to ensure a secure fit. Depending on your setup, having a spray gun with adjustable settings can also enhance your washing capabilities. Finally, make sure you have access to a water source and a power outlet if you plan to use any electric-powered attachments.
How does the pressure from a garden hose compare to that of a traditional pressure washer?
A garden hose generally operates at a much lower pressure compared to a traditional pressure washer. The average garden hose delivers water at a pressure of around 40 to 60 psi (pounds per square inch), while a pressure washer can produce anywhere from 1,300 psi to over 3,000 psi. This significant difference means that while a garden hose can handle light cleaning tasks, such as watering plants or rinsing off dirt, a pressure washer is more effective for tougher jobs like removing grime from driveways or cleaning siding. By using an attachment, you can increase the pressure slightly, but it will not match the power of a dedicated pressure washer.
Can I use any garden hose for this conversion, or are there specific types that work best?
Most standard garden hoses can be used for this conversion, but there are a few considerations to keep in mind. It is advisable to choose a hose that is at least 5/8 inch in diameter, as this size typically allows for better water flow. Also, ensure that the hose is in good condition, with no cracks or leaks, as these can affect performance. Some hoses are designed for high pressure and may perform better than others, so checking the specifications can be beneficial. If you have a choice, opting for a reinforced hose may provide better durability during the conversion.
What are the limitations of using a garden hose as a pressure washer?
Using a garden hose with an attachment to function as a pressure washer has its limitations. While it can increase the pressure to some extent, it will not achieve the levels of a proper pressure washer, which can significantly limit its cleaning power. This means that it might struggle with heavy-duty tasks, such as removing oil stains or deep-seated dirt. Additionally, the attachments may not offer the same variety of nozzle options or pressure settings that professional models provide. Lastly, the water flow rate may be restricted, leading to longer cleaning times for larger areas.
Is it safe to convert my garden hose into a pressure washer, and are there any precautions I should take?
Yes, it is generally safe to convert a garden hose into a pressure washer, provided you take certain precautions. Make sure all connections are secure to prevent leaks, which can lead to water damage. It is also advisable to wear protective gear, such as goggles and gloves, to shield yourself from any debris that may be dislodged during cleaning. Additionally, avoid using the attachment on surfaces that could be damaged by high pressure, like delicate siding or painted surfaces. Always follow the manufacturer’s instructions for the attachment, and never exceed the recommended pressure to maintain safety.
How can I turn my garden hose into a pressure washer?
To convert your garden hose into a pressure washer, you will need a few specific attachments. First, purchase a pressure washer attachment that is compatible with standard garden hoses. This typically includes a nozzle that can increase the water pressure as it exits. You will also need a spray gun that can handle higher pressures. Once you have these items, simply connect the nozzle to the end of your garden hose, attach the spray gun, and ensure that all connections are tight to prevent leaks. After that, turn on the water supply and test the system. Adjust the nozzle settings as needed to achieve the desired pressure for cleaning tasks like washing cars or patio furniture.


.jpg)


