
.jpg)


.jpg "How to operate a honda pressure washer")
Before you even think about starting the engine, ensure that all connections are secure. This simple step can prevent leaks that might occur when you crank it up. I’ve seen too many people jump right in, only to be sprayed with water or left with a machine that won’t function properly. Double-checking connections may save you from an unnecessary mess.
Next, be mindful of the water supply. Always use a clean source; muddy or contaminated water can clog the system and damage the interior components. A quick rinse of the intake filter can do wonders if you notice a drop in performance. In my early days, I learned this the hard way. A few minutes spent on maintenance can save hours of frustration later.
When it comes to choosing the right nozzle for your task, don’t underestimate its significance. Different nozzles provide varying spray patterns and pressures. For example, a 0-degree nozzle is great for tough stains, but it requires a steady hand and caution. I once damaged a patio surface by using too strong a spray without realising the consequences. Knowing which attachment to utilise can transform your cleaning experience from a chore into a breeze.
Lastly, always consider your surroundings. Protect nearby plants, furniture, or delicate surfaces from the powerful stream. I’ve made the mistake of neglecting this, resulting in an unintended paint job on a garden statue. Using tarps or barriers can shield sensitive areas while you work, allowing you to focus on the task at hand without worry.
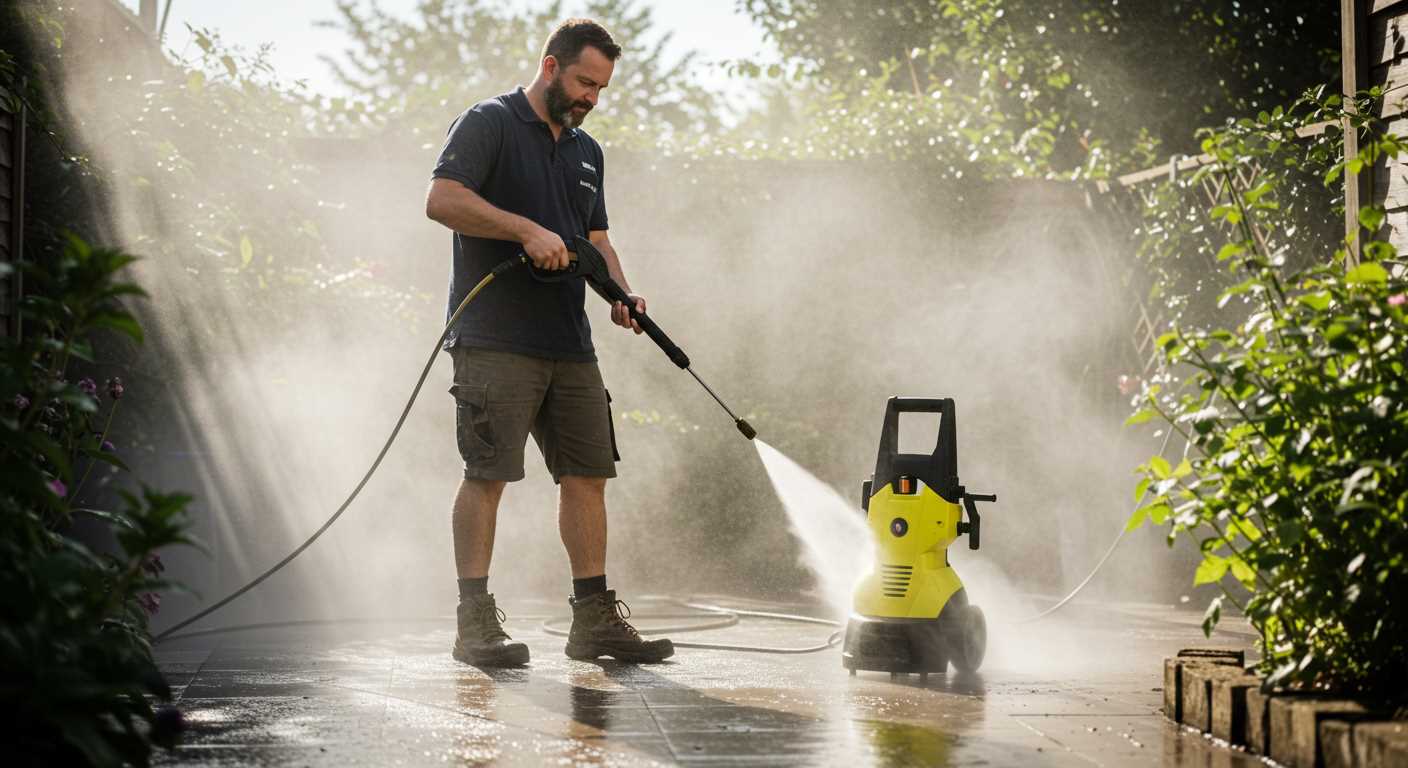
Efficient Use of a Honda Cleaning Machine
Begin your task by ensuring you have the right nozzle attached. For light jobs, a wider nozzle works well, while a narrower one is better for tough stains. I recall a time when I tackled a particularly stubborn oil stain on my driveway. Switching to a narrow nozzle made all the difference, cutting through the grime effortlessly.
Fuel and Maintenance Checks
Before starting, check the fuel level. Honda engines are reliable, but running low on fuel can lead to performance issues. I’ve learned to keep a spare canister handy. Additionally, inspect the oil level; fresh oil ensures smooth operation. A quick routine check can save you from unexpected interruptions during your cleaning tasks.
Operating Techniques
Always maintain a safe distance from the surface you’re cleaning–too close can cause damage. I’ve seen friends accidentally strip paint from their fences because they were too eager. It’s best to keep the nozzle about two feet away and adjust as needed. Use sweeping motions rather than holding the spray in one spot, as this prevents etching and promotes even cleaning.

Lastly, if you’re planning to can fish, it might be worth learning how to can fish with a pressure cooker. A clean workspace makes a big difference in the process, just as it does in maintaining your equipment.
Understanding the Pressure Washer Components
The key to maximising the performance of your cleaning equipment lies in grasping the function of each component. The heart of this machine is the engine, which fuels the system. A reliable engine ensures consistent power delivery, so always check for any unusual noises or vibrations during use. Routine maintenance, like checking the oil level, can prolong its lifespan.
Next, consider the pump. This element pressurises the water, allowing for effective cleaning. A well-maintained pump contributes to optimal water flow and pressure. If you notice a drop in performance, it might be time to inspect for leaks or clogs. Regularly flushing the system with clean water can prevent sediment buildup.
The nozzle plays a pivotal role in determining the spray pattern and intensity. Different tasks require different nozzles; for instance, a wider spray is ideal for rinsing, while a narrow jet is perfect for tough stains. Keep the nozzles clean and free of debris to maintain efficiency. Swapping them out based on the task ensures you get the best results.
The hose is your lifeline, connecting the source to the nozzle. Check for kinks or cracks that could impede water flow. A high-quality, durable hose can withstand regular use, but if you’re facing frequent issues, it might be worth investing in a more robust option.
Finally, don’t overlook the accessories. Items like brushes, surface cleaners, and extension wands can enhance versatility. Having the right tools on hand can save time and effort, making your cleaning tasks more manageable. Always store them properly to avoid damage.
By understanding these components, you can troubleshoot issues effectively and ensure your equipment remains in top condition, ready to tackle any cleaning challenge that comes your way.
Preparing Your Work Area for Pressure Washing
Clear the area of any furniture or obstacles. I recall a time when I overlooked moving a garden gnome, only to see it flying off the patio when I started the machine. Ensure all items, including plants and decorations, are relocated at least 10 feet away from the cleaning zone.
Inspect the surface that requires cleaning. Look for fragile spots, such as loose tiles or cracked pavements. I once encountered a driveway with weak sections that crumbled under pressure. Mark these areas with cones or tape to avoid any mishaps.
Cover windows and delicate fixtures with plastic sheeting. I learned this the hard way after a stray stream of water caused damage to a window frame. Use painter’s tape to secure the edges of the sheeting for added protection. This simple step can save you from costly repairs.
Check for nearby electrical outlets and ensure they’re secured. Water and electricity do not mix. I’ve come across situations where someone accidentally sprayed an outlet, leading to a brief but alarming shock. Always use extension cords rated for outdoor use and keep them dry.
Assess the water source. Make sure the hose is long enough to reach your cleaning area without straining. I once had to make a last-minute dash to find an additional hose because mine was too short. A well-planned setup saves time and frustration.
Lastly, lay down tarps or drop cloths if you’re working on a surface that could stain. I vividly remember cleaning a brick patio and watching the dirt run off and discolour the surrounding grass. Protecting the ground can save you from unwanted clean-up afterwards.
Connecting the Water Supply and Power Source
Ensure a reliable water connection before you begin. Connect the garden hose to the water inlet on the machine securely. Use a quality pressure washer nozzle for garden hose to prevent leaks and optimise water flow. Check for any kinks or blockages in the hose that could hinder performance.
Water Supply Connection Steps
1. Turn off the water supply before making connections.
2. Attach the hose to the inlet, ensuring it’s tightly fitted.
3. Turn on the water supply to check for leaks.
4. Ensure that the hose is straight and free of obstructions.
Power Source Setup
For electric models, plug the machine into a grounded outlet. Always check the cord for damage before use. If you’re using a gas-powered unit, ensure the fuel tank is filled and the oil level is adequate. Checking these levels regularly can save you from interruptions during your cleaning tasks.
| Type | Connection Instructions |
|---|---|
| Electric | Plug into a grounded outlet; inspect cord for damage. |
| Gas | Fill fuel tank and check oil levels before starting. |
With the water and power connections established, you’re set to tackle your cleaning tasks efficiently. Just remember to keep an eye on that water flow and power supply throughout your work to avoid any disruptions.
Selecting the Right Nozzle for Your Task
For optimal results, choose the appropriate nozzle based on your specific cleaning task. Each nozzle type delivers a different spray pattern, influencing cleaning effectiveness and surface safety.
Fan nozzles are colour-coded for easy identification. The red nozzle provides a narrow, high-pressure stream, perfect for tough stains on concrete. However, use it cautiously to avoid damaging softer surfaces. The yellow nozzle offers a 15-degree spray, suitable for stripping paint or cleaning heavily soiled surfaces. The green nozzle, with a 25-degree angle, is excellent for general cleaning tasks, like washing cars or patios.
The white nozzle, producing a 40-degree fan, is ideal for delicate surfaces. It works wonders on windows or painted areas without risking damage. Lastly, the black nozzle delivers a low-pressure spray, perfect for applying detergents. Always remember to switch nozzles based on the task at hand to enhance efficiency and prolong the life of your equipment.
During my time in the cleaning equipment industry, I encountered countless situations where using the wrong nozzle led to unsatisfactory results or surface damage. I once used a red nozzle on a wooden deck, thinking it would quickly remove dirt. Instead, I ended up with deep gouges in the wood. Switching to the white nozzle restored the deck without causing any harm. This experience taught me the importance of selecting the right nozzle for each unique project.
Before starting, always test the nozzle on a small, inconspicuous area to ensure compatibility with the surface. Understanding your nozzles will save time and enhance your cleaning efforts significantly.
Starting the Honda Pressure Washer Safely
Before igniting the engine, ensure you’re in a safe environment. Clear the area of any obstacles or debris that could pose a risk while you’re working.
Check Fuel and Oil Levels
- Use only the recommended fuel type. Avoid mixing in any additives that could damage the engine.
- Inspect the oil level using the dipstick. If it’s low, top it up with the appropriate grade of oil.
Safety Gear and Precautions

- Wear safety goggles to protect your eyes from debris and high-pressure water.
- Use gloves to shield your hands from water and potential chemicals.
- Non-slip footwear is crucial for maintaining grip on wet surfaces.
Once you’ve confirmed the area is clear and you’re properly equipped, proceed to start the engine. Engage the choke if the engine is cold, then turn the ignition switch to the ‘on’ position. Pull the starter cord firmly but steadily until you hear the engine roar to life. If it doesn’t start after a few attempts, check the fuel and oil levels again.
After starting the engine, allow it to idle for a minute. This helps the machine warm up and ensures optimal performance. Adjust the throttle to the desired speed before you begin using the unit. Always remember to keep a firm grip on the wand when you pull the trigger for the spray. This will prevent any unexpected movement that could lead to accidents.
Engaging in these practices ensures not only your safety but also the longevity and reliability of your equipment. Happy cleaning!
Adjusting Pressure Settings for Different Surfaces
When tackling various surfaces, adjusting the settings is crucial for achieving optimal results and preventing damage. For instance, when cleaning delicate materials like wood decking, dial down the pressure to around 1300-1600 PSI. This lower setting helps remove dirt without stripping the wood’s finish.
For concrete driveways or patios, a higher pressure is often needed. I typically set it between 2500-3000 PSI. This range effectively blasts away oil stains and grime. However, if you’re approaching a painted surface, reduce the intensity to avoid peeling the paint.
Specific Surface Guidelines
Brick surfaces require a careful balance. I recommend a pressure range of 1800-2200 PSI, ensuring you don’t dislodge any mortar. When I first attempted this, I mistakenly used too high a setting and ended up with loose bricks. A narrow fan nozzle works well here, directing the water precisely and minimizing the risk of damage.
Final Tips
Always test on an inconspicuous area first. Each surface reacts differently, and establishing the right pressure setting can save you headaches later. Adjusting the pressure not only protects the surfaces but also enhances the efficiency of the cleaning process. Trust me, a little caution goes a long way in achieving a professional finish.
Proper Technique for Using the Pressure Washer
Maintain a steady distance of approximately 2 feet from the surface you’re cleaning. This prevents damage while ensuring effective cleaning. I remember a time when I was too close to a delicate wooden deck; the result was splintered wood that required additional repairs.
- Use sweeping motions: Move the nozzle in a side-to-side motion, overlapping each pass slightly. This technique ensures even coverage and reduces the risk of streaks or missed spots.
- Angle the nozzle: Instead of pointing directly at the surface, tilt the nozzle slightly. This helps to disperse the water pressure and lessens the chance of causing surface damage.
- Work from top to bottom: Always start from the highest point of the area you’re cleaning and work your way down. For instance, when washing a house, begin with the roof and move down to the foundation.
- Keep the nozzle in motion: Avoid holding the nozzle stationary for too long in one spot. This prevents potential damage to the surface, especially on softer materials like wood or painted surfaces.
When cleaning driveways or patios, use a slow, deliberate approach. I recall cleaning my driveway where I rushed through the process. The result was uneven cleaning, leaving dirt in some areas while over-cleansing others. A steady pace yields better results.
Be mindful of wind direction, especially if you’re using detergent. I learned this the hard way during a windy day, where the soap ended up blown back onto me rather than onto the surface I intended to clean.
Lastly, ensure to incorporate a consistent pattern. This not only makes the task more organised but also helps in tracking your progress. It’s easy to lose focus when you’re deep into the cleaning process.
Cleaning and Maintaining Your Pressure Cleaner
Regular upkeep is key to maximising the lifespan of your equipment. After every use, I recommend clearing any debris from the nozzle and checking the filter for clogs. A simple rinse under running water can do wonders for maintaining optimal performance.
Once a month, inspect the hoses for cracks or leaks. If you spot any damage, replacing the hose immediately will prevent further complications. I once ignored a small leak, and it turned into a major issue that required an expensive repair. Don’t make the same mistake!
Every few months, check the oil level and top it up if necessary. This is often overlooked but keeping the engine lubricated is critical. I learned this the hard way when I neglected oil changes and faced engine issues down the line.
Cleaning the air filter is another essential step. A clogged filter can hinder performance, so make it a habit to clean or replace it regularly. I’ve found that a clean filter allows the machine to run more smoothly, which can save you time and energy during your projects.
It’s also wise to store your equipment properly. Drain any leftover water from the system and store it in a dry place. I once left mine outside during a rainstorm, which led to rust forming on the components. Protect your investment by keeping it secure and dry.
Finally, always refer to the manufacturer’s manual for specific maintenance guidelines. I’ve seen many owners skip this step and miss out on critical care tips tailored to their model. Following the manual ensures your cleaning tool remains in peak condition.
Troubleshooting Common Issues with Honda Pressure Washers
One common issue I’ve encountered is the machine not starting. If the engine turns over but fails to ignite, check the fuel level and ensure it’s fresh. Stale petrol can prevent proper combustion. Also, inspect the spark plug for any signs of wear or carbon buildup; replacing it can often resolve the problem.
If the unit starts but lacks power, this may indicate a clogged nozzle. Detach the nozzle and clean it thoroughly with a small wire or needle. Additionally, ensure you’re using the correct nozzle for the task at hand–a wrong choice can lead to inadequate performance.
Pressure fluctuations often stem from air trapped in the system. To eliminate this, run the machine with the trigger pulled until the water flows steadily. If the issue persists, check for any kinks in the hose that could restrict water flow.
Leakage around the connections is another frequent complaint. Tighten all fittings and inspect for any cracks or damage in the hoses. If you find a damaged part, replacing it is usually straightforward and can prevent further complications.
Lastly, if you notice excessive vibrations, ensure that all components are securely fastened. Loose parts can cause instability and may lead to further damage over time. Regular inspections can help catch these issues early.
.jpg)
.jpg)


