
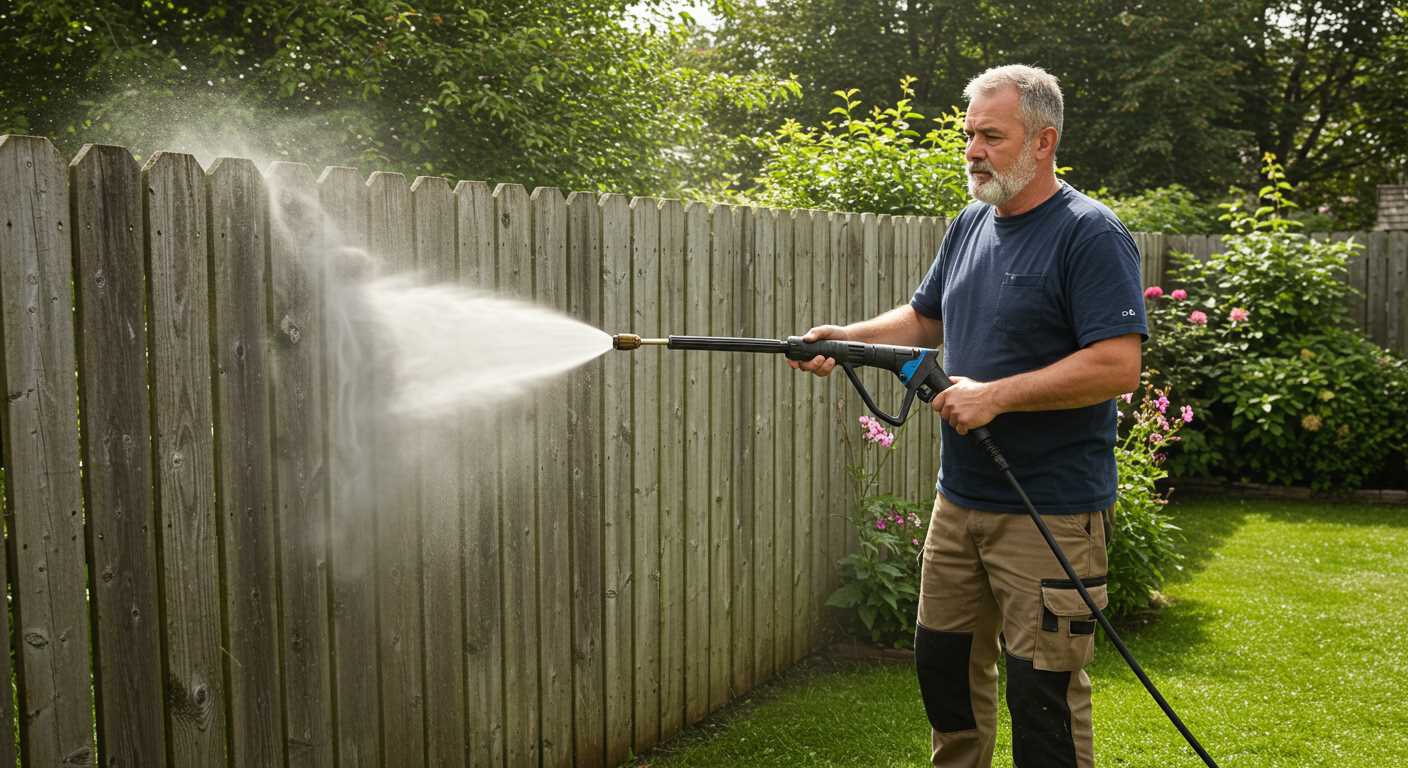


Begin with a thorough inspection of your water source and ensure it’s capable of delivering sufficient flow for your equipment. I’ve encountered many setups where the water supply was inadequate, leading to frustrating downtime. A minimum of 5 gallons per minute is ideal for most models, so verify your source before proceeding.
Next, focus on the connections between your water tank and the cleaning device. Use high-quality hoses, preferably reinforced ones, to prevent leaks and bursts. In my experience, rubber hoses tend to last longer than PVC ones, especially in fluctuating temperatures. Always secure connections with hose clamps to avoid any mishaps during operation.

Consider integrating a filter system at the inlet. This simple addition can save you from costly repairs down the line. I recall one project where a clogged filter led to significant damage, costing more in repairs than the initial setup. Regularly clean or replace your filters to maintain optimal performance.
Finally, ensure that your unit is properly ventilated. Heat buildup can lead to inefficiency and potential damage. I’ve seen units fail due to poor airflow, so placing your equipment in an area that allows for adequate ventilation is key. Adjusting your setup for airflow can make all the difference in performance and longevity.
Choosing the Right Pressure Cleaner for Your Setup

Opt for a model with at least 3000 PSI and 2.5 GPM for robust cleaning tasks. A unit within this range can tackle heavy-duty jobs like graffiti removal or deep cleaning of vehicles and machinery. If you plan on handling lighter tasks, like washing patios or garden furniture, a machine with around 2500 PSI and 2 GPM will suffice.
Key Factors to Consider
- Power Source: Decide between electric and petrol. Electric models are quieter and easier to maintain, while petrol units offer more mobility and power.
- Weight: Ensure it’s manageable for transport. Heavier units may require more robust mounting solutions.
- Durability: Look for units with sturdy frames and quality components. A solid construction often translates to longevity.
- Accessories: Nozzles and extension wands can enhance versatility. Check compatibility with your chosen model.
- Brand Reputation: Research user reviews and expert recommendations. Reliable brands often provide better support and warranty options.
Personal Recommendations
From my experience, the Honda-powered machines consistently deliver excellent performance and reliability. Brands like Karcher and Simpson are also worth considering due to their robust service networks. Always test the unit if possible; feeling the machine’s weight and observing its operation can offer insights that specifications alone cannot.
Lastly, remember to account for the necessary accessories in your budget. A quality hose and appropriate connectors can significantly enhance your cleaning experience. Investing in the right model will not only save you time but also ensure you achieve the best results on every job.
Understanding Water Supply Requirements for Cleaning Equipment
Ensure your water supply meets specific demands for optimal performance. A typical unit requires a minimum flow rate of 3 to 5 gallons per minute (GPM) to function efficiently. Insufficient flow can lead to inadequate cleaning results and potential damage.
Key Factors to Consider
- Water Source: Connect to a reliable source. Municipal water is preferred due to its consistency, while well water may vary in pressure and quality.
- Pressure: Aim for a minimum inlet pressure of 20 PSI. Low pressure can hinder performance, while excessive pressure may cause leaks or equipment failure.
- Hose Size: Use a minimum of 3/4-inch diameter hoses to reduce friction loss. Larger hoses allow for better flow and can handle the demands of multiple units.
Additional Recommendations
- Install a filtration system to prevent debris from entering your equipment, which can cause clogs and damage.
- Keep hoses and connections in good condition. Regularly inspect for wear and replace as necessary.
- Consider your cleaning needs. For heavy-duty tasks, check the specifications of the best commercial pressure washers to ensure adequacy.
In my experience, addressing water supply issues upfront saves time and frustration later. Always test your setup before commencing work to ensure everything runs smoothly. Trust me, it’s worth the effort.
Selecting Appropriate Hoses and Fittings for Plumbing
Choosing the right hoses and fittings for your high-pressure system is critical. In my experience, I’ve found that the quality of these components directly impacts performance and longevity. Start with hoses designed to handle high-pressure applications; look for those rated significantly above the maximum output of your machine. A common mistake is opting for cheaper alternatives that can fail under pressure, leading to costly repairs and downtime.
Consider using reinforced hoses made from materials like rubber or thermoplastic, as these provide flexibility and durability. For connections, brass or stainless steel fittings are preferable due to their resistance to corrosion and wear. I remember one job where I used plastic connectors to save costs, and it ended in frustration when they cracked during operation, causing a significant delay.
Pay attention to the diameter of the hoses. A too-small diameter restricts water flow, affecting the overall efficiency of the unit. Based on my testing, a 3/8-inch diameter hose typically balances pressure and flow well for most applications. It’s also wise to have a mix of lengths; longer hoses can be handy for larger areas, but remember, excessive length can also lead to pressure drops.
Consider quick-connect fittings for ease of use. In the field, I’ve appreciated the time saved by being able to swiftly change hoses or attachments without fumbling around. Make sure the fittings match the hose diameter and pressure rating to maintain a secure connection without leaks.
Finally, always keep spare hoses and fittings on hand. I once had a critical job interrupted because I didn’t have an extra hose. It taught me the value of preparedness. Having a backup set can save you from unexpected breakdowns and help maintain your workflow.
Installing a Water Tank in Your Pressure Cleaning Rig
Begin with selecting a tank that matches your operational needs. A capacity of around 200 to 500 litres is ideal for most tasks, ensuring you have ample water supply without overloading the vehicle.
Next, secure the tank in a stable position within the unit. Use brackets or straps to fasten it, preventing movement during transport. Position the tank low to maintain balance, distributing weight evenly across the axle.
Connect the tank to your equipment using high-quality hoses. I recall a time when I opted for cheaper hoses, and they kinked under pressure, leading to frustrating downtime. Invest in reinforced hoses that can withstand high flow rates and pressure.
Incorporate a shut-off valve between the tank and your cleaning device. This allows for quick adjustments while working, without the need to disconnect hoses. During a recent job, this feature saved me time when switching between different cleaning tasks.
Don’t forget about the drainage system. Installing a drain valve at the bottom of the tank simplifies maintenance and cleaning. I learned this the hard way after a few jobs where I had to manually siphon out leftover water.
Finally, consider the positioning of your tank’s fill point. It should be easily accessible, allowing for quick refills. I’ve often found myself in tight spots where accessibility was key to efficiency. Make sure to plan this out before fixing everything in place.
With a proper setup, your cleaning rig will be ready for any task. If you’re considering a reliable unit, check out the Nilfisk pressure washer for car. It’s a solid choice that complements any water tank system.
Connecting the Pressure Cleaning Unit to the Water System
To ensure optimal performance, link the cleaning unit to a reliable water source. It’s best to use a dedicated water supply, as this avoids interruptions during operation. I recommend using a ¾ inch hose for the most common setups. This size balances flow rate and pressure well, allowing your equipment to function efficiently.
Choosing the Right Connection Method
Choose between a quick-connect or threaded connection based on your needs. Quick-connect fittings allow for fast and easy changes, which is beneficial on busy jobs. Threaded connections, while slower to attach, provide a more secure fit and are less prone to leakage. In my experience, having a mix of both types in your toolkit can be helpful for various situations.
Water Quality Considerations
Inspect the water quality before connecting your equipment. Any debris or sediment can damage the internal components of the machine. A filter installed in the water line can prevent this issue. I’ve encountered clogged pumps and damaged seals due to poor water quality, and it’s a hassle that can easily be avoided.
| Connection Type | Advantages | Disadvantages |
|---|---|---|
| Quick-Connect | Fast setup, easy to switch | Can be less secure |
| Threaded | More secure, less leakage | Slower to connect |
Make sure to check for leaks after connecting everything. A small leak can lead to significant water loss and impact the performance of the cleaning unit. I’ve seen hoses that seemed fine at first but had tiny cracks that caused issues later on. Always do a thorough inspection before starting your work.
Once everything is connected, run the system briefly without pressure to ensure that everything is working correctly. This step helps to purge any air from the lines and confirms that your connections are secure. Knowing that everything is in order before you begin will save you time and frustration on the job.
Setting up a drainage system for waste water
To effectively manage waste water from your cleaning operations, installing a proper drainage system is key. Begin by determining the best location for drainage that allows for gravity flow, thus reducing the need for pumps. Ideally, position the drainage outlet at a lower point compared to your work area.

Choosing the right materials
Use durable, non-corrosive materials for your drainage pipes, such as PVC or HDPE. They withstand chemicals and high temperatures better than traditional options. Make sure to select a pipe diameter that can handle the volume of waste water generated during use; typically, a 4-inch pipe is an excellent choice for most applications.
Installing a sediment trap
A sediment trap is invaluable for capturing debris and contaminants before they enter the drainage system. Place a trap at the start of your drainage line, ensuring it’s easily accessible for cleaning. Regular maintenance of this trap prevents blockages and prolongs the life of your drainage system.
Always comply with local regulations regarding waste water disposal. Connect your drainage to an approved disposal site or treatment facility. If you’re unsure about legal requirements, consult with local authorities to avoid any penalties.
Implementing a drainage system not only protects the environment but also enhances the efficiency of your operations. Having a reliable way to handle waste water allows you to focus on the task at hand without worrying about spills or environmental impact.
Testing the Plumbing System for Leaks and Performance
After completing the installation of the water delivery system, the next step is to verify that everything functions correctly. Begin by filling the water tank and allowing it to sit for a few minutes, ensuring there are no visible drips or damp patches around the connections. It’s best to check all joints and connections thoroughly, as even a minor leak can lead to significant issues over time.
Pressure Testing
Once you’ve visually inspected the system, it’s time for a pressure test. This involves running the water through the setup at full force while monitoring for leaks. Use a pressure gauge to check that the system maintains the necessary pressure. If there’s any drop, it indicates a leak somewhere in the network. When I tested my first setup, I found a small leak at a fitting that I had overlooked. A simple tightening resolved the issue, saving me from more serious problems down the line.
Performance Evaluation
Monitor the spray pattern and water flow from the nozzle. An inconsistent or weak spray can indicate a blockage or an issue with the hose or fittings. During a test run, I once discovered that one of the hoses was kinked, leading to a reduced flow. After replacing it with a higher-quality hose, the performance improved dramatically. Always keep an eye on the water temperature as well; it should remain stable and within the operational range of your equipment. Regular testing not only ensures reliability but also enhances the longevity of your entire setup.
Regular maintenance tips for your pressure cleaning system plumbing
Inspect hoses regularly for wear and tear. I’ve seen too many jobs halted because a simple crack in a hose caused a leak. Replace any damaged sections immediately to prevent further issues. Always keep spare hoses on hand; it saves time and hassle during operations.
Check all fittings and connections for tightness. Loose fittings can lead to significant water loss and reduced performance. I recommend using thread seal tape on threaded connections to create a watertight seal. This small step can prevent many headaches down the line.
Clean the water inlet filter frequently. If it becomes clogged, it restricts flow and can strain the pump. I typically clean mine after every few uses, especially if the source water has a lot of sediment. A clean filter ensures optimal performance and prolongs the lifespan of the equipment.
Inspect and clean the tank regularly if you’re using one. Algae can build up, especially in warmer months. I’ve found that a mix of vinegar and water does wonders for keeping tanks clean. Make it a routine to check for any contaminants that might affect the water quality.
Pay attention to the pump oil level and condition. It’s easy to forget, but I’ve learned the hard way that neglected oil can lead to pump failure. Change the oil as per the manufacturer’s recommendations, and always check it before starting a job.
During winter months, ensure all water is drained from hoses and equipment. Freezing temperatures can cause serious damage. I always run a bit of antifreeze through the system if I know it’ll be sitting unused in cold weather.
Finally, test the system before each major job. A quick check for leaks and functionality can save you from unexpected downtime. I’ve always made it a habit to do a pre-job inspection, and it’s saved me countless hours of lost work.
.jpg)


