


To tackle unwanted markings on surfaces, I always recommend using a unit that delivers at least 3000 PSI. This level of power is often adequate to dislodge most stubborn residues without damaging the underlying material. During my years in the cleaning equipment industry, I’ve observed that the right nozzle choice plays a critical role–opt for a 15-degree or 25-degree nozzle for precision and effectiveness.
Before you start, ensure the area is free from obstacles and that you’ve adequately protected surrounding plants and surfaces. I recall a client who overlooked this step and ended up damaging their patio furniture. A little preparation goes a long way in avoiding mishaps.
Mixing a suitable cleaning solution can enhance the process. A biodegradable cleaner can be effective, especially in breaking down tough stains. Once you’ve applied the solution, allow it to sit for a few minutes to maximise its impact. Remember, patience can significantly improve the results.

Once you’re ready, maintain a distance of about 12 inches from the surface and use sweeping motions to cover the area. I learned the hard way that staying too close can risk surface damage. Always test a small, inconspicuous spot before committing to a larger area to ensure you don’t compromise the integrity of the surface you’re cleaning.
Finishing off the process with a rinse at a lower pressure can help remove any residual cleaner and debris. This final touch not only leaves the area looking pristine but also prolongs the life of your surfaces by ensuring no harsh chemicals remain.
Effective Techniques for Cleaning Off Unsightly Marks
Begin with the right setup. A wide nozzle, such as a 25-degree or 40-degree angle, works best to disperse water gently without causing damage to the surface beneath. For stubborn stains, consider switching to a turbo nozzle, but use it with caution.
Prior to starting, test the equipment and detergent on a small, inconspicuous area. This ensures compatibility and prevents potential damage. I once encountered an issue where the wrong soap reacted poorly with the surface, leaving a worse mark than before.
Here are the steps I recommend:
- Spray the area thoroughly to dampen it. This helps lift dirt and stains.
- Apply a suitable cleaning solution, like best car wash soap for pressure washers, to help break down the residue.
- Let the detergent sit for the recommended time; patience is key. I once rushed this step and paid for it later with extra scrubbing.
- Using the pressure cleaning tool, start from a distance of about 2 feet. Gradually move closer as needed, maintaining a steady motion to avoid streaks.
- Rinse the area thoroughly to ensure all detergent is washed away. This final step is crucial to prevent any soap residue from attracting more dirt.
After several sessions, I learned that tackling smaller sections at a time can yield better results. It’s more manageable and allows for focused attention on each area. Keep the area well-ventilated if working indoors to avoid inhaling any fumes from the cleaning products.
Finally, maintain the equipment regularly to ensure optimal performance. A well-maintained machine not only works better but also lasts longer, which I can personally attest to after years of experience in the field.
Choosing the Right Pressure Washer for Graffiti Removal
For effective cleaning, opt for a machine with at least 2000 PSI. This pressure is sufficient for tackling stubborn marks on various surfaces. I remember using a unit with lower power once; it was frustrating trying to achieve results, and I ended up spending more time than necessary.
Flow Rate Matters
Look for a model that offers a flow rate of 2.5 GPM or higher. A higher flow rate helps in rinsing away remnants quickly and efficiently, saving you time and effort. Once, I worked with a unit that barely met this threshold, and the difference in performance was evident–less water meant more scrubbing.
Surface Compatibility
Consider the surfaces you’ll be working on. Some machines come with adjustable pressure settings, allowing you to switch between high and low pressure as needed. I recall a day when I had to switch from concrete to painted surfaces; having that flexibility saved me from damaging the paint. Accessories like different nozzles can also enhance versatility, making it easier to adapt to various tasks.
Preparing the Surface Before Cleaning
Clear the area surrounding the target surface. Remove any furniture, planters, or obstacles that might hinder movement. I recall a time when I overlooked a flower pot, which ended up getting soaked and muddy – a hassle I could have avoided.
Inspect the surface for loose paint or debris. I once encountered a wall that looked deceptively clean, but as I began, chunks of paint started peeling off, complicating the task. A thorough inspection saves time and ensures a better outcome.
Identify the Right Cleaning Solution

Choose an appropriate cleaning agent tailored to the surface material. For instance, brick requires a different approach than wood. I learned this the hard way; an unsuitable solution can cause damage. Always test a small area first to gauge the reaction.
Protect Surrounding Areas
Cover nearby plants, windows, and surfaces that shouldn’t be exposed to strong jets or cleaning agents. I once neglected to shield a window and ended up with streaks that needed additional attention. A bit of preparation goes a long way in preventing extra work later.
Selecting the Appropriate Cleaning Solution
Opt for a biodegradable cleaner specifically designed for tough marks. I recall a project where I faced stubborn stains on an old brick wall. Using a general-purpose cleaner didn’t yield results. Switching to a dedicated solution made a significant difference. Always check the product label for compatibility with your surface; some cleaners can damage certain materials.
Types of Solutions
There are various types available: gel-based, liquid, or spray-on formulas. Gel solutions cling to vertical surfaces, allowing for more extended contact time, which I found beneficial for layered applications. Liquid cleaners are easier to rinse away but might require multiple applications, especially on porous surfaces. For quick jobs, spray-on options offer convenience but may not penetrate deeply into the stains.
Application Tips
Before applying any solution, ensure the area is free from loose debris. Apply the cleaner generously and let it dwell for the recommended time stated on the product. I learned through trial and error that rushing this step often leads to unsatisfactory results. After dwelling, use the washer to rinse away the solution along with the marks. Always wear protective gear, especially goggles and gloves, when handling chemicals.
Setting Up Your Pressure Washer Safely
Before starting your task, ensure that your equipment is positioned on a stable surface. Uneven ground can lead to accidents, so take the time to find a flat area. I once encountered a situation where I lost control of the unit due to a slight incline, which resulted in damage to the surrounding area. Always place the machine on a solid foundation.
Check Connections and Hoses
Inspect all connections, hoses, and fittings for any signs of wear or damage. I vividly remember a day when I overlooked a small crack in a hose. The result was a sudden burst of water, which startled me and soaked my clothes. Ensure that everything is securely attached before you begin.
Wear Appropriate Safety Gear
Protective clothing is non-negotiable. Don sturdy footwear, goggles, and gloves. I recall a time when I underestimated the power of the water stream and ended up with a painful bruise on my leg. Personal safety should always come first. Additionally, consider ear protection if your equipment is particularly loud.
Keep bystanders at a safe distance. I often set up barriers or cones to ensure that others stay clear of the workspace. This not only protects them but also allows you to focus on the task at hand without distractions.
Lastly, make sure you have a clear emergency plan in place. Know where the nearest first aid kit is located and have a phone nearby in case of emergencies. Preparation can make a significant difference in ensuring a safe and successful experience.
Techniques for Targeting Difficult Graffiti Types
For those stubborn stains, a tailored approach is key. Begin with a fan nozzle, as it disperses water more evenly, reducing the risk of surface damage while maintaining intensity. Adjust the distance from the surface; starting at about 12 inches can help gauge the right spot without causing harm.
Layered Approach
An effective method involves working in layers. Start with a low-pressure setting to saturate the area, followed by a higher pressure to lift the residue. This technique minimises the risk of pushing the pigment deeper into the material.

Heat Application
Some types are more responsive to heat. If your unit has a hot water option, utilise it for enhanced cleaning power. Heat helps break down the bond between the pigment and the substrate, making it easier to eliminate. Combine this with a suitable cleaning agent for optimal results.
For tough instances, consider a pressure washer pump brand that is known for its durability and performance. This can make a significant difference when tackling challenging marks.
Adjusting Pressure Settings for Different Surfaces
For delicate areas like painted wood or soft masonry, I recommend starting at a lower setting, around 1000 to 1500 PSI. During one job, I encountered a historic building with ornate woodwork. I dialed back the pressure and was able to clean without causing any damage, maintaining the integrity of the surface.
On tougher materials such as concrete or brick, ramping up to 2500 PSI can be effective. I recall a sidewalk heavily tagged in a busy urban area. Increasing the pressure allowed me to blast away those stubborn marks quickly, yet I remained cautious to avoid etching the surface.
Always adjust the nozzle type according to the job. A wider spray angle, like a 40-degree nozzle, disperses the force and is safer for fragile surfaces. I once used a 25-degree nozzle on a painted fence, which led to some peeling. From that experience, I learned the importance of matching the nozzle with the surface type.
Take into account the distance from the nozzle to the surface. Keeping it 12 to 18 inches away for softer materials helps prevent damage. I made the mistake of getting too close once, resulting in a dent on a wooden surface. Since then, I’ve been meticulous about maintaining the right distance.
Always test a small, inconspicuous area first. Before tackling a large section, I usually pick a corner to see how the surface reacts. This practice saved me from potential disasters, especially on older bricks where the mortar can be fragile.
Using Nozzle Types for Optimal Results
Choosing the right nozzle is essential for achieving the best outcomes in cleaning tasks. Each type has its unique characteristics, influencing the effectiveness of the cleaning process.
- 0-degree nozzle: This nozzle delivers a concentrated stream of water, perfect for tough, stubborn marks. Use it only at a distance to prevent damage to surfaces. I recall a project where I tackled a particularly challenging tag on a stone wall; the 0-degree nozzle cleared it effectively, but I had to maintain a safe distance to avoid chipping the stone.
- 15-degree nozzle: Ideal for heavy-duty cleaning, this option provides a wider spray than the 0-degree. It’s excellent for brick and concrete surfaces, where higher pressure is necessary to lift embedded stains. I’ve had great success with this nozzle on patios, where grime tends to accumulate.
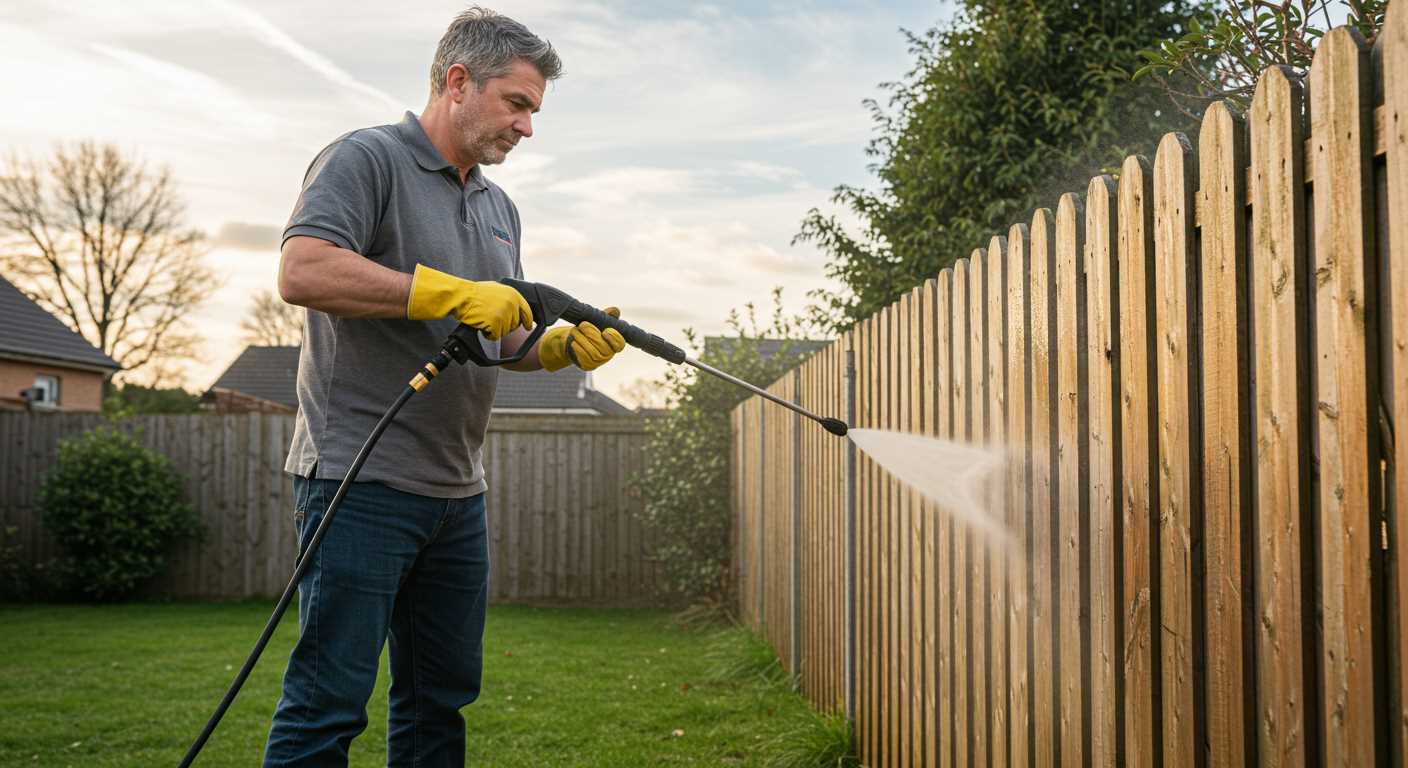
- 25-degree nozzle: This is a versatile choice for general cleaning tasks. It works well on painted surfaces and wood, offering a good balance between pressure and coverage. I often use this nozzle for cleaning fences and decks, ensuring I don’t damage the wood while still achieving a clean finish.
- 40-degree nozzle: This nozzle is designed for delicate surfaces, providing a gentle spray. It’s perfect for cleaning vehicles or sensitive materials without risking any harm. I remember using this on a vintage car; the gentle pressure ensured the paint remained intact while removing dirt.
- Rotary nozzle: This type combines the power of a 0-degree nozzle with a wider spray pattern. It’s great for heavily soiled areas where traditional nozzles struggle. I found it particularly useful in a commercial setting, where large expanses of concrete needed thorough cleaning.
Experimenting with different nozzles on various surfaces has taught me the importance of selecting the right tool for the job. Each nozzle type offers distinct advantages, and knowing when to utilise each one can save time and ensure optimal results. Remember to adjust your distance and angle based on the specific nozzle to enhance effectiveness while protecting the surface beneath.
Post-Cleaning Care for Treated Surfaces
After tackling unsightly markings, it’s crucial to maintain the integrity of the surfaces you’ve just cleaned. One of the first steps I recommend is applying a protective sealant. This helps shield against future vandalism and environmental factors. Choose a sealant designed for the specific material of your surface, whether it’s masonry, wood, or metal.
Ensure the area is completely dry before applying any protective product. I recall a time when I rushed this step, only to find that the sealant didn’t adhere properly, leading to a need for another round of cleaning. Patience pays off here.
Regular inspections are also key. Make it a habit to check the surfaces periodically for any signs of new markings or deterioration. Early detection can save time and effort later. I recommend setting a schedule, perhaps every few months, to assess the condition.
In addition, consider employing a gentle detergent wash every now and then to keep the surfaces pristine. I’ve used a mixture of mild soap and water for routine maintenance, which helps remove dirt and grime without damaging the underlying material.
Finally, educate those around you about the importance of keeping the area clean. In one neighbourhood I worked in, a community effort to maintain public spaces significantly reduced the recurrence of unwanted marks. Encourage local involvement and responsibility; it can make a lasting difference.
Preventing Future Tagging with Protective Coatings
Applying a protective coating on surfaces can significantly reduce the likelihood of unwanted markings. From my experience, the right sealant not only acts as a barrier but also simplifies future cleaning efforts. Consider using anti-graffiti solutions that create a non-porous layer, thus preventing paint from adhering effectively.
There are two main types of protective coatings: sacrificial and permanent. Sacrificial coatings can be washed away, taking any unwanted designs with them, while permanent coatings provide long-term protection. Choose based on your needs and the expected frequency of cleanings.
| Coating Type | Durability | Cleaning Method</th |
|---|---|---|
| Sacrificial | Short-term | Pressure washing or chemical solutions |
| Permanent | Long-term | Requires specific solvents or removers |
Before applying any coating, ensure the surface is thoroughly cleaned and dried. I’ve encountered cases where improper surface preparation led to peeling and reduced effectiveness of the coating. After application, always follow the manufacturer’s instructions regarding drying times and additional treatments.
Regular maintenance checks can also help to monitor the integrity of the protective layer. If you notice wear or damage, reapply the coating promptly to maintain its protective qualities. In my time, I’ve seen properties effectively deter tagging simply by being proactive with these coatings. It’s a small investment that pays off in the long run.
FAQ:
What equipment is needed to remove graffiti with a pressure washer?
To effectively remove graffiti using a pressure washer, you will need a few key pieces of equipment. Firstly, a pressure washer with a minimum pressure of 2000 PSI is recommended, as this will provide enough power to remove stubborn graffiti. Additionally, you should have a suitable nozzle, typically a 15-degree or 25-degree nozzle, to focus the water stream effectively. It’s also advisable to use graffiti removal solutions or chemicals designed for this purpose, as they can help break down the paint before applying the pressure washer. Lastly, protective gear such as gloves and goggles is important to safeguard yourself from any chemicals or debris that may be released during the cleaning process.
Can all surfaces be cleaned with a pressure washer when removing graffiti?
Not all surfaces are suitable for pressure washing, particularly when it comes to removing graffiti. Surfaces such as concrete, brick, or stone are generally safe and effective for pressure washing. However, softer materials like wood, stucco, or painted surfaces can be damaged by high pressure, leading to splintering or peeling paint. It is crucial to assess the surface before starting the cleaning process. For delicate surfaces, consider using a lower pressure setting or a different cleaning method, such as manual scrubbing with a softer brush and appropriate cleaning solutions.
What safety precautions should I take when using a pressure washer for graffiti removal?
When using a pressure washer to remove graffiti, it’s important to follow several safety precautions. Always wear protective gear, including gloves, goggles, and sturdy footwear, to shield yourself from high-pressure water and any chemicals used. Ensure that the work area is clear of obstacles and bystanders to prevent accidents. Be cautious of the electrical connections and water sources, keeping them away from the pressure washer to avoid any hazards. Lastly, make sure to read the manufacturer’s instructions for both the pressure washer and any cleaning solutions you use to ensure safe handling and operation.
How do I prepare the area before pressure washing graffiti?
Preparing the area before pressure washing graffiti is essential for achieving the best results. Begin by removing any loose debris or dirt from the surface using a broom or brush. If the area is large, consider marking off the zone with cones or tape to keep people away during the cleaning process. It is also advisable to cover nearby plants or surfaces that could be damaged by the pressure washer or cleaning chemicals. Lastly, test a small, inconspicuous area first to ensure that the pressure and cleaning solution will not damage the surface before proceeding with the entire job.
.jpg)

.jpg)


