


First and foremost, ensure that the power supply is completely turned off before attempting any disconnections. I’ve often seen individuals rush into this step, only to face unexpected sprays of water or, worse, accidents. Safety should always be your priority.
Next, locate the quick-release mechanism typically found at the connection point. This can vary slightly between brands, but most feature a simple push or pull tab. In my experience, applying even pressure while pulling back on the tab ensures a smooth separation without damaging the fittings.

If you encounter resistance, do not force it. Check for any locking features or residue that may be causing the hold-up. A gentle twist while pulling can sometimes help dislodge stubborn connections. I recall a time when I was on a job and struggled with a particularly stubborn setup; a little patience and the right angle made all the difference.
After disconnecting, inspect both the fitting and the attachment for any signs of wear or damage. I’ve learned that preventive maintenance goes a long way in prolonging the life of your equipment. A quick clean-up of the connectors can also prevent future issues.
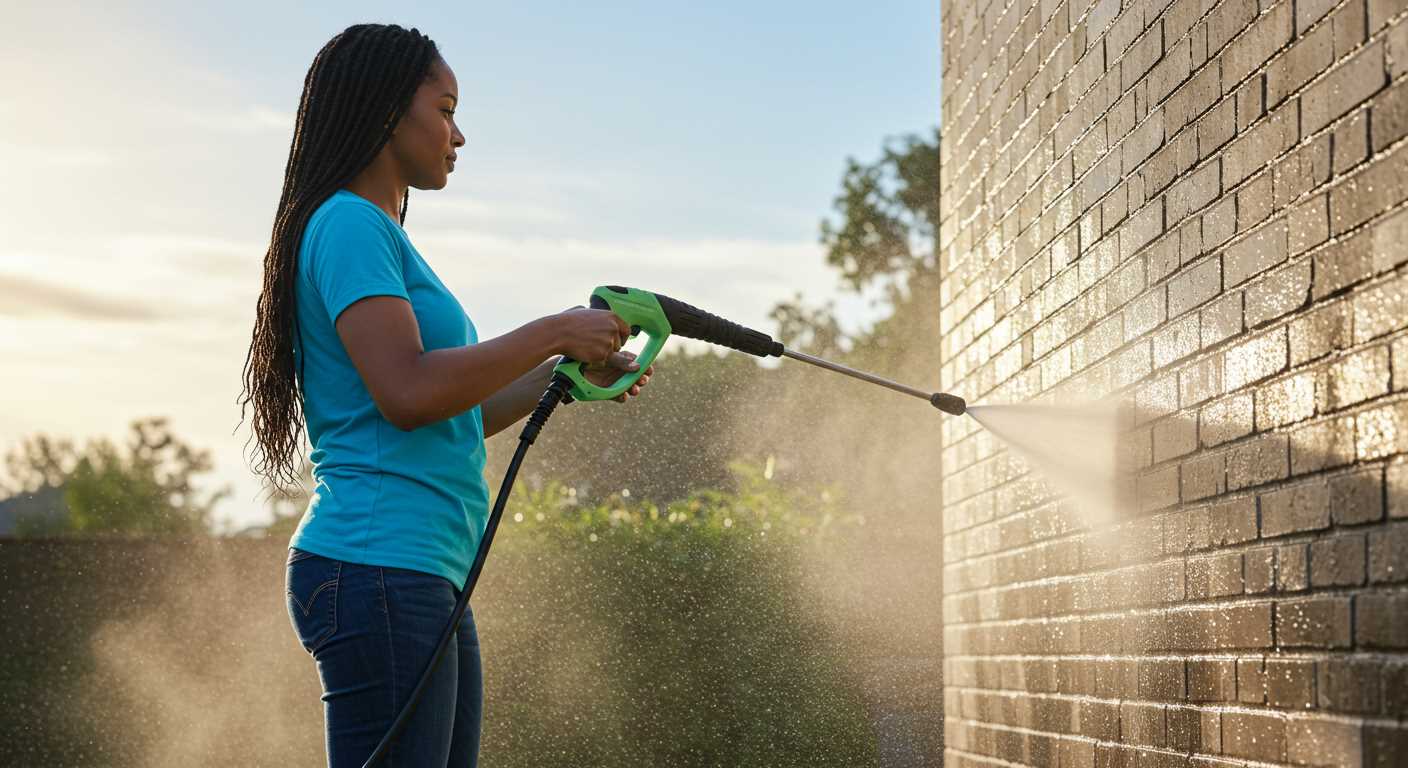
Steps to Detach the Pipe from Your High-Pressure Cleaner
First, ensure the unit is powered off and disconnected from the electrical supply. This is a critical safety precaution. Next, locate the connection point of the pipe, which is typically secured with a threaded fitting or a quick-release mechanism. If it’s threaded, turn it counter-clockwise with a wrench or by hand, depending on the tightness. For quick-release fittings, simply press the release tab and pull the pipe away from the unit.
After detaching, inspect both the connection point and the pipe for any signs of wear or damage. This is a good practice to maintain the longevity of the equipment. If you encounter resistance, avoid forcing it, as this might cause damage. Instead, try lubricating the threads or fitting with a bit of penetrating oil to ease the release.
Maintaining Your Equipment
Regularly check and clean the connections to prevent debris buildup, which can complicate future detachments. If you often use your high-pressure cleaner for tasks like cleaning pathways, consider investing in a model designed specifically for such jobs, like the pressure washer for paths. This can enhance efficiency and ease of use.
Final Tips
Always store the pipe in a manner that avoids kinks or bends. This not only preserves its integrity but also ensures that next time you need to detach it, the process will be straightforward. Remember, proper care of your high-pressure cleaner extends its lifespan and improves performance.
Gather Necessary Tools for Hose Removal
Before tackling this task, ensure you have the right equipment at hand. Here’s a list of items I recommend based on my years of experience in the field:
| Tool | Description |
|---|---|
| Adjustable Wrench | Useful for loosening and tightening fittings. Make sure it’s of good quality to prevent slipping. |
| Screwdriver Set | A flat-head or Phillips screwdriver may be needed for securing or loosening clamps. |
| Bucket or Container | To catch any residual water that may leak out during the process. |
| Protective Gloves | Wearing gloves will keep your hands safe from sharp edges and dirt. |
| Rags or Towels | Handy for cleaning up spills or drying off components after disconnection. |
Having these items ready will streamline the process and minimise frustration. I remember a time when I forgot my wrench and had to improvise with pliers, which made the job take much longer. Trust me, being prepared pays off!
Ensure Pressure Washer is Powered Off
Before attempting any disconnection, ensure the unit is completely powered down. This step might seem trivial, but I’ve seen too many accidents occur due to oversight. Unplugging the device is crucial; if it’s electric, locate the power cord and remove it from the outlet. For gas-powered models, turn off the fuel valve to prevent any unexpected starts while you’re working.
After disconnecting the power source, I recommend checking the on/off switch. Flip it to the ‘off’ position just to be certain. In my experience, double-checking this can save you from a potential mishap. It’s a simple precaution that can prevent injuries or equipment damage.
Allow the unit to sit for a short period, ensuring that any residual pressure has dissipated. Press the trigger on the spray gun to release any remaining pressure, making the entire process safer. I once rushed this step and regretted it when a sudden spray caught me off guard. Taking a moment now can save you a lot of trouble later.
Locate the Hose Connection Points
Identify the specific connection points for the tubing on your cleaning device. Typically, you’ll find two main areas: the inlet, where water enters, and the outlet, where the pressurised stream exits. It’s crucial to know these locations to facilitate a smooth disconnection process.
Inlet Connection
The inlet connection is usually situated at the rear or base of the unit. When I first started working with these devices, I often overlooked this area. A simple twist or pull can free the fitting, but ensure you are gripping the connector firmly to avoid damage.
Outlet Connection
The outlet connection is generally located at the front of the unit. This is where the pressurised water flows out. During my early days, I found myself struggling with stubborn fittings. A quick check for any locking mechanisms or clips before attempting to detach the outlet can save you time and frustration.
Release Pressure in the Hose
To alleviate any residual force within the tubing, follow these steps:
- With the equipment switched off, locate the trigger gun. This is typically found at the end of the wand.
- Firmly grasp the trigger and pull it to release remaining fluid. Ensure you aim it away from yourself and others.
- Hold the trigger for several seconds. This will help expel any trapped water and alleviate pressure effectively.
- After releasing the trigger, listen for any hissing sounds. If you hear any, continue holding until it ceases.
In my experience, some users may overlook this critical step, which can lead to unexpected sprays when detaching the connector. Always prioritise safety by ensuring pressure is completely relieved before proceeding.
Once you’ve confirmed that the system is fully depressurised, you can confidently move on to disconnecting the fittings without any risk of injury or mess. It’s a simple yet often neglected precaution that makes the entire process smoother.
Disconnect the Hose from the Pressure Washer
To successfully detach the tubing from your high-pressure cleaning unit, grip the connection tightly with one hand while applying a counter-clockwise twist. This technique effectively loosens the fitting, allowing for a smooth disconnection. Ensure you maintain a firm hold to prevent any accidental slipping.
After you’ve unfastened it, it’s wise to inspect the threads for any signs of wear or damage. This can help you avoid future leaks and ensure a snug fit when reattaching. If you notice any wear, consider replacing the fitting before reusing the equipment.
For stubborn connections, a pair of adjustable pliers can give you extra leverage. Just be cautious not to over-tighten, as this might damage the connection points. A gentle but firm approach works best, ensuring longevity for your equipment.
| Step | Description |
|---|---|
| 1 | Grip the connection firmly and twist counter-clockwise. |
| 2 | Inspect threads for wear or damage post-disconnection. |
| 3 | Use adjustable pliers for added grip if necessary. |
| 4 | Avoid over-tightening to prevent damage. |
Once detached, allow any residual water to drain before storing your equipment. This step helps prevent mildew and keeps your components in optimal condition. Keeping everything dry and clean contributes to the longevity of your tools.
Inspect Hose for Damage During Removal
Always examine the flexible tube carefully while detaching it. Look for any signs of wear, such as cracks, bulges, or fraying. I recall a time when I overlooked a small split on a colleague’s equipment, which led to a nasty spray of water during a routine task. A quick visual check could have prevented that mishap.
Check Fittings and Connectors
Inspect the fittings at both ends. Ensure they are not corroded or stripped. A damaged connector can lead to leaks and reduced performance. I once had to replace an entire assembly because I missed a worn-out fitting during a similar inspection. If you spot any irregularities, replace those components before reusing the setup.
Assess for Blockages
While you’re at it, look inside the tube for any blockages or debris. A clogged line can affect operation and cause unnecessary strain on the unit. I often find that a quick flush can clear minor obstructions, but if there’s significant buildup, it might be time for a thorough clean or replacement. Regular maintenance makes a big difference in longevity and efficiency.
For a break from cleaning, consider checking out how long to roast a chicken in pressure cooker. It’s a great way to enjoy a meal while keeping your tools in top shape.
Store Hose Properly After Removal
After detaching the tubing, proper storage is crucial to ensure its longevity and performance. Here’s how to do it effectively:
- Clean Thoroughly: Before storing, rinse the line with clean water to remove any detergent or debris. This prevents buildup that can damage the material over time.
- Dry Completely: Ensure the line is completely dry to avoid mould and mildew. Lay it flat in a shaded area or hang it up to dry before folding.
- Avoid Kinks: When coiling the tubing, use a loose figure-eight pattern. This technique helps to prevent kinks and makes uncoiling easier for the next use.
- Use a Reel or Hook: If possible, use a hose reel or wall-mounted hook for storage. This keeps the line off the ground and reduces the risk of tangling or damage from environmental factors.
- Store in a Cool, Dry Place: Keep the line in a shaded, dry area. Extreme temperatures and direct sunlight can degrade the material over time.
- Check Regularly: Periodically inspect the line for any signs of wear or damage while it’s stored. Catching issues early can save you money and hassle later.
Following these steps will help maintain the integrity of your equipment, ensuring it’s ready for action when you need it next.

.jpg)


