


Utilising a high-pressure cleaning device can yield impressive results for tackling unwanted greenery on asphalt surfaces. I recall a particularly stubborn patch on my driveway that seemed to thrive no matter what I did. Armed with the right gear and a little know-how, I transformed it into a clean, inviting space.
First, ensure you have a suitable model that offers adjustable pressure settings. Too much force can damage the surface beneath, while too little might not eliminate the growth effectively. I recommend starting with a lower setting and gradually increasing it until you find the sweet spot for your specific surface.
Before diving in, clear the area of any loose debris. This simple step not only protects your equipment but also ensures maximum efficiency during the cleaning process. I learned this the hard way–trying to work around obstacles only added time and frustration to my task.
Next, consider pre-treating the area with a specialised cleaner designed for organic growth. Allow it to sit for a few minutes to break down the stubborn patches. My experience shows that this initial treatment can significantly enhance the effectiveness of the subsequent wash.
When you begin the washing process, maintain a consistent distance of about 30 cm from the surface. This helps prevent any damage while ensuring an even application of water. A sweeping motion can help you cover more ground efficiently, reducing the chances of missing spots.
Once finished, inspect the area closely. You might find that a second pass is needed for particularly stubborn sections. This method not only improves the overall appearance but also prevents regrowth in the future.
Lastly, consider sealing the asphalt once it’s completely dry. This step provides a protective barrier, making it harder for organic matter to take hold again. Trust me, investing a little extra time now can save you from more extensive cleaning later on.
Choosing the Right Pressure Washer for Moss Removal
Select a unit with at least 1500 PSI for effective cleaning; this pressure is sufficient to tackle stubborn growth without damaging surfaces. I recall a time when I opted for a lower-rated model, and I spent hours struggling with tough spots that a more powerful washer would have handled in minutes.
Look for a washer that offers adjustable pressure settings. This feature allows you to tailor the intensity based on the surface you’re working on. I’ve often found that using too high a setting can lead to unintended damage. An adjustable model saved me from a costly repair on my driveway once.
Consider a machine with a wide spray nozzle. A 25-degree nozzle is ideal for most tasks, providing a good balance between coverage and power. I’ve had experiences where a narrower nozzle took too long, while a wider one didn’t provide enough force, leaving me with patches to clean up later. The right nozzle makes a real difference in efficiency.
Weight and portability are key factors, especially if you’ll be moving the equipment around frequently. I remember lugging a heavier unit up and down my garden path, which became cumbersome. A lighter model with wheels made my task much easier and less tiring.
Don’t overlook the importance of a reliable motor. Electric models are quieter and easier to maintain, while petrol-powered ones offer more power for extensive jobs. I’ve used both types; my electric unit serves well for routine tasks, but when I needed to clear a large area quickly, the petrol one was unbeatable.
Lastly, check for customer reviews and warranty information. I once purchased a unit based solely on recommendations, only to find it underperformed in real-world conditions. A solid warranty provides peace of mind, especially if you encounter issues after purchase.
Preparing the Tarmac Surface Before Cleaning
Ensure the area is free from debris, such as leaves and loose stones. A clean surface allows for optimal cleaning results. I recall once overlooking this step; the remaining debris only complicated the task later.
Next, check for any cracks or significant damage on the surface. If you spot any issues, consider applying a suitable filler. This not only protects the integrity of the tarmac but also ensures that water doesn’t seep into problematic areas during the cleaning process.
After clearing the area, it’s beneficial to dampen the surface lightly. This helps the cleaning solution adhere better and can prevent excessive splatter. In my experience, a quick rinse with a garden hose works well for this purpose.
Lastly, be mindful of your surroundings. Ensure there are no pets or children nearby, as the cleaning process can be quite vigorous. I once had a near mishap when my dog got too curious! For those with pets, it’s worth considering questions like can dogs get under a chicken wire fence to keep them safe during your cleaning efforts.
Selecting the Appropriate Nozzle for Pressure Washing

Choosing the right nozzle is critical for achieving optimal results. Based on my experience, I always recommend using a 25-degree nozzle for a broad spray pattern. This option strikes a balance between pressure and coverage, allowing effective cleaning without damaging the surface. The wider spray helps avoid concentrated areas that may strip the surface too aggressively.
Understanding Nozzle Types
There are several types of nozzles, each serving a specific purpose. The 0-degree nozzle delivers a concentrated jet, which is useful for stubborn stains but can harm surfaces if not used carefully. The 15-degree nozzle is more aggressive, suitable for tougher grime. However, for general cleaning tasks, the 25-degree nozzle is usually the best choice. On the other hand, a 40-degree nozzle is ideal for rinsing and delicate surfaces, providing a gentle spray that won’t cause damage.
Testing the Nozzle
Before starting, I suggest testing the nozzle on a small, inconspicuous area. This allows you to gauge the pressure and adjust as necessary. If you notice any damage or discolouration, switching to a wider spray is wise. Remember, a nozzle is not just a tool; it’s an extension of your technique. Mastering its use can significantly enhance your cleaning efficiency and effectiveness.
Ultimately, the right nozzle can make a substantial difference in your project. Selecting wisely will ensure that you maintain the integrity of the surface while achieving the desired cleanliness.
Setting the Correct Pressure Level for Tarmac
For optimal results, I recommend setting your equipment to a pressure level between 80 to 150 bar. This range is effective for dislodging stubborn growth while preventing damage to the surface. From my experience, starting at the lower end is ideal; you can always increase the pressure if necessary.
During one project, I began at 100 bar, which was sufficient for lighter stains. However, as the job progressed, I adjusted to 130 bar to tackle more tenacious patches. Each tarmac surface can react differently, so a gradual approach serves well.
Watch for signs of distress on the surface. If you notice any chipping or cracking, dial back the pressure immediately. It’s better to take your time than to rush and cause irreversible damage.
Additionally, consider the distance between the nozzle and the surface. Keeping it around 30-45 cm away can help you maintain control over the pressure applied. I’ve found that too close can lead to unwanted abrasions, while too far may not yield the desired effect.
Using a pressure gauge can help you monitor levels accurately. This tool ensures you stay within the recommended range throughout the cleaning process, making adjustments as needed.
Ultimately, the key is to remain attentive. Every tarmac area is unique, and a tailored approach will yield the best outcome. Trust your instincts, and don’t hesitate to experiment within safe boundaries to find what works best for you.
Using Cleaning Solutions with Pressure Washers
For optimal results in your cleaning task, incorporating specialised cleaning solutions is a game-changer. Here’s how to effectively use them alongside high-powered equipment.
- Choose the Right Solution: Not all cleaners are suitable for every job. Select a formula specifically designed for outdoor surfaces. A solution with anti-fungal properties is ideal for tackling organic growth.
- Mixing Instructions: Follow the manufacturer’s guidelines for dilution. Typically, a concentrated cleaner needs to be mixed with water at a specific ratio. Over-concentrating can lead to residue.
- Application Method: Before using the device, apply the solution evenly across the surface. A sprayer can help ensure thorough coverage. Allow it to dwell for the recommended time; this enhances its effectiveness.
- Compatibility Check: Ensure the cleaner is suitable for your equipment. Some high-pressure units have specific compatibility requirements. Using the wrong cleaner can damage seals and components.
During my years in the field, I’ve often found that combining a quality cleaning agent with a robust machine produces results that speak volumes. For example, while testing various mixtures, I discovered that a biodegradable cleaner not only worked wonders on grime but also left the area looking refreshed without harsh chemicals.
Lastly, always rinse thoroughly after cleaning. Residual cleaning agents can attract dirt, negating your hard work. A clean rinse cycle ensures the surface remains pristine longer.
Techniques for Effective Moss Removal from Tarmac
Utilising a high-pressure cleaner can be highly efficient for tackling unwanted growth on asphalt surfaces. Begin by considering the angle of attack; a 45-degree angle is often the most effective to dislodge accumulated growth without damaging the surface beneath.
Targeted Approach
Focusing on smaller sections at a time allows for more thorough cleaning. I’ve found that treating a 1×1 metre area can yield better results than attempting to clean a larger space all at once. This method ensures that the nozzle remains at an optimal distance, preventing surface damage while allowing concentrated pressure to work effectively.
Post-Cleaning Inspection
After the initial cleaning, it’s wise to inspect the area for any remaining growth. Sometimes, a second pass with a slightly higher pressure can tackle stubborn spots that might have resisted the first attempt. I often recommend a final rinse with plain water to ensure no cleaning agents linger, which could affect the surface over time.
Safety Precautions While Using a Pressure Washer
Always wear safety goggles to protect your eyes from debris and water spray. A good pair of waterproof gloves shields your hands from harsh detergents and high-pressure water. Sturdy footwear is essential; slip-resistant shoes prevent accidents on wet surfaces.
Positioning and Stability
Ensure the unit is stable and placed on a flat surface to avoid tipping over. Before starting, inspect the hose for any damages. A damaged hose can lead to unexpected bursts of water, posing a risk to you and nearby individuals.
Water and Electrical Safety
Maintain a safe distance between the machine and any electrical outlets or devices. Water and electricity are a dangerous combination. Always check the power cord for frays or cuts before use. If using an electric model, employ a ground fault circuit interrupter (GFCI) to minimise shock risks.
Finally, keep children and pets at a safe distance while operating. The noise and pressure can be startling, and safety should always come first.
Post-Cleaning Care for Tarmac Surfaces
Once the cleaning is complete, immediate attention to maintenance is key to prolonging the life of your asphalt. Here are specific steps you should consider:
- Inspect for Damage: Check for cracks or holes that may require filling. Early detection prevents further deterioration.
- Apply a Sealant: Consider sealing the surface after cleaning. This adds a protective layer, reducing the chances of future growth and wear.
- Regular Maintenance: Establish a routine to inspect and clean the surface. Monthly checks can help keep it clear of debris and prevent build-up.
- Monitor Weather Conditions: Avoid heavy traffic on the surface after cleaning, especially during rain. Wet conditions can lead to slippery areas and potential damage.
- Weed Control: Keep an eye out for weeds. If they start to sprout, address them quickly to prevent root systems from damaging the tarmac.
In my experience, applying a sealant not only enhances the appearance but also significantly reduces the maintenance work needed in the long run. I once neglected this step, thinking it was an unnecessary expense. However, after a few months, I noticed patches starting to wear down and attract debris again.
Additionally, I recommend using a gentle broom or blower regularly to keep the surface clear of leaves and dirt. This simple act can make a noticeable difference in the longevity of your asphalt. A client of mine who followed this advice saw a marked improvement in the condition of their driveway over the years.
Staying proactive with these measures ensures your asphalt remains in excellent condition, saving you time and effort in the future.
Preventing Future Moss Growth on Tarmac
Applying a protective sealant can significantly reduce the likelihood of unwanted growth on your tarmac surface. Sealants create a barrier that inhibits moisture retention, which is essential for preventing the establishment of unwanted greenery.
Regular maintenance is also key. Implementing a cleaning schedule, ideally every few months, keeps surfaces clear of organic debris. This proactive approach discourages the accumulation of materials that promote plant growth.
Creating better drainage around your area can help too. Water pooling often contributes to a damp environment, ideal for spore germination. Consider placing gravel or installing drainage channels to divert water away from your tarmac.
Planting vegetation strategically around the edges can also be beneficial. Low-maintenance ground covers can absorb excess moisture while adding aesthetic value. Choose hardy plants that thrive in your local climate and require minimal upkeep.
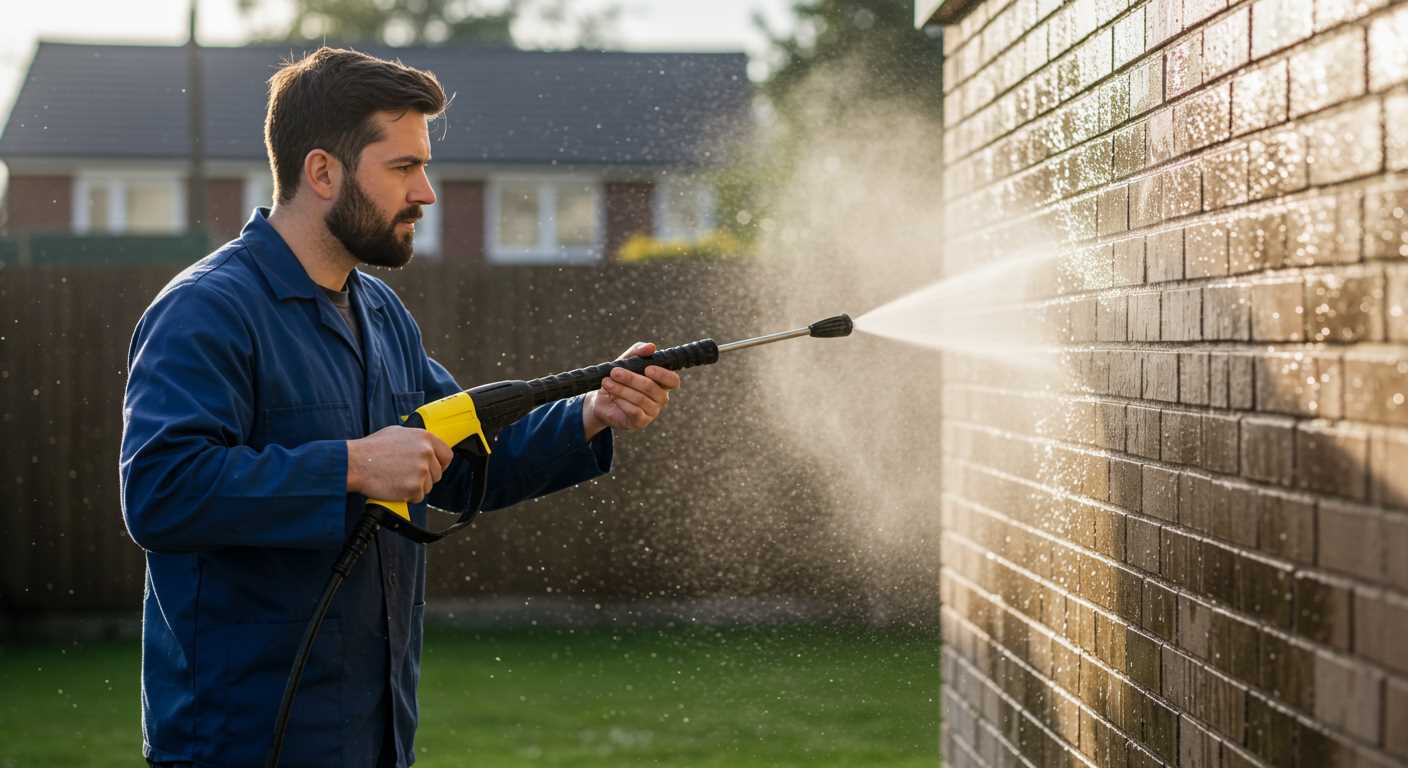
Utilising high-quality cleaning equipment, such as a pressure washer for brick house, for routine clean-ups ensures that any organic matter is swiftly dealt with before it can take root.
Finally, always monitor for early signs of growth. The sooner you address any patches of greenery, the less likely they are to spread and become a larger issue. Early intervention is the best strategy for maintaining a clean and tidy surface.
FAQ:
What is the best pressure washer setting for removing moss from tarmac?
When using a pressure washer to remove moss from tarmac, it is advisable to set the pressure between 1500 and 2000 PSI. This range is powerful enough to dislodge moss without damaging the tarmac surface. Additionally, using a wide-angle nozzle can help spread the water evenly, ensuring a thorough cleaning without concentrating too much pressure on a single spot.
Do I need to use any cleaning solutions while pressure washing moss off tarmac?
While a pressure washer can effectively remove moss on its own, incorporating a cleaning solution can enhance the process. A mild detergent or a specific moss and algae remover can help break down the moss, making it easier to wash away. It’s important to apply the solution before pressure washing and allow it to sit for a short period to penetrate the moss. After that, rinse thoroughly with the pressure washer.
How often should I clean moss from my tarmac driveway?
The frequency of cleaning moss from your tarmac driveway depends on your local climate and the amount of shade your driveway gets. In damp or shaded areas, moss can grow quickly, so it may be necessary to clean it every six months. However, in sunnier locations, an annual cleaning might suffice. Regular inspections can help determine when a cleaning is needed, allowing you to maintain the appearance and integrity of your tarmac.
Are there any precautions I should take while using a pressure washer on tarmac?
Yes, there are several precautions to consider when pressure washing tarmac. First, avoid using too high a pressure setting, as this can damage the surface. Secondly, ensure you are using the correct nozzle to prevent concentrated blasts that might gouge the tarmac. It’s also wise to clear the area of any loose debris and to wear protective gear, such as gloves and goggles, to shield yourself from flying debris and cleaning solutions. Lastly, be cautious of the surrounding areas, as the high-pressure water can splash onto nearby plants or structures.
.jpg)


