


Detach the water jetting device by first shutting off the motor and disconnecting the fuel line. Safety is paramount; ensure not to skip this crucial step. While working, use protective gloves and goggles to avoid any spills or splashes that may occur during the process.
Next, locate the securing bolts that attach the water jetting device to the motor casing. Typically, these bolts can be found at the base and sides. Using a socket wrench, carefully unscrew them, ensuring not to strip the threads. If the bolts are stubborn, a little penetrating oil can assist in loosening them up.

Once the bolts are removed, gently tap around the connection points with a rubber mallet. This will help dislodge any stubborn fittings without damaging the components. Be prepared to support the assembly as it may drop once fully detached. Always check for any remaining hoses or connections that might still be attached before pulling the unit away from the motor.
After the unit is separated, take a moment to inspect both the water jetting device and the motor for any signs of wear or damage. Maintaining these components can significantly extend their lifespan and improve performance. Remember, a little preventative maintenance goes a long way in ensuring your equipment remains in top condition.
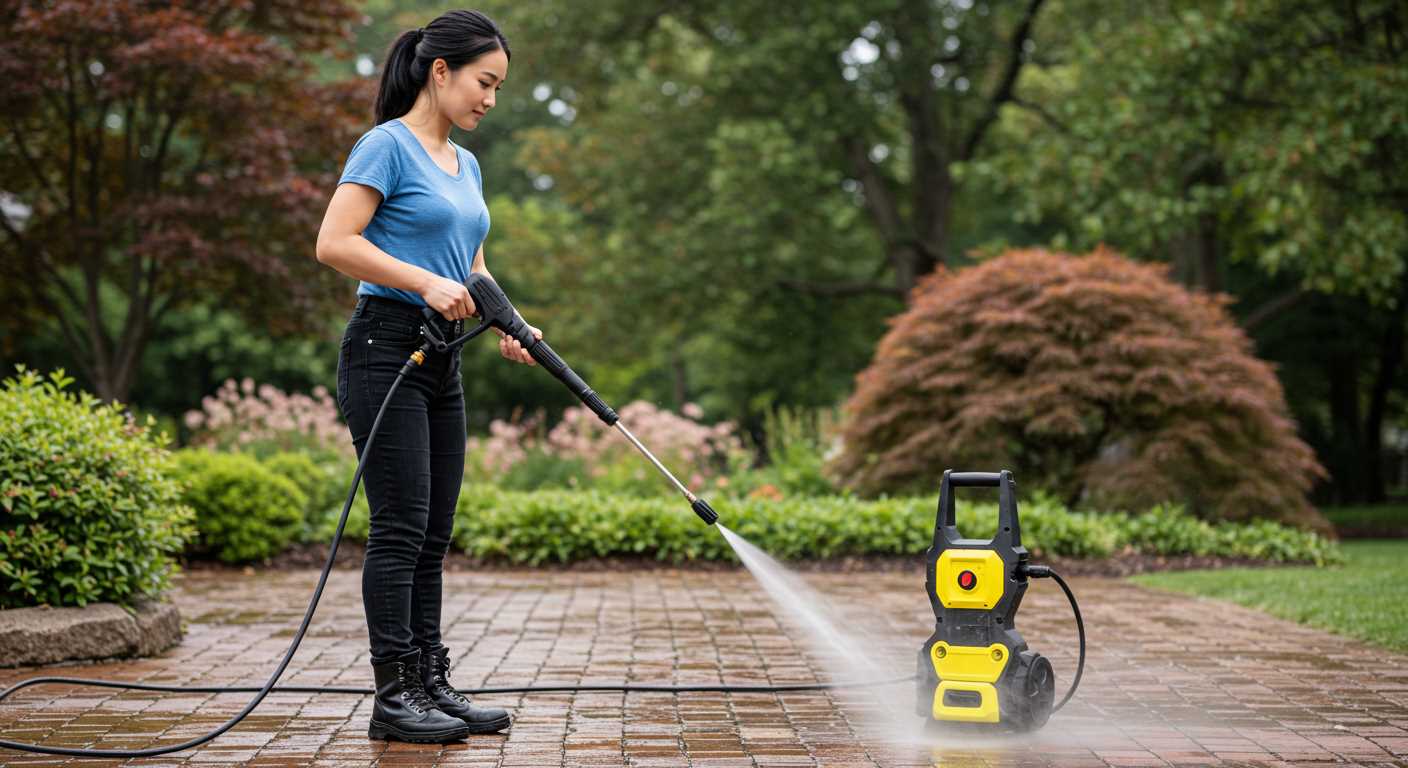
Steps to Detach the Washing Unit from a Honda Motor
First, ensure the unit is completely turned off and disconnected from any power source. Safety goggles and gloves are a must to protect against any debris or accidental splashes during the process.
Next, locate the bolts securing the assembly to the motor. Typically, these will be situated at the base where the two components meet. Use a socket wrench to carefully unscrew these bolts. Keep them in a safe place as you’ll need them for reassembly later.
Once the bolts are removed, gently wiggle the assembly to break the seal. If it feels stuck, applying a bit of penetrating oil around the joints can help ease the process. Allow the oil a few minutes to work before trying again.
As you pull the unit away, be mindful of any hoses connected to the assembly. Disconnect these carefully, ensuring not to damage any fittings. If necessary, take pictures during disassembly to assist with reinstallation.
After separation, it’s wise to inspect the components for wear or damage. This is an excellent opportunity to clean any grime build-up, enhancing the performance of the unit once reattached.
If you’re considering extending your reach during cleaning tasks, look into a pressure washer telescoping extension wand. It can make a significant difference in accessing hard-to-reach areas without hassle.
Gathering Necessary Tools for Pump Removal
Begin with a reliable set of tools to streamline the disassembly process. A socket wrench set is crucial for loosening bolts, while pliers help with stubborn fittings. Here’s a quick list of items you’ll need:
| Tool | Purpose |
|---|---|
| Socket Wrench Set | Loosens and tightens bolts effectively. |
| Pliers | Grips and removes stubborn connections. |
| Screwdriver Set | Handles screws of various sizes. |
| Torque Wrench | Ensures proper tightening of components post-installation. |
| Drain Pan | Collects any fluids during the process. |
| Safety Goggles | Protects your eyes from debris and fluid. |
| Gloves | Provides grip and protects hands from sharp edges. |
Having these tools on hand can save time and headaches. In my experience, I’ve often underestimated the importance of a good set of pliers. During one particular job, a stubborn fitting nearly resulted in a delay, but the right tools turned a frustrating situation into a straightforward task.
Lastly, ensure your workspace is organised. A tidy area makes it easier to find tools and parts, reducing the risk of misplacing anything. If you’re interested in tech, check out how a digital camera is an example of a computer peripheral. Just as in photography, having the right tools at your disposal can make all the difference in achieving great results.
Locating the Pressure Washer Pump on Honda Engine
First, ensure your machine is powered off and disconnected from the power source. Begin by examining the rear section of the motor; the unit is typically mounted there. Look for a cylindrical component attached to the motor casing, usually housed in a protective frame. This is often where you’ll find the water delivery assembly.
Check for hoses leading to and from this component; they usually connect to a water inlet and outlet. The assembly may have visible bolts or screws securing it to the motor. These fasteners can indicate the exact mounting points, aiding in the identification of the unit’s location.
If your model features a belt drive system, follow the belt path to locate the attachment point on the engine. This could provide additional insight into how the assembly is connected to the engine’s power system.
For easier access, it may be beneficial to tilt or raise the machine slightly, allowing for better visibility of the assembly. Sometimes, manufacturers place diagrams or labels on the chassis, which can also guide you to the correct position.
Once located, double-check for any additional components that might obstruct your access, such as guards or covers. Removing these will facilitate your task, making it simpler to work on the assembly later on.
Draining Fluid from the Pressure Washer System

Before tackling any maintenance task, it’s crucial to drain the fluid effectively. This not only prevents spills but also protects components during disassembly. Start by locating the fluid reservoir, which is usually situated near the base of the unit. Make sure to have an appropriate container ready to catch the liquid.
Next, identify the drain plug, often found at the lowest point of the tank. Using a wrench, carefully loosen it, allowing the fluid to flow into your container. Keep an eye on the colour and consistency of the liquid; this can indicate whether it’s time for a change or if there are underlying issues.
After draining, ensure that no fluid remains in the system. Tilt the unit slightly to encourage any remaining liquid to escape. It’s wise to check hoses and connectors for residual fluid, as this can affect performance once everything is reassembled.
Always dispose of the drained fluid according to local regulations. Many areas have specific guidelines for handling such substances. Taking the time to do this properly not only keeps your workspace clean but also helps the environment.
Lastly, it’s a good practice to inspect the reservoir for any signs of wear or damage while it’s empty. If you notice any cracks or leaks, consider replacing the part before continuing with your project. This proactive approach can save you time and hassle in the long run.
Disconnecting Hoses and Electrical Connections
Begin by ensuring the machine is turned off and unplugged. Safety first! Next, locate the water inlet hose and the high-pressure outlet hose. Use an adjustable wrench to carefully loosen the fittings. Be cautious not to damage the threads while detaching these lines; they can be quite delicate.
As you disconnect these hoses, have a towel or a small container handy to catch any residual water that may spill out. I recall a time when I neglected this step, and the resulting mess was rather inconvenient. Keep your workspace tidy!
Next, focus on the electrical connections. Identify the power lead connected to the motor. Gently unplug this connection to avoid any damage to the wiring. In my experience, it’s helpful to label the wires with tape to ensure you remember where each one goes during reassembly.
Double-check all connections before proceeding. If you encounter any resistance while disconnecting, reassess the fittings and ensure you’re not forcing anything. It’s always better to take a moment to investigate than to risk breaking a component.
Unfastening the Pump from the Engine
Begin by locating the fastening bolts that secure the assembly to the motor. Typically, these bolts are positioned at the base of the unit and may require a socket wrench for removal. Make sure to select the appropriate size to avoid stripping the heads.
As you start loosening the bolts, apply a penetrating oil if they seem stubborn; this can help break the bond formed by corrosion. Allow a few minutes for the oil to penetrate before attempting to turn the bolts again.
Once the bolts are adequately loosened, carefully remove them while supporting the assembly. This is crucial–dropping it can cause damage. I recall a time when I was overly confident and ended up with a cracked casing because I didn’t secure it properly during removal.
After all bolts are out, gently wiggle the unit to break any remaining seals. If it feels stuck, double-check for any overlooked connections or brackets. It’s easy to miss a hidden fastener, especially if you’re in a hurry.
Upon successfully detaching the assembly, place it on a clean, flat surface to prevent any debris from contaminating the interior. This step is often overlooked, but keeping your workspace tidy can save you headaches later.
Inspecting and Preparing for Pump Replacement
Start by checking the condition of the surrounding components. Look for signs of wear or damage around the area where the device connects to the power unit. Pay special attention to the mounting brackets and seals. Any visible cracks or corrosion could indicate underlying issues that may complicate the installation of a new unit.
Visual Assessment
- Inspect for leaks around connections.
- Check hoses for abrasions or soft spots.
- Look for rust on metal parts.
- Examine the motor for any signs of overheating or damage.
After the visual inspection, ensure all necessary parts for the replacement are available. This includes seals, gaskets, and any mounting hardware. If you notice anything missing or damaged, it’s wise to procure replacements before proceeding. This will save you time and potential frustration during the installation process.
Testing the System
- With the system off, pull the recoil starter a few times. Ensure there’s no unusual resistance, which could indicate a seized component.
- Turn on the water supply and check for leaks in the system without turning on the motor.
- If possible, run the motor briefly to ensure it operates smoothly without any unusual noises.
Document any issues you find during your inspection. This record will be useful later, especially if you encounter difficulties during the installation of the new unit. Keeping a checklist can help streamline the process and ensure nothing is overlooked.
Lastly, gather all tools and replacement parts in one accessible location. This preparation will facilitate a smoother workflow when you begin the actual installation. Avoiding distractions and having everything on hand will help you stay focused and efficient.
FAQ:
What tools do I need to remove a pressure washer pump from a Honda engine?
To remove a pressure washer pump from a Honda engine, you will typically need a few essential tools: a socket set (including different sizes of sockets), a wrench set, pliers, and possibly a screwdriver. It’s also advisable to have a soft cloth or rag to clean any spills and a container to catch any residual fluids. Depending on the specific model of the pressure washer, you might also need a torque wrench for reassembly.
What are the steps involved in removing the pump from the engine?
To remove the pump from a Honda engine, first, ensure the pressure washer is turned off and unplugged. Next, disconnect the water supply and drain any water from the pump. Use your socket set to remove the bolts securing the pump to the engine. Carefully detach any hoses connected to the pump, taking note of their positions for reassembly. Once all connections are free, gently wiggle the pump to detach it from the engine. Be cautious of any remaining fluid and ensure you have a suitable container ready to catch it.
How can I tell if the pump is faulty and needs to be removed?
Signs that your pressure washer pump may be faulty include reduced pressure during operation, unusual noises, or leaks around the pump area. If you notice a significant drop in performance or if the pump is leaking fluid, it may be time to remove it for inspection or replacement. Before proceeding, consult the manufacturer’s guidelines for specific symptoms related to your model.
Are there any safety precautions I should take before removing the pump?
Yes, there are several safety precautions to consider. First, ensure that the pressure washer is completely powered off and disconnected from any electrical sources. It is also essential to relieve any pressure in the system by running the machine briefly after disconnecting the water supply. Wear safety goggles and gloves to protect yourself from any splashes or debris. Lastly, work in a well-ventilated area to avoid inhaling any fumes from the engine.
What should I do after removing the pump? Do I need to perform any maintenance?
After removing the pump, it’s a good opportunity to perform maintenance on both the pump and the engine. Inspect the pump for any signs of wear or damage that may necessitate repair or replacement. Clean any dirt or debris from the engine and the mounting area to ensure a proper seal upon reinstallation. Additionally, check the hoses and connections for any signs of wear. It may also be wise to change the oil in the engine if it hasn’t been done recently. Following these steps can help ensure your pressure washer operates effectively when the pump is reattached.
.jpg)


