


First thing to check is the nozzle. If you notice inconsistent water flow or weak pressure, it could be blocked. A simple way to clear it is by soaking the nozzle in vinegar for a few hours, then using a soft brush to scrub away any debris. This method has saved me countless hours of frustration, allowing me to get back to my cleaning tasks quickly.
Next, inspect the seals and O-rings. Over time, they can wear out and lead to leaks. Replacing these components is straightforward and often requires only a basic toolkit. I remember a time when I wasted a whole afternoon dealing with leaks before realising that a simple O-ring replacement was all that was needed. Keep a set of spare seals on hand; it’s a small investment that can save you significant time and effort.
Another aspect to consider is the trigger mechanism. If it feels stiff or unresponsive, it may just need some lubrication. A silicone-based spray can work wonders, restoring smooth operation. I’ve often found that a little maintenance goes a long way, making my equipment feel almost brand new again.
How to Repair Bosch Pressure Washer Gun
First, check the O-ring seals. A common issue I’ve encountered is leaks due to worn O-rings. Remove the nozzle and inspect the seals; if they’re cracked or brittle, replace them. It’s a simple fix that can save you from bigger problems down the line.
If you notice a lack of pressure, the filter might be clogged. Disconnect the unit and locate the inlet filter. Clean it under running water, ensuring all debris is removed. I once spent hours troubleshooting a unit, only to find the filter was the culprit!
Sometimes, the trigger mechanism can become stuck. This usually happens from dirt accumulation. Remove the trigger assembly and clean it thoroughly with a soft brush. Lubricating the moving parts lightly can also help restore smooth operation.
For issues with power, inspect the electrical connections. A loose wire can result in intermittent function. Carefully check all connections and tighten any loose screws. I’ve had instances where a simple re-securement saved an entire unit from being replaced.
If the spray pattern is inconsistent, try cleaning the nozzle. Use a needle or a pin to clear any blockages. I suggest doing this regularly, as it significantly enhances performance. A clean nozzle is crucial for maintaining optimal pressure and spray consistency.
Lastly, if the unit is still malfunctioning, consider the pump. Check for any unusual noises or vibrations during operation. If you suspect damage, it may be time to consult with a professional or look into replacement options. I’ve seen many units that were simply too far gone after neglecting this component.
Identifying Common Faults in Bosch Pressure Washer Guns
Start with examining leaks. If you notice water dripping from the handle or connections, this often indicates a worn-out O-ring or a loose fitting. Inspect these areas carefully. Replacing the O-ring can usually resolve minor leaks. Ensure to use the correct size for a snug fit.
Low Pressure Issues

Low pressure can stem from several sources. A clogged nozzle is a frequent culprit; use a pin to clear any debris. Additionally, check the water inlet filter for blockages. If the filter is clean and the nozzle is clear, consider the possibility of an air leak in the hose or connections. Tightening fittings might help restore normal function.
Trigger Malfunctions
If the trigger becomes stuck or unresponsive, inspect it for dirt or damage. A dirty trigger mechanism can hinder performance, so clean it thoroughly. If the trigger is damaged, replacement may be necessary. Regularly lubricate the trigger to maintain smooth operation.
For enhanced cleaning, consider investing in motorcycle pressure washer foam to achieve better results.
Tools Required for Repairing Bosch Pressure Washer Guns
Start with a flathead screwdriver for removing screws and accessing internal components. A Phillips screwdriver is also necessary for different screw types. Make sure to have a pair of pliers handy; they are useful for gripping and twisting stubborn parts. A wrench set will assist in loosening or tightening bolts and fittings that may be corroded or overly tightened.
Keep a set of small picks or needle-nose pliers at your side for retrieving O-rings or gaskets that can often slip out of reach during disassembly. An adjustable spanner can come in handy for various nut sizes, while a torque wrench ensures you assemble everything back to the manufacturer’s specifications.
A multimeter is invaluable for diagnosing electrical issues. This tool helps test connections and ensure that components are functioning as they should. Don’t forget a cleaning brush; it’s essential for removing grime and debris from parts, ensuring everything is clear before reassembly.
Finally, stock up on replacement parts such as O-rings, seals, and nozzles. Having these components on hand will save you time and effort when addressing common issues. For those considering upgrades, check out the best cordless pressure washers for future projects.
| Tool | Purpose |
|---|---|
| Flathead Screwdriver | Remove screws |
| Phillips Screwdriver | Access different screw types |
| Pliers | Grip and twist components |
| Wrench Set | Tighten or loosen bolts |
| Small Picks | Retrieve O-rings and gaskets |
| Adjustable Spanner | Fit various nut sizes |
| Torque Wrench | Ensure proper assembly |
| Multimeter | Diagnose electrical issues |
| Cleaning Brush | Remove grime and debris |
| Replacement Parts | O-rings, seals, nozzles |
Step-by-Step Guide to Disassemble the Pressure Washer Gun
Begin by ensuring the appliance is disconnected from any power source. Safety is paramount; even a small residual charge can lead to mishaps. Once safe, gather your tools: a screwdriver set, pliers, and a small container for screws.
Removing the Nozzle
Start with the nozzle. Gently twist and pull it away from the main body. If it’s stuck, a little warm water can help loosen any built-up debris. Inspect the nozzle for clogs or damage before setting it aside.
Taking Apart the Main Body
Next, locate the screws on the handle, usually found at the base and along the sides. Use the appropriate screwdriver to remove them. Keep them in your container for easy access later. Once the screws are out, carefully pull the handle apart. You might need to wiggle it a bit; don’t use excessive force as you could break the internal components.
Inside, you’ll find a trigger mechanism and various seals. Take note of how everything fits together; a quick photo can be helpful for reassembly. If any seals look worn or cracked, replace them to prevent leaks during use. For stubborn parts, a gentle prying with pliers can assist. However, avoid damaging the plastic casing.
Continue disassembling until you reach the inner workings that need attention. Clean any dirt or debris you encounter, as this can affect performance. Be patient and meticulous; rushing can lead to lost parts or misalignment later.
Once everything is clean and inspected, reverse the process for reassembly. Ensure each component is aligned correctly, and tighten screws firmly but not over-tightened, as this can cause stress fractures.
Pro Tip: Keep a diagram of how everything fits together handy. It makes reassembly smoother and ensures nothing is missed.
Inspecting and Replacing Worn Seals and O-Rings
Start by examining the seals and O-rings for any visible signs of wear or damage. Look for cracks, distortion, or any kind of hardening that may indicate they need replacing. A simple visual inspection can save time and effort later on.
To remove the worn components, use a small flathead screwdriver or a pick tool to carefully pry them out. Be cautious not to scratch the surfaces they sit against, as this can lead to further issues down the line. Once removed, clean the grooves thoroughly to eliminate any debris or residue that could hinder a proper seal.
Select replacements that match the original specifications. Using the wrong size can lead to leaks or inadequate performance. When fitting new O-rings, apply a light coat of silicone grease to ensure smooth installation and improve longevity. This prevents tearing during assembly and helps maintain a solid seal when in use.
After installing the new seals, reassemble the components carefully. Ensure everything fits snugly without excessive force. Once reassembled, perform a test run to check for leaks. If everything is sealed correctly, you should see a noticeable improvement in performance.
From my experience, regular maintenance of these parts can significantly extend the lifespan of your equipment. Keep a spare set of O-rings and seals on hand, as this can speed up the process when issues arise. Always remember to check these components periodically to avoid unexpected failures during operation.
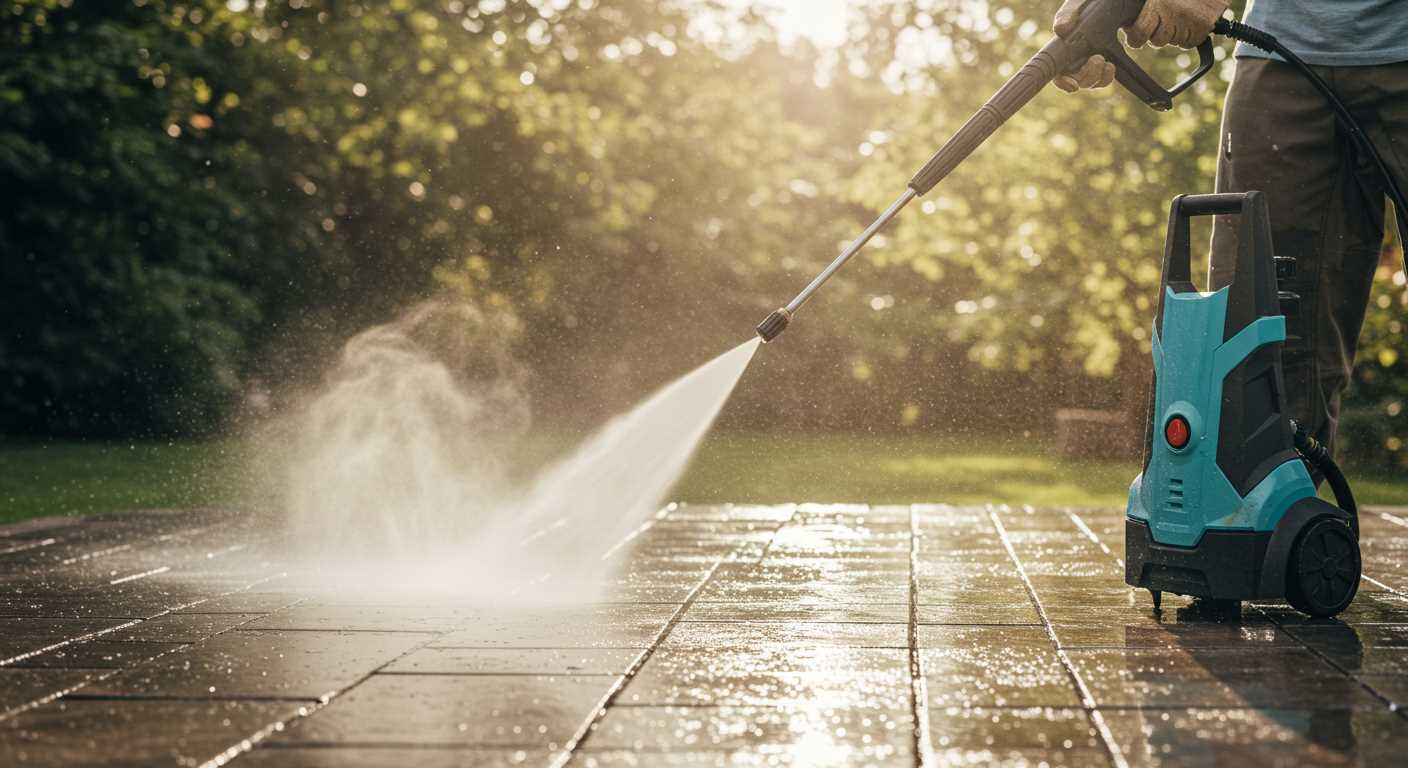
How to Clean the Nozzle and Improve Water Flow
Regular maintenance of the nozzle can significantly enhance water flow and overall performance of your cleaning tool. Start by ensuring the machine is turned off and disconnected from the power source. Remove the nozzle from the lance; this often involves simply twisting it off. Inspect it for any visible blockages or debris.
Cleaning the Nozzle
Using a soft brush or a needle, gently clear any obstructions from the nozzle orifice. If the build-up is stubborn, soak the nozzle in a solution of warm water mixed with a bit of vinegar for about 30 minutes. This will help dissolve mineral deposits. After soaking, rinse thoroughly under running water to remove any remaining residue.
Testing and Reattaching
Before reattaching, test the nozzle by running water through it to ensure a smooth flow. If everything looks good, secure the nozzle back onto the lance tightly, ensuring there are no gaps. Check for leaks while the equipment is running, adjusting the nozzle as necessary. A clean nozzle not only improves water flow but also enhances the cleaning efficiency, allowing for better results in your tasks.
Troubleshooting Electrical Components in Electric Models
For electric variants, pinpointing electrical issues is crucial for restoring functionality. A thorough inspection of the power cord is essential. Look for frays, cuts, or exposed wires. If any damage is evident, replace the cord immediately.
Power Supply Check
Ensure the unit is receiving power. Test the outlet with another device to confirm it’s operational. If the outlet works, check the pressure cleaner’s plug. If the plug is damaged, a replacement is necessary.
Fuse Inspection
Many electric models feature a built-in fuse to protect against overload. Locate the fuse compartment, often found near the power switch. If the fuse appears blown, replace it with an identical type. Always ensure the unit is unplugged before opening the compartment.
- Check for a visible break in the fuse wire.
- Use a multimeter to test continuity if unsure.
- Replace with the same rating to avoid future issues.
If the fuse continues to blow, this may indicate a deeper electrical fault, such as a short circuit within the motor or wiring. In such cases, further investigation is warranted.
Motor Functionality
Listen for unusual sounds from the motor when powered on. A humming noise without movement often indicates a jam or electrical failure. Disconnect the unit and manually inspect the motor for blockages. Lubricate moving parts if necessary.
- Check for debris or obstructions in the motor housing.
- Ensure all connections are secure and free of corrosion.
If the motor shows signs of wear or malfunction, it may require replacement. Consult the manufacturer’s specifications for compatible parts.
Lastly, always consult the user manual for specific troubleshooting steps tailored to your model. Following these guidelines will help ensure your equipment runs smoothly and efficiently.
Reassembling the Pressure Washer Gun Correctly
Ensure the body of the sprayer aligns properly with the trigger assembly. Start by placing the trigger into the housing, making sure it moves freely without obstruction. It’s vital to check the spring mechanism; it should sit snugly in its designated slot to provide the right tension.
Next, insert the locking pins or screws to secure the trigger in place. Use a suitable screwdriver to tighten them gently; overtightening can lead to complications later. I recall a time when I rushed this step, which resulted in a misalignment that caused the trigger to stick. A simple fix turned into a frustrating ordeal.
Once the trigger is secure, attach the nozzle section, ensuring the rubber o-ring is in good condition. This prevents leaks and maintains pressure. If the o-ring is worn, replace it before proceeding. I’ve seen many users overlook this, leading to unnecessary water loss during operation.
Finally, check all connections before reassembling the handle. Ensure that all parts fit snugly and securely. A loose handle can lead to vibrations during use, which can affect performance. I once had a customer complain about excessive shaking, only to find that the handle wasn’t attached properly. A quick adjustment resolved the issue.
After everything is assembled, conduct a quick test. With the water supply connected but the power off, pull the trigger to see if water flows smoothly. If there are any unusual sounds or leaks, disassemble and inspect again. Taking these steps ensures a smooth and effective operation for your cleaning tasks.
Testing the Repaired Unit for Leaks and Performance
After completing the fix, the next step is to evaluate the functionality and integrity of the unit. Here’s how to ensure everything is working properly.
-
Visual Inspection:
Before turning on the device, conduct a thorough visual examination. Look for any remaining loose parts or misalignments. Pay special attention to the seals and O-rings; they should be flush and seated correctly.
-
Leak Test:
Prepare a basin or a large container to catch any water. Connect the unit to a water source without powering it on. Check for leaks by turning on the water supply. Observe all joints and seals closely.
-
Functional Test:
With the water supply on, proceed to power the device. Aim the nozzle away from yourself and any objects. Activate the trigger to release water and watch for smooth operation. A steady stream without sputtering indicates a successful assembly.
-
Performance Check:
Test the pressure output by adjusting the nozzle settings if applicable. Different settings should produce varying spray patterns. Ensure that the pressure is adequate for your cleaning needs.
-
Extended Operation:
Run the unit for several minutes. Monitor for consistent performance and any signs of overheating or unusual sounds. This will help identify any potential issues before extensive usage.
-
Final Inspection:
After the test run, switch off the unit and disconnect it from the water source. Inspect all areas once again for signs of leaks or wear, including the trigger mechanism and hose connections.
By following these steps, you can ensure that your cleaned and restored equipment operates at optimal levels, ready to tackle any task ahead.
.jpg)


