


First off, if you notice water pooling beneath your unit, it’s often due to a worn-out O-ring or a faulty connection. I remember my own K4 acting up one summer. After a thorough inspection, I found that the O-ring near the lance was cracked. A quick replacement, and it was good as new.
Check all hose connections and fittings. Any loose parts can lead to unwanted leaks. I’ve had situations where the simple act of tightening a connector resolved the problem instantly. Grab a wrench and ensure everything is snug; you’ll save yourself a lot of hassle.
Another common culprit is the pump assembly. If you hear unusual noises or notice fluctuating water pressure, it could indicate an internal issue. In my experience, disassembling the pump and inspecting the seals can reveal hidden wear. If you spot any damage, it’s often best to replace the entire pump rather than attempting a quick fix.
Lastly, never underestimate the importance of regular maintenance. A clean filter can prevent many headaches down the line. I learned this the hard way when my unit started losing pressure due to a clogged inlet screen. A simple clean-out restored its performance, reminding me to check those filters regularly.
Addressing Issues with Your Karcher K4 Model
Inspect the seals and O-rings in the connections. Over time, these components can degrade, leading to unwanted moisture. I once encountered a similar problem; replacing the O-ring made a significant difference, and the machine functioned like new. Always have a few spare O-rings on hand, as they are inexpensive and can save you hassle in the long run.
Check hose connections for tightness. A loose hose can cause water to escape. I recall a situation where a simple twist of the connector resolved what seemed like a major issue. Ensure that all parts are hand-tightened, but avoid over-tightening, as this can damage the threads.
Examine the water inlet filter. Debris can accumulate, restricting flow and causing back pressure. Cleaning this filter regularly prevents future complications. I recommend doing this at least once a season, or more frequently if you work in dusty environments.
If you notice a constant drip from the handle, the trigger gun may need replacement. I had to replace mine after years of use; it’s a straightforward task that can restore functionality. Look for a compatible replacement online or at local retailers.
Consider the impact of temperature on performance. Cold weather can harden seals, leading to leaks. I learned the hard way to winterise my equipment properly. Storing it in a climate-controlled environment can prevent leaks and extend its lifespan.
For budget-conscious shoppers looking for a reliable machine, explore options available for under £100. You may find alternatives that suit your needs without breaking the bank.
Lastly, if your outdoor spaces require maintenance, think about investing in the best garden pond vacuum. It complements your cleaning routine and ensures your garden remains pristine.
Identifying Common Leak Sources in Karcher K4
Start by inspecting the connections at the water inlet. A loose or damaged hose fitting can lead to unwanted water escape. Ensure everything is tightened properly; a simple twist can often do the trick. If the hose itself shows signs of wear, such as cracks or abrasions, it may be time for a replacement.
Next, check the lance and nozzle. Over time, debris can accumulate, causing blockages or improper sealing. Remove the lance and clean it thoroughly. If the nozzle is damaged, swapping it out is a straightforward solution that can prevent further issues.
Pay attention to the seals and O-rings throughout the unit. These small components can wear down, leading to minor leaks. Inspect them closely; if they appear brittle or misshapen, replacing them can restore proper function. I’ve found that keeping a few spares on hand saves time during maintenance.
Don’t overlook the pump assembly. If you notice water pooling underneath the machine, it could indicate a failure within the pump. Check for cracks or corrosion in the pump housing. If damage is evident, professional service may be necessary to address the issue effectively.
Lastly, examine the detergent tank if your model has one. A faulty seal can lead to leaks during operation. Ensure the tank is secure and inspect the seal for any signs of wear. Sometimes a simple reseat or replacement can solve the problem.
By systematically checking these areas, you can identify the source of unwanted water flow and maintain your equipment’s performance. In my experience, diligence in maintenance can extend the lifespan of your cleaning equipment significantly.
Tools Required for Efficient Repairs
For a successful fix of water leaks in your cleaning equipment, having the right tools on hand is key. Based on my experience, here’s a list of must-have items that will make the process smoother.
Basic Hand Tools
A set of basic hand tools is indispensable. You’ll need a flathead and Phillips screwdriver to access various components. A pair of pliers, preferably adjustable ones, can help grip and turn stubborn fittings. Also, a wrench set, including both metric and imperial sizes, will cover most nuts and bolts you encounter. Don’t forget a utility knife for any necessary cutting tasks.
Specialised Equipment
For more intricate issues, a pressure gauge is invaluable. It provides insights into the system’s performance and helps identify whether the problem stems from a pressure irregularity. Additionally, a multi-meter can assist in diagnosing any electrical faults. If you suspect seals or O-rings are causing issues, a seal removal tool simplifies the extraction process without damaging surrounding parts. Lastly, a small container for holding nuts, bolts, and other small components during disassembly keeps everything organised and prevents loss.
Having these tools at your disposal not only expedites the troubleshooting process but also reduces the frustration that often accompanies equipment malfunctions. Trust me, being prepared makes all the difference.
Steps to Inspect and Replace Seals
Begin by disconnecting the power source and water supply to ensure safety. Inspect the unit carefully, focusing on areas where leaks are commonly found, such as connections, hoses, and joints. Look for signs of wear, such as cracks or hardened rubber.
Next, use a suitable tool to remove the affected seals. Depending on the design, you might need a flathead screwdriver or a seal puller. Take care not to damage any surrounding components during the extraction process.
Once the old seals are removed, clean the surfaces thoroughly. A cloth or a brush can help clear away debris and residue, ensuring a proper fit for the new seals.
Select replacement seals that match the specifications of your model. Check dimensions and material compatibility; rubber or silicone options often provide durability. Here’s a quick reference table for common seal sizes:
| Seal Type | Dimensions (mm) | Material |
|---|---|---|
| O-ring | 10 x 2 | Rubber |
| Washer | 15 x 3 | Silicone |
| Gasket | 20 x 10 | Rubber |
Install the new seals by carefully placing them into their designated grooves. Ensure they sit evenly without twisting. Reassemble any components you removed, tightening them gently to avoid damage.
After reassembly, reconnect the water source and power. Test the unit briefly to check for any remaining leaks. If all is well, your equipment is ready for use again.
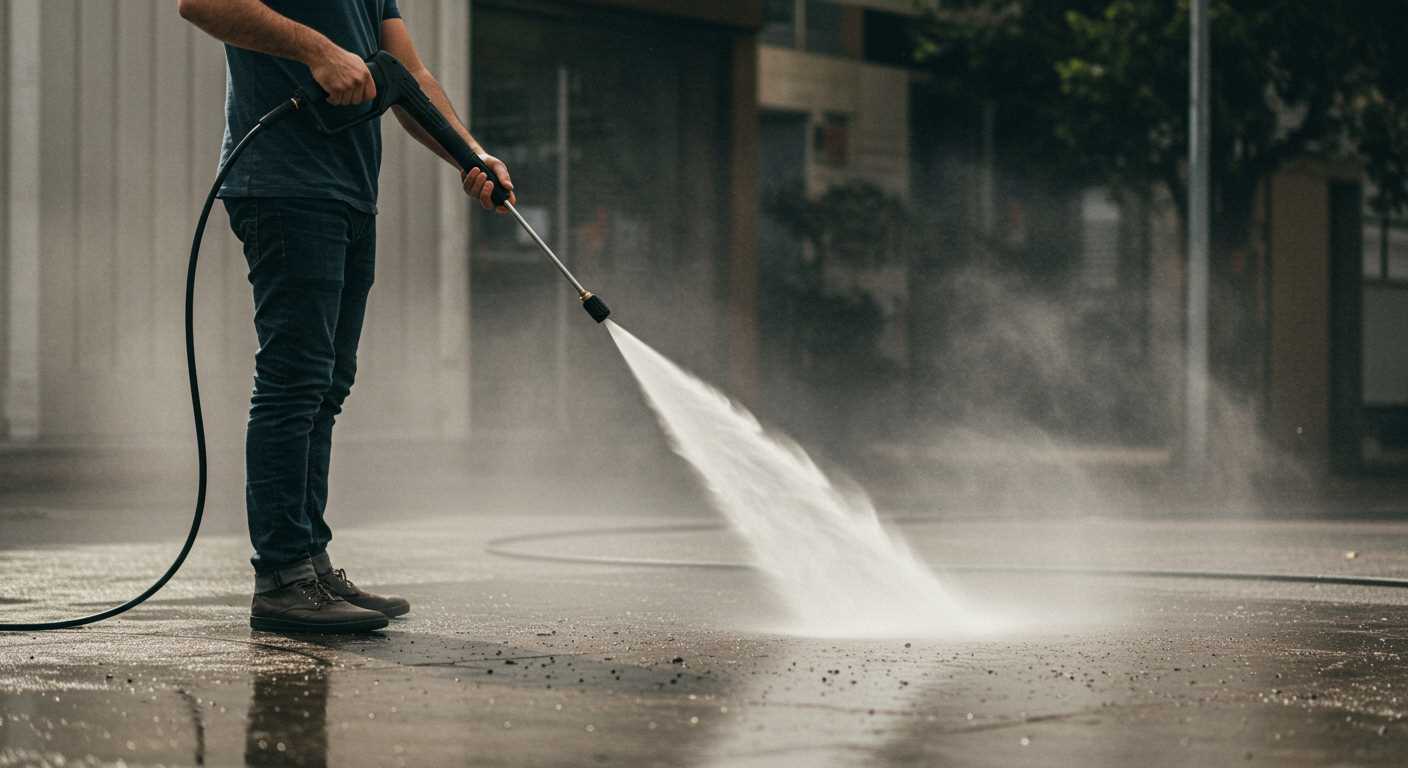
Fixing Hose Connections and Fittings
Inspect the hose connections for any signs of wear or damage. I recall a time when a simple twist on the connector resolved what seemed like a significant issue. Ensure that the hoses are properly secured to the unit and the gun. Sometimes, a loose connection can lead to pressure loss, which may appear as a leak. Tighten the fittings with your hands first; if that doesn’t suffice, use a wrench, but be cautious not to overtighten.
Replacing Damaged Fittings
If the connection points are cracked or corroded, replacement is necessary. Measure the diameter of the fittings to ensure you purchase the correct size. I once had a situation where mismatched fittings caused more headaches than expected. Take the old fitting to the store, if possible, to compare and find an exact match. Once you have the new part, simply unscrew the old fitting and screw in the new one, ensuring a snug fit.
Checking the Hose for Leaks
Run water through the hose while inspecting it for any leaks. Pay attention to areas near the connectors and along the length of the hose. A spray of soapy water can help reveal small leaks; bubbles will form at the leak points. In one instance, I found a small puncture that was easy to patch with hose repair tape. Remember, if the hose is significantly damaged, replacing it may be more practical than attempting a fix.
Repair or Replace the Pump
Begin with disconnecting the unit from the power source and water supply to ensure safety. If the pump exhibits signs of failure, you might notice reduced pressure or inconsistent water flow.
In my experience, addressing the pump issue often involves checking for cracks or damage in the housing. If you spot any, replacing the entire pump is the best course of action. Attempting to seal cracks might only provide a temporary fix.
- Tools required: socket set, screwdrivers, and pliers.
- Purchase a compatible replacement pump from a reliable supplier or manufacturer.
Once you have everything ready, follow these steps:
- Remove the screws securing the pump to the main body. Keep them in a safe place for reassembly.
- Disconnect the hoses attached to the pump. Use pliers if the connections are tight.
- Carefully detach the pump, ensuring no additional components are damaged during the process.
- Position the new pump in place, aligning it with the mounting holes.
- Reconnect the hoses securely, ensuring there are no leaks at the joints.
- Reattach the screws to secure the pump firmly.
- Reconnect the water supply and power, then test the unit for proper operation.
If the pump operates smoothly, your task is complete. However, if issues persist, consider consulting a professional technician for further assessment. In my years of working with these machines, I’ve found that sometimes a second opinion can save a lot of hassle.
Troubleshooting Electrical Issues Causing Leaks
Start by inspecting the power supply. Unplug the unit and check the cord for any signs of wear or damage. A frayed wire can lead to malfunctioning components, potentially causing fluid to escape.
Common Electrical Components to Check
- Power Switch: Ensure it is functioning correctly. If it feels loose or unresponsive, it might require replacement.
- Thermal Fuse: This component protects the motor from overheating. If the unit suddenly stops working, the fuse may have blown, leading to internal pressure issues.
- Motor Connections: Inspect for loose or corroded connections. Tighten any loose wires and clean off corrosion with a wire brush.
Testing Electrical Components
- Use a multimeter to test continuity on the power switch and thermal fuse. If either shows no continuity, replace it.
- Check the motor itself. If the motor hums but doesn’t start, it may indicate electrical failure, warranting further inspection or replacement.
- Ensure that the circuit supplying power is functioning correctly. Test with another appliance to rule out external issues.
After addressing the electrical components, reassemble and test the machine. If issues persist, consult a professional or consider replacement options. Trust me, these steps can save both time and frustration.
Maintenance Tips to Prevent Future Leaks
Regular inspection of all components is key. Every few months, check hoses, fittings, and seals for signs of wear or damage. I recall a time when I caught a small crack in a hose just in time, saving me from a much larger issue down the line. Always replace any worn parts immediately to maintain optimal performance.
Proper Storage Techniques
Storing your equipment correctly plays a significant role in longevity. Avoid leaving it exposed to extreme temperatures or direct sunlight, as this can cause materials to degrade. During winter months, draining all water and storing it in a dry place can prevent internal components from freezing and cracking.
Use Quality Accessories
Investing in high-quality hoses and connectors can make a noticeable difference. I’ve seen cheaper options fail, leading to frustration and unnecessary repairs. Using recommended accessories not only enhances performance but also reduces the risk of leaks, as they are designed to fit perfectly with the machine.
.jpg)
.jpg)


