


To restore functionality in your high-pressure cleaning device, begin by disconnecting it from the power source. This simple step often resolves minor operational glitches. After unplugging, allow the unit to sit for a few minutes; this can clear temporary errors and reset internal components.
Next, inspect the water supply. Ensure that the hose is free from kinks and that the inlet filter is clean. A clogged filter can lead to inadequate water flow, causing the machine to malfunction. If necessary, remove the filter and rinse it thoroughly under running water.

After checking the water supply, reconnect the device to the power source and turn it on. Look for any indicators on the control panel; a flashing light may signal an error that needs attention. If you encounter persistent issues, consult the user manual for specific troubleshooting steps tailored to your model.
In my experience, regularly maintaining your equipment can prevent many common issues. Cleaning the nozzles and ensuring the detergent tank is filled with the proper solution can enhance performance and longevity. Remember, a well-cared-for cleaner will save you time and effort in the long run.
Steps to Restore Functionality of Your Cleaning Device
First, make sure the unit is turned off and disconnected from the power source. Check the power cord and plug for any damage. If everything looks fine, plug it back in and switch it on. If the device remains unresponsive, locate the reset button, usually found near the power switch or on the motor housing. Press and hold this button for a few seconds; this action often clears any faults preventing operation.
Next, inspect the water supply. Ensure the hose is securely connected and there are no kinks or blockages. Sometimes, air trapped in the system can cause issues. To eliminate this, detach the spray wand and turn on the machine briefly to purge any air, then reconnect the wand.
Occasionally, the device may require a thorough cleaning. Remove the nozzle and check for clogs, especially if you’ve been using detergent. Clear any debris to restore proper flow. If your model has a filter, clean or replace it as well, as a dirty filter can impede performance.
Lastly, if the machine continues to malfunction, consult the user manual for troubleshooting information specific to your model. In my experience, many problems can be traced back to simple oversights or maintenance needs. If all else fails, contacting customer support may be necessary to diagnose more complex issues.
Identifying the Need for a Reset
Problems with your high-pressure cleaner often manifest in specific ways, prompting the need for a restart. A sudden loss of power or pressure can signal an issue. In my experience, when the unit starts sputtering or produces a pulsing spray, it’s a clear indication that something isn’t quite right. Don’t ignore these signs; they can lead to more significant damage if left unaddressed.
Another common symptom is an unusual noise coming from the motor. If you hear grinding or unusual vibrations, it’s time to take action. I recall a time when a friend’s unit made a strange whirring sound, which turned out to be a blocked filter. Addressing it early saved him from costly repairs.
Leaks are another telltale sign. If you notice water pooling beneath the machine, it might be due to a faulty seal or hose. I once encountered a situation where a simple replacement of a worn-out o-ring resolved a persistent leak, restoring the unit to full functionality.
Lastly, if the appliance fails to turn on altogether, this is a clear indication that something is off. Check the power supply and connections first. I often found that a loose cord or tripped breaker was the culprit behind such issues. Always ensure that the power source is functioning correctly before seeking more complex solutions.
Being aware of these indicators can save you time and frustration. If you are considering an upgrade, take a look at options like a battery portable pressure washer for added convenience and mobility.
Powering Off Your Karcher Pressure Washer
To switch off your cleaning device, locate the power button, typically situated near the handle or on the control panel. Press it firmly to turn off the unit. This action stops the motor and ceases water flow immediately, ensuring safety and preventing any potential damage.
Unplugging the Unit
After powering down, disconnect the power cord from the outlet. This step is crucial to avoid any accidental activation while you’re performing maintenance or adjustments. I remember a time when I overlooked this precaution; it led to an unexpected spray of water during a simple hose check. Always prioritise safety first!
Draining the System
Once the unit is off and unplugged, relieve any remaining pressure by squeezing the trigger on the lance. This action ensures the hose and pump are free of any residual water, preventing freezing during colder months. I’ve encountered numerous situations where neglecting this step caused issues the next time I attempted to use the device. Additionally, if you’re interested in preserving fresh produce, consider checking out this guide on how to can corn without pressure cooker.
Disconnecting the Water Supply
Before proceeding with any adjustments, ensure the water source is completely disconnected. This step is crucial for safety and prevents water from accidentally spraying during maintenance. Start by turning off the tap or valve supplying water to the unit. A quick twist of the handle is all it takes, but be mindful of residual pressure in the hose.
Removing the Hose
Next, detach the water hose from the inlet of your machine. Depending on the model, you may need a wrench to loosen the connection. Always check for any signs of wear or damage on the hose, as this can lead to leaks or reduced performance. After detaching, allow any remaining water to drain from the hose before storing it properly.
Checking for Blockages
While the water supply is disconnected, take this opportunity to inspect the inlet filter. A clogged filter can cause operational issues. Simply remove it, rinse it under clean water, and ensure it’s free from debris. Reinstall the filter securely before reconnecting your water source. Regular maintenance of these components can enhance the longevity of your equipment.
Locating the Reset Button
First off, if you’re struggling to find the reset button on your machine, it’s usually situated in a straightforward location. Check the control panel where the power switch is located. Often, the button will be labelled distinctly, making it easy to spot.
Common Locations
In many models, the reset button can be found near the motor housing or at the back of the unit. It’s typically a small, red or yellow button that stands out from the rest of the controls. If you can’t find it right away, refer to the user manual for your specific model–this will provide the exact location.
Visual Cues
Look for any icons or labels that indicate a reset function. Sometimes, it’s accompanied by a warning symbol, suggesting that the machine was in a fault condition. If you’re still having trouble, a quick online search with your model number should yield helpful diagrams or photos showing the button’s position.
Once you locate it, press firmly. You should hear a click, which indicates the function has been engaged. This small step can often resolve issues that may arise during operation.
Performing the Reset Procedure
To initiate the procedure, ensure the machine is in a safe and stable position. Engage the safety latch to prevent any accidental activation during the process.
Step-by-Step Guide
- Press and hold the reset button for approximately five seconds. This action should trigger an audible click, indicating the system is engaging.
- Monitor the indicator lights. A solid green light typically signifies a successful reset, while a flashing red light may indicate further issues that need addressing.
- Release the reset button once the light status has stabilised. This ensures the system is ready for operation.
Final Checks

After you’ve completed the procedure, reconnect the water supply and power on the device. Test it briefly to confirm that everything is functioning as expected. If problems persist, inspect the hoses and connections for blockages or leaks. In my experience, many issues arise from something simple, like a kinked hose or a clogged filter.
Remember, regular maintenance can prevent the need for such procedures in the future. Keep an eye on the equipment and act quickly when you notice any irregularities.
Reconnecting the Water Supply
Ensure that the water source is ready for connection. I’ve seen many users overlook this step, leading to frustration later. Begin by checking the water tap to confirm it’s fully operational. If the pressure is low or the supply is interrupted, it will affect performance.
Attach the garden hose to the water inlet on the machine securely. A firm connection prevents leaks and ensures a steady flow. I’ve encountered instances where a loose connection caused the unit to lose pressure, which can be quite puzzling.
Open the water tap gradually. Listen for any unusual sounds, such as gurgling, indicating air in the system. I learned the hard way that immediate high-pressure operation without purging the air can lead to damage. Let the water run for a moment before activating the equipment.
Finally, check for any leaks around the hose connection. A good practice is to visually inspect the entire length of the hose for kinks or blockages. A smooth supply is key to optimal functioning. I’ve seen how a simple kink can lead to significant performance issues, so it’s worth taking a moment to double-check everything before proceeding.
Testing the Pressure Washer After Reset
Ensure the unit is properly functioning by following these steps:
- Reconnect the power supply and ensure the machine is plugged in securely.
- Turn on the equipment and listen for any unusual sounds, which might indicate an issue.
- Open the water source and let it flow into the device for a few moments to eliminate air bubbles.
Next, it’s time to conduct a performance test:
- Engage the trigger on the spray gun and observe the water flow. It should be steady and without interruptions.
- Check for leaks around the hoses and connections. Any signs of water escaping indicate a need for further inspection.
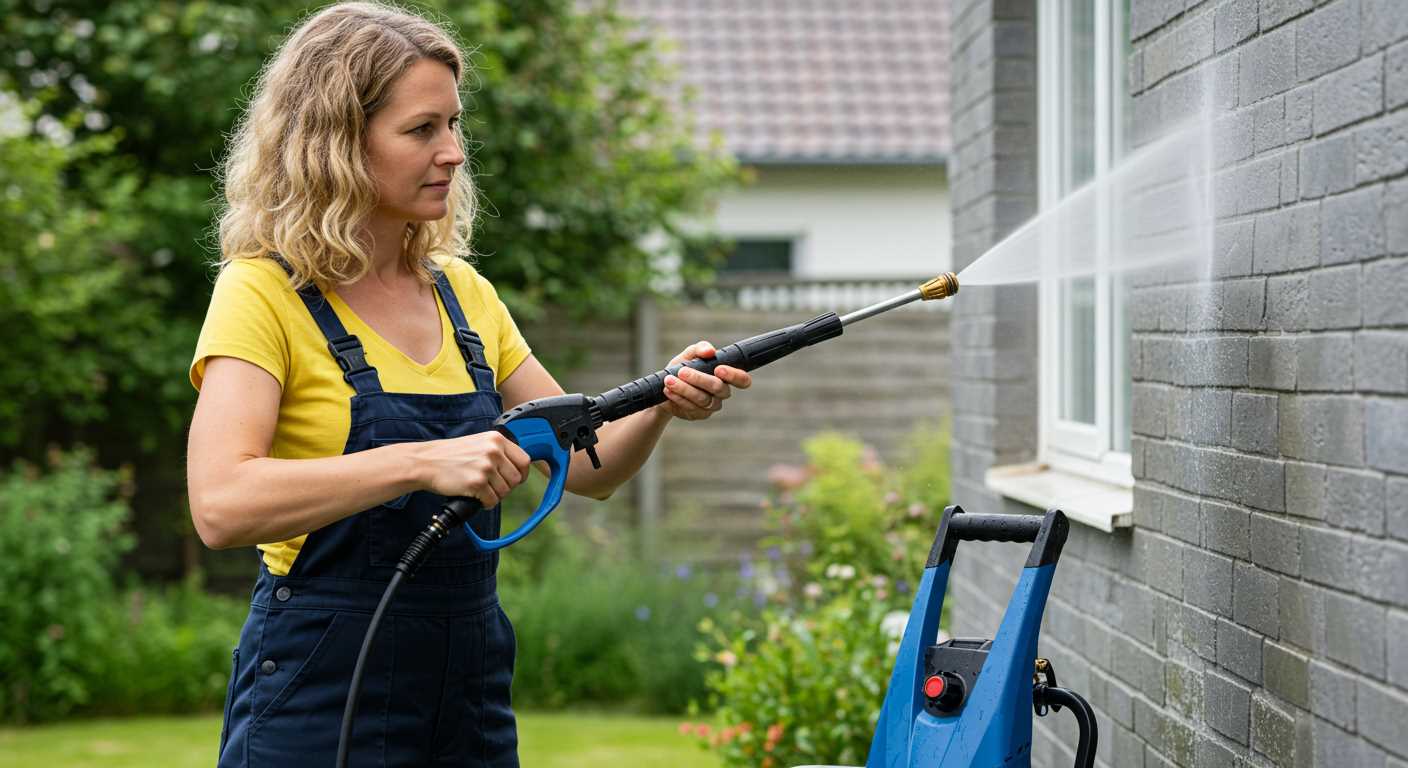
- Test various spray nozzles to confirm they all produce the appropriate spray pattern and pressure.
In my experience, a thorough test can reveal minor issues before they escalate. If the output seems inconsistent, consider inspecting the nozzle for clogs or blockages. A simple cleaning often resolves these minor inconveniences.
If everything seems in order, go ahead and test the device on a small area to ensure it performs as expected. This step helps confirm that the machine operates efficiently and effectively.
Troubleshooting Common Issues Post-Reset
If you encounter issues after reinitialising your cleaning device, there are several specific areas to check. Start by examining the water supply. Ensure that the source is fully open and that the hose is free from kinks or blockages. A restricted flow can lead to inadequate performance.
Next, inspect the connection points. Loose fittings can create air leaks, causing a reduction in pressure. Tighten all hoses and connections securely, making sure there are no visible cracks or damage.
Another common problem may stem from the nozzle. If the spray pattern appears uneven or weak, it could be clogged. Detach the nozzle and clean it thoroughly with water or a soft brush to eliminate any debris that may be obstructing the flow.
In some cases, the motor may not engage properly. Listen for any unusual sounds during operation, as this can indicate an internal issue. If the motor hums but does not start, it could be a sign of electrical problems. Check the power cord for frays or damage and ensure it is plugged into a functioning outlet.
Below is a table summarising potential issues and their solutions:
| Issue | Possible Cause | Solution |
|---|---|---|
| Poor water flow | Kinked hose or closed supply | Check hose and open water source |
| Loose connections | Air leaks | Tighten all fittings |
| Weak spray | Clogged nozzle | Clean or replace the nozzle |
| Motor not starting | Electrical issue | Inspect power cord and outlet |
Lastly, if you have checked all these areas and problems persist, consult the user manual for advanced troubleshooting steps or consider reaching out to the manufacturer for assistance. It’s essential to address these issues promptly to maintain the machine’s performance and longevity.

.jpg)


