


Before you fire up your new cleaning machine, ensure you’re equipped with the right tools and knowledge. I remember the first time I unpacked my own unit; I was eager to get started but soon realised that a little preparation goes a long way. First, gather all components: the machine itself, the hose, the trigger gun, and any nozzles or attachments. It’s a good idea to check the manufacturer’s manual for specific assembly instructions, as different models may vary slightly.
Next, connect the hose to a suitable water source. It’s essential to use clean, fresh water to avoid damaging the pump. I once made the mistake of using water from a nearby pond, thinking it would be fine. The result? Clogged filters and a trip to the repair shop. Ensure that all connections are tight to prevent leaks. Once the water supply is secure, attach the trigger gun to the other end of the hose.

After setting up the hose, plug the machine into a power outlet. If your model requires a GFCI outlet, ensure you have one available; this is a safety feature that protects against electrical shock. I recall a time I overlooked this detail while working outdoors and had to scramble for an extension cord. Once powered on, check the pressure settings based on the task at hand. A higher pressure isn’t always better; for delicate surfaces, lower settings are advisable.
Finally, before you start cleaning, test the spray pattern with a simple pull of the trigger. This quick check will help you familiarise yourself with the equipment and avoid any surprises while working. With everything in place, you’re ready to tackle dirt and grime effectively. Enjoy the process; there’s nothing quite like the satisfaction of seeing surfaces transformed with a little effort!
Setting Up Your Cleaning Equipment
Begin by ensuring the machine is on a flat, stable surface. Uneven ground can lead to instability during operation, which is something you want to avoid at all costs. I recall a time when my machine tipped over because of a slight slope, causing a mess I had to clean up afterward.
Connecting the Water Supply
Attach the hose to your water source. Here’s a tip: check for any leaks at the connector. I’ve had instances where a loose connection resulted in water spraying everywhere, creating a slippery situation. Make sure to tighten the hose securely.
- Verify the water supply is clean and free from debris.
- Ensure the water pressure is adequate; it should be within the recommended range in the manual.
Powering Up the Machine
Once the water is connected, plug the unit into a power outlet. Use an extension cord if necessary, but ensure it’s rated for outdoor use to prevent any electrical hazards. I’ve seen too many people overlook this detail and end up with a tripped breaker.
- Check the electrical rating on both the machine and the extension cord.
- If using a GFCI outlet, ensure it functions correctly before starting.
After everything is connected, turn on the water supply first, then the power. This sequence prevents dry running, which can damage the internal components. Trust me, I’ve learned the hard way about the importance of this step!
With everything in place, you’re ready to tackle your cleaning tasks efficiently. Keep an eye on the connections and listen for any unusual sounds while in use; they can be indicators of underlying issues that need addressing. Happy cleaning!
Choosing the Right Location for Your Pressure Cleaner

Identify a flat, stable surface to place your machine. Uneven ground can lead to vibrations that may affect performance and safety. I recall a time when I set up on a slight incline; it resulted in a frustrating spill of water and soap all over my yard. Not ideal.
Keep the unit away from areas with heavy foot traffic. This not only protects the equipment from accidental bumps but also ensures that you can work without interruptions. I’ve learned the hard way that having curious neighbours peek over can be distracting, especially when you’re focused on a tough job.
Ensure sufficient drainage in the vicinity. Excess water can accumulate quickly, and poor drainage can lead to a slippery mess. I always check where the runoff will go; once, I found myself battling a mini pond I hadn’t anticipated.
Access to power sources is vital. Check the length of your extension cord if needed, and ensure that it’s rated for outdoor use. I’ve had moments where I underestimated the distance, forcing me to rearrange everything mid-task. A quick trip to the nearest socket can waste valuable time.
Consider the proximity to your cleaning project. If you’re tackling a large area, it’s wise to position your equipment centrally to minimise movement. I remember a long day spent dragging my cleaner back and forth across the driveway; it was exhausting and time-consuming.
| Tip | Description |
|---|---|
| Stable Surface | Place on flat ground to avoid spills and uneven performance. |
| Avoid Foot Traffic | Keep away from busy areas to minimise distractions and accidents. |
| Good Drainage | Ensure the area can handle excess water to prevent slips. |
| Power Access | Check for nearby outlets and use outdoor-rated extension cords. |
| Central Location | Position near your project to reduce unnecessary movement. |
Finally, protect your machine from harsh weather conditions. If it’s sunny, heat can affect components, while rain poses a risk of electrical issues. I learned to always have a tarp handy for unexpected showers.
Connecting the Water Supply to Your Cleaner
To ensure your machine operates smoothly, it’s crucial to connect the water source properly. I’ve seen too many users overlook this step, leading to frustrating experiences. Here’s how to get it right.
- Select the Right Hose: Use a high-quality garden hose, ideally 5/8 inches in diameter. A smaller diameter can restrict flow, affecting performance.
- Check for Leaks: Before connecting, inspect your hose for any cracks or leaks. A faulty hose can waste water and reduce pressure.
- Attach the Hose: Securely connect one end of the hose to your water supply, ensuring a tight fit to prevent leaks. The other end goes into the water inlet on your unit.
- Use a Filter: If your water source contains debris, consider installing a filter at the inlet. This will protect the internal components of your machine from damage.
On one occasion, I neglected to check the hose connection before starting. Water sprayed everywhere, creating quite a mess. Since then, I make it a habit to double-check connections.
- Turn on the Water Supply: Open the tap fully before starting the motor. This ensures a steady flow and avoids running the pump dry.
- Purge Air from the Hose: Before activating your machine, squeeze the trigger on the lance to release any trapped air. This helps maintain consistent pressure once you start cleaning.
After connecting everything, it’s wise to test the system briefly. A quick check can save you from potential mishaps during a larger cleaning task. Always remember to follow these steps for a hassle-free operation.
Installing the High-Pressure Hose Properly
Attach the high-pressure hose to the machine securely. I’ve seen many users overlook this step, leading to leaks or even dangerous situations. Ensure the connection is tight, but don’t overtighten, as this can damage the threads. My advice? Give it a firm twist until you feel resistance, then stop.
Choosing the Right Hose Length
Selecting the appropriate length for the high-pressure hose is crucial. A longer hose offers flexibility but may lead to a decrease in pressure. I typically use a 10-metre hose for most tasks, which strikes a balance between reach and performance. For larger areas, consider using multiple hoses with quick-connect fittings.
Regular Maintenance Tips
Check the hose regularly for wear and tear. Look for cracks or bulges, as these can lead to unexpected failures. I’ve had hoses burst mid-job, creating a mess and wasting time. Always store the hose coiled and out of direct sunlight to prolong its life. If you notice any damage, replace it immediately to ensure safety and functionality.
For those with pets, be cautious about surrounding areas. While setting up, consider how nearby installations, like fences, can impact your work environment. If you’re curious about safety around pets, check out this article on whether can an electric fence injure dog.
Attaching the Nozzle for Different Cleaning Tasks
For various cleaning applications, choosing the right nozzle is key to achieving the best results. Each nozzle serves a specific purpose, and knowing how to attach them correctly can save time and enhance efficiency.
Types of Nozzles
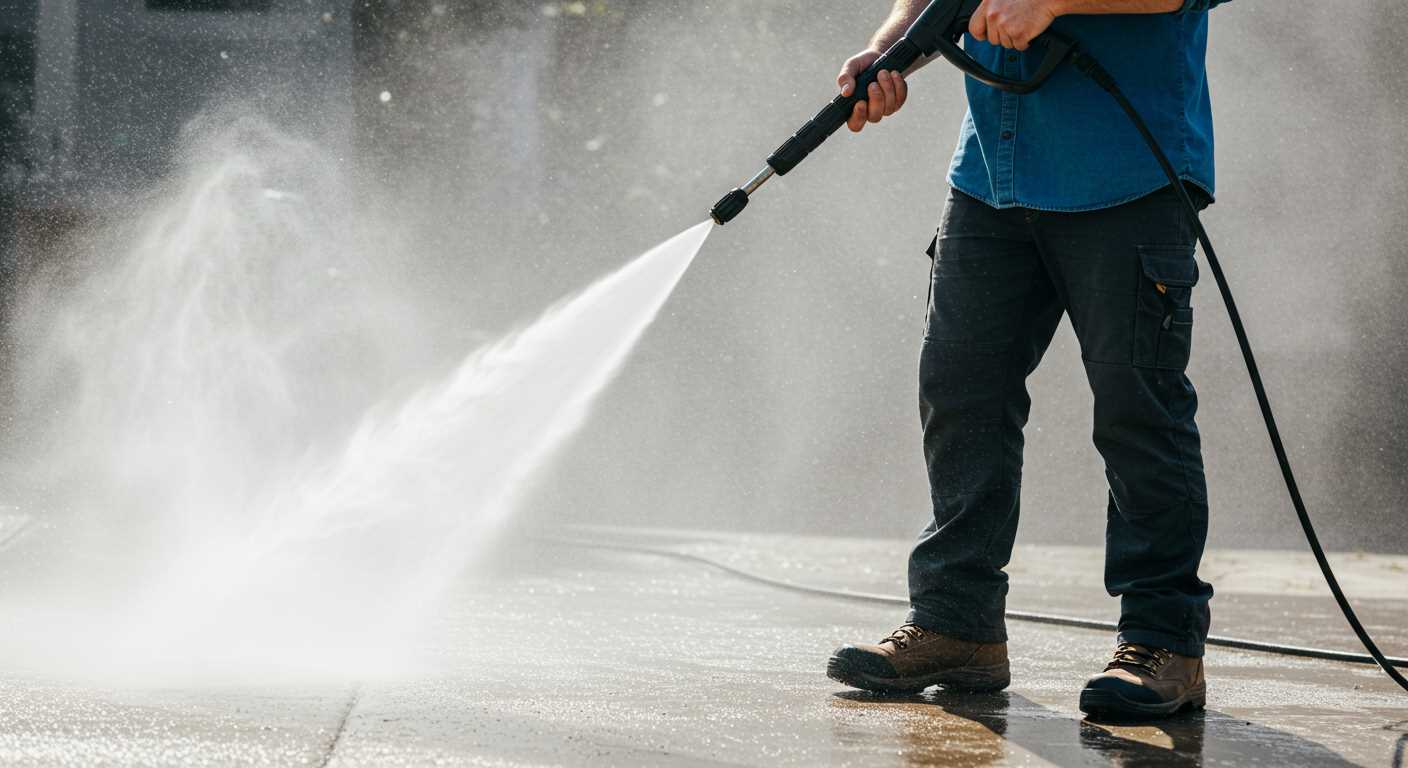
Start with the 0-degree nozzle, perfect for tackling tough stains on hard surfaces like concrete. The concentrated stream delivers maximum pressure, making it ideal for removing ingrained dirt. For larger areas, switch to the 25-degree nozzle, which provides a wider spray. This is great for washing driveways or patios where you want to cover more ground without risking damage.
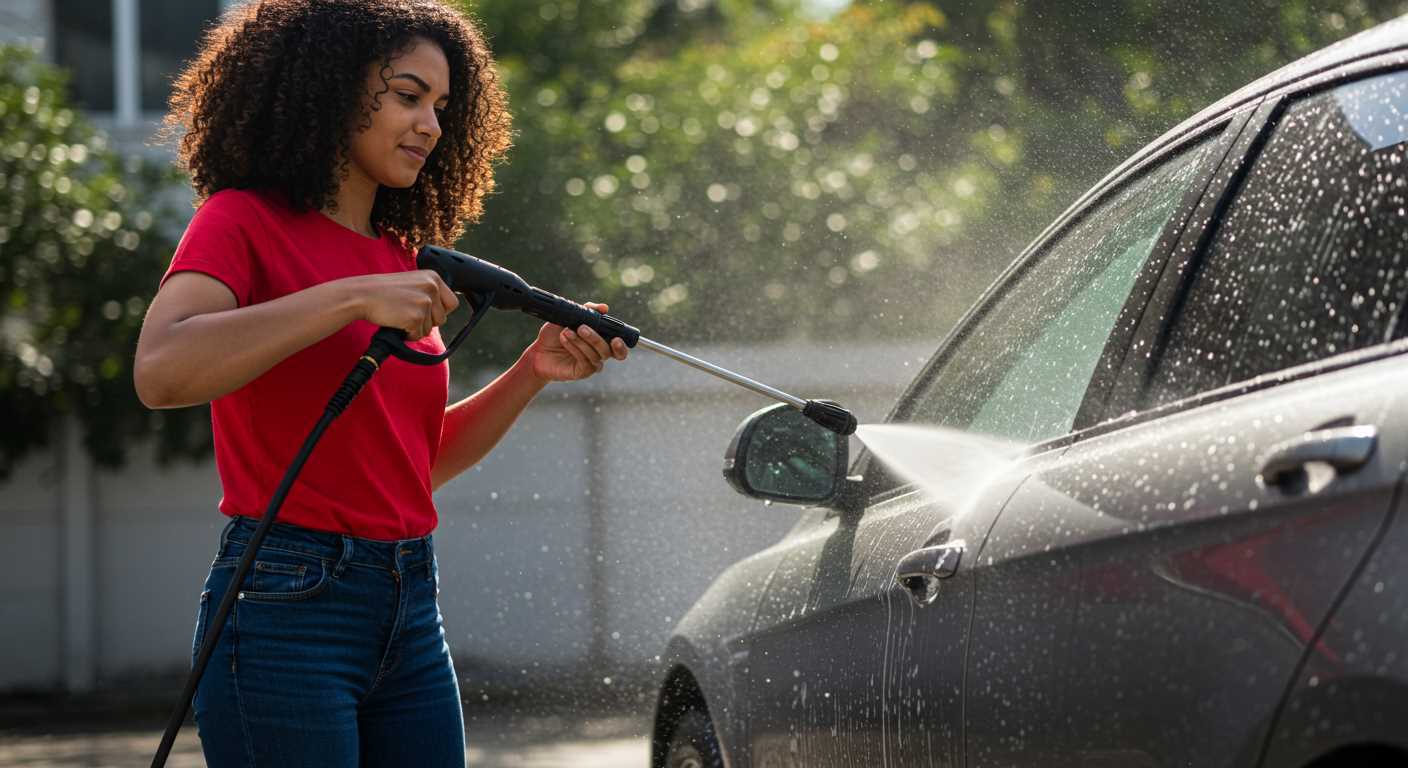
If you’re dealing with delicate surfaces, such as cars or wooden decks, the 40-degree nozzle is your best bet. Its gentle spray minimizes the risk of harm while still providing thorough cleaning. Lastly, consider using a soap nozzle for applying detergents effectively. This attachment allows for low-pressure spraying, ensuring the cleaning solution adheres to surfaces properly before rinsing.
Attaching the Nozzle
To attach a nozzle, ensure the machine is off and unplugged. Locate the quick-connect fitting on the end of the high-pressure lance. Simply pull back the collar, insert the nozzle of your choice, and release the collar to lock it in place. A firm pull on the nozzle helps confirm it’s secured. If you’re switching nozzles during a job, always release any built-up pressure first by pulling the trigger before making changes.
For my own projects, I’ve found that keeping a dedicated storage space for nozzles helps prevent misplacement and ensures quick access. Having a clear labelling system can also expedite the process, especially when working on multiple tasks in one day. Following these tips will help you maximise the performance of your equipment and streamline your cleaning experience.
Power Supply Configuration for Your Cleaning Equipment
Ensure your unit is connected to a power source that meets the required specifications. For most machines, a standard household outlet will suffice. However, verify the voltage and amperage ratings on the machine’s label to avoid any mishaps.
Choosing the Right Extension Cord
If the outlet is not conveniently located, opt for an extension cord. Use a heavy-duty cord rated for outdoor use and with a sufficient gauge to handle the power requirements. A 12-gauge cord is typically recommended for distances exceeding 50 feet.
| Length of Cord | Recommended Gauge |
|---|---|
| Up to 25 feet | 14-gauge |
| 26 to 50 feet | 12-gauge |
| Over 50 feet | 10-gauge |
Ground Fault Circuit Interrupter (GFCI) Protection
Utilise a GFCI outlet or use a GFCI adapter with your equipment. This feature is crucial, especially in wet environments, as it cuts off power instantly if it detects a ground fault, significantly reducing the risk of electric shock.
Once everything is connected, turn on the power supply and check for any unusual sounds or smells. If something seems off, disconnect immediately and investigate. It’s better to be cautious than to risk damaging your equipment or yourself.
Priming the Pump Before Use
Before firing up your machine, ensure the pump is primed to avoid damage and ensure optimal performance. Begin by filling the water tank completely. This prevents air from entering the system, which can lead to cavitation and affect the longevity of the unit.
Next, locate the water inlet and attach the garden hose securely. Turn on the water supply and allow it to run for a few moments. You want to see a steady stream of water flowing into the pump without any interruptions. This step is critical; if you notice bubbles or sputtering, air may be trapped, which can impede the pump’s function.

After confirming a steady flow, switch on the machine while holding the trigger on the gun. This action releases any trapped air within the system. Keep the trigger engaged until you see a consistent spray coming from the nozzle. This indicates that the pump is properly primed and ready for action.
From my experience, skipping this step can lead to costly repairs. I once neglected to prime a unit before use, and it resulted in significant damage that required extensive repairs. Taking a few extra minutes to ensure everything is primed correctly saves time and money in the long run.
Always remember, a well-prepared pump translates to better performance and a more efficient cleaning process. Treat the priming phase as a crucial part of your preparation routine, and your equipment will reward you with reliable service for years to come.
Testing the Washer for Leaks
Before any cleaning task, checking for leaks is a must. Start by turning on the water supply without activating the motor. Inspect all connections, including the hose, nozzles, and any fittings. If you notice water pooling around these areas, there’s a chance of a faulty seal or connection. Tighten any loose fittings, but don’t overdo it, as that can damage the threads.
Conducting a Pressure Test
After securing all connections, it’s time to engage the equipment. With the water flowing, turn on the motor and allow it to reach operating pressure. Observe the unit closely for any signs of moisture escaping from joints or parts. Listen for unusual sounds; a steady operation without hissing or sputtering indicates a solid setup. If any leaks appear, shut down immediately and address the issue before proceeding.
Checking the Hose for Integrity
Don’t overlook the high-pressure hose. Visually inspect it for cracks or abrasions. Run your hand along its length to feel for any weak spots. If you find any damage, replace the hose rather than risk a potentially hazardous situation. A well-maintained hose is key to effective performance and safety.
Understanding Safety Precautions During Operation
Always wear appropriate personal protective equipment (PPE) before using the machine. Safety goggles and gloves are non-negotiable; they protect against debris and high-pressure water spray. I recall a day when I neglected to wear goggles while cleaning a patio. The pressure was so intense that small stones flew out and hit my face. Lesson learned–never skip the safety gear.
Maintaining a Safe Distance
Keep a safe distance from surfaces while operating the equipment. A minimum of 2 feet is recommended to avoid damage to the material being cleaned. I once got too close to a delicate wooden fence, and the high pressure stripped away layers of paint. It’s crucial to know your limits with the nozzle. Adjust the distance based on the type of surface: concrete can handle more pressure than wood or glass.
Understanding Electrical Safety
Ensure that electrical connections are secure and properly rated for the equipment. Use a grounded outlet and avoid using extension cords if possible. One instance, I had a mishap with a frayed cord, which resulted in a minor shock. Always inspect cords before use and keep them away from water to prevent accidents. If you’re working outdoors, consider using a GFCI outlet for added protection.
Lastly, if you’re considering using the machine for delicate tasks like cleaning windows, ensure you choose the right model for the job. You might want to check out this pressure washer for cleaning windows for optimal results.
.jpg)
.jpg)


