
.jpg)


.jpg "How to set up an electric pressure washer")
Before anything else, ensure you have a sturdy surface to work on. A flat area prevents any accidents during use. I’ve seen too many mishaps occur simply because the unit was on an uneven surface. Next, check that you have a reliable water source nearby. A consistent flow is key. During my years working with various models, I learned that insufficient water can lead to overheating and mechanical issues.
Connect the hose securely to both the machine and the water supply. I can’t stress enough how important this step is. A loose connection can lead to leaks or a complete loss of pressure. After securing the connections, it’s time to plug the device into a suitable power outlet. Make sure the extension cord is rated for the wattage of your unit; using the wrong cord can lead to electrical problems.
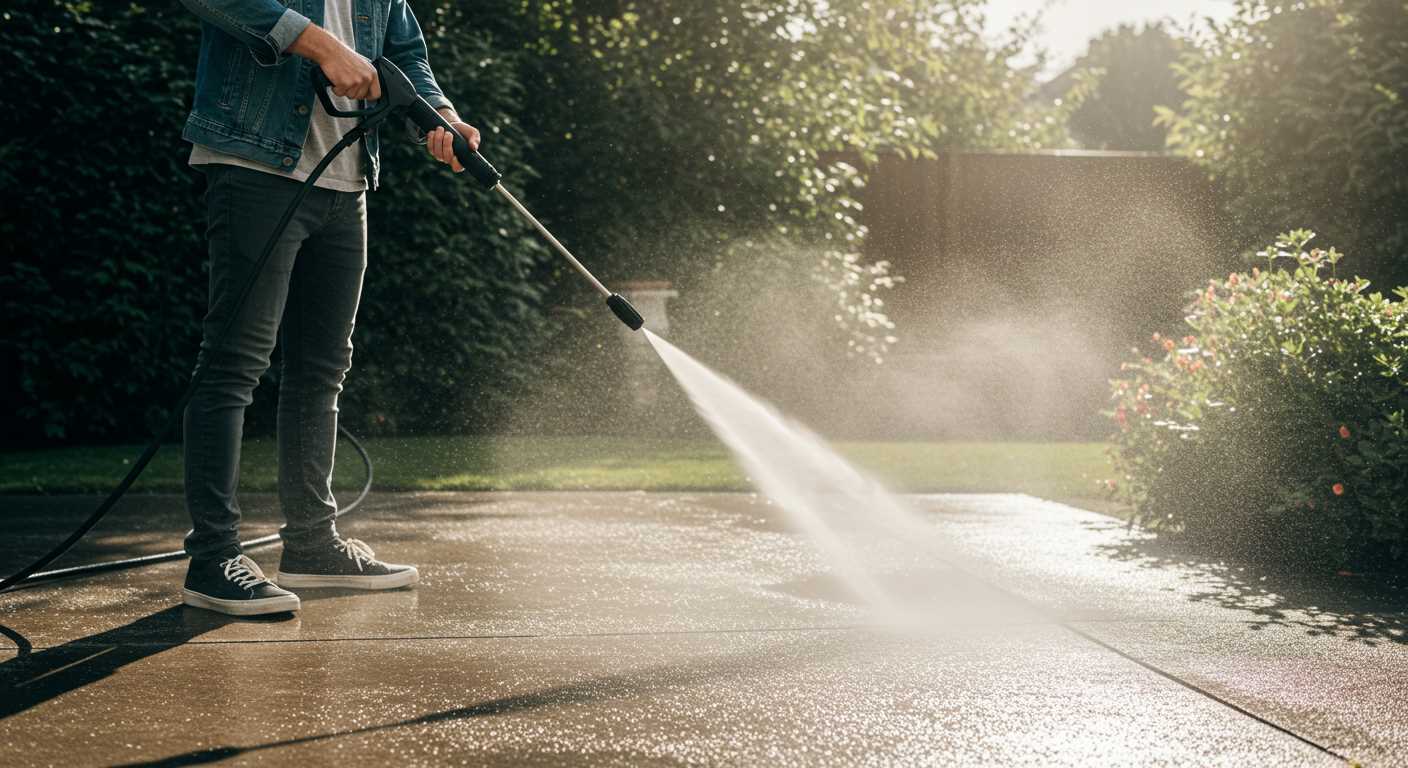
Once everything is connected, turn on the water supply before starting the motor. This prevents air from getting trapped in the system. My first time using one of these machines, I neglected this step and ended up with a frustrating sputter. After a few moments, you can switch on the power and let the system build up pressure. Always remember to test the spray nozzle at a safe distance before getting too close to your cleaning project.
Don’t forget to adjust the nozzle according to the surface you’re cleaning. A narrower spray works wonders on tough stains, while a wider spray is better for delicate surfaces. I’ve learned this the hard way–getting too aggressive on a fragile surface can lead to damage. With these tips in mind, you’ll be well on your way to achieving sparkling results.
Choosing the Right Location for Your Pressure Cleaning Device
Identify a flat, stable surface to place your cleaning unit. I recall one time trying to use mine on a slight incline; it was a frustrating experience as the equipment kept shifting, making the task cumbersome. A level ground ensures safety and functionality.
Ensure proximity to a power source. Opt for an area where you can easily plug in without using long, hazardous extension cords. I once had to stretch a cable across my driveway, which not only posed a tripping hazard but also limited my mobility during the cleaning process.
Consider drainage options. Water will flow freely during operations, so position your device where excess water can drain away from your home’s foundation or any sensitive areas. I learned this the hard way after a session left my patio flooded because I hadn’t thought ahead.
Avoid enclosed spaces. Operating in a garage or a small shed can lead to the accumulation of harmful fumes, which is a safety risk. I remember doing this once and found myself gasping for fresh air; now I always work outdoors in an open area.
Protect from elements. If possible, place your unit under a shelter or cover to shield it from rain or direct sunlight. Weather can affect performance and longevity. I’ve seen how prolonged exposure to the elements can wear down equipment faster than expected.
Assess noise levels. If you live in a residential area, consider the impact on neighbours. I’ve had instances where my cleaning sessions drew complaints due to noise. Starting early on weekends can help maintain good relations.
Lastly, keep it accessible. Ensure there’s enough space around the device for movement and easy access to hoses and nozzles. I’ve struggled before with tangled hoses, wishing I’d chosen a more spacious spot. Planning the layout can save time and effort.
Connecting the Water Supply to the Pressure Cleaner
Ensure the water source is at least 5 metres away from your unit for optimal performance. Use a high-quality hose, preferably one that is specifically designed for high water flow, to prevent any restrictions. I remember once using a standard garden hose, and the pressure dropped significantly, leading to unsatisfactory results. A reinforced hose can handle the pressure better and will last longer.
Before connecting, check for any leaks in the hose and fittings. A small leak can reduce the effectiveness and increase wear on the machine. It’s also a good practice to install a filter at the water inlet to prevent debris from clogging the system. I once had a minor mishap when dirt particles entered the pump, leading to costly repairs.
Attach the hose securely to the water inlet on your machine. It’s crucial to tighten it without overdoing it, as plastic fittings can crack. After connecting, turn on the water supply and check for leaks before starting the cleaner. This simple step can save you from frustration during use.
For those looking for a cleaner that requires less maintenance, a brushless pressure washer might be worth considering. They tend to have fewer problems with water flow due to their advanced technology.
Once everything is connected and running, you can begin your cleaning tasks. If you ever need to clean your outdoor equipment or even think about how to clean a fish tank with vinegar, having a reliable water source will make all the difference.
Assembling the Pressure Washer Components
Begin by gathering all parts from the box. You should have the main unit, a hose, a spray gun, and various nozzles. Lay everything out clearly to avoid confusion during assembly.
Attach the hose to the inlet on the main unit. Ensure the connection is tight to prevent leaks. I’ve seen many units malfunction due to loose fittings, so don’t skip this step.
- Check for O-rings on the hose connector. If missing or damaged, replace them before securing.
- Use pliers to tighten the connection slightly, but avoid overtightening, which can damage the threads.
Next, connect the spray gun to the other end of the hose. Depending on the model, this may involve simply screwing it on or clicking it into place. Make sure the locking mechanism, if present, engages properly.
Attach the appropriate nozzle for your task. Each nozzle serves a different purpose, from wide spray for rinsing to narrow jets for tough stains. I often keep a chart handy for quick reference on which nozzle to use for different jobs.
- Identify the colour-coded nozzles:
- Red: 0 degrees – high pressure for tough spots
- Yellow: 15 degrees – for heavy cleaning tasks
- Green: 25 degrees – general cleaning
- White: 40 degrees – safe for delicate surfaces
- Attach the nozzle securely to the spray gun.
Lastly, check all connections once more before powering on. A quick inspection can save you from potential mishaps during operation. I’ve learned the hard way that a loose connection can lead to a messy situation!
Setting up the Power Supply Safely

Always plug your machine into a dedicated circuit. This ensures that it gets the right voltage without overloading. I’ve seen too many setups where users connect their units to extension cords or power strips, which can lead to overheating or tripped breakers. It’s a simple choice that makes a big difference.
Using a Ground Fault Circuit Interrupter (GFCI) is non-negotiable. These devices cut off power if they detect a fault, protecting you from electrical shocks. I learned this the hard way during a rainy day demo; the moment I plugged in without a GFCI, I felt that jolt. Never again.
Check the Power Rating
Always verify that your power source meets the required specifications for your unit. Most models will have a label indicating the necessary voltage and amperage. If you’re unsure, consult the manual. On one occasion, I overlooked this detail, and my unit simply wouldn’t start. A quick check revealed I was using a lower voltage than required.
Ensure the outlet is in good condition. Frayed wires or loose connections can create sparks or worse. Inspect the plug and outlet before every use. It’s a quick check that can save you from potential hazards.
Avoid Wet Conditions
Keep your power supply area dry. Water and electricity are a dangerous mix. I remember a demo where a light drizzle turned my setup into a risky affair. Always ensure the ground is dry, and if it rains, wait it out. Your safety is paramount.
Finally, ensure that the cable is secured and does not create a trip hazard. I’ve seen accidents happen because someone didn’t notice a misplaced cord. Maintain a tidy and safe workspace.
Selecting the Correct Nozzle for Your Cleaning Task
For any cleaning job, the right nozzle can make a world of difference. I remember one time, I tackled a grime-covered patio with the wrong attachment, and it took forever. Switched to the appropriate one, and the job was done in minutes. Here’s how to choose wisely.
Nozzle Types Overview
- Zero Degree: Produces a concentrated stream. Ideal for stubborn stains on concrete, but be cautious of the potential for damage.
- 15 Degree: A powerful option for removing tough dirt and grime. Works well on driveways and heavily soiled surfaces.
- 25 Degree: A versatile choice, perfect for general cleaning tasks like siding and decks. A good balance between power and coverage.
- 40 Degree: Gentle spray for delicate surfaces. Suitable for washing cars or outdoor furniture without risk of damage.
- Soap Nozzle: Usually a wider spray pattern. Designed to apply cleaning solutions effectively, enhancing the cleaning process.
Choosing the Right Nozzle for Your Job
- Assess the Surface: Hard surfaces need more power. Use a narrow nozzle for concrete; switch to a wider one for softer materials.
- Evaluate the Dirt Level: Heavy stains demand more pressure. Start with a narrow nozzle for tough spots, then switch to a wider one for overall cleaning.
- Consider the Cleaning Solution: If you’re using detergent, grab the soap nozzle. This will help distribute the cleaner evenly.
- Test Before Committing: If unsure, test on a small, inconspicuous area. This prevents damage and ensures you’re using the right nozzle.
By picking the right nozzle, you can save time and effort. I’ve seen jobs go from hours to mere minutes just by using the correct attachment. It’s all about matching the tool to the task at hand.
Performing a Pre-Use Safety Check
Before getting started, I always check the equipment thoroughly. It’s a straightforward process that can save you from accidents and equipment damage. Begin by inspecting the power cord for any signs of wear or damage. If you notice frays or exposed wires, don’t use it until it’s repaired or replaced. A damaged cord can lead to electrical shocks or short circuits.
Water Supply Inspection
Next, examine the water supply hose. Look for kinks, cracks, or blockages that may restrict water flow. Ensure that the connections are secure and that there are no leaks. A compromised hose could lead to reduced performance or even cause flooding in your workspace.
Safety Gear and Environment
Personal protective gear is a must. Equip yourself with gloves, goggles, and sturdy footwear. I’ve seen too many people underestimate the importance of protection. The high-velocity water can cause injuries, especially when dealing with stubborn grime.
Additionally, check your surroundings. Remove any obstacles or fragile items from the area. It’s easy to overlook a garden ornament or a delicate plant. You don’t want to be distracted while working, so create a clear and safe workspace.
| Item | Check | Action |
|---|---|---|
| Power Cord | Look for frays or damage | Repair or replace if damaged |
| Water Hose | Inspect for kinks or leaks | Replace if compromised |
| Protective Gear | Ensure you have gloves, goggles, footwear | Wear them during use |
| Workspace | Remove obstacles and fragile items | Clear the area before use |
Taking these precautions isn’t just about following a checklist; it’s about ensuring your safety and extending the life of your equipment. Trust me, a little diligence goes a long way.
.jpg)


