
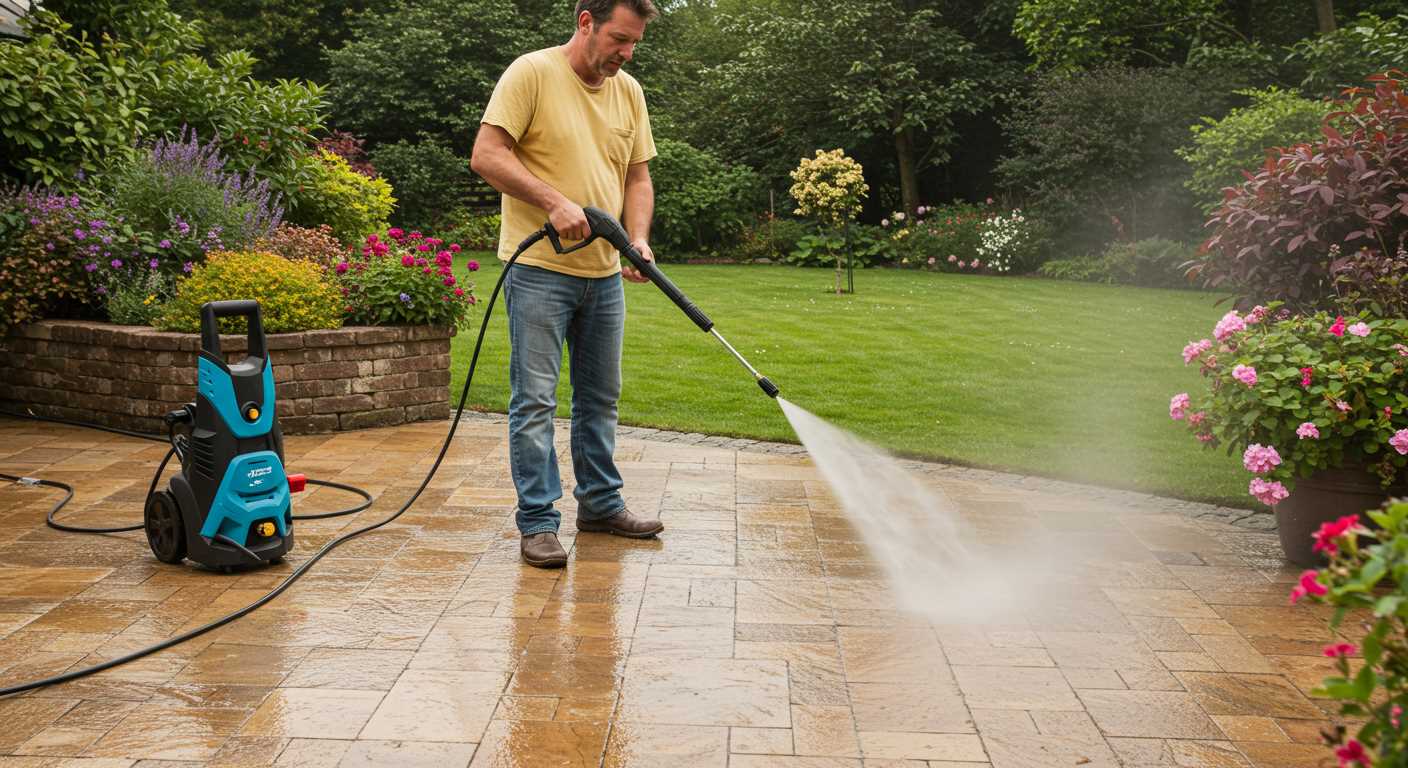


Using a foam sprayer with a high-powered cleaning device can elevate your car washing experience significantly. First, ensure you have the right adapter to connect your sprayer to the water outlet of your machine. Most brands offer specific fittings, so check compatibility before you proceed.
Next, fill the sprayer reservoir with a quality car shampoo mixed according to the manufacturer’s recommendations. I’ve found that a 1:10 ratio of shampoo to water works wonders for achieving that thick, clingy foam that effectively lifts dirt and grime. Remember, too much soap can lead to excessive suds that may not rinse off easily.
After you’ve mixed the solution, attach the sprayer securely to the machine, ensuring all connections are tight to prevent leaks. Adjust the nozzle to a wider spray pattern, as this helps in covering larger areas efficiently. I often start from the top of the vehicle and work my way down, allowing the foam to penetrate stubborn spots.

Once everything is connected and adjusted, switch on your cleaner and give the sprayer a test run. If the foam isn’t thick enough, consider tweaking the mixture or adjusting the nozzle further. In my experience, finding the perfect balance often requires a bit of experimentation.
Lastly, take your time rinsing off the foam. A thorough rinse prevents soap residue from causing streaks. Using a lower pressure setting can help to ensure you don’t accidentally damage any delicate surfaces while washing. With practice, you’ll master the technique and enjoy the benefits of a spotless finish.
Installing a Foam Applicator on a High-Pressure Cleaning Unit
Attach the applicator to the high-pressure unit’s lance by aligning the connection point and twisting it in place. This ensures a snug fit and prevents any leaks during operation.
Adjust the nozzle to achieve the desired spray pattern. Most applicators come with an adjustable nozzle that can switch between wide and narrow sprays, which is ideal for different cleaning tasks.
Next, mix the cleaning solution according to the manufacturer’s recommendations. Typically, a ratio of 1:10 (cleaner to water) works well for most applications. Ensure the solution is compatible with the device to avoid any damage.
- Use distilled water if possible to avoid mineral build-up.
- Always use a cleaner designed for use with such tools.
- Test the mixture on a small area first to confirm compatibility.
Fill the applicator’s reservoir with the mixed solution. Be cautious not to overfill it, as this can lead to spillage during operation. Secure the cap tightly to prevent any leaks.
Once everything is connected and filled, turn on the water supply before starting the machine. Activate the unit and allow it to build pressure before using the applicator. This step is vital to ensure consistent flow and foam generation.
Begin applying the foam at the bottom of the surface and work upwards. This helps in preventing streaks and ensures even coverage. Allow the foam to dwell for the recommended time to break down dirt and grime effectively.
- Always rinse the surface after the cleaning solution has dwelled.
- Switch back to a standard nozzle for rinsing, ensuring a thorough clean.
- Clean the applicator after use to maintain its performance.
In my experience, using a mixture of hot water with the cleaning solution often enhances the cleaning power, especially for stubborn stains. Just keep an eye on the temperature limits specified by the manufacturer. After many years in this field, I can confidently say that a well-prepared applicator makes all the difference in achieving a spotless finish.
Choosing the Right Foam Cannon for Your Pressure Washer
To ensure optimal cleaning results, select a model compatible with your equipment’s specifications. Look for the correct fitting size, typically 1/4-inch quick connect, which matches your spray gun. I once overlooked this detail and ended up with a unit that didn’t fit, causing unnecessary frustration.
Next, consider the adjustable nozzle feature. This allows you to modify the spray pattern and thickness of the suds. During one of my tests, I found that a wider spray worked wonders for large surfaces, while a tighter pattern was perfect for tough spots.
Pay attention to the material construction. Brass fittings and durable plastic can withstand the rigours of regular use, unlike cheaper alternatives that may crack or break. I remember using a low-quality model that failed mid-clean, leading to a messy situation.
Lastly, the detergent tank capacity matters. A larger tank means fewer refills during extensive cleaning sessions. I learnt this the hard way while detailing a friend’s car; running out of detergent halfway through was inconvenient. Choose wisely for a smoother experience.
Preparing Your Pressure Washer for Foam Application
Ensure your equipment is ready for optimal results by following these steps. First, confirm that your unit has the correct nozzle and is compatible with the attachment you plan to use. A quick glance at the manual can save time and prevent mishaps.
Check the Soap Reservoir
The soap reservoir must be clean and free of any old cleaning solutions. Residues can interfere with the new mixture, reducing its effectiveness. Rinse it thoroughly with water, and if necessary, use a mild detergent to eliminate stubborn remnants.
Inspect Hoses and Connections
Before you start, examine all hoses and connections for leaks or damage. A compromised hose can lead to a loss of pressure, affecting the application of the cleaning solution. Replace any faulty parts as needed. Also, ensure that the connections are tight and secure to prevent any mishaps during operation.
| Component | Action |
|---|---|
| Soap Reservoir | Clean thoroughly and rinse out |
| Hoses | Inspect for leaks and replace if necessary |
| Connections | Tighten and secure |
Lastly, choose a suitable cleaning solution. I recommend using a high-quality product specifically designed for your equipment. For suggestions, check the best car wash liquid for pressure washer. Getting the right mixture will enhance cleaning efficiency and help maintain the condition of your surfaces.
Connecting the Foam Cannon to the Pressure Washer
First, ensure that your equipment is turned off and unplugged for safety. Begin by locating the quick-connect fitting on the end of your high-pressure unit. This is where the attachment will join.
1. Remove the existing nozzle or lance from the outlet. Most models allow for a simple twist or pull to detach the component.
2. Take the foam applicator and align it with the quick-connect fitting. Push it firmly into place until you hear a click, indicating a secure connection.
3. If your equipment uses specific adapters, attach them as needed to ensure a snug fit. Always refer to the manufacturer’s instructions for your specific model.
Once connected, check for leaks. Turn on the water supply and power up the unit, allowing it to build pressure. Watch for any signs of leakage around the connection points. If there are issues, disconnect and reattach to ensure a tight seal.
After confirming everything is secure, adjust the nozzle on the applicator to your desired spray pattern. For a broader application, opt for a wider setting, while a tighter focus is great for stubborn grime.
Finally, before application, ensure you have your cleaning solution mixed according to the guidelines. This preparation will enhance the cleaning process and optimise performance.
Selecting the Appropriate Foam Soap
Choose a soap that is specifically formulated for use with high-pressure cleaning devices. Regular car wash soaps won’t provide the same thick lather or cling needed to lift dirt effectively. Look for products labelled as ‘snow foam’ or ‘high foam’ designed for this application.
I’ve tried various brands over the years, and I often find that those with a pH-neutral formula work best, especially for vehicle surfaces. Acidic or highly alkaline soaps can damage paint finishes or strip wax. A gentle yet effective soap will ensure your vehicle remains in great condition while still getting a thorough clean.

Consider the type of cleaning task at hand. For general washing, a versatile soap is suitable, but if tackling heavy grime or grease, opt for a more concentrated solution. Some soaps are enhanced with degreasers, which can make a noticeable difference in performance.
Always check for compatibility with your equipment. Some formulations may not work well with certain brands or models, potentially leading to clogs or damage. I once used a popular product that was incompatible with my setup, resulting in a frustrating cleaning session and a clogged attachment.
Investigate user reviews and recommendations. I often relied on feedback from fellow enthusiasts to guide my choices. A well-reviewed product can save you time and effort in the long run.
Finally, consider the dilution ratio. A highly concentrated soap might seem appealing, but it’s crucial to follow the manufacturer’s instructions for mixing. Too much soap can create excessive suds, which can affect the rinsing process. I learned this the hard way during a particularly messy wash.
Adjusting the Foam Cannon Settings for Optimal Foam
For the best results, start with the dilution ratio of soap to water. A common recommendation is 1:10, but this can vary based on the specific cleaner you use. Always check the manufacturer’s instructions for optimal mixing ratios. I’ve found that less concentrate often yields a thicker lather, which clings better to surfaces.
Next, adjust the nozzle to achieve the desired spray pattern. A wider spray covers more area, while a narrower one provides concentrated coverage. I prefer starting with a wide pattern for initial application, then switching to a narrow setting for stubborn spots. Remember, the distance from the surface matters too. Keeping the nozzle about 18 inches away will help the foam adhere effectively.

Pressure also plays a role. If you find the foam isn’t clinging as expected, reducing the pressure can help. Lower pressure allows the soap to stay on the surface longer, enhancing its cleaning power. I usually try a few settings to see what works best for the specific job at hand.
Additionally, consider the ambient temperature. Cold weather can affect foam stability. If working in cooler conditions, pre-warm your cleaning solution slightly. This simple step can improve the foam’s performance significantly.
Lastly, experiment with different soaps. Some products are designed specifically for thicker foam production. Testing a few options can lead to discovering the perfect match for your equipment. For those with Karcher systems, check out the Karcher pressure washer for cleaning patio to find a compatible soap that maximises foam creation.
Testing the Foam Cannon with Water
Begin by filling the canister with clean water. This allows you to test the flow and distribution without wasting any soap. Attach the assembly to the unit securely, ensuring all connections are tight to prevent leaks. Start the machine and observe the spray pattern. You should see a consistent, even mist emanating from the nozzle.

Adjust the nozzle to modify the spray width. A wider spray covers larger areas quickly, while a narrower focus is beneficial for detailed work. Keep an eye on the distance between the nozzle and the surface; about 2-3 feet is ideal for optimal coverage.
If the coverage is uneven or insufficient, check the settings on the canister. Ensure the dial is set to a suitable level for water. Sometimes, a simple tweak can enhance the distribution significantly. You might also want to vary the pressure slightly to see how it affects the output.
After testing, assess the water’s trajectory and impact on the surface. If it feels too harsh or too gentle, consider revising your approach. Each model reacts differently, so a bit of experimentation will lead you to the desired results.
Finally, take note of how the unit handles during operation. Watch for any unusual sounds or vibrations that could indicate issues. A smooth operation is key for achieving the best results when you switch to using cleaning solutions.
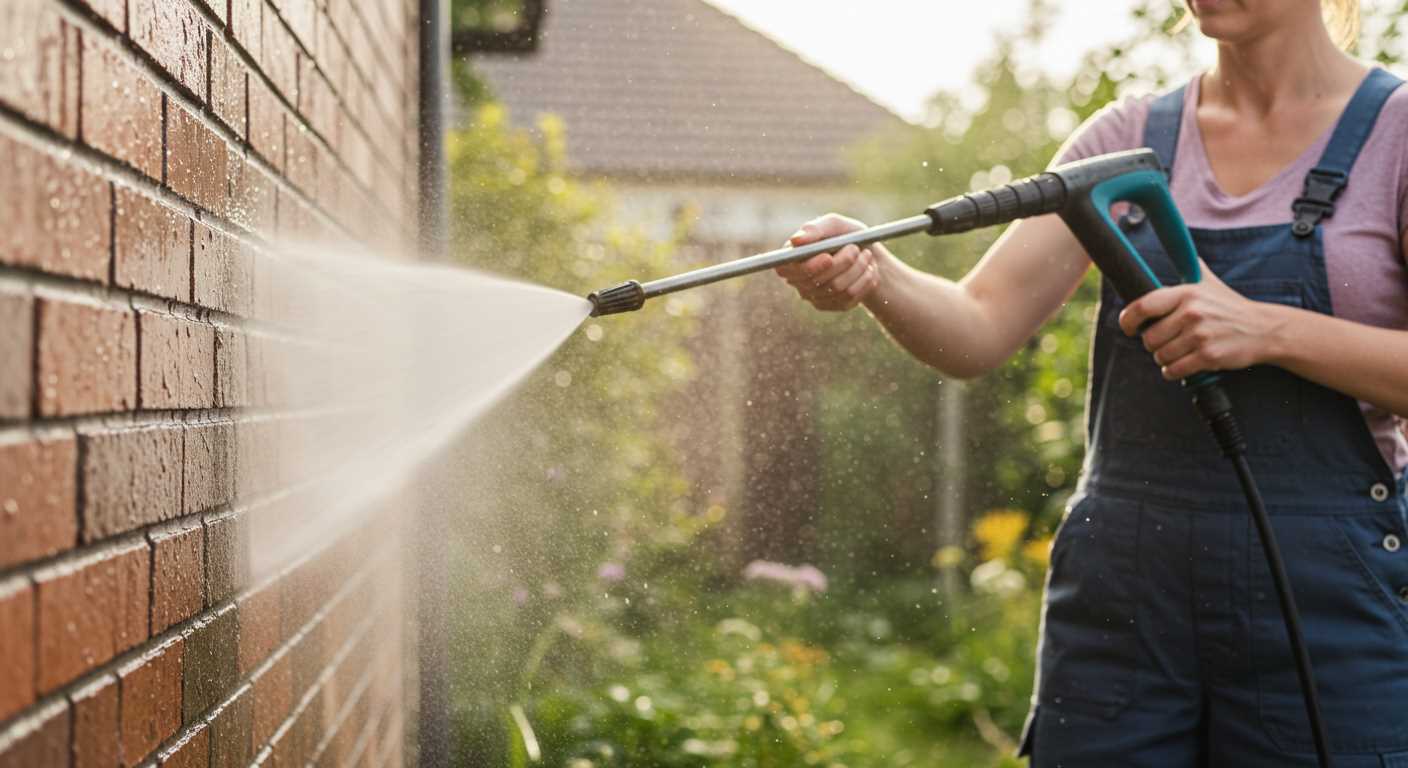
Applying Foam to Your Vehicle or Surface
For optimal results, begin from the top of your vehicle or surface and work your way down. This method ensures that any dirt or grime flows downwards, preventing recontamination of cleaner areas. Aim the nozzle at a slight angle to achieve better coverage. Move the wand in a sweeping motion to create an even layer of the cleaning solution.
Timing is Key
Allow the cleaning solution to dwell for about five to ten minutes, but don’t let it dry out. This contact time is critical for breaking down dirt and grime. If you notice the solution starting to dry, lightly mist it with water to keep it wet. During my experience, I’ve found that a little patience here pays off significantly, as it enhances the cleaning power.
Rinsing Techniques
Once the cleaning solution has had time to work, rinse thoroughly using a wide fan spray. Keep the nozzle at a distance of about 12 to 18 inches from the surface. This distance prevents damage while ensuring all residues are washed away. If you’re working on a particularly dirty area, consider going over it a second time to ensure nothing is left behind. In my years of testing, I discovered that a thorough rinse leads to a streak-free finish.
Cleaning and Maintaining Your Foam Cannon
Regular maintenance is key to ensuring longevity and optimal performance. After each use, rinse the attachment with clean water to remove any soap residue. This prevents clogs and keeps the nozzle functioning smoothly. I’ve found that a quick rinse right after using saves hours of frustration later on.
Inspecting Components
Periodically check the various parts for wear and tear. Look for cracks or damage in the container and nozzle, as these can affect performance. A few years back, I had a nozzle that cracked, and it resulted in poor spray patterns. Replacing damaged parts as soon as you notice them can save time in the long run.
Storage Recommendations
Store the attachment in a dry, cool place to prevent degradation of materials. Avoid leaving it in direct sunlight or extreme temperatures. I remember one summer, I left mine outside, and the heat warped the container. A little care in storage can keep your equipment in top condition.
Troubleshooting Common Foam Cannon Issues
If the suds aren’t sticking or you find yourself with a watery mess instead of rich lather, check the soap concentration first. A mix that’s too diluted will not cling effectively. I always recommend starting with the manufacturer’s suggested dilution ratio and adjusting from there based on your experience and the specific cleaning task.
Low Pressure Output
When the output pressure is insufficient, inspect the nozzle. A clogged or damaged nozzle can restrict flow. Additionally, ensure that the connection between the cleaning unit and the attachment is secure. I once encountered a situation where a loose fitting caused a significant drop in performance, and tightening it resolved the issue instantly.
Foam Not Dispensing
If you’re not seeing any suds at all, ensure the detergent tank is filled appropriately. Sometimes, users expect a strong flow even with an empty tank. Also, check the filters; a blocked filter can prevent the soap from reaching the nozzle. I’ve seen this happen more often than one would think, and a simple clean of the filter did the trick.
.jpg)


