


To power up your Subaru cleaning device, ensure the engine is on a flat surface. This prevents any accidental tipping and guarantees stability during operation. Check the fuel level; a full tank of fresh fuel will save you from interruptions. If the machine has been idle for a while, consider using a fuel stabiliser to enhance performance.
Next, locate the choke lever. If your model has a cold start feature, set it to the choke position. This enriches the fuel mixture, making ignition smoother. Don’t forget to check the oil level before attempting to ignite the engine. A well-lubricated engine runs more efficiently and prolongs the life of your equipment.
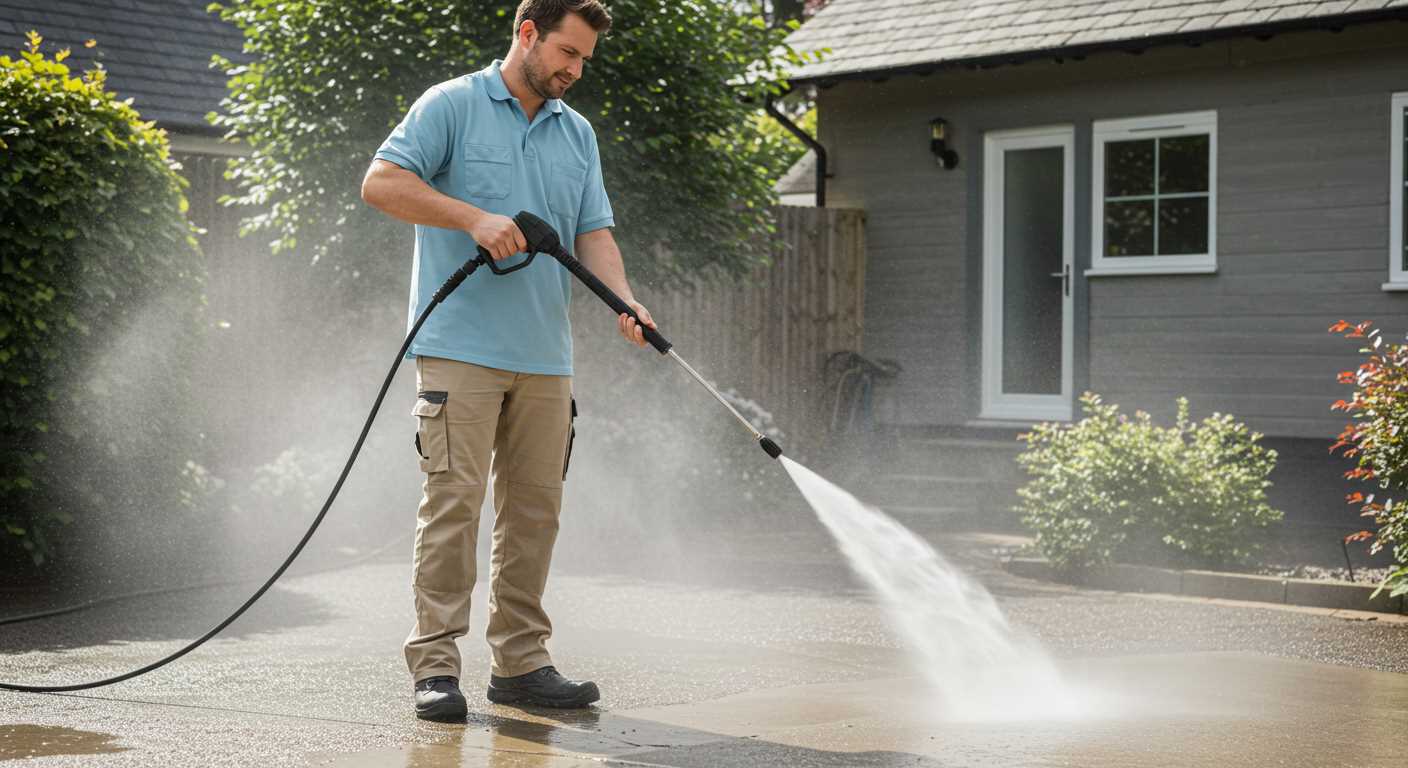
Once everything is set, secure the water supply. Attach the hose firmly to prevent leaks and ensure a steady flow. If your model includes a filter, inspect it for any debris that could hinder operation. A clean filter ensures optimal water pressure and flow.
Now, it’s time to turn the ignition. With the choke engaged, pull the starter cord firmly. You might need a few attempts, especially if the machine hasn’t been used recently. Once the engine roars to life, gradually disengage the choke. This trick helps the machine warm up without stalling.
As you prepare to use your cleaning device, remember to adjust the nozzle according to the task ahead. A wider spray is suitable for delicate surfaces, while a focused stream tackles tougher grime. With these steps, you’re set to tackle any cleaning task efficiently.
Starting Your Subaru Cleaning Device
Ensure the fuel tank is filled with fresh petrol before anything else. Old fuel can cause starting issues, so it’s best to avoid that pitfall. After refuelling, check the oil level. If it’s low, top it up with the recommended type to keep the engine running smoothly.

Next, locate the choke lever. If the engine is cold, set the choke to the closed position. This restricts airflow, helping the device to start more easily. If the engine is warm, you can leave the choke open.
Now, engage the safety latch, if present. This feature prevents accidental starting, ensuring safety during the start-up process. With your hand firmly on the handle, press the primer bulb several times to draw fuel into the carburettor. You’ll know it’s ready when you feel resistance.
Pull the starter cord firmly. If you don’t hear the engine catch right away, don’t panic. Give it another pull or two. Once it roars to life, adjust the choke to the open position gradually. This allows the engine to run efficiently.
Lastly, ensure all connections are secure and check for any leaks before you begin your cleaning tasks. For additional cleaning power, consider using the best air scrubber for asbestos to enhance your cleaning experience.
Checking Fuel and Oil Levels
Always check the fuel and oil levels before using your machine. For fuel, ensure you use fresh petrol; stale fuel can lead to starting issues. I recall a time when I attempted to fire up a unit after it had been sitting for a few months. It took a while to figure out that the old petrol was the culprit.
Open the fuel cap and inspect the tank. If the level is low, fill it with the recommended grade of petrol. Avoid overfilling, as this can lead to spills when you replace the cap.
Next, examine the oil level. Locate the dipstick, usually positioned near the engine. Remove it, wipe it clean, and reinsert it to check the oil level. The oil should be within the marked range. If it’s low, top it up with the specified oil type. I once neglected this step, and the engine ran rough until I corrected it. Keep in mind that oil condition matters too; if it appears dirty or gritty, it’s time for an oil change.
After these checks, you’re set for operation. Regular maintenance of these fluids not only enhances performance but also prolongs the life of your equipment.
Preparing the Machine for Use
Before you engage the motor, ensure the equipment is set up correctly to avoid mishaps. Begin by placing the device on a flat, stable surface, away from any obstacles.
Connect Water Supply
Attach the garden hose to the inlet. Ensure the connection is secure to prevent leaks. Turn on the water supply and let it run for a few moments to clear any debris. Check for smooth flow.
Check the Nozzle
Inspect the nozzle for any blockages. A clogged nozzle can hinder performance. Clear any dirt or buildup using a soft brush or cloth. Choose the appropriate nozzle based on the task; a wider spray is great for gentle cleaning, while a narrow spray is more effective for tough stains.
- For general cleaning, use a 25-degree nozzle.
- For stubborn grime, switch to a 15-degree nozzle.
Once the nozzle is ready, attach it securely to the wand. This ensures no detachment during operation.
Check Hose Connections
Inspect the high-pressure hose for any signs of wear or damage. A damaged hose can lead to leaks or bursts. Connect the hose to both the outlet and the wand securely.
Once everything is in place, take a moment to review all connections and settings. This will save time and effort during operation, ensuring a smooth experience.
Connecting the Water Supply Properly

Ensure you have a reliable water source before attaching the hose. A garden tap is typically the best option. Use a quality hose to prevent leaks and maintain water pressure. I’ve found that a hose with reinforced walls can handle higher pressures without bursting.
Attach the hose to the inlet of your unit securely. Make sure it is tightened enough to avoid any leaks, as even a small drip can reduce efficiency. I once had a colleague who overlooked this detail; he ended up with less power and a lot of frustration during a job.
Open the tap fully to allow maximum water flow. It’s important to check for any kinks or obstructions in the hose; they can impede the water supply. I’ve spent too much time troubleshooting issues caused by something as simple as a bent hose. Always double-check before you begin.
If your equipment has a water filter, ensure it is clean. A clogged filter can lead to inadequate water supply and potential damage to the pump. I always carry a spare filter with me, just in case. It’s a small investment that can save a lot of hassle later.
Once everything is connected, turn on the machine briefly to purge any air from the system. This step helps prevent air locks that could disrupt operation. I’ve seen machines perform poorly simply because air was trapped in the lines. Just a few moments can make a significant difference.
After these steps, check for any leaks again. It’s a quick visual inspection that can save you from bigger problems down the road. With everything secure, you’re ready to tackle your cleaning tasks effectively. Trust me; proper setup is half the battle won.
Adjusting Pressure Settings Before Starting
Before you engage the equipment, set the correct pressure level for your intended task. For light cleaning, such as washing cars or garden furniture, a lower setting around 1000-1500 PSI is sufficient. On the other hand, tougher jobs like removing paint or cleaning concrete may require settings closer to 3000 PSI. Always refer to the manual for specific recommendations tailored to your model.
Understanding the Dial
Most devices come with an adjustable dial or lever. If your unit features interchangeable nozzles, select the appropriate one before adjusting settings. Each nozzle is designed for different tasks; the wide fan spray is ideal for delicate surfaces, whereas the narrow jet is perfect for heavy-duty cleaning. Remember to adjust the pressure gradually, testing on a small area first to avoid damage.
Testing Pressure Levels
Once adjustments are made, it’s wise to conduct a brief test. Point the nozzle away from surfaces and pull the trigger. Observe the spray pattern and pressure. If you notice excessive kickback or an uneven spray, re-evaluate your settings. Consistent performance is key, especially if you’re considering investing in additional equipment, like a rechargable wireless pressure washer, for convenience and efficiency.
Starting the Engine Safely
Before engaging the engine, ensure you’re wearing appropriate protective gear, including safety goggles and gloves. This simple step can prevent injuries from accidental splashes or debris.
Check the area around the device for any hazards. Clear away any obstacles or flammable materials to create a safe environment. I once had a client who overlooked this and faced a small fire due to dry leaves nearby. A quick sweep of the area can save you from potential disasters.
Ensure the device is on a stable, flat surface. This not only helps with operational safety but also prevents tipping over during use. I’ve seen machines fall due to uneven ground, causing damage and risking injury.
Engage the safety latch on the trigger. This feature prevents accidental discharge of water when the engine is activated. I once had a colleague who forgot this step, resulting in a soaking and a jolt of surprise. It’s a quick check that can save you a lot of trouble.
Before activating the engine, double-check all connections, including the water supply and hoses. A loose connection can lead to leaks or even create a dangerous situation if water sprays unexpectedly. I always conduct a quick visual inspection to ensure everything is secure.
Finally, follow the manufacturer’s guidelines regarding the ignition process. Each model may have specific nuances; adhering to these instructions can prevent damage and ensure everything runs smoothly. I’ve learned the hard way that skipping steps can lead to unnecessary repairs.
| Safety Step | Description |
|---|---|
| Wear Protective Gear | Use safety goggles and gloves to prevent injuries. |
| Clear Work Area | Remove obstacles and flammable materials from the vicinity. |
| Stable Surface | Ensure the equipment is placed on solid ground to avoid tipping. |
| Engage Safety Latch | Activate the trigger lock to prevent accidental discharge. |
| Check Connections | Inspect water supply and hose connections for security. |
| Follow Manufacturer’s Guidelines | Adhere to the specific ignition instructions for your model. |
Performing Post-Operation Maintenance
After each use, it’s crucial to give your cleaning unit some attention. First, disconnect the water supply and let the engine cool down completely. I always make it a point to drain the water from the system to prevent any potential freezing or mineral build-up. This simple step can prolong the life of the internals significantly.
Next, inspect the nozzle and wand for any clogs or debris. I once overlooked a small blockage, thinking it was minor, only to find it caused uneven pressure the next time I used the machine. A quick rinse and thorough check can save you from frustration later.

Pay close attention to the fuel. If you’re using a gasoline unit, consider adding a fuel stabiliser if the machine will sit unused for a while. I learned this the hard way when I had to clean out the fuel system after letting it sit too long without treatment. Always store your unit with fresh fuel to maintain optimal performance.
Check the oil level as well; it’s as vital as fuel. If the oil appears dark or gritty, change it out before the next operation. I’ve seen engines fail simply because owners neglected this basic maintenance. Using the right oil type is essential, so refer to the manual for specifications.
Finally, give the exterior a good wipe-down. Dust and grime can accumulate, and a clean surface not only looks better but also helps you spot any leaks or damage. I make it a habit to clean mine right after use; it’s a small effort that pays off in the long run.

.jpg)


