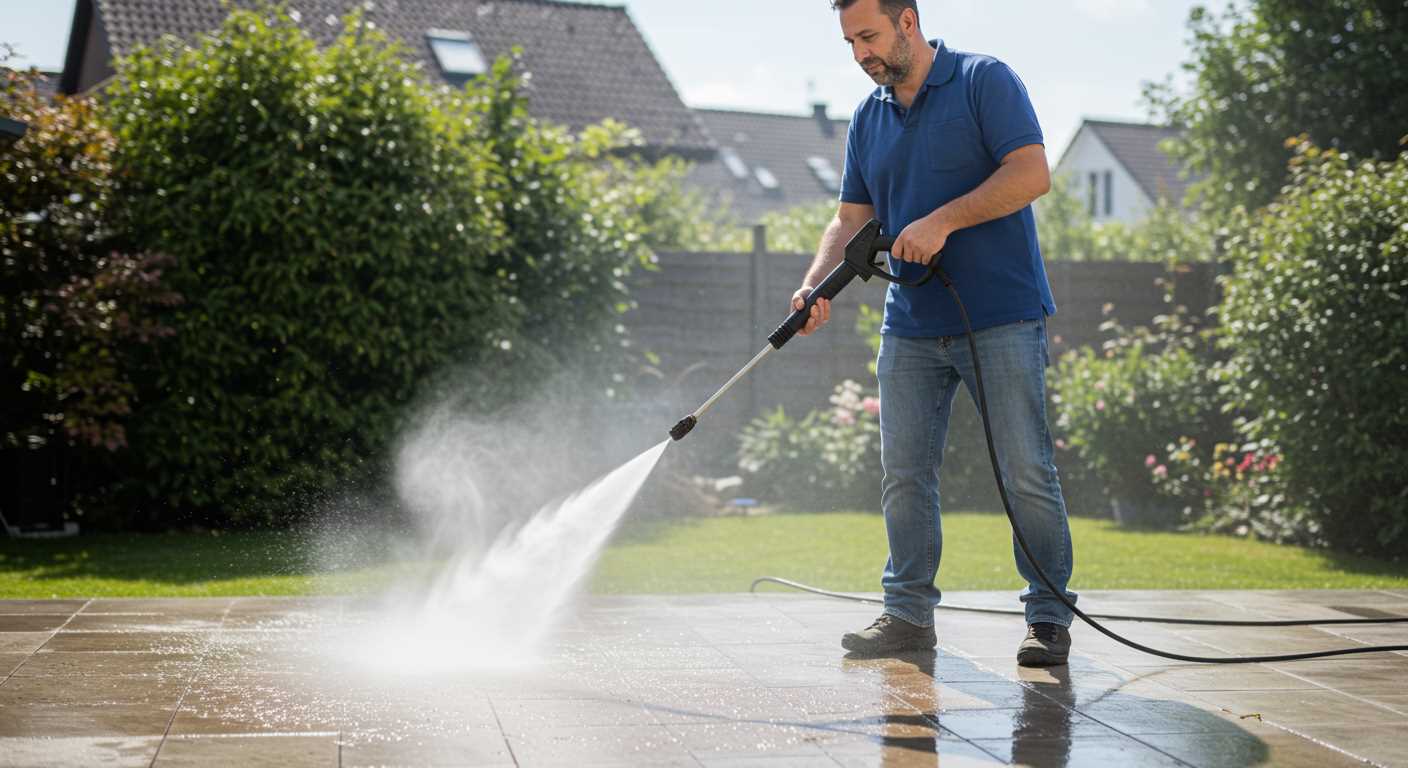


Before you even think about pulling the trigger, ensure that the water connection is secure. I’ve seen too many people overlook this simple step, leading to frustrating leaks and wasted time. Check the hose for any signs of wear and tear, and make certain that the fittings are tight. A tight connection keeps the pressure in check and avoids any unexpected surprises.
Next, it’s crucial to have the right detergent ready. I always keep a couple of different types on hand, depending on the surfaces I’m tackling. For concrete driveways, a heavy-duty cleaner works wonders, while for vehicles, a gentle soap is the way to go. Remember to mix according to the manufacturer’s instructions; using too much can create a slippery mess.
Powering up the machine is straightforward, but ensuring the fuel or electric source is reliable is key. I once had a job interrupted by a faulty extension cord. Always double-check that your power source is in good condition and rated for the equipment you’re using. This small precaution can save you from an unexpected shutdown in the middle of a project.
Once everything is set, adjust the nozzle to the appropriate setting. I prefer starting with a wider spray for delicate areas and then narrowing it down for tougher grime. This method allows me to gauge how much pressure is really needed without risking damage to surfaces. Trust me, it’s better to start gentle and increase intensity as needed.
Finally, safety gear is non-negotiable. I always wear goggles and gloves. High-pressure cleaners can kick up debris, and a little precaution goes a long way. Protecting yourself ensures that you can focus on the task at hand without any worries about potential injuries.
Steps for Initiating Your Craftsman Cleaning Device
Ensure the fuel tank is filled with fresh gasoline. Old or contaminated fuel can cause starting issues. Always check the oil level; if it’s low, refill with the recommended type before proceeding.
Connect the water supply to the inlet on the machine using a proper hose. Make sure the hose is free of kinks and leaks. Open the water source to allow water to flow into the system.
Safety First
Engage the safety lock on the trigger gun. This prevents accidental activation while you’re preparing the machine. Ensure you’re wearing appropriate protective gear, such as gloves and goggles.
Ignition Procedure
Locate the choke lever. If the engine is cold, set it to the choke position. If it’s warm, leave it in the open position. Pull the starter cord firmly until the engine fires. If it fails to start after a few attempts, check the choke and ensure the fuel valve is open.
Once the engine runs smoothly, adjust the choke back to the open position if you started with it closed. Allow it to warm up for a minute before applying pressure to the trigger gun.
Now, you’re ready to engage the trigger to begin your cleaning task. Always remember to turn off the machine and disconnect the water supply when finished, allowing it to cool down before storage.
Check the Fuel Level Before Starting
Always verify that there’s sufficient fuel in the tank. Running low can cause your machine to start poorly or not at all. I recall a time when I was eager to tackle a big project but found myself stranded because I hadn’t checked the fuel level. A quick glance could have saved me the frustration.
How to Check Fuel Levels
Open the fuel cap and visually inspect the tank. If you can’t see the fuel, use a dipstick or a funnel to gauge the level accurately. Ensure that you’re using the recommended type of fuel, as mixing fuels can lead to operational issues.
Refuelling Tips
If the tank is low, fill it up before any cleaning task. Use a funnel to avoid spills, which can not only waste fuel but also create a messy work area. After refuelling, clean any spills immediately to prevent slipping hazards.
Lastly, keeping a small fuel container on hand can be a lifesaver for those unexpected moments. I’ve been in situations where a quick top-up made all the difference in completing a job efficiently.
Inspect the Oil Quality and Level
Check the oil level using the dipstick. Remove it, wipe it clean, and reinsert it to get an accurate reading. The oil should be within the recommended range–if it’s too low, add the appropriate type of oil specified in the user manual.
Next, assess the oil’s condition. Fresh oil has a clear, amber colour. If it appears dark, gritty, or has a burnt smell, it’s time for a change. I once neglected this step, and the engine suffered, leading to costly repairs. Regularly changing the oil not only prolongs the life of the engine but also optimises performance.
When adding new oil, ensure you’re using the correct viscosity. Temperature variations can affect oil performance, so always refer to the manufacturer’s guidelines. For instance, I’ve found that using the right oil in colder months can make a noticeable difference in starting and operation.
After topping up or changing the oil, run the machine for a few minutes. This allows the new oil to circulate properly. Then, recheck the level to confirm it’s within the acceptable range. Keeping an eye on oil quality and levels has saved me from many headaches over the years, ensuring smooth operation every time I use my equipment.
Connect the Water Supply Properly
Ensure that the water source is turned off before attaching the hose. Use a high-quality garden hose, as it can withstand the pressure and prevent leaks. Connect one end of the hose to the water inlet on the machine, ensuring a tight fit to avoid any water loss during use.
Check the other end of the hose for compatibility with your faucet. If necessary, use an appropriate adapter. Once the hose is securely attached, turn on the water supply gradually and check for leaks at both connections. If you notice any drips, tighten the fittings before proceeding.
It’s crucial to ensure a steady flow of water to maintain optimal performance. A water supply that is too weak can hinder the effectiveness of the equipment, leading to unsatisfactory results. If you’re using a long hose, consider using a larger diameter to reduce water flow restrictions.
| Common Issues | Solutions |
|---|---|
| Leaking connections | Tighten fittings or replace washers |
| Low water pressure | Check for kinks in the hose or reduce hose length |
| Incompatible fittings | Use appropriate adapters or fittings |
Once everything is connected and leak-free, allow the water to flow for a minute to clear out any debris that may have accumulated in the hose. This simple step can prevent clogs and ensure the machine operates smoothly. Now you can proceed to power up the equipment with confidence that the water supply is properly connected.
Attach the Right Nozzle for Your Task
Choosing the appropriate nozzle is crucial for achieving optimal results. Each nozzle serves a specific purpose, and using the wrong one can either underperform or cause damage.
Understanding Nozzle Types
There are generally four main types of nozzles: 0-degree, 15-degree, 25-degree, and soap nozzle. The 0-degree nozzle delivers a concentrated stream of water, great for tough stains on hard surfaces. However, use it with caution; it can chip paint or etch softer materials. The 15-degree nozzle is ideal for stripping surfaces like decks or driveways. For most general cleaning tasks, the 25-degree nozzle provides a wider spray, making it perfect for washing cars and patios.
Testing and Adjusting the Nozzle
Before committing to a nozzle, I recommend a quick test. Start with the widest angle and gradually switch to narrower settings. This approach helps you gauge the effectiveness without risking damage. If you’re tackling a new surface, always start at a distance and move closer as needed. For applying soap, ensure you switch to the soap nozzle to avoid clogging the other nozzles.
Always secure the nozzle tightly to prevent any leaks. A loose connection can reduce pressure and affect your cleaning efficiency. Each task might require a different approach, so don’t hesitate to switch nozzles as needed. My experience shows that having a variety of nozzles on hand can save time and yield better results for any cleaning project.
Prime the Pump if Necessary
Ensure the pump is primed before operation. If the unit hasn’t been used for a while, air may have entered the system. To prime, disconnect the water supply and pull the trigger on the gun to release any trapped air. Reconnect the water supply, then turn on the water source and allow it to flow through the hose until a steady stream emerges from the gun without any spluttering. This indicates the pump is filled with water and ready for use.
In some models, there may be a specific priming procedure outlined in the manual. Always refer to it for tailored instructions. I once encountered a unit that required manual priming due to a faulty automatic priming feature. Following the manufacturer’s guidelines saved me from potential damage and ensured seamless operation.
Once primed, check for any leaks around the connections. If you spot any, tighten the fittings before proceeding. A well-primed pump enhances performance, ensuring a consistent flow and pressure during cleaning tasks. The difference is noticeable, especially when tackling stubborn grime. Regular maintenance of this process can extend the life of the equipment significantly.
Set the Choke for Cold Starts
Before you fire up the engine in chillier conditions, adjusting the choke is crucial. For cold environments, ensure the choke lever is in the “closed” position. This restricts the airflow, enriching the fuel mixture, which aids in ignition. If the engine has been running or the temperature is mild, set the choke to “open”. This allows for proper airflow, preventing flooding.
Practical Tip
When I first encountered difficulties getting my unit running in colder weather, I learned the hard way that forgetting to adjust the choke can lead to frustrating attempts and wasted time. After making the necessary adjustments, the engine roared to life smoothly. Monitoring your surroundings while starting can also make a difference. If it’s particularly brisk, ensure that the choke remains closed until the engine runs steadily. For those tackling specific jobs, like cleaning paving stones, having the right settings can make your experience much more rewarding. You can find suitable equipment by checking out this pressure washer for paving stones.
Final Remarks
Always remember to revert the choke to the open position once the engine is warmed up. This simple adjustment can save you from unnecessary hassle and ensure a smooth operation. Trust me, it’s a small step that significantly enhances performance.
Engage the Safety Features Before Use
Always ensure the safety features are activated before operating your cleaning equipment. This includes checking the safety lock on the trigger gun. Engaging this lock prevents accidental discharge, especially when moving between tasks.
Use the Pressure Relief Valve
Before turning on the motor, it’s wise to activate the pressure relief valve. This step releases any residual pressure in the system, preventing potential accidents. I’ve seen it happen where someone neglected this, only to face a surprising spray when they connected the water supply.
Wear Appropriate Safety Gear
Don’t skip personal protective equipment (PPE). Safety goggles, gloves, and sturdy footwear are mandatory. I recall a time when I was caught off guard by a sudden spray while working without protective gear, and it taught me a valuable lesson about respecting the power of the equipment. Protection isn’t just a suggestion; it’s a necessity.
Engine Engagement Following the Correct Procedure
Ensure the ignition switch is in the “on” position before proceeding. Pull the recoil starter handle firmly and evenly. This action should create a smooth and steady motion; a quick jerk might not engage the engine efficiently.
Here’s a step-by-step approach I recommend:
- Maintain a firm grip on the starter handle to avoid slipping.
- Draw the handle outwards until you feel resistance, then release it completely before pulling again.
- Should the engine fail to ignite after a few attempts, check the choke setting. If it’s on, adjust it to the “run” position before retrying.
In colder conditions, you may need to repeat the choke adjustment several times. After a successful ignition, let the engine idle for a few minutes. This allows the components to warm up and stabilise before applying any load. Pay attention to unusual sounds; they may indicate issues that require immediate attention.
If the engine stalls or hesitates, revisit previous checks, ensuring all fuel and oil levels are adequate, and the water supply is uninterrupted. Remember, a well-maintained machine performs better and lasts longer.
Adjust Pressure Settings Based on Surface
Always set the right pressure for the surface you’re cleaning to avoid damage. Here’s how to adjust effectively:
- Concrete: Use a high-pressure setting (around 2500-3000 PSI) for tough stains and grime. This will ensure a thorough clean without harming the surface.
- Wood: Opt for a lower setting (around 1500-2000 PSI). Too much force can strip the wood or cause splintering.
- Vehicles: Keep it at 1200-1900 PSI. This protects paintwork while still removing dirt and debris efficiently.
- Brick and Stone: A medium setting (about 2000-2500 PSI) works well, allowing for effective cleaning without jeopardising the integrity of the material.
- Windows: Use the lowest setting (around 1000-1500 PSI) to prevent breakage and ensure a streak-free finish.
Before adjusting, test the pressure on a small, inconspicuous area. This ensures you’re not causing unintended damage. If you’re looking for portable options, check out the best portable pressure washers for tailored choices based on your cleaning needs.
Proper pressure management can extend the life of your surfaces and enhance your cleaning efficiency, so it’s worth taking the time to adjust accordingly.


.jpg)


