


Before diving into the practical aspects, ensure you have the correct setup: a reliable water supply, the right nozzle attached, and power connected. I’ve seen many users overlook these basics, leading to unnecessary frustration. Trust me, taking a moment to check everything before turning it on can save you a lot of hassle.
One of the first things I learned during my years in the cleaning equipment industry is the importance of familiarising yourself with the user manual. Each model has its quirks. I remember a client who struggled with a unit because they skipped this step. After a quick review, they discovered a simple setting adjustment that transformed their experience completely. A well-understood manual can be your best friend.

Next, water pressure is key. I often recommend running through a test cycle to gauge the output before tackling any significant cleaning task. This not only helps in understanding the machine’s capabilities but also in selecting the appropriate nozzle for different surfaces. I recall a project where a friend used too strong a setting on delicate patio furniture, which resulted in damage. A proper check can prevent mishaps like that.
Always remember safety first. Wearing protective gear is non-negotiable–goggles and gloves should be part of your cleaning routine. I’ve witnessed too many close calls where someone underestimated the power of the spray, leading to injuries. A little precaution goes a long way in ensuring a safe and enjoyable cleaning session.
Steps to Prepare Your High-Pressure Cleaner
Check the oil level in the engine before anything else. A full tank will ensure optimal performance. Use the dipstick to gauge the oil; if it’s low, add the recommended oil type. Once that’s sorted, make sure the fuel tank is filled with fresh petrol. Old fuel can cause starting issues, so always use fuel that’s less than 30 days old.
Connect Water Supply and Attach Nozzle
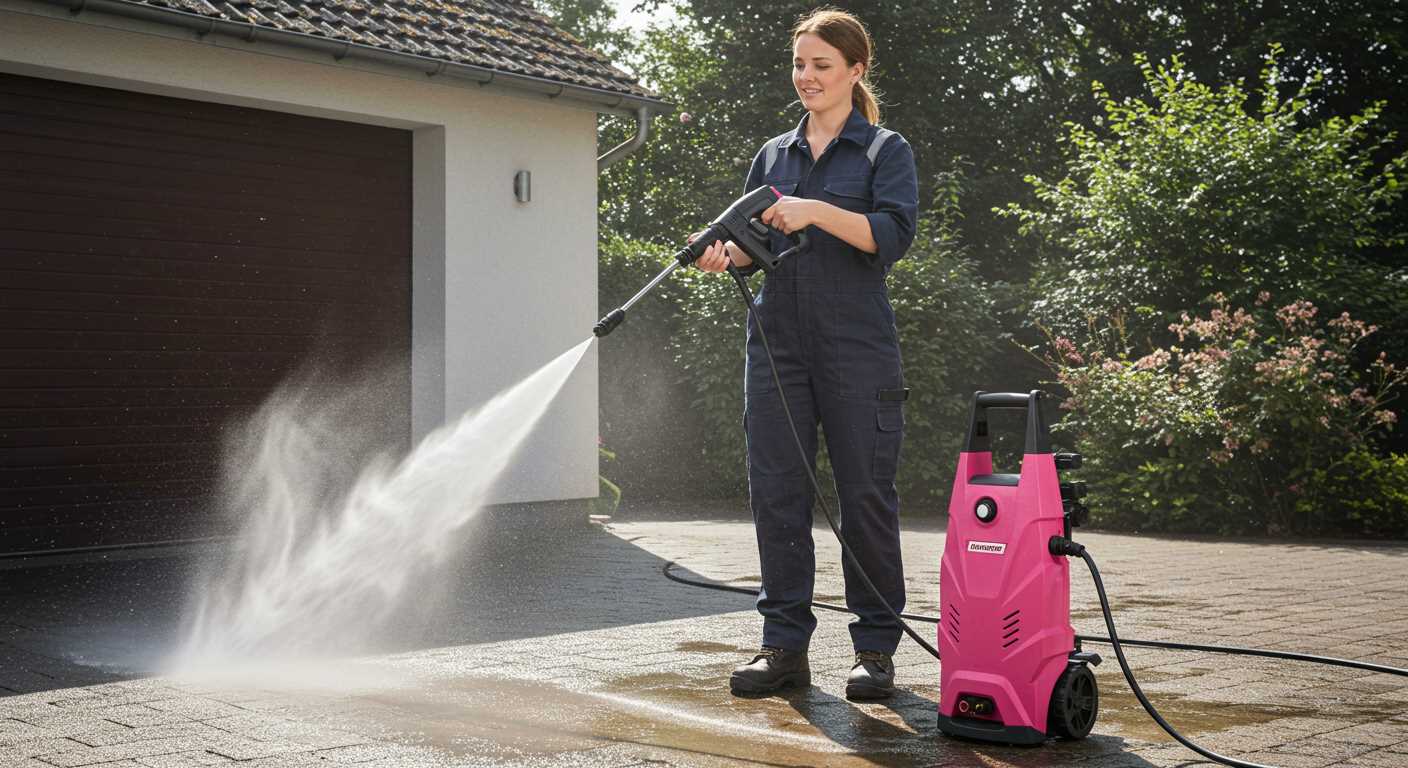
Next, attach a garden hose to the water inlet. Ensure it’s tightly secured to prevent leaks. Before you turn on the water, it’s wise to run a quick check for any kinks or blockages. Once the hose is connected, turn on the tap to allow water to flow into the unit. Choose the appropriate nozzle for your task; a wider spray is better for gentle cleaning, while a narrow jet works for tougher stains.
Power Up and Engage Safety Features
With everything in place, plug in the power cord or check the battery if it’s a cordless model. Ensure the safety lock is disengaged; this is crucial for operation. Pull the trigger on the wand to release any air in the system, which can help with a smoother start. Give the engine a few pulls if it’s a manual start, and you should be ready to tackle your cleaning job.
Understanding Ryobi Pressure Washer Components
Familiarity with each part of your cleaning device enhances performance and troubleshooting. Let’s break down some key components.
Motor and Pump
The heart of the machine is the motor, which drives the pump. A powerful motor ensures consistent water flow and pressure. I recall a time when a friend’s motor failed due to neglecting regular maintenance. Keeping the motor clean and free of debris is crucial. The pump, on the other hand, requires proper lubrication. If you notice a drop in pressure, it could indicate pump wear or air leaks, which often stem from improper assembly or maintenance.
Nozzle and Hose
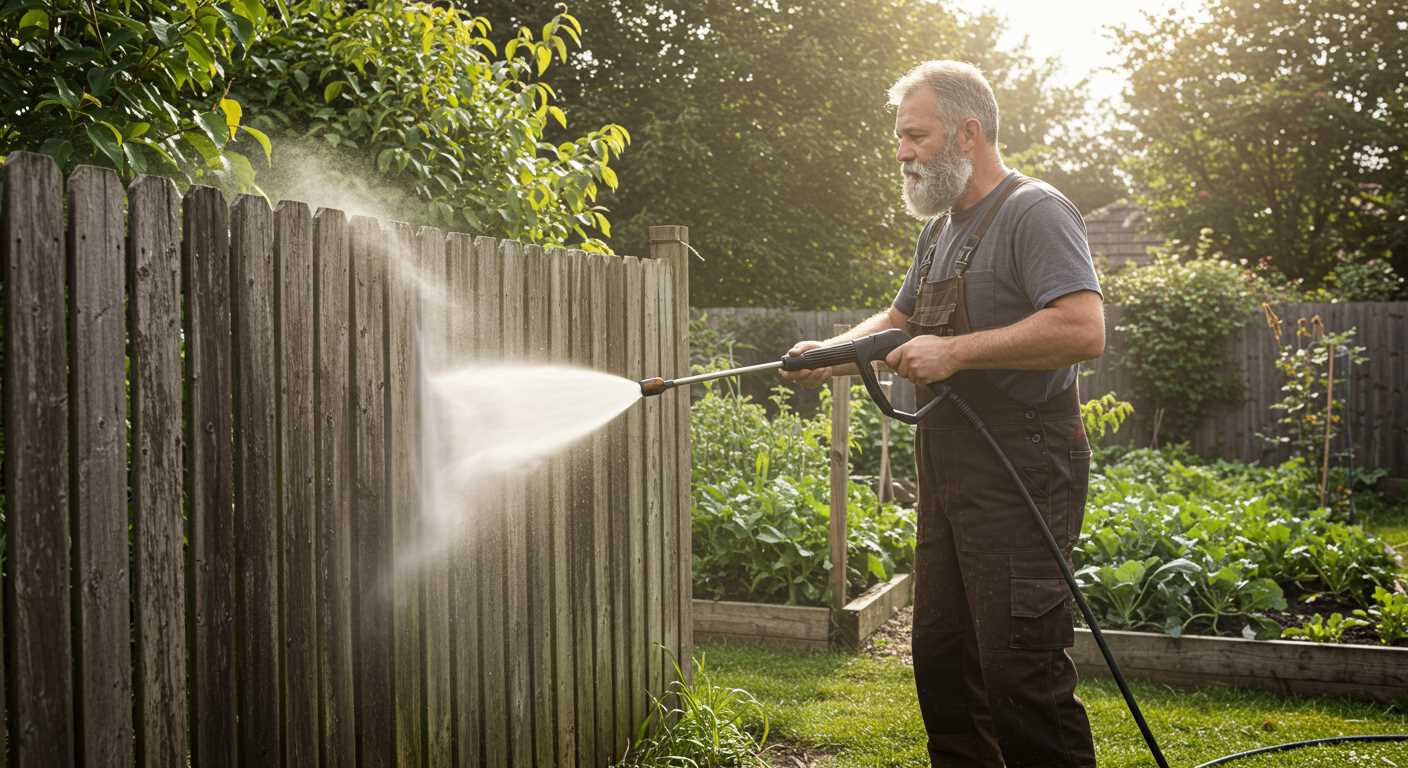
The nozzle determines the spray pattern – from a fine mist to a concentrated jet. Experimenting with different nozzles can transform cleaning tasks. I remember using a wide-angle nozzle to wash my patio, only to switch to a narrow jet for stubborn stains. As for the hose, ensure it’s kink-free and securely attached. A damaged hose can lead to leaks, diminishing pressure and affecting efficiency. Regularly inspect for wear and replace if necessary.
Preparing the Equipment for Use
Ensure the machine is on a stable, flat surface to prevent tipping. I recall a time when I had a slight incline, and it caused the unit to roll unexpectedly, leading to a minor mess. Always check the oil level; it’s often overlooked but vital for smooth operation. If the oil is low, refill it with the recommended type to avoid engine damage.
Connect the water source securely. I’ve had experiences where a loose connection led to leaks, wasting time and causing frustration. Use a garden hose in good condition, free from kinks or blockages. Before turning on the tap, inspect the inlet filter for debris. A clean filter ensures proper water flow and prevents damage.
Attach the nozzle fitting suitable for your cleaning task. I often switch between nozzles based on the surface–using a wider spray for gentle cleaning and a more focused jet for tougher grime. Double-check all connections; a loose nozzle can lead to a spray that’s less efficient and more hazardous.
Finally, fill the detergent tank if necessary. I’ve found that using the right cleaning solution can significantly enhance results, especially on stubborn stains. Always consult the manual for compatibility; using the wrong product can affect performance and void warranties.
Connecting the Water Supply Properly
Ensure the water source is suitable and equipped with a garden hose that meets the specifications outlined in the user manual. The hose should be free of any kinks or blockages to maintain a steady flow. I recall a time when I rushed through the setup, only to find that a small kink in the hose led to a frustrating lack of pressure. It’s always best to double-check.
Attach the garden hose securely to the inlet on the machine. Most models feature a threaded connection, so make sure it’s tight but not overdone, as that can lead to damage. I’ve seen too many connections ruined by excessive force. A snug fit is all you need.
Before turning on the water, ensure the other end of the hose is connected to a reliable tap with sufficient flow. If you’re using a long hose, consider its diameter; a smaller diameter can reduce flow rate. Here’s a quick guide on hose sizes and their effect on flow:
| Hose Diameter (inches) | Optimal Length (feet) | Flow Rate (GPM) |
|---|---|---|
| 1/2 | 50 | 8 |
| 5/8 | 100 | 10 |
| 3/4 | 150 | 12 |
Once everything is connected, turn on the water supply and inspect for leaks. If you notice any drips, recheck the connections. I had a situation where a minor leak turned into a significant mess, wasting both water and time.
After confirming there are no leaks, you can proceed to the next phase. Maintaining a clean and free-flowing water supply is key to optimal performance. Trust me; it makes a world of difference in the results you achieve.
Adding Fuel or Checking Power Source
Before you engage the cleaning device, ensure the fuel tank is adequately filled with the recommended type of fuel. This is a straightforward step but can often be overlooked. Here’s how I approach it:
- Locate the fuel cap, typically situated on the top or side of the unit.
- Unscrew the cap and check the fuel level. If it’s low, use fresh fuel, avoiding any that has been sitting for an extended period.
- Pour the fuel carefully to prevent spills, and ensure the cap is securely fastened once filled.
If your equipment operates on electricity, inspect the power source instead. Here are the steps I follow:
- Check that the power cord is in good condition, free of cuts or damage.
- Ensure it’s plugged into a functioning outlet. If you’re using an extension cord, confirm it’s rated for the current draw of your machine.
- For battery-operated designs, verify that the battery is charged and properly installed.
I’ve had instances where a simple oversight in fuel or power connection led to frustrating delays. Don’t let this happen to you. Properly preparing your equipment ensures a smoother experience. For those with pets, it might be worth pondering whether can dogs mate through a fence while you tackle your outdoor tasks!
Setting Up the Correct Nozzle for Your Task
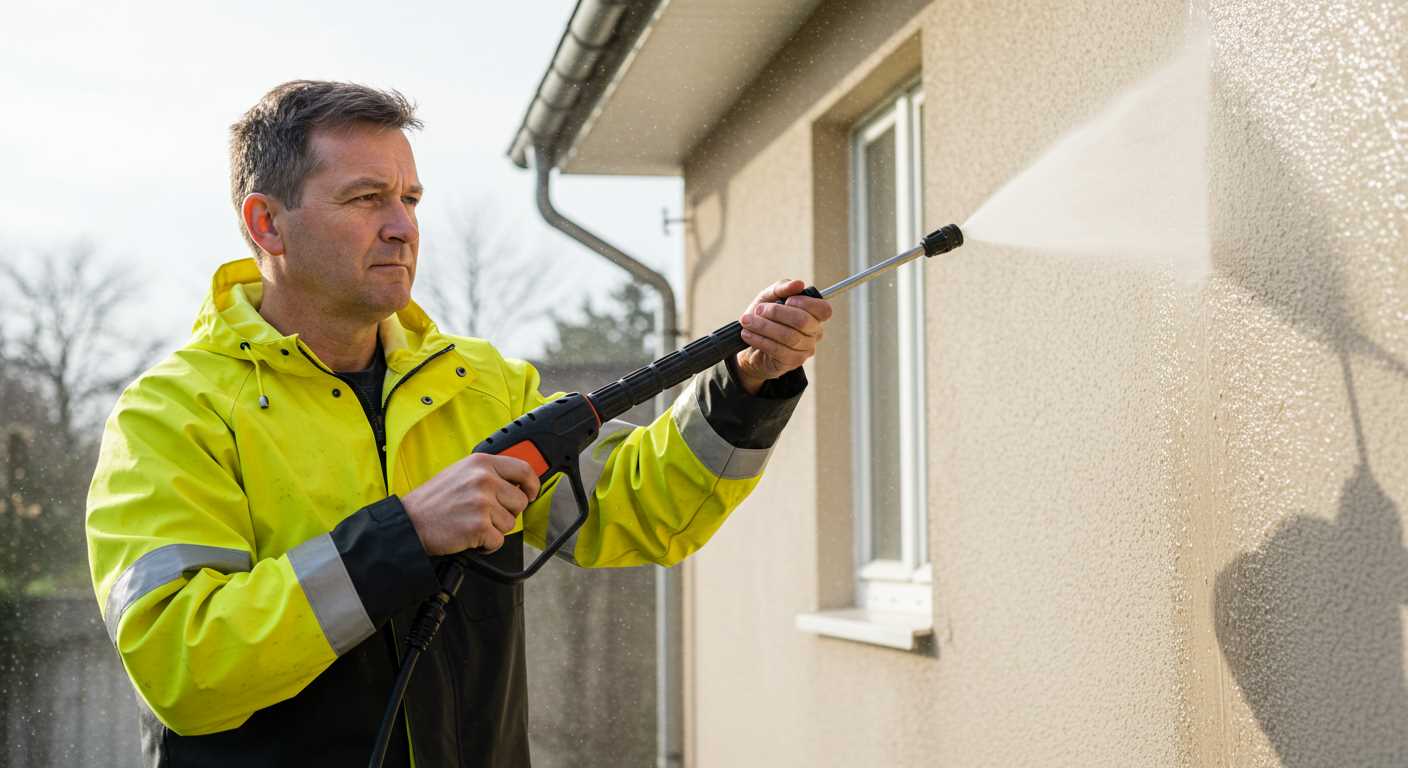
Choosing the right nozzle is key to achieving the desired results for your cleaning task. Each nozzle has a different spray pattern and pressure, making it suitable for various surfaces and grime levels. For example, the red nozzle, which delivers a narrow, high-pressure jet, is perfect for tough stains on concrete or brick but can damage softer materials like wood or painted surfaces.
For general purposes, I often reach for the yellow nozzle. It provides a 15-degree angle spray that balances power and coverage, making it effective for cleaning driveways and patios without causing damage. If you’re tackling delicate areas, such as cars or outdoor furniture, the white nozzle with a 40-degree angle is ideal. Its gentle spray removes dirt without risking scratches.

Always ensure the nozzle is securely attached before use. A loose connection can cause spray misdirection, leading to accidents or ineffective cleaning. If you’re using a pressure washer for use with water butt, remember to adjust your nozzle according to the water supply pressure, as this can affect performance.
After selecting your nozzle, test the spray pattern on a small, inconspicuous area to confirm it’s suitable for your intended surface. Adjust as needed to strike the right balance between pressure and coverage. This simple step can save time and prevent damage during your cleaning tasks.
Starting the Engine Safely and Correctly
.jpg "How to start ryobi pressure washer")

Before igniting the engine, ensure all safety gear is in place. I always recommend wearing goggles and gloves to protect against any debris or chemical splashes.
Here are the steps I follow to ensure a smooth ignition:
- Check the surroundings: Clear the area of any flammable materials or obstructions. A clean workspace reduces risks.
- Verify fuel levels: Confirm that the fuel tank is filled adequately. Insufficient fuel can lead to difficult starts and potential engine damage.
- Ensure the choke is set: Adjust the choke to the closed position for cold starts. This allows for a richer fuel mixture, aiding the ignition process.
- Engage the safety lock: If your model has a safety lock or button, ensure it’s activated. This prevents accidental ignition.
- Turn on the ignition: Flip the ignition switch to the ‘on’ position. Listen for any unusual sounds that might indicate issues.
- Pull the recoil starter: Grip the handle firmly and pull the starter cord briskly. A smooth pull is key; too hard may cause strain.
- Adjust choke after ignition: Once the engine fires, gradually move the choke to the open position to ensure even running.
If the engine doesn’t start after a few attempts, check for potential issues such as fuel blockage or faulty connections. On one occasion, I spent over an hour troubleshooting a stubborn machine, only to find a simple fuel line kink was the culprit.
Finally, let the engine warm up for a minute or so. This ensures all components are lubricated and ready for heavy use. Always monitor the engine for any irregularities during this warm-up period.
Maintaining Your Equipment After Use
After wrapping up a cleaning session, the next step is proper upkeep of your machine. This ensures longevity and optimal performance for future tasks. Begin by disconnecting the water supply. If you leave it connected, residual water can cause internal corrosion over time.
Clearing the System
Run the unit for a minute with the trigger squeezed, allowing any leftover water to flush out. This process helps prevent blockages in the system. Pay attention to the nozzle; it can collect debris. Detach it and rinse it under clean water, ensuring it’s free of any clogs.
Storing the Equipment
Store your device in a dry, sheltered area. Extreme temperatures can damage the components. If your model uses fuel, consider running the engine until it consumes the remaining fuel to avoid stale gas. For electric variants, unplugging and storing the cord neatly prevents wear and tear.
Check the oil level periodically if your unit has a combustion engine. Change it according to the manufacturer’s guidelines, as clean oil reduces wear on internal parts. Lastly, inspect hoses for cracks or leaks, replacing any damaged sections to maintain pressure efficiency.
Regular maintenance not only prolongs your machine’s life but also enhances performance. Keeping your equipment in top shape makes every cleaning task smoother and more satisfying.
FAQ:
What should I do before starting my Ryobi pressure washer?
Before starting your Ryobi pressure washer, it is important to prepare the unit properly. Begin by checking the oil level in the engine and topping it up if necessary. Ensure that the water supply is connected and that there are no leaks in the hoses. Inspect the high-pressure hose and spray gun for any signs of damage. Finally, make sure to read the user manual for specific instructions related to your model, as there may be unique features or requirements.
How do I connect the hoses on my Ryobi pressure washer?
To connect the hoses on your Ryobi pressure washer, first locate the water inlet on the pressure washer. Attach the garden hose to this inlet, ensuring a tight fit to prevent leaks. Next, connect the high-pressure hose to the pressure outlet on the washer. Be sure to secure both connections firmly. After connecting the hoses, turn on the water supply before starting the machine to allow water to flow through the system and avoid air locks.
What should I check if my Ryobi pressure washer won’t start?
If your Ryobi pressure washer won’t start, there are a few troubleshooting steps to consider. First, check that the power source is working if it’s an electric model, or ensure there is fuel in the tank for gas models. Next, inspect the spark plug for signs of wear or damage, as a faulty spark plug can prevent ignition. Additionally, make sure the safety features, such as the trigger lock, are not engaged. If these steps do not resolve the issue, consult the manual for more guidance or consider seeking professional assistance.
How can I maintain my Ryobi pressure washer for longevity?
To maintain your Ryobi pressure washer and ensure its longevity, regular upkeep is necessary. After each use, drain the water from the hoses and the pump to prevent freezing or corrosion. Clean the filter and check the spray nozzle for clogs. Regularly inspect the oil and replace it as needed, following the manufacturer’s recommendations. Additionally, store the unit in a dry place and cover it to protect it from dust and debris. Performing these maintenance tasks will help keep your pressure washer in good working condition for years to come.
.jpg)


