


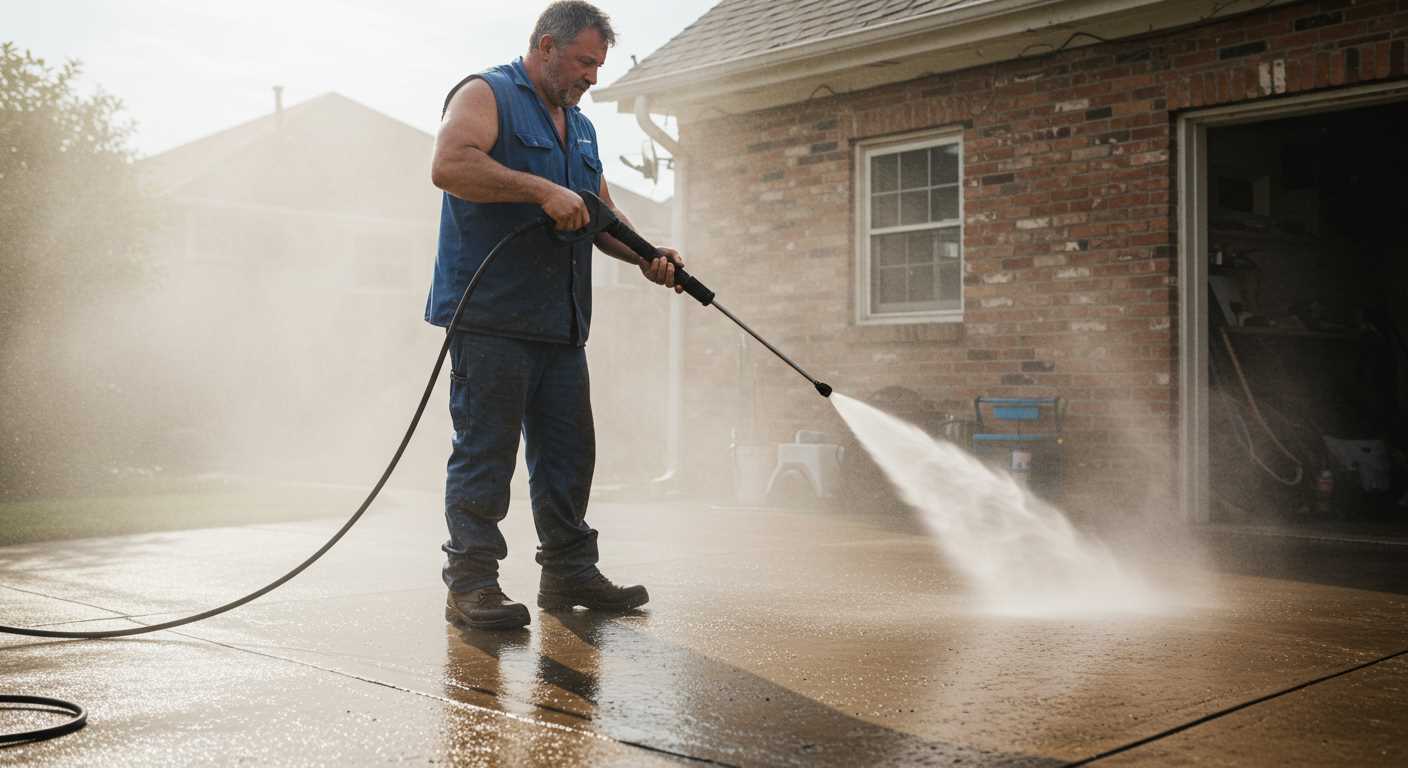
Start by disconnecting the water supply and power source. Safety is paramount; ensure there is no residual pressure in the system before proceeding. A common oversight is neglecting to release any built-up pressure. Always check the release valve to avoid any surprises.
Next, locate the assembly housing the non-return mechanism. Typically, this component is situated near the pump outlet. Carefully inspect the connection points; some models may require a specific tool to loosen the fittings. In my experience, a ratchet wrench offers the best leverage for stubborn connections.

Once you’ve successfully loosened the fittings, gently pull the assembly away from the pump. If the component resists, a light tap with a soft mallet can help dislodge it without causing damage. I’ve encountered a few models where corrosion caused the parts to stick, so a penetrating oil can be beneficial. Apply it sparingly and allow it to sit for a few minutes before attempting to remove the assembly again.
With the mechanism free, it’s wise to inspect it for wear or debris. Regular maintenance can prevent future issues. If you notice any damage, replacing the part may save you from larger problems down the line. Remember, a clean and well-maintained unit operates more effectively, prolonging its lifespan.
Removing the Non-Return Mechanism from a High-Pressure Cleaner
Begin by ensuring that your machine is completely powered down and disconnected from its water source. This is crucial to avoid any accidents. Gather the appropriate tools: a wrench set, pliers, and some towels to manage any residual water.
Steps to Detach the Component
First, locate the non-return mechanism, typically found near the inlet or pump assembly. It’s usually secured with several bolts. Use the wrench set to loosen and remove these bolts. Keep them in a safe place for reassembly later.
Next, gently pull the mechanism away from its housing. If you encounter resistance, check for any remaining screws or clips that may not have been removed. Once free, inspect it for any signs of wear or damage. If you’re planning to replace this part, consider searching for a pressure washer for dirt bikes that suits your needs.
Maintenance Tips
After removing the non-return mechanism, it’s wise to clean the area thoroughly. Debris can cause future issues, so use a cloth to wipe down the housing. If you’re keen on maintaining your aquatic space, you might find tips on how to clean a freshwater fish tank quite helpful, as the principles of cleanliness apply across various equipment.
| Tool | Purpose |
|---|---|
| Wrench Set | Loosening and removing bolts |
| Pliers | Handling small components |
| Towels | Managing water spills |
Keep everything organised, and you’ll find the reassembly process much smoother. Regular maintenance can prolong the lifespan of your cleaner and enhance performance.
Identifying the Uncheck Valve Location on Your Pressure Washer
To locate the check valve component on your cleaning unit, first, consult the user manual. Most manufacturers include detailed diagrams that pinpoint the exact placement. In my experience, it’s usually situated near the water inlet or integrated into the pump assembly.
Begin by disconnecting the unit from its power source and water supply. Safety is paramount. Next, inspect the area around the pump; you’ll often find a cylindrical piece that resembles a small canister. This is typically where the valve resides. In some models, it might be hidden under a protective cover, so look for any screws or clips that may need removal.
If you’re still struggling to find it, consider checking online forums or manufacturer websites. Many users share images and advice that can guide you. I’ve found that peer support can often lead to quicker resolutions than manuals alone.
Once located, take note of the orientation of the valve before removal. This ensures correct installation later on. Having a good understanding of its position will save you time and hassle when reassembling everything.
Gathering the Necessary Tools for Valve Removal
Before diving into the disassembly process, ensure you have all the required implements at your disposal. Having the right tools makes the task smoother and less time-consuming. Here’s what you need:
Basic Tools
A standard socket set is your best friend here. Look for a ratchet and a range of sockets, particularly those that fit the nuts on the assembly. A screwdriver set, especially flathead and Philips, will come in handy for any screws you encounter. Don’t forget a pair of pliers; they’re useful for gripping and twisting stubborn components.
Safety Gear
Always prioritise safety. Wear gloves to protect your hands from sharp edges and potential chemical residues. Safety goggles are also a wise choice to shield your eyes from debris or splashes. If you’re working in a poorly ventilated area, consider a face mask to avoid inhaling dust and fumes.
Finally, gather a clean cloth or towel to wipe down any surfaces and keep your working area organised. This helps prevent losing small parts during the process. With these tools collected, you’re well-prepared for the task ahead. Happy fixing!
Steps to Safely Disconnect the Pressure Washer Hose
Before disconnecting the hose, ensure the unit is completely powered down. Unplug the machine from the electrical outlet or turn off the fuel supply if it’s a gas model. This prevents any accidental activation during the process.
Next, release the pressure trapped in the system. Locate the trigger gun and squeeze it to allow any remaining water and pressure to escape. This step is vital to avoid sudden water discharge that could cause injury or create a mess.
After relieving the pressure, look for the hose connection point. Most models have a quick-connect fitting. Simply pull back the collar on the connector while gently pulling the hose away from the machine. If it’s stubborn, a slight twist may help to release it without damaging the fitting.
For those with threaded connections, use a wrench to carefully loosen the fitting. Be cautious not to apply excessive force, as this could strip the threads or damage the connector. Once loosened, unscrew it completely by hand.
Inspect the connection point for any signs of wear, such as cracks or corrosion. If any damage is present, consider replacing the fitting before reassembling. Proper maintenance extends the lifespan of your equipment.
Finally, store the hose in a clean, dry area to prevent kinks and damage. Keeping it coiled neatly ensures it remains ready for your next cleaning task.
Removing the Uncheck Valve: A Step-by-Step Guide
Begin by ensuring the equipment is completely powered down and disconnected from any electrical source. Safety is paramount. Next, locate the assembly where the non-return mechanism resides; it’s usually situated near the pump outlet. Identify the securing screws or bolts that hold the mechanism in place.
With the right tools–typically a socket wrench or screwdriver–loosen and remove these fasteners. Be cautious not to strip any threads during this process. Once the fasteners are out, gently wiggle the mechanism free from its housing. If it feels stuck, a light tapping with a rubber mallet can help dislodge it without causing damage.
Inspect the area for any debris or build-up that may have contributed to the tight fit. Cleaning the surrounding components can prevent future issues and ensure a smooth reinstallation. Once you’ve successfully removed the assembly, take a moment to examine the condition of the components. Look for any signs of wear or damage that might necessitate replacement.
Before moving on to reinstallation or replacement, take note of the orientation of the mechanism. This will ensure correct alignment when putting everything back together. Keep all removed parts organised to streamline the reassembly process later. With the non-return assembly out of the way, you are now prepared for further maintenance or upgrades to your cleaning equipment.
Inspecting the Uncheck Valve for Damage or Blockages
Begin with a thorough examination of the component for any signs of wear or obstruction. This can prevent further complications later on.
- Visual Inspection: Look for cracks, chips, or any deformities on the exterior. A damaged casing can lead to leaks.
- Check for Blockages: Use a small brush or compressed air to remove any debris that might be lodged inside. Even minor blockages can impede performance.
- Seal Integrity: Inspect the seals for any signs of deterioration. Worn seals can compromise the functionality of the mechanism.
- Test for Flexibility: Gently press on the component; it should have a slight give without feeling brittle or overly stiff.
If you notice any issues during your inspection, it’s advisable to replace the part to ensure optimal operation. In my experience, neglecting minor repairs often leads to larger problems down the line. I once overlooked a small fracture, thinking it wouldn’t impact performance, only to face a complete breakdown weeks later.
After confirming the component’s condition, proceed with necessary repairs or replacements as needed. This diligence can save you time and frustration in the long run.
Reassembling the Equipment After Valve Removal
After you’ve successfully extracted the non-return component, focus on reassembly. Begin by cleaning any debris from the housing where the mechanism was situated. A clean surface ensures a proper seal, preventing future leaks.
Next, carefully position the new or inspected component back into its original place. Ensure that any o-rings or seals are intact and properly seated. I’ve seen too many people overlook this step, leading to frustrating leaks later on.
Once the component is in place, tighten the securing fasteners to the manufacturer’s specifications. I always use a torque wrench for this–accuracy here is key to avoid over-tightening, which can damage the threads.
Reconnect any hoses or fittings you may have detached. Be sure they are snug but not overly tight, as this can cause wear over time. A little lubrication on the threads can help ease this process.
After everything is back in its rightful place, conduct a thorough inspection of the entire assembly. Look for any signs of wear or misalignment that could affect performance. I recall one instance where a small misalignment led to a complete breakdown during a critical job.
Finally, before powering up the unit, double-check all connections. It’s a simple step that can save you from potential headaches down the line. Once satisfied, reconnect the power source and initiate a test run. Watch for any leaks or irregular sounds that could indicate an issue with your reassembly.
FAQ:
What tools do I need to remove the uncheck valve from a pressure washer?
To remove the uncheck valve from a pressure washer, you will typically need a few basic tools. A socket wrench set will be useful for loosening bolts or nuts securing the valve. Additionally, a pair of pliers may help in gripping and manipulating parts. It’s also advisable to have a flathead screwdriver or a similar tool on hand to assist in prying off any fittings. Don’t forget to wear safety gloves to protect your hands during the process.
Can I remove the uncheck valve without disassembling the entire pressure washer?
Yes, in many cases, you can remove the uncheck valve without needing to disassemble the entire pressure washer. Most models have the uncheck valve located in a specific area that can be accessed without taking apart the whole machine. However, it may require removing some surrounding components or hoses. Always consult your pressure washer’s manual for specific instructions related to your model, as the process can vary.
What should I do if the uncheck valve is stuck and won’t come out?
If the uncheck valve is stuck, try applying some penetrating oil around the valve area and let it sit for a few minutes. This can help loosen any debris or corrosion that may be causing it to stick. Gently tap the valve with a rubber mallet to avoid damaging it, or use pliers to wiggle it free. If it still doesn’t budge, consult the manufacturer’s guidelines or consider seeking professional assistance to avoid damaging the pressure washer.
Is there a specific way to clean the uncheck valve before reinstallation?
Yes, cleaning the uncheck valve before reinstallation is important for optimal performance. Use a soft brush and warm soapy water to carefully clean the valve. Rinse it thoroughly to remove any soap residue. If there is mineral buildup or grime, a solution of vinegar and water can help dissolve it. Make sure the valve is completely dry before reinstalling it to prevent moisture-related issues.
What are the signs that the uncheck valve needs to be replaced?
There are several signs that indicate the uncheck valve may need replacement. If you notice water leaking from the valve or if the pressure washer is losing pressure during operation, these could be signs of a faulty valve. Additionally, if the pressure washer runs intermittently or has difficulty starting, the uncheck valve might be malfunctioning. Regular inspection can help catch these issues early, ensuring your pressure washer operates smoothly.
What tools do I need to remove the uncheck valve from my pressure washer?
To remove the uncheck valve from your pressure washer, you will need a few basic tools. A set of wrenches will help you loosen any fittings connected to the valve. Additionally, a screwdriver may be necessary if there are screws holding the valve in place. It’s also a good idea to have a cloth or towel handy to catch any residual water or debris that might spill out during the process. If your pressure washer has a specific model, consulting the manual for any special tools required is advisable.
What steps should I follow to safely take off the uncheck valve on my pressure washer?
To safely remove the uncheck valve from your pressure washer, follow these steps: First, make sure the pressure washer is turned off and disconnected from the power source. Next, release any remaining pressure by squeezing the trigger on the spray gun. Once this is done, locate the uncheck valve, which is often found near the pump. Use your wrench to carefully disconnect any fittings attached to the valve. If there are screws, remove them with a screwdriver. Carefully pull the uncheck valve out, making sure not to damage any surrounding components. After removal, inspect the valve for any signs of wear or damage before replacing or cleaning it. Always consult your pressure washer’s manual for specific guidance related to your model.
.jpg)


