


Begin by ensuring the unit is correctly connected to a power source. Check the plug and extension cord for any signs of wear or damage. A secure connection is crucial for safe operation, and a faulty cord can lead to unexpected issues.
Next, fill the detergent reservoir if your device requires it. I’ve often found that using high-quality cleaning solutions can significantly enhance performance. Make sure to follow the manufacturer’s guidelines regarding the type of detergent suitable for your machine.
After setting up, locate the power switch, usually found on the front or side panel. Flip the switch to activate the motor. Listen for any unusual sounds; a humming noise indicates that everything is functioning correctly. If you hear a clicking sound, it may signal a problem that needs to be addressed.
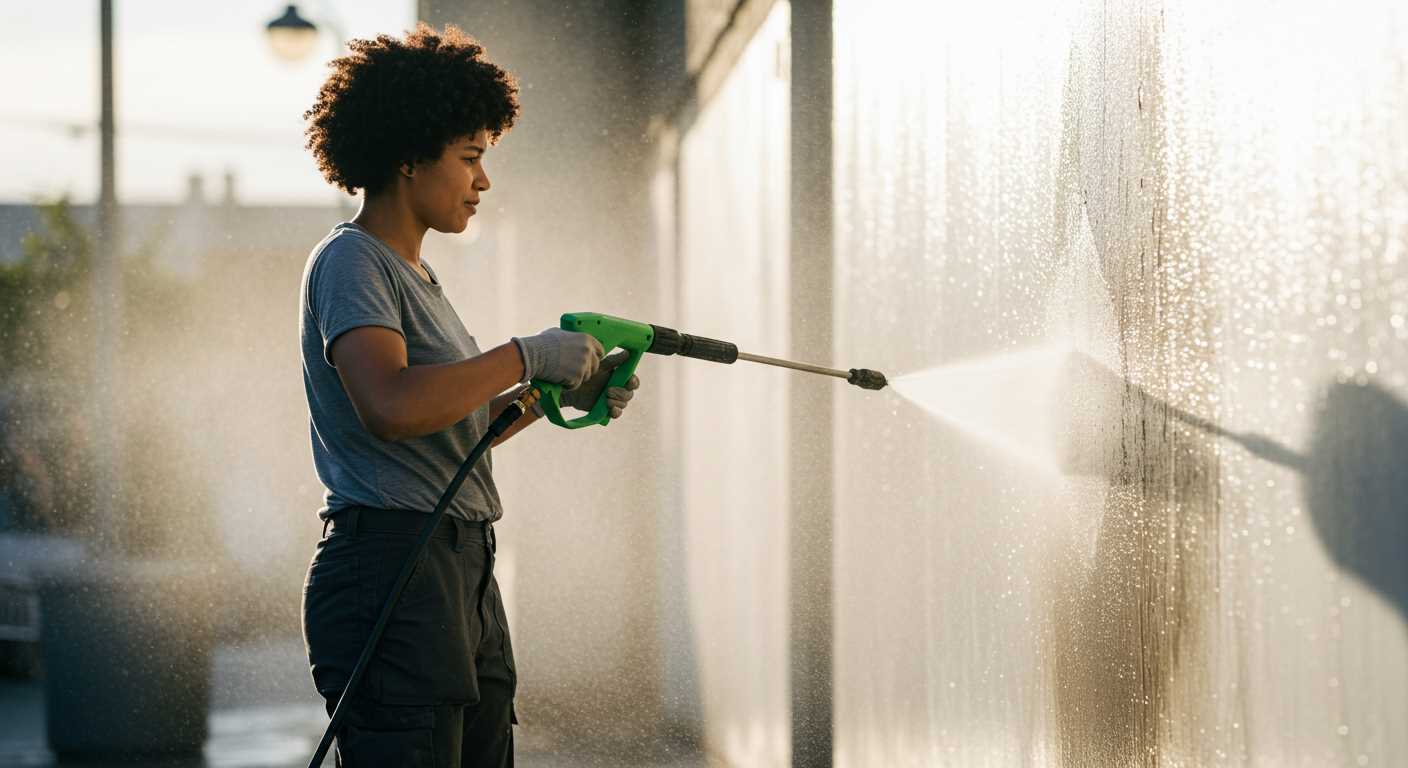
Once powered on, adjust the pressure settings to match your cleaning task. For delicate surfaces like cars or outdoor furniture, a lower setting is preferable to avoid damage. For tougher grime on patios or driveways, increase the pressure for better results.
Finally, test the nozzle by pressing the trigger. If water flows smoothly, you’re ready to start your cleaning project. Ensure you maintain a safe distance from surfaces to prevent any unwanted damage during the process.
How to Activate Your High-Pressure Cleaning Device
Begin by ensuring that all connections are secure. Attach the hose to the unit and ensure the nozzle is fitted correctly. If you have a detergent tank, fill it with the appropriate cleaning solution–this will make a noticeable difference in your cleaning results.
Next, plug the machine into a grounded outlet. It’s advisable to use a heavy-duty extension cord if your outlet is far away. Just ensure that the cord is rated for the amperage of your device. Now, locate the power switch, usually found on the control panel. Flip it to the ‘on’ position.
Purge the System
Before starting the cleaning, it’s wise to purge the system. Squeeze the trigger on the spray gun while the unit is off to release any trapped air. This step ensures a steady flow of water once you activate the motor. After purging, point the nozzle away from yourself and any surfaces you plan to clean.
Start the Equipment
With everything in place, you can now start the unit. Some models require pressing a button, while others may have a pull-start mechanism. Follow the manufacturer’s guidelines for your specific model. Once the motor is running, gradually squeeze the trigger on the gun. The water will flow, and you’re ready to tackle those tough cleaning tasks!
Choosing the Right Electrical Outlet for Your Pressure Cleaner
Ensure the outlet you select can handle the power requirements of your device. Most models require a specific voltage, typically 120V or 240V. Check the user manual for exact specifications. Using an outlet with insufficient voltage can lead to poor performance or damage.
Assessing the Circuit Rating
Look for circuits rated at 15A or 20A. A dedicated circuit is preferable, especially if you plan to use additional appliances simultaneously. Overloading a circuit can trip breakers and cut off power, disrupting your cleaning tasks.
Location Matters
Choose an outlet close to your work area. Extension cords can be a hazard, so if you must use one, opt for a heavy-duty extension rated for outdoor use. Check for signs of wear on cords–damaged cords can present serious safety risks.
Always ensure the outlet is GFCI-protected, especially when working outdoors. This feature provides an extra layer of safety by shutting off power in case of electrical faults.
In my experience, the right outlet setup has made a significant difference in efficiency. I once had a job where a client insisted on using a poorly rated extension cord. The cleaner struggled to maintain pressure, leading to a frustrating experience. Switching to a dedicated outlet resolved the issue, and we completed the task swiftly and effectively.
Inspecting the Equipment Before Use
Check the water supply connection first. Ensure the hose is securely attached and there are no leaks. A loose connection can lead to inadequate water flow, impacting performance.
Next, examine the power cord for any signs of wear or damage. A frayed cable can pose a safety risk, so replace it immediately if you notice any issues. I once overlooked this detail, and it resulted in a trip to the hardware store mid-cleaning.
Inspect the nozzle and spray wand. Look for blockages or debris that could hinder water flow. A clogged nozzle can create uneven pressure, affecting the cleaning outcome. I’ve had instances where a simple cleaning of the nozzle made a significant difference in efficiency.
Take a moment to review the oil levels if your model has an engine. Low oil can lead to overheating and damage. I always keep a small funnel and oil on hand, just in case the levels are lower than expected.
Finally, ensure all safety features are in place, including the trigger lock. It’s a small detail, but it can prevent accidental activation. I remember a colleague who forgot this step, resulting in a surprising blast of water that soaked everything nearby.
Connecting the Water Supply to the Pressure Cleaner
Before using your cleaning device, it’s vital to establish a proper water connection. Start by ensuring that the water source is clean and free of debris. A clogged supply can hinder performance and even damage the unit.
Attach a garden hose to the inlet of the machine, ensuring a tight fit to prevent leaks. I’ve often seen users neglect this step, leading to frustrating water drips and reduced functionality. Make sure the hose is rated for high pressure and can handle the flow rate required by your equipment.
After connecting the hose, turn on the water supply slowly. This allows the system to fill without causing sudden pressure spikes that could affect the internal components. I recall a time when a colleague quickly opened the tap, resulting in a burst hose and a messy clean-up. A gentle approach pays off.
Check for leaks around the connection points. If any water escapes, tighten the fittings or replace seals as necessary. I’ve learned that a small oversight here can lead to bigger issues down the line.
Once everything is secure, it’s a good idea to run water through the hose for a minute before starting the device. This clears any potential contaminants and ensures a steady flow when you begin. I’ve found this step particularly useful when working in areas with hard water, where mineral build-up can be a concern.
Finally, make sure that the water supply is sufficient for the machine’s requirements. Refer to the manufacturer’s guidelines for the minimum and maximum flow rates. I once faced a situation where a low flow rate led to overheating, causing the device to shut down mid-use, which was incredibly frustrating.
Plugging in the Pressure Washer Safely
Always ensure the machine is disconnected before connecting the power supply. This prevents accidental activation and potential hazards. Once you’re ready to plug in the device, follow these guidelines.
Choose the Right Extension Cord
- Select a cord rated for outdoor use to withstand the elements.
- Ensure the gauge is appropriate–generally, a 12 or 14-gauge cord is recommended for longer lengths.
- Avoid using multiple extension cords; this can lead to voltage drops and overheating.
Inspect the Power Source
- Check for any visible damage to the outlet. Cracks or burn marks indicate a problem.
- Ensure the outlet is grounded. Use a tester if unsure.
- Avoid using outlets shared with high-draw appliances to prevent tripping breakers.
Before plugging in, make sure the area is dry to avoid electrical shocks. If the ground is damp, use a Ground Fault Circuit Interrupter (GFCI) to add an extra layer of safety. After confirming everything is in order, connect the machine securely to the outlet.
Once plugged in, ensure the power switch is in the off position before activating the device. This simple step protects you from sudden starts and ensures a smooth operation.
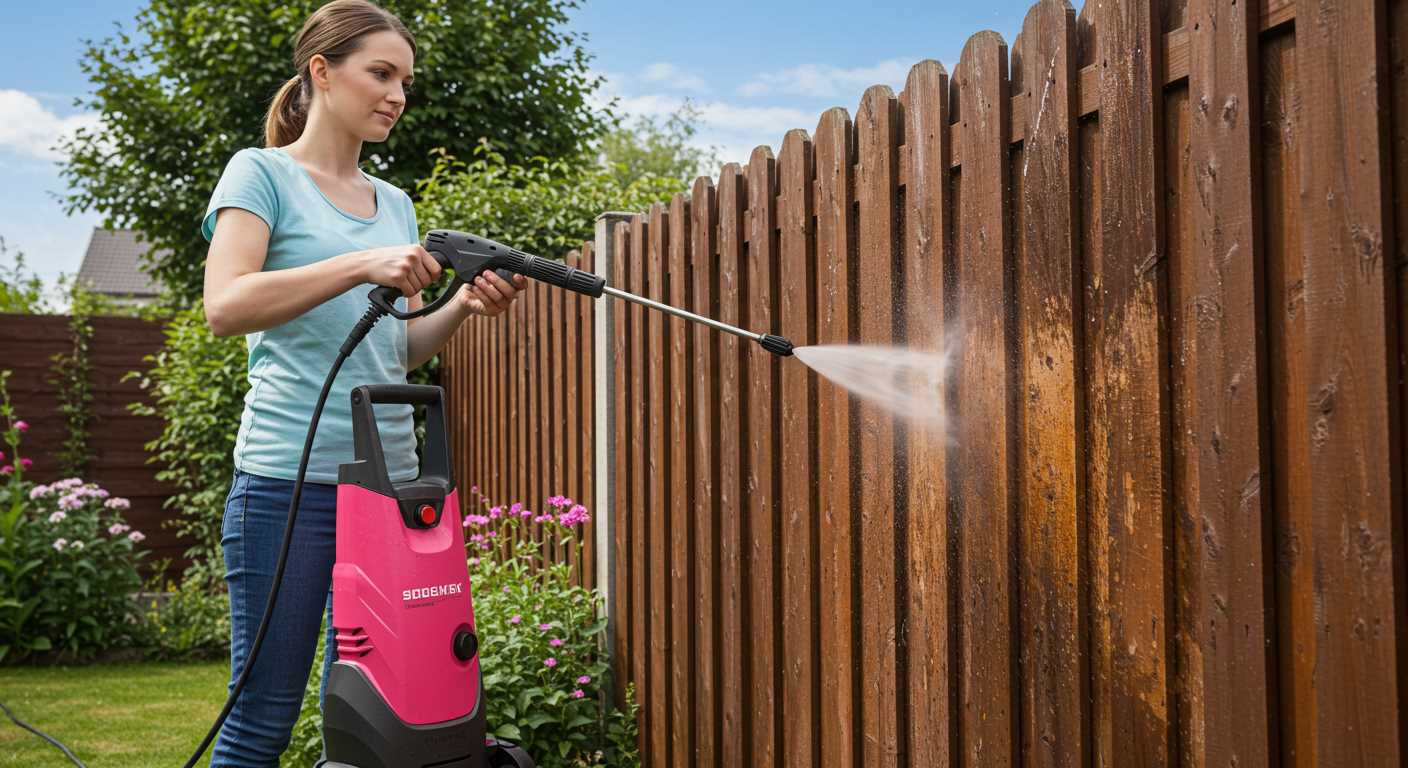
Setting the Correct Pressure Settings
For optimal results, adjust the force output according to the surface you’re cleaning. Start with a lower setting, especially on delicate materials such as wood or car paint. I recall a time cleaning my patio; I initially set the intensity too high, which resulted in damage to the wood. A gentle approach allowed me to safely remove dirt without causing harm.
Understanding Nozzle Types
Different nozzles correspond to various pressures. The red nozzle offers a concentrated jet for stubborn stains, while the white one is ideal for broader coverage. Switching nozzles mid-task can save time. I’ve found that using the yellow nozzle for concrete paths yields excellent results without risking damage.
Adjusting for Specific Tasks
Always consider the type of job. For vehicles, a lower pressure setting prevents scratches, while tougher jobs like stripping old paint may require higher force. Experimenting with settings can help you find the sweet spot for each task. If you’re looking to expand your capabilities, consider investing in pressure washer sandblasting kits for heavy-duty cleaning and restoration projects.
Engaging the Safety Lock Mechanism
Always engage the safety lock before operating the machine. This feature is designed to prevent accidental activation. To do this, locate the safety lock switch, usually found on the handle. Slide or push the mechanism until you hear a click, indicating it’s secure.
Personal Experience with Safety Features
One time, I was demonstrating a model to a customer. I neglected to engage the lock, and the unit accidentally activated when I was adjusting the nozzle. It was a wake-up call. From that day, I made it a habit to double-check the safety features before any demonstration or personal use. Safety should never be compromised.
Testing the Mechanism
After setting the lock, test it by attempting to engage the trigger. If it doesn’t release, the lock is functioning properly. If it does, ensure you’ve secured it correctly. Regular checks of this mechanism can save you from potential injuries and ensure a smoother operation.
Always remember, keeping safety as a priority not only protects you but also those around you. A little diligence in engaging these features goes a long way in maintaining a safe working environment.
Starting the Electric Motor of the Pressure Washer
Ensure the unit is on a flat surface and check that all connections are secure before activating the motor. Locate the power switch, typically found on the front or side of the machine. Flip it to the “on” position to initiate the electric motor.
Listen for a soft hum or whirring sound, which indicates the motor is operational. If there’s no sound, double-check the electrical outlet and ensure it’s functioning correctly. Using a multimeter can help verify power supply if needed.
Should the machine not start, inspect the circuit breaker or fuse box. A tripped breaker can prevent the motor from activating. Resetting the breaker often resolves this issue. If the problem persists, consult the user manual for troubleshooting steps, or consider reaching out to customer support.
After confirming the motor is running, allow it to reach operational speed before using any attachments. This ensures optimal performance and prevents potential damage to the equipment.
For those looking to enhance their cleaning setup, consider investing in the best air compressor for car wash. It can significantly improve efficiency when combined with your machine.
| Step | Action |
|---|---|
| 1 | Place the unit on a stable surface. |
| 2 | Find and switch on the power button. |
| 3 | Listen for the motor to engage. |
| 4 | Check the power supply if it doesn’t start. |
| 5 | Allow the motor to reach full speed. |
Checking for Leaks and Proper Functionality
Before starting your cleaning task, inspect all connections for leaks. I’ve seen numerous instances where a simple leak can turn a straightforward job into a frustrating mess. Here’s how to ensure everything is functioning correctly:
Key Areas to Inspect
- Hoses: Look for cracks or wear. A damaged hose can lead to leaks and decreased performance.
- Connectors: Ensure that all fittings are tight. Loose connections are common culprits for water escaping.
- Gun and Nozzle: Check for any blockages or damage. A clogged nozzle can affect the spray pattern and pressure.
Testing for Leaks
- Run the system briefly without engaging the cleaning solution. Observe all connections closely for any signs of leaks.
- Pay special attention to the areas where hoses connect to the unit and the spray gun.
- If you notice any leaks, tighten the connection or replace the damaged part as needed.
Once satisfied with the leak checks, test the functionality by engaging the trigger on the gun. A steady stream indicates that everything is working correctly. If you encounter irregularities, further investigation may be required.
In my experience, taking the time to check for leaks and ensuring proper operation can save you from unnecessary downtime and hassle during your cleaning projects.
Adjusting Nozzle Settings for Different Tasks
For optimal results, select the right nozzle based on the surface and cleaning requirement. A zero-degree nozzle delivers a concentrated jet, perfect for stubborn stains on concrete. Conversely, a 25-degree nozzle provides a wider spray for general cleaning of patios or decks.
Choosing the Right Nozzle
When dealing with vehicles, a 40-degree nozzle is ideal. It offers a gentler spray, preventing damage to paint while effectively removing dirt. Always test on a small area first to ensure compatibility with the surface.
Adjusting Pressure Based on Task
Adjust the pressure setting accordingly. For delicate surfaces like wood or painted areas, keep it low to avoid damage. Higher pressures are suitable for more resilient materials. Always prioritise safety and maintain a distance to prevent injury or surface damage.
FAQ:
What are the steps to turn on an electric pressure washer?
To turn on an electric pressure washer, first ensure that the unit is connected to a water supply and the water is turned on. Next, plug the pressure washer into a suitable power outlet. Check that the power switch is in the ‘off’ position before turning it on. Once everything is set, switch on the power at the outlet and then turn on the pressure washer by flipping the power switch to the ‘on’ position. Finally, pull the trigger on the spray gun to release any air from the system, and you should be ready to use the washer.
What safety precautions should I take before operating an electric pressure washer?
Before using an electric pressure washer, it’s important to wear appropriate safety gear, including goggles and gloves, to protect yourself from debris and high-pressure water. Ensure that the area is clear of bystanders, especially children and pets. Check the power cord for any damage or frays before plugging it in, and avoid using the washer in wet conditions to prevent electrical hazards. Additionally, ensure the spray nozzle is securely attached and never point the spray gun at yourself or others while in use.
Can I use an electric pressure washer for different cleaning tasks?
Yes, electric pressure washers are versatile tools that can be used for a variety of cleaning tasks. They are effective for washing cars, cleaning patios, driveways, and outdoor furniture, as well as removing dirt and grime from walls and fences. However, it’s important to choose the right nozzle and pressure setting for each task to avoid damaging surfaces. Always refer to the manufacturer’s guidelines for best practices specific to your model.
What should I do if my electric pressure washer won’t start?
If your electric pressure washer won’t start, first check that it is properly plugged into a functioning power outlet. Inspect the power cord for any visible damage. Make sure the water supply is turned on and that the water is flowing into the machine. If the motor still doesn’t run, check the pressure washer’s reset button or fuse, as these may need to be reset or replaced. If the problem persists, consult the user manual for troubleshooting tips or contact customer support for assistance.

.jpg)


