


Begin with the right nozzle. Choosing the appropriate attachment can make all the difference. For example, a 0-degree nozzle provides a concentrated stream, perfect for stubborn stains on concrete surfaces. However, for delicate areas, like wood decks, opt for a wider spray pattern. I once damaged a client’s deck by using too narrow a nozzle; a costly mistake that taught me the value of this simple choice.
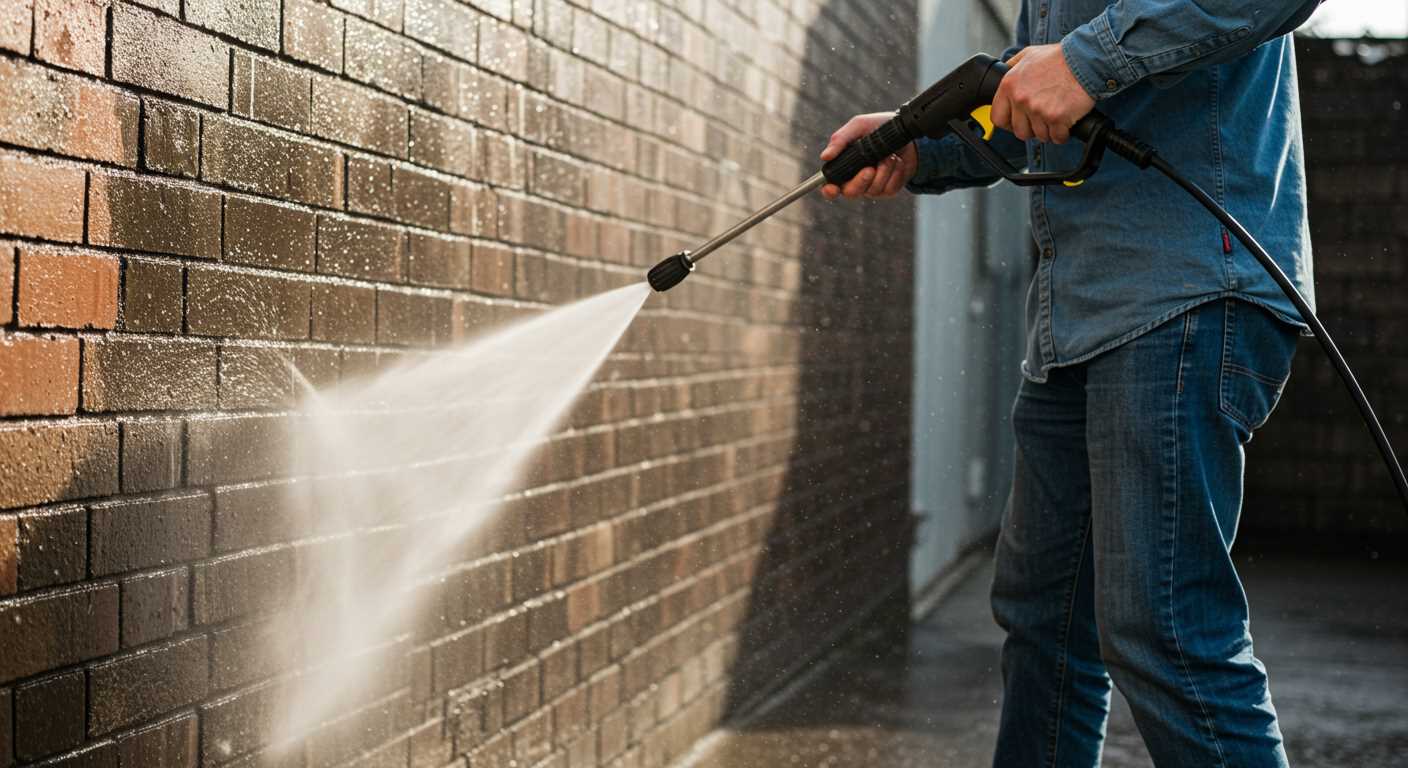
Always adjust the distance from the surface you are cleaning. Maintaining a consistent distance helps avoid damage. When I worked on a brick patio, I found that standing about two feet away allowed me to remove grime without chipping the mortar. Getting too close resulted in unwanted wear and tear, which was a lesson learned the hard way.

Pay attention to the cleaning solution. Not all detergents are compatible with every machine. I recall a time when I used a non-approved cleaner, leading to a foamy mess that clogged the nozzle. Stick to products recommended by the manufacturer to ensure optimal performance and avoid unnecessary interruptions.
Lastly, safety should never be overlooked. Always wear protective gear, including goggles and gloves. I once had a small rock ricochet off a surface and hit my shin. A simple precaution could have prevented that incident. Taking these steps will make your cleaning experience not only effective but also safe.
Choosing the Right Pressure Cleaner for Your Needs
For optimal results, selecting the right cleaner is paramount. Start by identifying the tasks you need to tackle. If you’re dealing with light cleaning like patios or garden furniture, a model with a lower PSI (around 1300-1900) will suffice. For tougher jobs like removing grime from driveways or vehicles, opt for a unit with a PSI of 2000 or more.
Next, consider the flow rate, measured in litres per minute (LPM). Higher flow rates will speed up your cleaning process. A cleaner with around 6-8 LPM is suitable for most home applications, while commercial-grade machines may push 10 LPM and beyond.
Another factor is portability. If you plan to move your equipment around frequently, look for models with wheels and a lightweight design. Handheld options can be beneficial for smaller jobs, but for larger areas, a wheeled version is advisable.
Don’t overlook attachments and accessories. Surface cleaners, for instance, can significantly reduce the time spent on flat surfaces. Check out pressure washer surface cleaners for options that enhance efficiency. Additionally, if you’re cleaning vehicles, consider products like the best car wax for pressure washer to protect surfaces while you clean.
| Use Case | Recommended PSI | Recommended LPM |
|---|---|---|
| Light Cleaning (Patios, Furniture) | 1300-1900 | 6-8 |
| Medium Cleaning (Decks, Fences) | 1900-2300 | 8-10 |
| Tough Cleaning (Driveways, Vehicles) | 2000+ | 10+ |
Lastly, evaluate the power source. Electric models offer convenience and quieter operation, while petrol models provide greater mobility and power, making them suitable for larger areas without easy access to electricity.
Preparing the Area for Pressure Washing
Clear the worksite of any furniture, plants, or obstacles. I once missed this step and ended up soaking my neighbour’s prized flowers. That added unnecessary stress to an otherwise straightforward task. Ensure all items are moved at least 10 feet away from the area you plan to clean.
Check for any fragile items like window screens or decorations. A friend of mine learned the hard way what happens when you don’t remove these; a few shattered pieces led to an unexpected repair bill. If something can be easily damaged, it’s best to take it inside or cover it with a tarp.
Inspect the surfaces you intend to treat. Look for loose paint, damaged wood, or cracked concrete. I once encountered a patch of flaking paint and decided to blast it away, only to find myself peeling off much more than intended. If repairs are necessary, tackle those first to avoid further complications.
Ensure proper drainage in the area. Water pooling can create a messy situation and affect your cleaning results. I recommend checking if the ground slopes away from the surface to allow for easy runoff. If not, consider using a wet vacuum to manage excess water during the process.
Lastly, prepare your power source and water supply. Ensure that your hose is long enough to reach the cleaning site without kinks. I’ve been caught off guard by a short hose before, and it’s frustrating to have to stop and reposition everything. A steady water supply is crucial for maintaining consistent performance.
Selecting the Appropriate Nozzle for Different Surfaces
Choosing the right nozzle is pivotal for achieving optimal cleaning results. Each type serves a unique purpose, and mismatching can lead to damage or inadequate cleaning.
- 0° Nozzle: This nozzle delivers the most intense jet. Use it sparingly on very tough surfaces like concrete or heavily stained driveways. I recall using it to remove graffiti from a wall; the results were impressive, but caution is necessary to avoid etching softer materials.
- 15° Nozzle: Excellent for stripping paint or cleaning heavily soiled surfaces. I’ve effectively used this on brick and stone patios, where stubborn grime clung tightly. Keep a safe distance to prevent chipping or damage.
- 25° Nozzle: A versatile choice for most general cleaning tasks including decks, siding, and vehicles. This nozzle strikes a balance between power and coverage. I often grab this one for routine clean-ups, as it efficiently removes dirt without risking damage.
- 40° Nozzle: Ideal for light cleaning tasks, such as washing cars or rinsing off delicate surfaces. I once used this on a painted surface, and it worked beautifully without causing any scratches or peeling.
- Soap Nozzle: Designed for applying detergent. It has a wider spray pattern to ensure even coverage. I find it particularly useful for cleaning outdoor furniture or preparing surfaces before a deeper clean.
Always adjust the nozzle based on the material and condition of the surface. Testing a small area first can save you from potential mishaps. Over the years, I’ve learned that patience and precision yield the best results.
Finally, keep your nozzles clean and free from debris. A clogged nozzle can significantly alter the spray pattern and pressure, potentially leading to unsatisfactory outcomes.
Understanding Detergent Usage and Application
Always opt for a detergent specifically designed for your cleaning device. Generic soaps can cause damage or leave residue. I recall a time when I used a household cleaner on a stubborn oil stain; it not only failed to lift the grime but also clogged the machine. Stick with products recommended by the manufacturer for safety and effectiveness.
Choosing the Right Detergent
Select a detergent based on the surface being cleaned. For vehicles, a pH-neutral formula is ideal to avoid paint damage. In contrast, heavy-duty degreasers work wonders on concrete and other tough surfaces. I once had great success using a degreaser on my driveway after a barbecue mishap; it cut through grease effortlessly and restored the surface.
Application Techniques
Apply detergent from the bottom up to prevent streaking. I learned this the hard way when I washed my patio and ended up with unsightly lines. Use a dedicated foam cannon or detergent tank for even distribution. Allow the solution to dwell for a few minutes, but don’t let it dry out. Rinsing too soon can lead to ineffective cleaning. Always follow up with a thorough rinse to remove all residues.
Techniques for optimal pressure washing
For achieving outstanding results, angle your spray wand between 25 to 45 degrees relative to the surface. This method provides the best combination of force and coverage without damaging the material.
Always maintain a distance of 12 to 24 inches from the surface being treated. Moving too close can cause etching or stripping, particularly on softer materials like wood or painted surfaces.
When working on vertical surfaces, start from the bottom and work your way up. This technique prevents streaking and ensures that dirt flows downward, making it easier to clean. For horizontal surfaces, the opposite applies: begin at one end and work your way across in a consistent pattern.
Incorporate overlapping strokes while washing. This ensures even coverage and prevents missed spots. A systematic approach, like washing in sections, allows for better control and ensures thorough cleaning.
For stubborn stains or areas with heavy grime, pre-soaking can be beneficial. Apply a suitable detergent, let it sit for 5 to 10 minutes, then rinse off before using the cleaning tool. This method loosens dirt, making the job considerably easier.
- Adjust the cleaning solution concentration based on the severity of the grime.
- Regularly check for debris or clogs in the nozzle to maintain optimal performance.
- Experiment with different spray patterns to find what works best for specific surfaces.
When using a cleaning solution, always start from the bottom and work upwards, rinsing from the top down. This approach prevents soap residue from drying on the surface and allows for a more effective rinse.
After pressure cleaning, inspect the area for any missed spots. Touch up as needed, and consider a second pass for areas requiring extra attention.
Lastly, ensure to follow the manufacturer’s guidelines for maintenance. Regularly check hoses and connections for wear and tear. This practice prolongs the lifespan of your equipment and ensures consistent performance.
Safety Precautions While Operating a Pressure Cleaning Device
Always wear appropriate personal protective equipment (PPE). I’ve seen too many people underestimate the power of these machines and end up with injuries. At minimum, you should have safety goggles, sturdy gloves, and non-slip footwear. I recall a colleague who neglected to wear goggles and ended up with debris in his eye while cleaning a driveway. It wasn’t a pleasant experience for him, and it could have been easily avoided.
Electrical and Water Safety
Ensure that all electrical connections are secure and positioned away from water exposure. I once witnessed a situation where a loose cable led to a shock hazard. It’s wise to use a Ground Fault Circuit Interrupter (GFCI) outlet to prevent electrical shocks. Keep the machine’s power cord free from water and avoid using it in wet conditions. If you’re working outdoors, make sure the area is clear of any electrical wires or outlets that could pose a risk.
Operating Environment
Clear the area of obstacles and potential hazards. I remember tackling a particularly cluttered patio, and it was all too easy to trip over items while focusing on the task at hand. If children or pets are around, ensure they are at a safe distance. Inform everyone nearby that you will be using a powerful cleaning device to avoid distractions. Always be mindful of your surroundings; you’d be surprised how quickly things can go wrong if you’re not paying attention.
Post-washing care and maintenance of your equipment
After completing your cleaning task, it’s crucial to give your equipment the attention it deserves. I’ve seen many machines suffer simply from neglect. First, disconnect the hose and nozzle, allowing any residual water to drain out. This prevents moisture from accumulating inside the unit, which can lead to corrosion over time.
Next, rinse the exterior of the machine with clean water. A quick wipe-down removes dirt and debris that could interfere with its performance. I always keep a soft cloth handy for this purpose. Additionally, check the power cord for any signs of wear or damage. A frayed cord can become a safety hazard, so address any issues immediately.
Inspect the filter and clean it regularly. A clogged filter can reduce efficiency and strain the motor. I typically do this after every few uses, which keeps my equipment running smoothly. If your model has a pump oil reservoir, ensure it’s filled to the recommended level. Fresh oil is essential for maintaining the pump’s longevity.
Store the equipment in a dry place, ideally indoors, to protect it from the elements. If you must leave it outside, invest in a quality cover. I’ve lost a few machines to rain and snow, and it’s not a mistake I plan to repeat. Lastly, consult the manufacturer’s manual for any specific maintenance tasks; regular servicing can save you money on repairs down the line.
.jpg)


