


Before anything else, ensure you’ve chosen the right nozzle for the task at hand. I learned this early on when a stubborn stain on my driveway resisted my initial attempts. Swapping out the standard nozzle for a more concentrated one made all the difference, cutting through the grime in seconds. Each nozzle serves a unique purpose, so keep a selection handy for various surfaces.
Next, always pre-soak the area if you’re dealing with tough dirt or grease. I often apply a suitable detergent with a low-pressure setting, allowing it to dwell for a few minutes. This simple step can significantly enhance the cleaning process, saving both time and effort.
Maintaining a consistent distance from the surface is another key aspect. I’ve seen many beginners get too close, resulting in damage to delicate materials. Keeping a distance of around 30 cm usually yields the best results while preserving the integrity of surfaces like wood or painted areas.

Lastly, don’t forget about safety. Always wear protective eyewear and gloves. I once had a splinter of debris fly into my eye while cleaning a patio, and it was a painful reminder of the importance of gear. A little precaution goes a long way in ensuring a smooth and successful cleaning session.
Selecting the Right Nozzle for Your Cleaning Task
Choosing the appropriate nozzle can make a significant difference in cleaning results. Each nozzle produces a specific spray pattern and pressure, tailored for various tasks. I remember a time I was cleaning a heavily stained driveway; switching from a wide spray to a narrow jet made all the difference in removing the grime effectively.
Understanding Nozzle Types
Generally, nozzles are colour-coded, indicating their spray angle and flow rate. A 0-degree red nozzle delivers a concentrated stream, ideal for tough stains on hard surfaces. However, be cautious; it can damage delicate materials. The 15-degree yellow nozzle works well for stripping paint or removing mildew. For larger areas, a 25-degree green nozzle suits most cleaning jobs, while a 40-degree white nozzle is perfect for gentle washing, like cleaning vehicles or windows.
Matching Nozzles to Surfaces
Consider the surface you’re tackling. For concrete or brick, a narrower nozzle is effective, but for softer surfaces like wood, opt for a wider spray to avoid damage. I recall using a green nozzle on a wooden deck, which provided a thorough clean without causing splinters. Always test a small area first to ensure the nozzle fits the task without causing harm. Remember, the right attachment not only improves efficacy but also saves time and effort.
Understanding Pressure Settings for Different Surfaces
For optimal results, it’s crucial to match the intensity of the stream with the material being cleaned. For delicate surfaces like wood decking or painted fences, a setting around 1,200 to 1,500 PSI works well. This lower pressure removes dirt without risking damage to the finish.
When tackling brick or concrete, increase the setting to approximately 2,500 to 3,000 PSI. These materials can withstand higher pressure and benefit from a more robust clean, effectively removing grime and stains embedded in the surface.
Glass and Windows
Cleaning windows requires a gentle touch. I prefer using a setting between 1,000 to 1,200 PSI. This prevents the risk of shattering the glass while still effectively removing dirt and streaks. Always keep the nozzle at least two feet away from the surface to avoid impact damage.
Vehicles
For cars, aim for a setting of around 1,500 PSI. This strikes a balance between cleaning power and safety for the vehicle’s exterior. I recommend using a fan spray nozzle to distribute the water evenly and reduce the chance of scratching the paintwork.
Preparing Your Area Before Getting Started
Clear the area of any obstacles like furniture, vehicles, or gardening equipment. It’s essential to create a safe and efficient workspace. I remember the first time I didn’t do this–ended up soaking my neighbour’s newly painted fence because I was too focused on the grime on my driveway.
Assessing Your Surroundings
Take a moment to examine the surfaces you’ll be cleaning. Check for fragile items, delicate plants, or electrical outlets. Cover any plants with tarps, and ensure that all electrical sources are protected from water exposure. I once had a mishap with a garden gnome that didn’t fare well against the force of the stream. Now, I always take a careful inventory before beginning.
Setting Up for Success
Gather all necessary supplies: detergents, extension cords, and safety gear. Make sure your equipment is nearby to avoid interruptions. I learned the hard way that walking back and forth can waste time and energy. A handy checklist can streamline the process. Here’s a quick table to help you prepare:
| Item | Purpose |
|---|---|
| Tarps | Protect plants and delicate surfaces |
| Extension Cords | Ensure power supply is accessible |
| Detergents | Enhance cleaning effectiveness |
| Safety Goggles | Protect your eyes from debris |
| Gloves | Keep hands safe from chemicals |
Lastly, consider the weather. Avoid working during rain or strong winds, as this can affect both safety and results. If you’re looking for a compact option, check out the small hot water pressure washer for tasks that require less power but still deliver impressive cleaning outcomes.
Proper techniques for handling the high-pressure cleaner
Grip the spray gun firmly with both hands to maintain control, especially when the machine is at full power. This helps prevent any accidental slips that could lead to injury or damage. Always keep the nozzle aimed away from yourself and others; errant sprays can cause severe injuries.
Body positioning and movement
Stand with your feet shoulder-width apart for stability. Lean slightly forward and maintain a low centre of gravity, allowing you to shift your weight as needed. When cleaning vertical surfaces, move the nozzle in a sweeping motion from top to bottom, allowing the dirt to fall away rather than being pushed back onto the cleaned area.
- Aim at a slight angle, approximately 30 degrees, to maximise cleaning effectiveness.
- Keep the nozzle at a consistent distance from the surface, typically 18 to 24 inches, to prevent damage.
- For stubborn stains, you can get closer, but don’t let the nozzle touch the surface.
Safety precautions
Before starting, check for any loose objects in the area. These can become projectiles when hit with high-pressure water. Wear appropriate protective gear, such as goggles and gloves, to shield yourself from flying debris and chemical splashes.
- Ensure that the area is free of electrical hazards.
- Be mindful of bystanders, especially children and pets.
- Keep the spray gun locked when not in use to prevent accidental activation.
After finishing, remember to disconnect the water supply and release any trapped pressure in the hose before storing the equipment. This will prolong the life of your machine and ensure it’s ready for your next cleaning task. For optimal air quality in your workspace, consider using the best air scrubber for grow room to eliminate any lingering dust or particles.
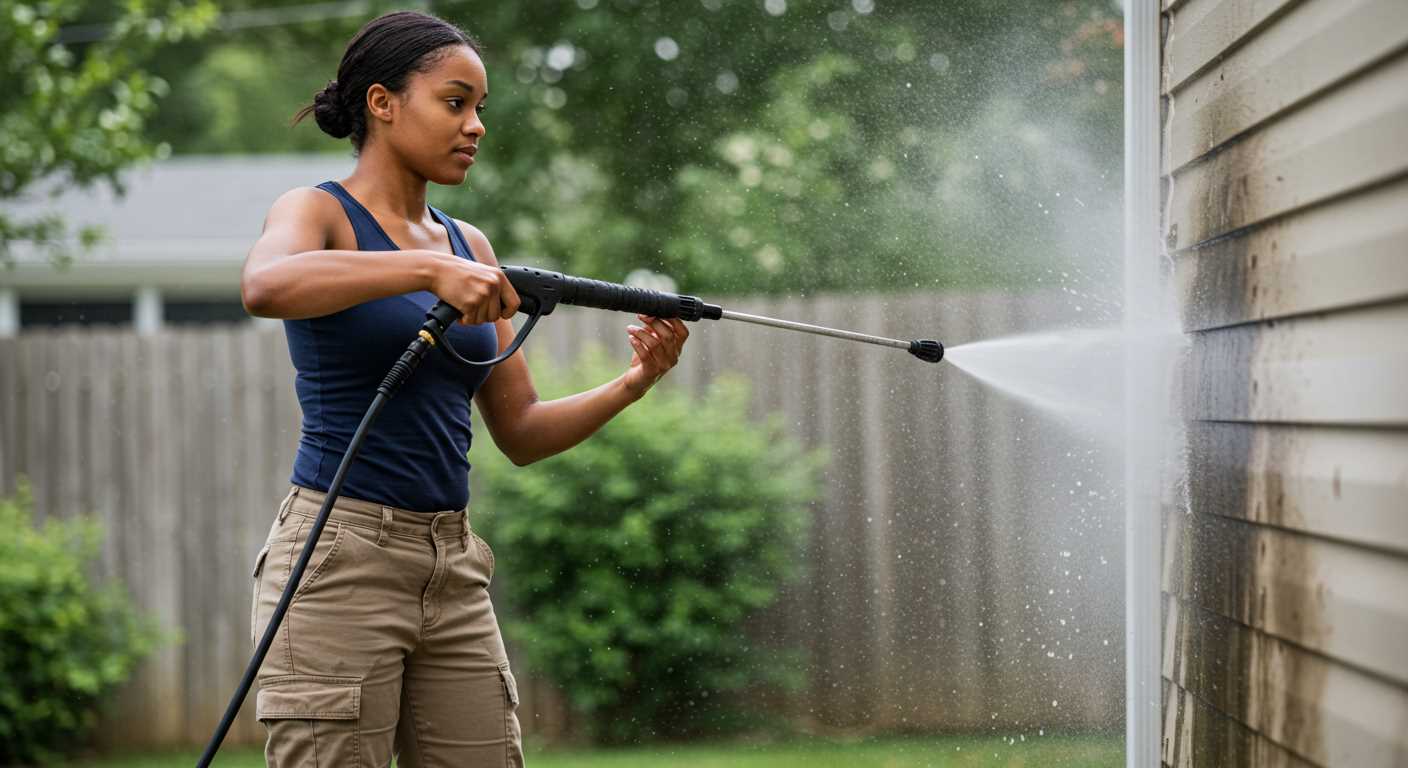
Maintaining a Safe Distance While Cleaning
Always keep a minimum distance of 2-3 feet from the surface being treated. This ensures that the force of the water does not damage delicate materials or surfaces. I recall a job where I was working on an old wooden deck. I started too close, and the wood splintered under the high pressure. Lesson learned: always assess the material before getting too close.
Adjusting Distance Based on Surface Type
For tougher surfaces like concrete, you might get away with being a bit closer, but I still recommend maintaining that safe distance to avoid unintended damage. When cleaning vehicles or painted surfaces, staying at least 3-4 feet away is wise to prevent stripping paint or causing dents. I once had a friend who aimed too closely at his car and ended up with a nasty spot that required a professional repair.
Vigilance While Operating
Keep an eye on your surroundings. If there are any people, pets, or delicate items nearby, increase your distance. I’ve seen pets startled by the noise and water spray, which can lead to accidents. Always communicate with anyone nearby to ensure they’re at a safe distance while you work. Safety first–every time.

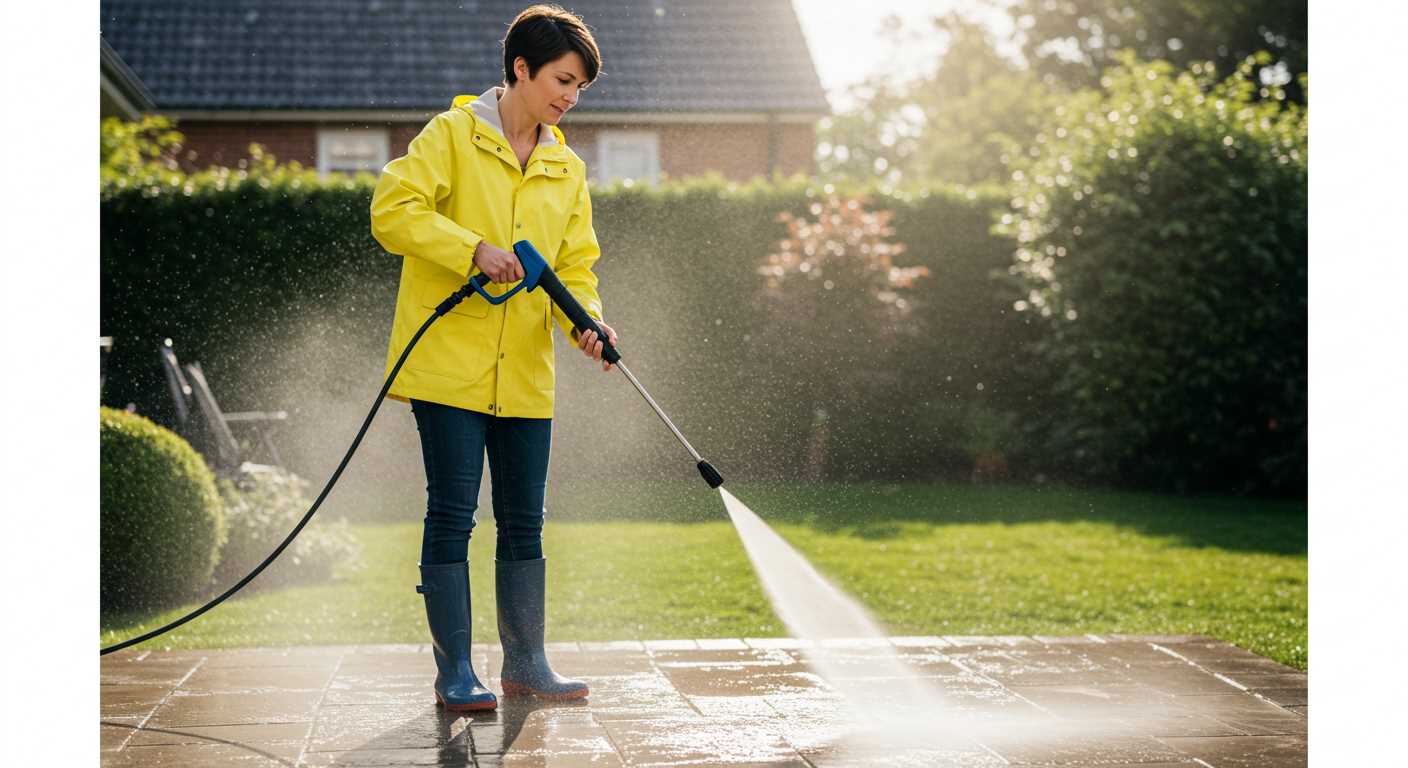
Tips for Cleaning Specific Items Like Patios and Vehicles
For patios, start with a 25-degree nozzle, which gently lifts dirt without damaging the surface. I remember the time I tackled a particularly grimy patio after a long winter. I worked methodically, beginning at one end and moving in straight lines. It’s crucial to keep the nozzle at a consistent distance–about 12 inches–while sweeping back and forth. A tip: if you encounter stubborn stains, pre-treat them with a suitable cleaner and let it sit for a few minutes before rinsing.
When it comes to vehicles, switch to a 40-degree nozzle to avoid scratching the paint. I once made the mistake of using a more powerful setting, which left marks. Always start from the top and work your way down, letting the water run off the surface rather than pooling. Keep a distance of at least 2 feet from the surface to ensure you don’t cause any damage. Additionally, using a dedicated car shampoo can greatly enhance the results–mix it in the detergent tank if your equipment allows.
For outdoor furniture, I’ve had success with a low-pressure setting and a fan spray nozzle. This combination effectively removes dirt and grime without risking damage to cushions or fragile materials. After cleaning, I recommend applying a protective spray designed for the furniture material to prolong its life and maintain appearance.
Lastly, don’t forget about garden tools and equipment. A quick blast with a narrower nozzle can clear off mud and debris efficiently. I’ve found that letting them dry in the sun after washing helps prevent rust.
Post-cleaning care for your pressure cleaning equipment
After finishing your task, it’s crucial to give your equipment some attention. Start by disconnecting the water supply and draining any remaining liquid from the hoses. This prevents any potential damage or freezing if the temperature drops.

Next, flush the system with clean water. This step clears out any detergent or debris that might linger, ensuring the longevity of your machine. Run it for a few minutes without any attachments to do this effectively.
Cleaning and Storage
Give the exterior of your unit a gentle wipe-down. Use a damp cloth to remove any grime or residue that may have accumulated during operation. Keeping the exterior clean not only looks good but also helps in spotting any potential issues before they escalate.
When storing your equipment, keep it in a dry, sheltered location. If possible, store it upright to avoid any damage to the internal components. If you need to store it for an extended period, consider using a pump protector to lubricate the internal components.
Routine Maintenance
Regularly check hoses and nozzles for wear and tear. Cracks or leaks can diminish performance and lead to costly repairs. Replace any worn parts promptly. I’ve often found that a small investment in maintenance saves a lot in the long run.
Lastly, keep an eye on the oil levels in the engine, if applicable. Regular oil changes can significantly prolong the life of your equipment. I’ve seen machines run for years longer just by keeping up with this simple task. Always refer to the user manual for specific maintenance intervals and recommendations.
.jpg)
.jpg)


