


Start by gathering your materials: a reliable cleaner, a container filled with water, and the appropriate detergent. This approach allows for a versatile cleaning experience, particularly for stubborn grime and dirt. I recall a weekend when my patio had accumulated a significant amount of dirt. Instead of dragging a long hose across the yard, I opted for the bucket method. Within minutes, I had the desired results without the hassle of traditional setups.
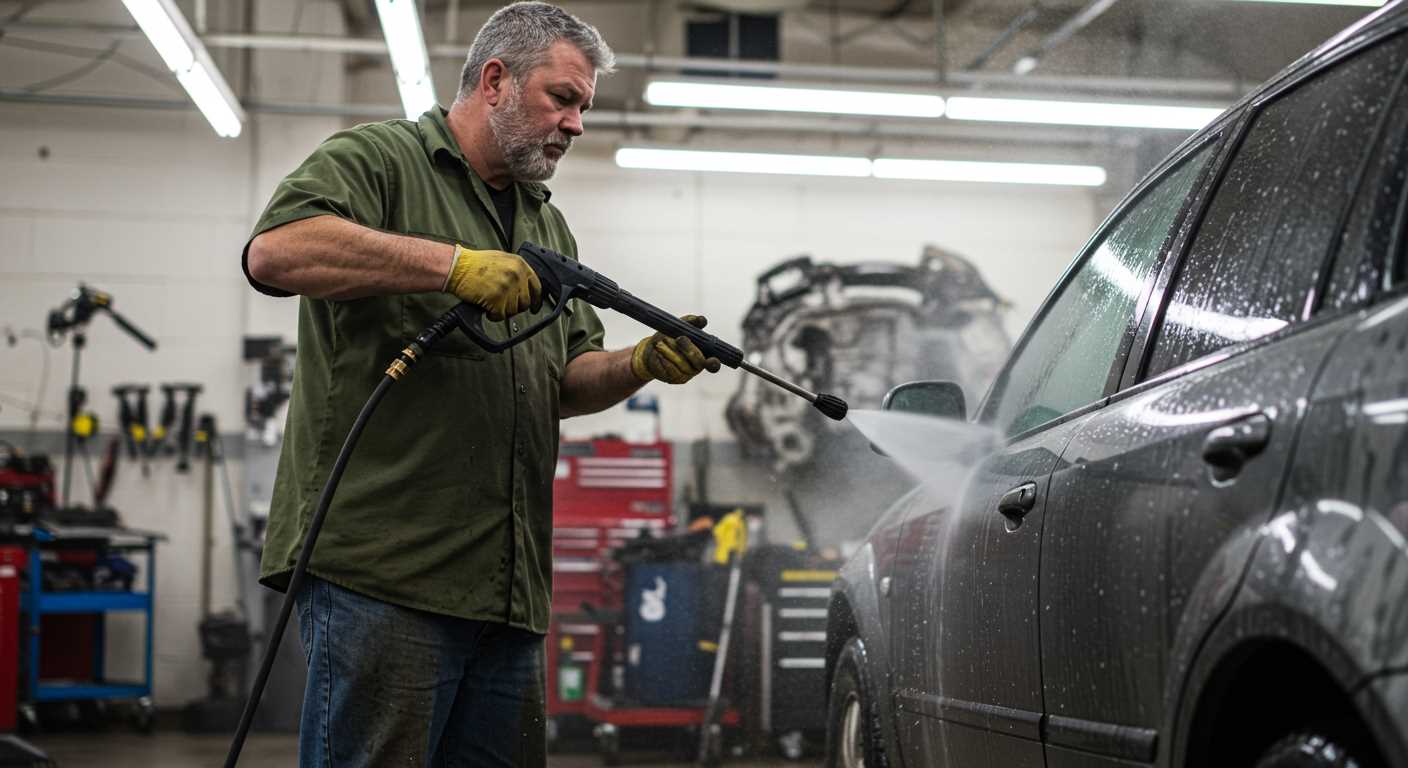
Next, ensure the correct nozzle is attached. A wider spray pattern will cover more ground quickly, while a narrower stream provides focused cleaning for tough spots. I learned this the hard way during a car wash; switching nozzles made all the difference in reaching those hidden areas. It’s an essential step for anyone looking to maximise their cleaning efforts.

Mix your cleaning solution in the container according to the manufacturer’s instructions. I often experiment with various detergents, and each time, I’m reminded of how a good cleaner can enhance performance. Pour the mixture into the container, then simply immerse the cleaner’s intake hose into it. This method not only saves water but also ensures a steady supply of detergent during your cleaning session.
Finally, maintain a consistent distance from the surface you’re cleaning. Too close may damage the material, while too far reduces effectiveness. I’ve made this mistake before, especially on different surfaces, and found that adjusting my distance was crucial for achieving the best results. With these tips, you can elevate your cleaning game significantly.
Using a Karcher Pressure Washer with a Bucket
Start by selecting an appropriate bucket, ideally one that holds around 5 to 10 litres. This size is manageable and sufficient for most cleaning tasks. Fill it with water, then add a suitable detergent for the surface you’re cleaning, ensuring it mixes well.
Instead of connecting directly to a tap, attach a suction hose to the inlet of your device. This allows the unit to draw water from the bucket. Make sure the hose is submerged in the water to avoid air intake, which can cause the motor to run dry.
Once everything is set up, turn on the machine. Adjust the nozzle to the desired pressure setting based on the task at hand–lower settings are better for delicate surfaces, while higher ones work well for tougher grime.
During operation, keep the nozzle at least 30 cm away from the surface to prevent damage. Move in a sweeping motion, allowing the detergent to penetrate for a few moments before rinsing. If necessary, refill the bucket as you go to ensure a steady water supply.
After completing the task, remember to clean the suction hose and the bucket. Remove any leftover detergent and rinse thoroughly to keep your equipment in good condition.
From my experience, using this method is not only practical but can also save time and water. I’ve tackled everything from patios to garden furniture using this technique, achieving great results while maintaining my equipment’s longevity.
Choosing the Right Bucket for Your Karcher Pressure Washer
Consider a container that holds at least 20 litres. This size ensures ample water supply for various tasks, preventing frequent refills. Look for sturdy plastic or metal options, as they withstand the rigours of outdoor use.
Material Matters
Opt for high-density polyethylene (HDPE) or stainless steel. HDPE is lightweight and resistant to chemicals, making it ideal for detergents. Stainless steel, on the other hand, offers durability and longevity, especially if you’re dealing with harsh cleaning agents.
Features to Look For
Choose a model with a secure lid to minimise spillage during transport. Handles are crucial; ergonomic designs make lifting easier. A wide base prevents tipping, ensuring stability on uneven surfaces. Additionally, consider options with measurement markings for precise detergent mixing.
In my experience, a well-chosen container enhances the efficiency of your cleaning tasks. After all, a reliable source of water sets the foundation for effective cleaning, allowing you to tackle dirt and grime with confidence.
Preparing the Pressure Washer for Bucket Use
First, ensure the machine is switched off and unplugged. This simple step can prevent any accidents while you’re setting everything up. Next, check the water inlet filter for any debris. A clean filter guarantees optimal flow, crucial when drawing water from a container.
Attach a suitable hose to your unit, ensuring it fits securely. The right hose length is vital; it should reach the bucket without strain yet remain flexible enough for ease of movement. Make sure there are no kinks or leaks, as these can hinder performance.
Position the chosen container–ideally a sturdy bucket–close to the machine. The water level should be high enough for the inlet to draw efficiently. If your bucket has a lid, consider removing it to avoid any vacuum issues that might impede flow.
Next, connect the suction hose to the water inlet. Ensure it’s submerged deeply enough in the water to prevent air intake. If the hose floats, weigh it down with a small stone or similar item to keep it submerged.
After the hose is positioned correctly, run a quick test. Turn on the unit briefly to check for any leaks around the connections. If everything is tight, proceed to the next step.
| Step | Description |
|---|---|
| 1 | Switch off and unplug the device. |
| 2 | Inspect and clean the water inlet filter. |
| 3 | Attach the hose securely to the machine. |
| 4 | Position the bucket close to the machine. |
| 5 | Connect the suction hose to the water inlet. |
| 6 | Test for leaks and ensure proper function. |
Finally, if you plan to use detergent, make sure it’s compatible and follow the manufacturer’s recommendations for dilution. This ensures the cleaning process is not only thorough but also safe for your equipment.
Connecting the Bucket to Your Karcher Pressure Washer

To successfully attach the container to your cleaning device, follow these precise steps:
- First, ensure your machine is powered off and unplugged. Safety is paramount.
- Locate the water inlet on the device. This is where you will connect the hose or adapter.
- If your container lacks a direct connection point, use a suitable adapter to create a secure fit. Many models come with these accessories.
- Fill the container with the appropriate cleaning solution or water, depending on your task. Be mindful of the mixture ratio if using a detergent.
- Once the container is ready, position it close enough to the inlet to avoid any kinks in the hose.
- Connect the hose from the container to the water inlet, ensuring a tight seal to prevent leaks.
- After securing the connection, check for any signs of leakage before turning on the device.
Testing the Connection
After setting everything up, it’s wise to conduct a brief test:
- Turn on the machine while monitoring the connections.
- Observe if the liquid flows smoothly without interruptions.
During my time in the field, I often encountered issues with inadequate connections. It’s a good habit to double-check your setup to avoid unnecessary interruptions during cleaning tasks.
Adjusting the Flow Rate
Once you’ve confirmed the connection is secure, adjust the flow rate if your unit allows it. This adjustment helps control the amount of solution dispensed, ensuring optimal results for your specific cleaning requirements. I’ve found that a lower flow rate often works better for delicate surfaces, while a higher rate suits tougher jobs.
Adjusting Water Flow Settings for Optimal Performance
To achieve the best results, it’s essential to fine-tune the water flow settings on your equipment. Here’s how I typically approach this based on years of hands-on experience.
Identifying the Right Pressure Level
- Start by assessing the surface you are cleaning. Delicate materials like vehicles or wooden decks require lower pressure settings.
- For tougher surfaces, such as concrete driveways, adjusting to a higher flow may be beneficial.
During my time testing various devices, I found that too high a pressure can damage softer surfaces. A gentle touch often yields better results without compromising the integrity of the material.
Modifying Flow Rate for Different Applications
- For rinsing purposes, a broader spray pattern and higher flow rate are effective. This helps in washing away dirt and grime quickly.
- Conversely, when applying detergents, a narrower spray can help in concentrating the cleaner, allowing it to penetrate stains more effectively.
In the past, I frequently adjusted the settings based on the task. For example, when cleaning outdoor furniture, I would use a lower flow setting to avoid oversaturation while ensuring thorough cleaning. Experimenting with these adjustments can greatly enhance your cleaning experience.

Regularly checking the water inlet filter is another tip I’ve learned. A clogged filter can restrict flow, leading to subpar performance. Keeping it clean ensures your device runs smoothly and efficiently.
Lastly, don’t hesitate to experiment. Each task is unique, and adjusting the settings accordingly can make a noticeable difference in the outcome.
Applying Detergents Properly with a Bucket System
Start by selecting a quality detergent formulated for your cleaning task. I’ve found that using the wrong type can lead to unsatisfactory results or even damage surfaces. Always check the label for compatibility with your equipment.
Mix the detergent with water in your chosen container according to the manufacturer’s instructions. For instance, a common ratio is one part detergent to four parts water. However, some products may require different proportions, so it’s wise to read the guidelines carefully.
When attaching the detergent solution, ensure the suction hose is submerged in the mixture. This allows the system to draw detergent effectively. I’ve had instances where the hose wasn’t deep enough, resulting in inadequate foaming and cleaning power.
Adjust the nozzle to a low-pressure setting to allow the solution to apply evenly. I recommend moving the wand in a sweeping motion, starting from the bottom and working upwards. This technique prevents streaking and allows the detergent to cling to the surface for optimal cleaning.
Let the solution sit for a few minutes, but don’t allow it to dry on the surface. I’ve often set a timer for this step. It’s crucial to rinse off the detergent thoroughly after the dwell time to avoid residue, which can trap dirt and create a sticky surface. A thorough rinse will enhance the overall finish.
After cleaning, clean the bucket and any remaining detergent thoroughly to prevent residues from hardening. Leftover detergent can clog the system during future uses. Always store your cleaning solution properly to maintain its effectiveness. For more insights on cleaning equipment, you might find this link useful: are digital cameras and scanners input or output devices.
Maintenance Tips for Using a Bucket with Your Pressure Washer
Regular cleaning of the inlet filter is crucial. I remember a time when neglecting this simple task led to a noticeable drop in performance. A clogged filter restricts water flow, causing strain on the motor. Remove it periodically and wash it under running water to keep it clear of debris.
Inspect Hoses and Connections
Examine hoses and connections for wear and tear. Cracks or leaks can significantly affect the operation. I’ve had hoses burst mid-task, leading to messy clean-ups and wasted time. Replace any damaged parts immediately to avoid interruptions and maintain optimal performance.
Store Properly
After finishing, store your equipment in a dry, sheltered location. Extreme temperatures and moisture can damage components. I’ve seen units degrade rapidly due to improper storage. A simple cover can protect it from dust and moisture, extending its lifespan.
Troubleshooting Common Issues When Using a Bucket
Low water pressure is a frequent concern. Ensure your container is filled adequately. If the water level is too low, the machine may struggle to draw water effectively. Always keep the bucket at least halfway full during operation.
If you notice inconsistent spray patterns, check the filter for blockages. A dirty filter can restrict water flow. Clean it regularly to maintain optimal performance.
Connecting Issues
Sometimes, the connection between the hose and the bucket can cause problems. Ensure that the hose is securely attached and that there are no kinks or bends. A tight fit prevents air from entering the system, which can lead to pressure drops.
Detergent Problems
When applying cleaning solutions, use the recommended dilution ratios. If you notice excessive foam or insufficient cleaning action, adjust the ratio. Too much detergent can clog the system, while too little may not clean effectively. For those interested in enhancing their cleaning capabilities, consider a car pressure washer with foam gun for better application.
Lastly, if the machine shuts off unexpectedly, check for overheating. Continuous operation without breaks can lead to this. Allow the unit to cool down before resuming use, and ensure that the bucket is always filled to prevent running dry.
.jpg)
.jpg)
.jpg)


