


Before engaging with your new cleaning device, ensure you have a reliable source of water nearby. This simple step can save you time and frustration, preventing any interruptions during your cleaning tasks. A consistent flow of water not only improves output but also prolongs the life of your equipment.
Next, always check the connections and hose for any leaks or kinks. I recall a time when I was eager to tackle a particularly stubborn patio after a long winter. In my haste, I overlooked a small kink in the hose. It cost me precious time until I realised the issue was affecting performance. A thorough inspection can make all the difference.
Adjusting pressure settings according to the surface being cleaned is key. For delicate surfaces like car paint, a lower setting works wonders, while driveways and concrete can handle a more robust output. I’ve often had to remind myself to adapt my approach based on the task at hand, which can enhance the cleaning experience significantly.
Lastly, always keep a variety of nozzles at hand. Each attachment serves a different purpose, and having the right one can turn a laborious chore into an enjoyable task. I learned this the hard way after struggling with a stubborn stain on my deck, only to find that a simple nozzle switch made the job effortless. Proper preparation and adaptability are your best allies in achieving the best results.
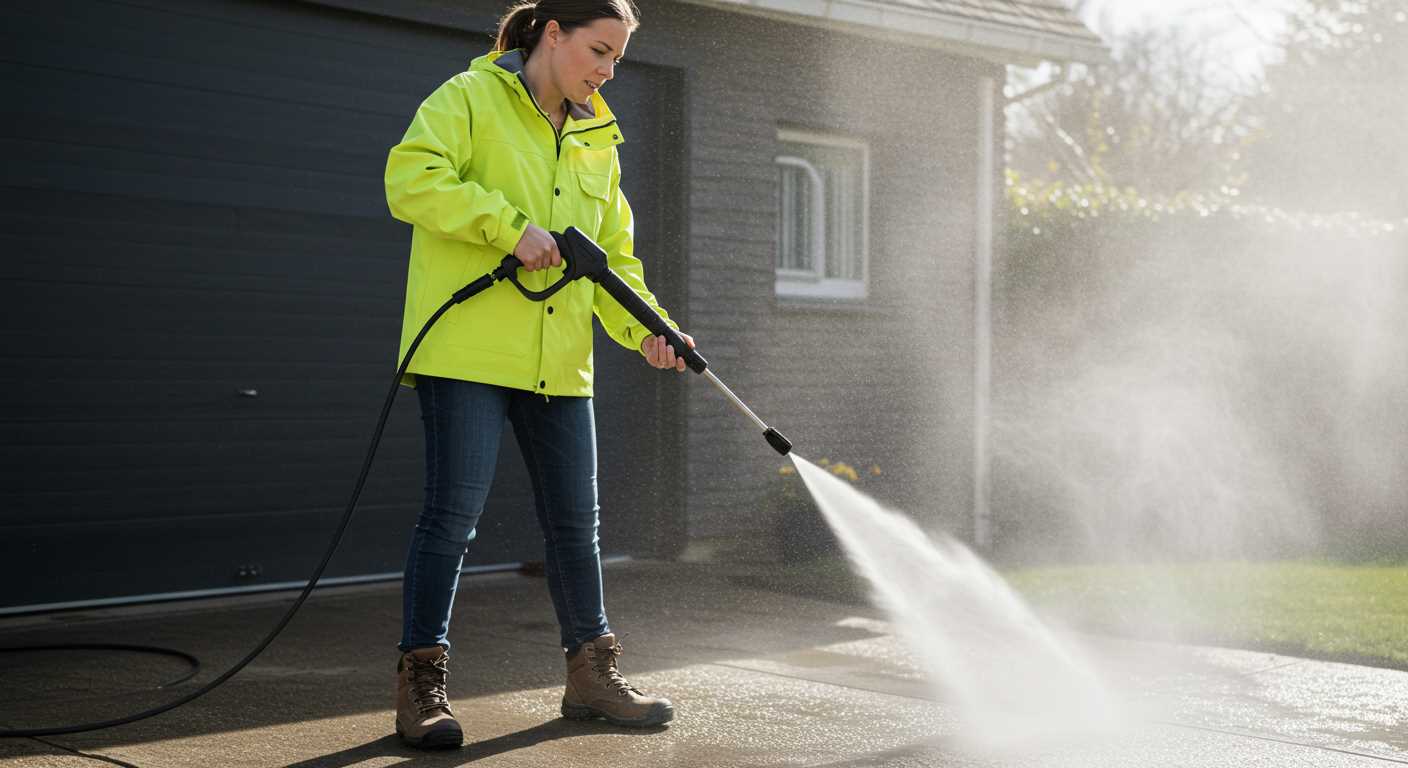
Utilising a Spear and Jackson High-Pressure Cleaner
Before starting, ensure that the equipment is placed on a flat, stable surface. This prevents any tipping over during operation. Connect the water supply, making sure to secure the hose tightly to avoid leaks. Turn on the tap, allowing water to flow through the unit before powering it up.
Adjusting Settings
Familiarise yourself with the various settings. Select the nozzle appropriate for the task; for delicate surfaces, a wider spray is advisable, while a narrower jet is ideal for tough grime. Remember, changing nozzles is a simple twist and pull motion. Always test on a small area first to gauge effectiveness.
Cleaning Techniques
Maintain a consistent distance from the surface, usually around 2 feet for general cleaning. Move the lance in sweeping motions, overlapping each stroke to ensure thorough coverage. For stubborn stains, pause briefly on the area while keeping the jet moving. Avoid directing the spray at electrical connections or delicate plants, as this can cause damage.
After completing the task, turn off the machine and disconnect the water supply. Release any remaining pressure by squeezing the trigger before storing it away. This prolongs the lifespan of the equipment and ensures safety for future use.
In my experience, routine maintenance is key. Regularly inspect the hoses and nozzles for wear and tear, and clean the filter to prevent clogs. A little attention goes a long way in keeping your device in top condition.
Choosing the Right Pressure Cleaner Model
Selecting the appropriate model requires an understanding of your specific needs. For instance, if you’re tackling heavy-duty tasks like removing paint or cleaning large surfaces, opt for a unit with a higher bar rating, typically around 150-180 bar. This will deliver the power necessary for such demanding jobs.
Conversely, lighter tasks like washing vehicles or patio furniture can be handled effectively with a model offering around 100-120 bar. These machines are often more compact and easier to manoeuvre, making them ideal for smaller projects.

Another factor to consider is the flow rate, measured in litres per hour (L/h). A higher flow rate allows for quicker cleaning, which is significant for larger areas. For average domestic use, look for units that provide at least 400-500 L/h.
Additionally, consider the accessories that come with the unit. A variety of nozzles, brushes, and extension wands can greatly enhance versatility. For example, a rotating nozzle is perfect for stubborn dirt while a foam cannon helps with pre-soaking surfaces.
Lastly, pay attention to the build quality and warranty. A robust design ensures longevity, especially if you plan on using it frequently. A warranty of at least two years is advisable, providing peace of mind against manufacturing defects.
In my experience, investing time into selecting the right model pays off. I once purchased a machine without considering the flow rate, which led to frustration during a big cleaning job. Learning from that, I now always match the equipment to the specific task at hand.
Setting up your pressure washer for first use
Begin by selecting a suitable location. Ensure it’s a flat, stable surface with proper drainage. Avoid areas with standing water or near delicate plants.
Gather Required Components
- Unit itself
- Hoses
- Nozzles
- Cleaning solution (if applicable)
- Water supply (hose and tap)
Assembly Steps
- Attach the high-pressure hose to the unit and the spray gun, ensuring secure connections to prevent leaks.
- Connect the water supply hose to the inlet on the machine. Check for a washer inside the connector to maintain a tight seal.
- Fill the detergent tank with an appropriate cleaning solution if needed. Always follow manufacturer recommendations for types of detergents.
- Before turning on the machine, ensure that all connections are tight, and there are no kinks in the hoses.
After assembling, turn on the water supply and check for leaks at all connection points. If everything looks good, plug the unit into a power source and switch it on. Test the spray gun by pulling the trigger, allowing water to flow through the system and removing any air trapped inside.
Lastly, adjust the nozzle to your desired spray pattern. For initial use, a wider fan setting is recommended, especially for delicate surfaces. Always keep a safe distance from the surface being cleaned to avoid damage.
Connecting the Water Supply and Power Source
Start by ensuring that your water source is suitable for the task at hand. A garden hose with a diameter of 1/2 inch is typically ideal. Connect one end of the hose to the water tap and the other to the inlet on the machine. Make sure the connection is tight to prevent leaks, and check the hose for any kinks that could restrict water flow.
Next, it’s essential to ensure that the power source is ready. If your equipment requires an electrical connection, plug it into a suitable outdoor socket with proper grounding. Avoid using extension cords unless absolutely necessary, as they can reduce performance. Always check the voltage requirements specified in the manual; mismatched voltage can lead to malfunction.
Once both connections are secure, turn on the water supply fully before starting the motor. This action primes the system and helps avoid air pockets, which can cause issues when you begin. After that, switch on the unit and listen for the motor to engage smoothly, indicating everything is functioning correctly.
In my experience, taking these steps can prevent common problems. I once encountered issues due to a loose hose connection, causing a frustrating delay in a project. Now, I always double-check everything before I start working. It saves time and enhances efficiency.
Selecting the Appropriate Nozzle for Your Task

For optimal results, choosing the right nozzle is paramount. The standard nozzles generally include 0°, 15°, 25°, and 40°, each designed for specific tasks. For tough stains on concrete or brick, the 0° nozzle delivers a concentrated jet, but caution is necessary as it can damage softer surfaces. I recall a time when I used it on a patio–perfect for the grime but left a few marks I had to buff out later.
For general cleaning, the 25° nozzle strikes a balance, making it ideal for driveways and decks. It offers sufficient power without being overly aggressive. I often rely on this one for routine maintenance. The 40° nozzle is gentler, perfect for delicate surfaces like cars or painted wood, ensuring you don’t strip away finishes. When I washed my car, I was pleased with the results; it removed dirt without any damage.
Adjustable nozzles provide versatility, allowing you to switch spray patterns without changing the attachment. This feature is invaluable when moving between different surfaces. I learned early on that having a dedicated nozzle for each task saves time and hassle.
Consider the material and size of the area too. Larger surfaces may benefit from wider spray angles, while intricate details require precision. For those looking to enhance their equipment, check out which pressure washer accessories deliver the most bang for the buck. Investing in the right nozzle not only improves your cleaning efficiency but also prolongs the life of your equipment.
Adjusting Pressure Settings for Different Surfaces
For optimal results, tailor the pressure settings based on the type of surface you’re cleaning. For delicate materials like painted surfaces or wood, keep the pressure low, around 1000 to 1500 PSI. This prevents damage while still providing effective cleaning. I remember working on a friend’s wooden deck; using lower pressure not only preserved the wood but also allowed for a thorough clean without leaving any marks.
Hard Surfaces
When tackling concrete or brick, ramping up the pressure to approximately 2500 to 3000 PSI is advisable. This level removes tough stains such as oil or grime effectively. I once cleaned a garage floor covered in grease; the high pressure made quick work of the mess, saving time and effort.
Adjusting Nozzles
In addition to pressure, selecting the correct nozzle is key. For wider surfaces like driveways, a 25-degree nozzle spreads water over a larger area while still delivering enough force. On the other hand, for precise cleaning, like removing mildew from a patio, a 15-degree nozzle with a higher pressure works wonders. One time, I switched nozzles mid-cleaning to tackle some stubborn spots, and it made all the difference.
Techniques for Cleaning Driveways and Patios
Begin by clearing debris such as leaves and stones from the surface. This prevents damage and ensures a smoother cleaning process. If the area has not been cleaned for a while, consider pre-treating with a suitable cleaning solution to tackle stubborn stains like oil or mildew. Allow the solution to sit for a few minutes for maximum effect.
Optimal Angle and Distance
Maintain a distance of about 12 to 18 inches from the surface while working. This distance helps avoid damage while still providing effective cleaning. Adjust your angle to around 45 degrees to the surface. This technique allows the water to lift dirt away without causing harm.
Pattern and Movement
Adopt a systematic approach, moving in straight lines or overlapping passes. This ensures even coverage and prevents streaking. For tough stains, a slow, deliberate movement can help lift the grime. If necessary, follow up with a second pass on particularly dirty areas to achieve a spotless finish.
After cleaning, rinse the area thoroughly to remove any leftover cleaning solution. This step is crucial to prevent slippery surfaces. For those interested in preserving foods, you might find it useful to learn how to can chicken without a pressure cooker. It’s a handy skill to develop alongside your outdoor cleaning practices.
Using Detergent for Enhanced Cleaning Results
For optimal cleaning, always incorporate a suitable detergent into your routine. This not only boosts the cleaning power but also helps to break down stubborn grime and stains.
Selecting the Right Detergent
Choose a detergent specifically formulated for your equipment. Look for biodegradable options that are safe for plants and pets. Here are a few key points to consider:
- Check compatibility: Ensure the detergent is designed for high-pressure applications.
- Consider the surface: Select a product tailored for the material you are cleaning–concrete, wood, or vehicles.
- Concentration matters: A concentrated formula often provides better results with less product.
Applying Detergent Effectively
Follow these steps to maximise detergent usage:
- Fill the detergent tank according to the manufacturer’s instructions.
- Attach the appropriate nozzle for detergent application, usually a low-pressure option.
- Start with a test area to gauge the effectiveness and ensure no damage occurs to the surface.
- Apply detergent from the bottom up to avoid streaking and allow it to sit for a few minutes.
- Rinse thoroughly with clean water, ensuring all residues are removed.
In my experience, using a good quality detergent can turn a standard clean into a remarkable transformation. I remember tackling a particularly grimy patio; after applying a specially formulated cleaner, the difference was striking. It wasn’t just cleaner–it looked revitalised.
For tough stains, consider pre-treating with a concentrated solution before the main wash. This extra step can save time and effort, especially on heavily soiled areas.
Maintaining Your Cleaning Equipment After Use
After each session, disconnect the water supply to prevent any backflow issues. It’s crucial to empty the tank and hoses to avoid any residual water that can lead to corrosion or blockages. I’ve seen too many units suffer from this simple oversight.
Next, thoroughly clean the nozzle. A clogged nozzle can severely impact performance. I often keep a small pin handy for this purpose. Just a quick poke can bring it back to optimal function.
Inspect the hoses for any signs of wear or damage. Ensure there are no kinks or abrasions. I typically store mine coiled loosely to prevent crimping. This small step extends the life of the hoses significantly.
Check the filters. A clean filter ensures proper function and longevity. If it’s dirty, rinse it under running water. I’ve noticed that neglecting this can lead to reduced pressure and an overall lack of efficiency.
Store the equipment in a dry, shaded area to protect it from the elements. I’ve learned the hard way that leaving it exposed to harsh weather can lead to unnecessary wear and tear.
Finally, consider running a cleaning solution through the system periodically. This helps maintain the internals and keeps everything functioning smoothly. I do this once a month, and it makes a noticeable difference in performance.
Troubleshooting Common Issues with High-Pressure Cleaners
If you notice a lack of water flow, check the inlet filter for blockages. Debris can easily obstruct the filter, reducing water supply. A simple rinse often resolves this issue. If the flow is still weak, inspect hoses for kinks or leaks. A damaged hose might need replacement.
Motor Won’t Start
Should the motor fail to engage, ensure that the power source is functioning. Check the plug and socket for any signs of damage. If using an extension lead, confirm it’s rated for the appliance’s wattage. If everything checks out, listen for unusual sounds which could indicate a jammed motor. Unplug, check for obstructions, and restore power.
Unusual Noises or Vibrations
Noises can signal a problem. A rattling sound might mean loose components. Tighten any accessible screws or bolts. If vibrations are excessive, inspect the base for stability. Ensure it’s placed on even ground to prevent unwanted movement during operation.
| Issue | Possible Cause | Solution |
|---|---|---|
| Lack of Water Flow | Blocked inlet filter or damaged hose | Clean filter, inspect hoses |
| Motor Won’t Start | Power source issues or motor jam | Check plugs, sockets and clear obstructions |
| Noisy Operation | Loose components or uneven surface | Tighten screws, reposition on level ground |
In cases of persistent leaks, examine seals and connections. Replacing worn seals can often solve the problem. If the detergent delivery system malfunctions, check for blockages in the siphon tube. Clearing any debris usually restores functionality.

.jpg)


