


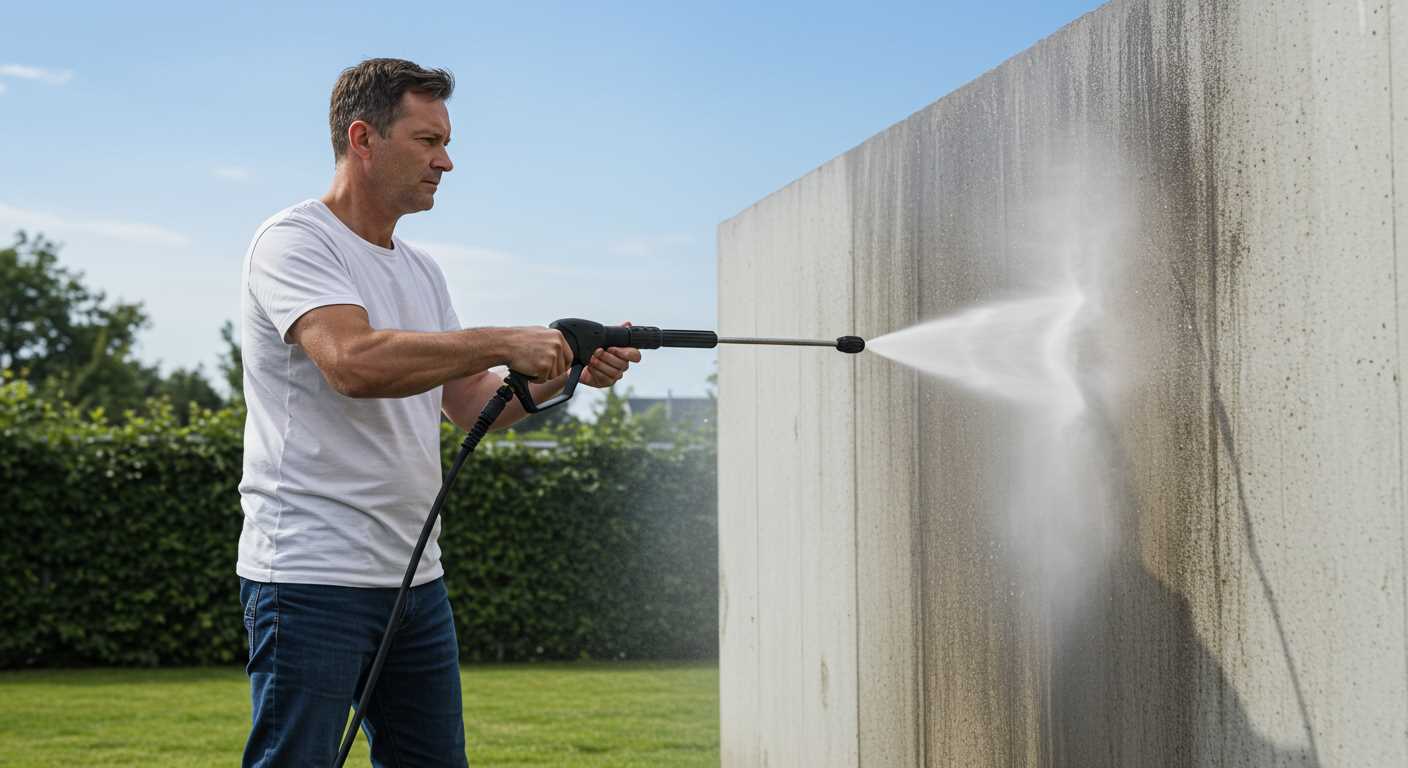
First and foremost, ensure you choose the right fluid for your machine; the wrong type can cause significant damage. I recall a time when a friend used a non-compatible product, resulting in costly repairs. Always opt for a solution designed specifically for your equipment’s model.
Next, prepare your machine by thoroughly draining any remaining water from the system. I’ve seen many units suffer from freeze damage simply because users overlooked this step. Disconnect all hoses and let the unit run for a few moments to clear out any residual moisture.
Once the system is drained, it’s time to introduce the fluid into the pump. Follow the manufacturer’s instructions closely; I usually fill the pump with the fluid until it reaches the recommended level. It’s essential to avoid overfilling, which can lead to operational issues later on.

After adding the solution, run the machine for a minute or two to ensure it circulates throughout the entire system. This step is crucial; I once skipped this and ended up with a section of the pump that froze overnight. Always make sure the fluid reaches every nook and cranny.
Finally, store your equipment in a dry, temperature-controlled environment. I’ve learned the hard way that leaving machines outdoors can result in unexpected problems come spring. A little preparation goes a long way in extending the life of your equipment.
Applying Anti-Freeze to Your Cleaning Equipment
Begin with the machine completely off and disconnected from any power source. This ensures safety and prevents accidental activation.
Follow these steps for proper application:
- Drain all water from the system. Remove any hoses and run the unit until no liquid comes out.
- Locate the inlet for the cleaning fluid. Typically, it’s near the pump. This is where you’ll pour the protective solution.
- Pour the recommended amount of anti-freeze into the intake. Check your manufacturer’s guidelines for specific measurements.
- Reconnect hoses and power supply, then run the machine for a minute or two. This distributes the fluid throughout the internal components.
- Finally, disconnect everything again and store the equipment in a dry place to prevent moisture accumulation.
After several seasons of maintaining my own units, I’ve learned that consistent care leads to a longer lifespan. If issues arise, particularly with the nozzle or trigger mechanism, you might want to check out some tips on gun repair on a pressure washer.
Regular application of this protective fluid has saved my machines from harsh winter conditions more than once. It’s a small effort that yields significant benefits in the long run.
Understanding the Importance of Anti-Freeze
Every winter, I make it a point to prepare my cleaning equipment for the colder months. The consequences of neglecting this can be disastrous; I’ve seen machines suffer severe damage due to freezing temperatures. Here’s what I’ve learned:
- Protects internal components: The liquid prevents water inside the unit from freezing, which can lead to cracked pumps and damaged seals. I’ve had close calls where a simple freeze could have resulted in costly repairs.
- Extends lifespan: Regularly applying this protective solution can significantly prolong the life of your device. In my experience, those who took the time to protect their equipment enjoyed many more seasons of reliable service.
- Avoids downtime: Imagine facing a malfunction just when you need your gear the most. Eliminating the risk of freeze damage means you can rely on your tools all year round.
- Enhances performance: Keeping the internal system free of ice ensures smoother operation. I’ve noticed that machines treated with this fluid operate without the strain that freezing can cause.
From my years in the industry, I can confidently say that overlooking this step is a mistake that can have long-lasting effects. It’s a small effort that yields significant rewards, ensuring your gear remains functional and efficient throughout its lifespan.
Choosing the Right Type of Anti-Freeze
Selecting the correct formulation is vital for safeguarding your equipment. I’ve had experiences with various types, and not all products are created equal. Look for non-toxic options that are safe for the environment, especially if you’re working around plants or pets.
Types of Formulations
There are generally two types: propylene glycol and ethanol-based solutions. I prefer propylene glycol; it’s less harmful and effective at lower temperatures. Ethanol-based products can be risky–especially in terms of flammability and potential damage to seals and gaskets.
Consider Viscosity and Concentration
Check the viscosity; a thicker solution can coat internal components better. Concentration matters too. Some brands offer concentrated formulas that need dilution, while others come ready to use. Personally, I favour those that are ready to pour, eliminating any guesswork. Always read the label for proper storage and disposal instructions.
For additional cleaning tips, you might find this guide on how to clean algae from fish tank glass useful, especially when it comes to maintaining your equipment in optimal condition.
Preparing Your Equipment for Anti-Freeze Application
Begin with the engine. Ensure it’s turned off and completely cool before proceeding. Disconnect the spark plug wire to prevent accidental starts while working on the system. This step is crucial for your safety.
Draining the System
Next, drain all the water from the unit. Locate the drain plug or valve and open it to let any remaining liquid escape. Tilt the machine slightly to ensure all water is eliminated from the pump and hoses. Leaving water can cause internal damage during freezing temperatures, so be thorough.
Applying the Solution
Once drained, reattach the drain plug and connect the siphon hose to the inlet. Place the other end into the container with the chosen solution. Start the machine briefly to draw the fluid into the system, allowing it to circulate. Monitor the process; you may need to stop briefly to check if the solution is flowing properly. Keep an eye on the output; it should run clear, indicating that the solution has filled the internal components.
After a few moments, turn off the machine, disconnect the siphon hose, and remove any excess solution from the exterior. Store your unit in a dry place, ideally sheltered from extreme cold.
These straightforward steps will ensure your equipment remains in peak condition, ready for use when the weather warms up again.
Steps to Safely Add Anti-Freeze to the System
Begin by ensuring the unit is completely turned off and disconnected from the power source. This eliminates any chance of accidental activation during the process. Remove any existing fluid from the tank; this is crucial to prevent mixing with the new solution.
Next, locate the inlet where you will introduce the coolant. If your model has a siphon tube, attach it securely to the container of the freeze-protection liquid. If not, a funnel can be used to pour the solution directly into the tank. Always refer to the manufacturer’s guidelines to determine the correct amount required.
Flushing the System
Once the coolant is added, it’s essential to flush the system to ensure that it circulates properly. Engage the trigger on the gun to let the mixture flow through the hoses and out of the nozzle. This step guarantees that every part of the water system is treated effectively. Keep the trigger pulled until you see the anti-freeze coming out of the nozzle, indicating the system is fully filled.
Final Checks and Storage
After flushing, turn off the machine and disconnect the container. Inspect all connections and hoses for any leaks. Store the unit in a dry, sheltered place to protect it from extreme temperatures. This simple routine not only prolongs the life of your equipment but also ensures it’s ready for action when the weather warms up again.
Flushing Out the Anti-Freeze After Winter
First thing to do is to gather your tools: a bucket, fresh water, and a garden hose. Start by disconnecting the water source from your unit. This prevents any residual liquid from mixing with the fresh water you’ll be using.
Next, attach the garden hose to the inlet of your machine. Ensure it’s secured tightly to avoid leaks. Place the other end of the hose into a bucket to catch the expelled fluid. If your model has a detergent tank, make sure it’s empty or rinsed out to prevent contamination.
Now, turn on the water supply and let the system fill. Once the water starts flowing through, switch on the motor to allow the liquid to circulate. It’s critical that you let this run for about 5-10 minutes. This duration ensures that all traces of the winter solution are flushed out from the internal components.
While the machine is running, check for any unusual sounds or leaks. If you notice anything odd, it’s best to stop and inspect the unit before proceeding further. After the flushing period, turn off the motor and disconnect the hose.
Finally, check the bucket for any remnants. You want to ensure that nothing has been left behind. Reconnect your water source and perform a test run with plain water. This helps confirm that everything is clear and functioning properly. If the output is consistent and clean, your equipment is ready for the upcoming season.
Identifying Signs of Anti-Freeze Related Issues
Monitor for unusual noises during operation, which could indicate that the fluid is not circulating properly. A gurgling sound or excessive vibrations might suggest blockages or improper application of the liquid. Additionally, check for any leakage around the connections; if you notice fluid pooling, it may point to a compromised seal or a faulty component.
Temperature Fluctuations
Be aware of changes in temperature readings on your device. If the gauge shows temperatures that are lower than expected, it may signal that the coolant is not functioning as intended. Regularly inspect hoses for cracks or signs of wear, as these can lead to diminished performance and potential freezing damage.
Performance Issues
If the unit struggles to maintain pressure or exhibits inconsistent flow, it may be suffering from issues related to the coolant. This inconsistency can affect cleaning efficiency. If you’ve winterized your equipment but are now facing these problems, it’s wise to reevaluate the application process and the type of fluid you’ve chosen. A thorough inspection of filters and nozzles is also advisable, as they can become obstructed if not properly maintained.
Maintaining Your Pressure Washer Throughout the Season
Regular upkeep is key to ensuring your cleaning equipment performs optimally. After using your machine, always clean the nozzle and any attachments. A clogged nozzle can drastically reduce efficiency and lead to uneven spray patterns.
Check the oil levels frequently. If your unit has a gas engine, monitor the oil quality and change it as needed. Dirty oil can damage internal components, leading to costly repairs.
Inspect hoses for cracks or leaks. Even small damages can lead to significant pressure loss. If you notice any issues, replace the hose immediately to prevent further problems during operation.
Consider flushing the system with clean water after each use. This helps remove any residual detergent or debris, preventing buildup that can impair performance over time.
Store your equipment in a dry environment to avoid rust and corrosion. If you’re in a region with harsh winters, ensure all water is drained from the system before storing it away.
Finally, keep an eye on the pump. Listen for unusual sounds during operation, as these may indicate wear or damage. Regular checks can help you catch potential issues before they escalate.
Storing Your Machine Properly with Anti-Freeze
To ensure longevity and peak performance of your equipment during off-seasons, proper storage is critical. After winterising your machine with a freeze protection solution, follow these storage steps.
First, select a cool, dry location free from direct sunlight. Avoid damp areas that can cause corrosion. Ideally, the storage area should maintain a stable temperature above freezing to prevent any potential risk of freezing residual liquid.
Next, disconnect all hoses and attachments. This action prevents any trapped liquid from causing damage. After disconnection, clean all components with warm soapy water to remove any debris or residue. Rinse thoroughly and allow them to dry completely before storing.
For the unit itself, check the fuel tank. If applicable, fill it with fuel stabiliser to prevent degradation. Run the engine briefly to circulate the stabiliser, then turn it off. This practice helps keep the fuel system in optimal condition.
Store the unit upright to prevent leaks. If you have a cover, use it to protect the machine from dust and moisture. Here’s a quick checklist:
| Step | Description |
|---|---|
| Location | Store in a cool, dry place away from sunlight. |
| Disconnect | Remove hoses and attachments, clean and dry them. |
| Fuel System | Add fuel stabiliser and run the engine briefly. |
| Storage Position | Keep the unit upright to avoid leaks. |
| Protection | Cover the unit for additional protection from dust. |
Regular checks during the storage period can help identify any issues before the next season. By following these guidelines, you’ll ensure that your equipment remains in prime condition, ready for action when the time comes to put it back to work.
FAQ:
What is the purpose of using anti-freeze in a pressure washer?
Using anti-freeze in a pressure washer helps prevent the internal components from freezing during cold weather. This is particularly important for the pump and other parts that could be damaged by ice formation. Anti-freeze acts as a protective measure, ensuring that the machine remains in good working condition when temperatures drop.
How do I add anti-freeze to my pressure washer?
To add anti-freeze, first ensure that the pressure washer is turned off and disconnected from the power source. Locate the water inlet and remove any attachments. Pour the anti-freeze directly into the water inlet until it fills the system. After that, start the machine briefly to allow the anti-freeze to circulate through the pump and hoses. Make sure to follow the manufacturer’s instructions for the specific type of anti-freeze recommended for your model.
Can I use regular automotive anti-freeze in my pressure washer?
It is not advisable to use regular automotive anti-freeze in a pressure washer unless specified by the manufacturer. Automotive anti-freeze contains additives that may not be suitable for the materials used in pressure washers. It is better to use a product specifically designed for pressure washers or one that is marked as safe for such equipment to avoid potential damage.
How often should I use anti-freeze in my pressure washer?
The use of anti-freeze depends on your local climate. If temperatures regularly drop below freezing and you plan to store your pressure washer for winter, it’s wise to use anti-freeze at the end of the season. If you live in a milder area, regular use may not be necessary. Always refer to your owner’s manual for guidance on seasonal maintenance.
What are the signs that my pressure washer has been damaged by freezing?
Signs of freeze damage in a pressure washer include leaks, cracks in the pump housing, and reduced water pressure during operation. If you notice any of these issues, it may indicate that ice has caused internal harm. It’s essential to inspect your machine thoroughly and seek repairs if necessary, especially before using it again in warmer weather.
.jpg)


