


Before you even plug in the unit, ensure you have the right attachments ready. I’ve found that having a variety of nozzles on hand can dramatically affect the outcome of your cleaning task. For instance, the 25-degree nozzle is perfect for general cleaning, while the 15-degree one excels at removing stubborn stains.
Next, always start with a thorough inspection of your equipment. I once skipped this step, and it resulted in a frustrating experience when a clogged filter hindered my progress. Check the hoses for any cracks and ensure all connections are secure. This simple act can save you time and headache later on.
Water source considerations are paramount. Make sure the hose you connect to is not only long enough but also free of kinks. I remember a time when I had to frequently reposition my setup due to a short supply line, which wasted valuable time. A solid, uninterrupted water flow is key to achieving the best results.

Adjusting the pressure settings based on the surface you’re cleaning can make all the difference. I learned this the hard way while attempting to clean an old wooden deck. Using too high a setting led to splintering, which was far from the desired outcome. It’s often best to start low and gradually increase until you find the sweet spot.
Finally, don’t forget safety gear. A pair of sturdy gloves and some protective eyewear can prevent injuries from flying debris. I’ve had my share of close calls, and trust me, it’s better to be safe than sorry. Taking these precautions will ensure your cleaning session is not only productive but also enjoyable.
Choosing the Right Nozzle for Your Task
For effective cleaning, selecting the correct nozzle is paramount. Each type has specific applications. The red nozzle, with a narrow spray, is ideal for tackling tough stains on surfaces like concrete. I recall using it to remove paint from a driveway, which was remarkably satisfying. You can find more about this technique on this guide.
The yellow nozzle offers a wider spray than red, perfect for stripping dirt from patios or decks without damaging the surfaces. I often choose this one for cleaning garden furniture–it effortlessly blasts away grime.
For delicate tasks, the green nozzle is your best friend. It provides a balanced spray that’s effective yet gentle, making it suitable for surfaces like laminate floors. I had great success using it on my own floors, ensuring they looked spotless. If you’re interested in tips for cleaning laminate, check out this article.
Lastly, the white nozzle is ideal for applying soap. It creates a fan spray that covers more area, perfect for pre-treating surfaces before a thorough rinse. I usually switch to this one when washing my car to ensure even soap distribution.
Choosing the right nozzle transforms your cleaning tasks, making them quicker and more efficient. Each nozzle serves a purpose–knowing when to use them will save you time and effort, leading to better results in all your cleaning endeavours.
Preparing Your High-Pressure Cleaner for Action
Before getting started, ensure the machine is on a stable surface. I recall a time when I took a chance and placed mine on uneven ground; it caused unnecessary strain and made the task more difficult. Always check the oil level in the pump. A low oil level can lead to overheating and potential damage, something I learned the hard way during one of my early days.
Next, fill the tank with the appropriate cleaning solution. I prefer to use biodegradable detergents, as they’re safer for the environment and still deliver excellent results. Always mix the detergent according to the manufacturer’s instructions; getting this ratio wrong can lead to subpar performance or even damage the unit.
Connect the water supply securely. I once had a loose connection that resulted in a frustrating and messy delay. Make sure the hose is free from kinks and blockages. An unobstructed water flow is crucial for optimal operation. A good tip is to run the water through the hose for a few seconds before connecting it to the machine to ensure there’s no debris that might clog the system.
After that, attach the desired nozzle. It’s a common mistake to forget this step, leading to ineffective cleaning. I’ve often switched nozzles mid-task to tackle different surfaces, which can save time and improve results significantly. Always check the nozzle for clogs and clean it if necessary. A simple pin can clear out any stubborn debris.
Lastly, plug the machine into a suitable power source. Ensure the extension cord is rated for the wattage required. In my experience, using an inadequate cord can lead to power issues and even potential hazards. Once everything is set, give a quick check for leaks or unusual noises before firing it up. It’s a small step that can save you from larger headaches later on.
Connecting the Pressure Cleaner to a Water Source
Ensure a steady water supply before getting started. It’s vital to connect your cleaner to a reliable water source to avoid any interruptions during operation.
Follow these steps for a proper connection:
- Locate the water inlet on the machine, usually situated at the back or side.
- Choose a suitable garden hose, ideally one that is at least 1/2 inch in diameter to allow for sufficient water flow.
- Attach one end of the hose to the water faucet and the other end to the inlet on the cleaner. Make sure the connection is tight to prevent leaks.
- If necessary, use hose washers to enhance the seal at both ends, ensuring no water escapes.
Before turning on the water supply, check for any kinks or blockages in the hose. A clear path is essential for optimal performance.
Once everything is connected, turn on the faucet gradually. This helps to avoid sudden pressure spikes that may damage the equipment. Watch for leaks at the connections and tighten if needed.
After securing the connections, you can proceed to the next phase of your cleaning task with confidence, knowing that your water supply is reliable and ready for action.
Starting Your Pressure Cleaner Safely
Always wear protective gear before switching on your equipment. Safety glasses, gloves, and sturdy footwear are crucial to prevent injuries from debris or water spray.
Check your surroundings for obstacles or hazards that could pose a risk. Clear the area of any loose items, such as garden tools or toys, to ensure a safe working environment.
- Ensure the power cord is in good condition, free from frays or damage.
- Verify that the water supply is turned on and that hoses are securely connected to avoid leaks.
- Position the unit on a stable surface to prevent tipping over during operation.
Before starting the motor, ensure the nozzle is attached correctly and that you are standing at a safe distance from the outlet. Pull the trigger to release any trapped air in the system, which helps avoid sudden bursts of water when you switch on the machine.
Start the motor according to the manufacturer’s instructions, typically by turning the ignition key or pressing the start button. Maintain a firm grip while activating the trigger to control the flow of water effectively.
Once operational, always keep your body clear of the nozzle to prevent any accidents. If you need to stop, release the trigger and turn off the motor completely before making any adjustments or moving the machine.
Adjusting Pressure Settings for Different Surfaces
Set the pressure according to the surface you’re working on to avoid damage. For delicate materials like painted wood or vinyl siding, a lower setting around 1200-1500 PSI is ideal. This prevents stripping paint or causing dents. I once tackled a patio table made of pine; I started with a gentle 1300 PSI and achieved a clean finish without harming the wood grain.
Concrete and Brick
For tougher surfaces such as concrete or brick, increase the pressure to around 2500-3000 PSI. This higher setting effectively removes stubborn stains like oil or algae. During a recent project, I cleaned old brickwork with 2700 PSI, which restored its original look without any adverse effects. Just keep the nozzle at a safe distance–about 12 inches–to prevent surface damage.
Vehicles and Equipment
When cleaning cars or garden equipment, adjust to about 1500-2000 PSI. Use a wide-angle nozzle to distribute the water evenly and avoid dings on the paint. I remember cleaning my truck; I opted for 1600 PSI and the 25-degree nozzle. The results were impressive, and the paint remained intact. Always rinse from bottom to top to prevent streaking.
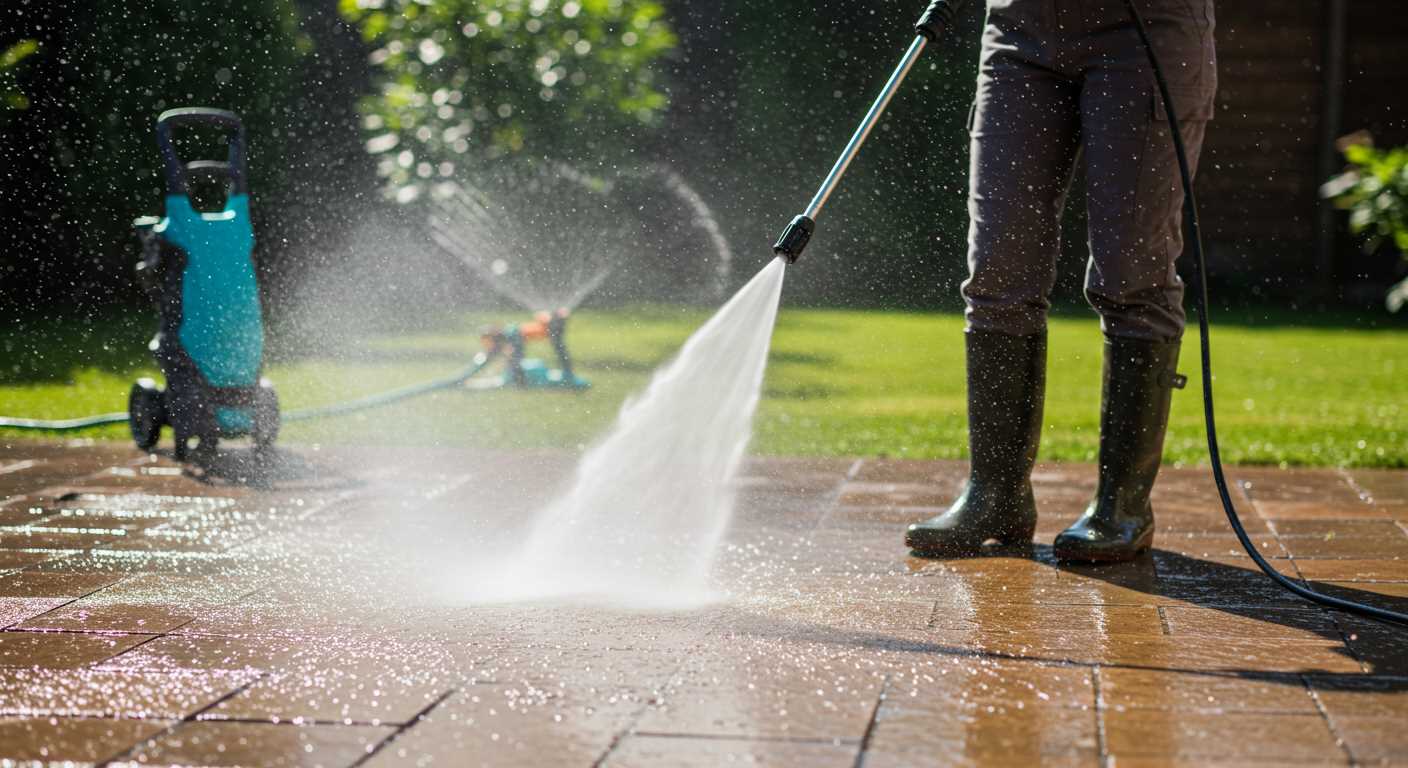
Proper techniques for cleaning various materials
For concrete surfaces, maintain a distance of 12 to 18 inches to avoid damage. Use a sweeping motion, overlapping each pass slightly. This method helps eliminate dirt and stains without etching the surface. After treating stubborn stains, a second pass at a lower pressure can yield better results.
Wood requires a gentler touch. Keep the nozzle at least 24 inches away and always operate at a lower setting. Move with the grain to prevent splintering. Test a small, inconspicuous area first. I’ve seen too many decks ruined by improper techniques, so caution is paramount.
For vehicles, the fan tip is ideal. Maintain a distance of about 2 feet and avoid high pressure on painted surfaces. Clean from the top down, allowing dirt to fall away. A lower pressure setting protects the finish, and a dedicated car soap attachment can enhance cleaning without risking damage.
When tackling outdoor furniture, adjust the distance based on the material. For plastic, aim for 18 inches, while aluminium can handle a bit more pressure. I once cleaned an entire patio set using a fan nozzle and was amazed at how quickly grime disappeared without any scratches.
Brick and stone require a careful approach. A 15-degree nozzle works well, but keep it at least 12 inches away. Use a consistent motion, and don’t linger too long on any section to prevent erosion. Years ago, I learned this the hard way when I accidentally chipped a brick by getting too close.
Lastly, when cleaning windows or glass surfaces, employ a wide fan spray and maintain a distance of around 3 feet. This prevents streaks and ensures a clear finish. I’ve found that using a dedicated attachment for glass can significantly improve results and save time.
Maintaining Your Equipment After Use
After completing a cleaning task, it’s crucial to take a few minutes to care for your machine. First, disconnect it from the water supply. This prevents any potential backflow issues. Next, let the machine run for about a minute without water. This clears out any remaining cleaning solution or debris from the nozzle and pump. Trust me, this simple step can extend the life of your gear significantly.
Cleaning the Nozzle and Hose
After running the equipment without water, inspect the nozzle. Any clogs can hinder performance. Use a small pin or a brush to clear any blockages. Rinse the hose thoroughly to remove any soap residue, which can cause deterioration over time. I’ve seen many units fail due to neglecting these small but vital tasks.
Storing Your Equipment Properly

Once everything is cleaned, store your gear in a cool, dry place. If you can, keep it covered to protect it from dust and moisture. I learned the hard way that exposure to the elements can lead to rust and other damage. Lastly, check the oil levels regularly if your model requires it. Regular maintenance keeps the machine ready for action whenever you need it next.
Troubleshooting Common Issues with Your Cleaning Equipment
When your equipment isn’t delivering the performance you expect, it’s time to troubleshoot. One common issue is the machine not starting. First, check the power source; ensure the cord is plugged in securely and the outlet is functioning. If everything seems fine, inspect the reset button or fuse for any triggers.
No Water Flow
No water flow can be frustrating. First, confirm that the water source is turned on and the hose is free of kinks. If the hose is clear, check the inlet filter for debris. A clogged filter can restrict water flow, so rinse it thoroughly before reassembling.
Low Pressure Output
Low output pressure is often due to nozzle obstruction. Remove the nozzle and inspect it for blockages. Rinsing it under water usually does the trick. If the problem persists, examine the connections; loose fittings can lead to pressure loss. Tighten all connections and run the unit again.
| Issue | Possible Cause | Solution |
|---|---|---|
| Machine won’t start | Power source issue | Check plug and outlet |
| No water flow | Clogged inlet filter or kinked hose | Clear hose and clean filter |
| Low pressure output | Blocked nozzle or loose connections | Clean nozzle and tighten fittings |
| Excessive vibrations | Worn or damaged components | Inspect and replace parts as necessary |
| Water leaks | Loose fittings or damaged seals | Inspect seals and tighten fittings |
Should you encounter excessive vibrations, inspect the components for wear. Damaged parts can cause instability. Replace any worn-out pieces to restore smooth operation.
Leaks can stem from loose fittings or damaged seals. Regularly check these areas, and if you find any issues, tighten the fittings or replace the seals as needed. Keeping an eye on these common problems can greatly enhance your experience and extend the life of your equipment.
.jpg)


