


For an outstanding clean, combining the right tools is key. I recommend starting with a quality foam cannon attached to your high-pressure cleaning unit. This setup allows for an even application of cleaning solutions, ensuring that dirt and grime are thoroughly lifted from surfaces.
Adjust the dilution ratio of your cleaning solution to match the task at hand. For instance, a 1:10 ratio works wonders on lightly soiled areas, while tougher stains may require a stronger mix. I recall a time when I tackled an old vehicle covered in grime; the right solution applied with a foam cannon made the cleaning process not only easier but also enjoyable.

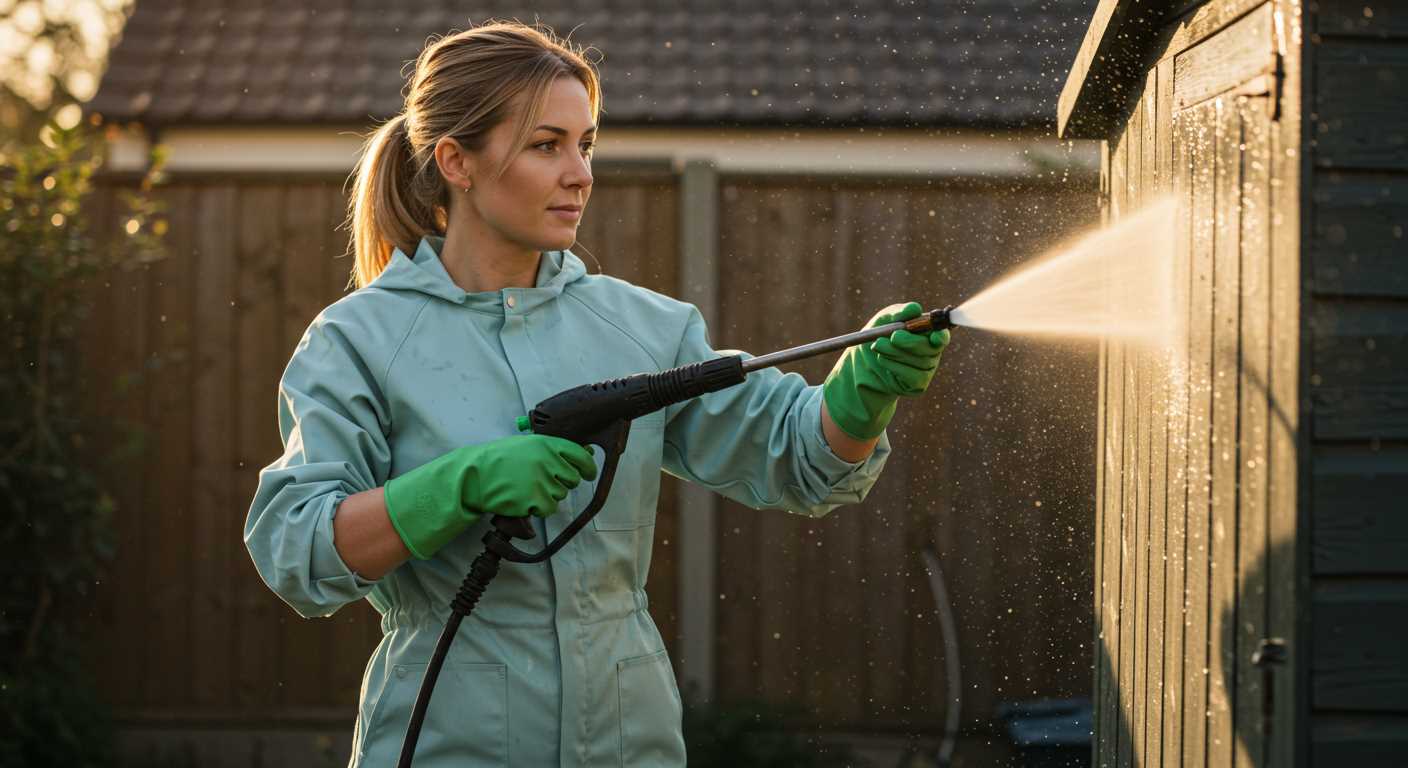
While applying the foam, maintain a distance of about 3 to 4 feet from the surface. This distance helps in creating a thick layer of foam that clings effectively, providing ample time for the cleaning agents to work their magic. I’ve found that using a sweeping motion while spraying ensures complete coverage, which is crucial for achieving that spotless finish.
After allowing the foam to dwell for a few minutes, follow up with a gentle rinse. Avoid using too narrow a spray pattern, as this can risk damaging delicate surfaces. Instead, opt for a wider fan spray to rinse away the foam efficiently, revealing the clean surface beneath.
Effective Application Techniques
Begin by preparing the cleaning solution according to the manufacturer’s instructions. Dilution ratios are critical; too strong can damage surfaces, while too weak may not provide the desired results. Use a clean container to mix your solution thoroughly.
Setting Up the Equipment

Once the mixture is ready, attach the detergent reservoir to your machine. Ensure it’s securely fastened to prevent leaks. Next, select the appropriate nozzle for your task; a wide-angle nozzle works best for spreading the foam evenly.
- Check the foam applicator for any clogs or damages.
- Connect your garden hose to the water inlet and ensure all connections are tight.
- Turn on the water supply before starting the motor.
Application Process
With everything set, turn on the motor and allow it to reach the necessary pressure. Begin applying the foam from the bottom of the surface and work your way up. This technique prevents streaks and ensures even coverage.
- Maintain a consistent distance of around 3 feet from the surface.
- Make overlapping passes to ensure complete coverage.
- Allow the foam to sit for the recommended time to break down grime.
After the foam has dwelled, rinse off thoroughly using a high-pressure spray. Start from the top and work your way down, ensuring all residues are washed away. Regularly check the nozzle to avoid blockages during rinsing.
Finally, clean the equipment after each use. Rinse the foam applicator and reservoir to prevent residue build-up. Store your tools in a dry place to prolong their lifespan.
Choosing the Right Foamer for Your Pressure Washer
For optimal results, it’s vital to select the correct type of foamer that suits your cleaning equipment. Here’s a straightforward approach to make an informed choice:
Types of Foamers
- Adjustable Foam Cannons: These allow you to control the foam output. I recommend this type, especially for varying cleaning tasks. You can tweak the nozzle and dilution ratio for desired coverage.
- Foam Guns: Perfect for light-duty applications, foam guns connect directly to a garden hose. They’re easy to use, but don’t provide the same effectiveness as a cannon for heavy-duty jobs.
Compatibility
Check the specifications of your high-pressure cleaner to ensure compatibility. Most foamers come with fittings that suit standard models, but it’s wise to verify. I once faced compatibility issues because I didn’t double-check the connection size.
Material Quality
- Brass Components: Opt for foamers with brass fittings. They resist corrosion better than plastic and last longer.
- Durable Housing: Look for tough materials that can withstand high pressure and chemicals. I’ve had foamers fail due to poor-quality plastics.
Price vs. Performance
Invest wisely. While cheaper options may seem appealing, they often compromise on performance and durability. I’ve learned that spending a little more upfront can save money in the long run by avoiding frequent replacements.
Choosing the right attachment is a blend of understanding your specific needs and considering the capabilities of your equipment. Make informed decisions, and you’ll notice a significant difference in your cleaning efficiency.
Preparing Your High-Pressure Cleaning Device for Foaming
Ensure the machine is on a stable surface and securely connected to a water supply. Check the hose for any leaks or kinks that could affect water flow. A steady supply of water is crucial for optimal performance.
Next, inspect all fittings and connections. Tighten any loose parts to prevent unwanted leaks during operation. I once faced an embarrassing situation at a client’s home due to a loose connection, which resulted in a soapy mess instead of the desired foam.
Before incorporating the foaming sprayer, rinse the system briefly to clear any residual detergent or debris. This step can save you from mixing incompatible products, which can damage the components.
Adjust the pressure settings according to the manufacturer’s guidelines. If the unit has multiple settings, opt for a lower pressure initially to avoid overshooting the foam application. Too high a pressure can lead to uneven coverage and wastage.
Fill the foam container with your chosen cleaning solution, ensuring it meets the compatibility requirements of your sprayer. I’ve had great success using pH-neutral soaps, which are gentle yet effective on various surfaces.
| Step | Description |
|---|---|
| 1 | Secure the machine on a stable surface |
| 2 | Inspect all hose connections for leaks |
| 3 | Rinse the system to clear residuals |
| 4 | Adjust pressure settings as per guidelines |
| 5 | Fill container with compatible cleaning solution |
Lastly, perform a quick test run without the foam attachment. This ensures everything is functioning correctly and provides an opportunity to make adjustments before applying foam to your surfaces.
Mixing Soap Solution for Optimal Foam Creation
For achieving that thick, clingy lather, the proper ratio of soap to water is crucial. From my extensive experience, I’ve found that a mixture of 1 part soap to 4 parts water typically yields excellent results. Start by selecting a high-quality detergent specifically designed for foaming applications. Avoid household cleaners that can damage surfaces or leave residues.
Measuring and Mixing
Using a measuring cup can help maintain consistency. Pour the soap into a clean bucket, then add water slowly while stirring gently to prevent bubbles from forming prematurely. It’s important to mix thoroughly; any undissolved soap may clog the sprayer later. If you prefer a stronger solution for tougher grime, adjust the ratio to 1:3, but be cautious–too much soap can lead to excessive foam that may not rinse away easily.
Testing the Solution
Before applying it to your entire surface, conduct a patch test on a small, inconspicuous area. This step ensures that the solution won’t cause any damage or discolouration. If the test area shows no adverse effects after a few minutes, you’re ready to proceed. Adjust the concentration based on your results; some surfaces may react differently, and tailoring your mix will yield the best outcome.
Additionally, consider the temperature of the water. Warm water can enhance the soap’s effectiveness, helping it to break down grease and grime more effectively. Just be sure not to exceed the manufacturer’s temperature recommendations for your equipment.
By carefully mixing your soap solution and making adjustments based on your observations, you’ll create an optimal blend that maximises foaming power and cleaning efficiency.
Setting Up the Foamer Attachment Correctly
Ensure the attachment is securely connected to your cleaning unit’s spray wand. A loose connection can lead to leaks, reducing effectiveness. Check that the O-ring is intact and positioned properly to create a tight seal.
Adjust the nozzle to the desired spray pattern. For broader coverage, opt for a wider fan setting, while a tighter stream is ideal for targeted applications. Experiment with different angles to maximise foam distribution on surfaces.
Verify the soap reservoir is filled with the appropriate solution. The mixture should align with the manufacturer’s recommendations for optimal results. Some solutions work better at specific dilutions, so take note of any guidance provided.
Before starting, ensure the unit is set to the correct pressure setting. Lower pressures are often more effective for applying foam, as they allow for better adhesion to surfaces, especially on delicate materials like vinyl. If you’re cleaning siding, consider researching best vinyl siding cleaners to find suitable products.
Finally, don’t forget to test the setup on a small, inconspicuous area before proceeding with larger surfaces. This step helps confirm that your attachment is functioning correctly and that the soap solution behaves as expected without damaging the surface.
Applying Foam Evenly on the Surface
For an even application of suds, maintain a consistent distance of around 2 to 3 feet from the surface. This distance allows the foam to expand and cling effectively, creating a thick layer that adheres to dirt and grime.
Start from the bottom and work your way up to prevent streaks and ensure all areas are covered. Employ a sweeping motion, moving horizontally across the surface. Overlapping passes slightly helps in achieving uniform coverage. Pay attention to corners and edges, as these areas often accumulate more dirt.

Adjust the nozzle for a wider spray pattern. A fan spray setting disperses the foam more broadly, allowing for quicker coverage of larger surfaces. If you notice spots that are missed, go back and touch them up with a focused spray to ensure no contaminants are left behind.
Consider the ambient conditions. On hot days, foam can dry quickly, so work in shaded areas if possible. If the soap starts to dry before you can rinse, it can leave behind residue. In cooler weather, you might need to apply a thicker layer to compensate for slower breakdown.
After applying the foam, allow it to sit for several minutes before rinsing. This dwell time enables the cleaning agents to penetrate and loosen dirt, leading to a more thorough clean when you do rinse it away.
Adjusting Pressure Settings for Best Results
For optimal cleaning performance, calibrate the force of your machine according to the surface being treated. Soft surfaces, like cars or painted fences, benefit from lower settings–typically around 1200 to 1500 PSI. Higher pressures can damage delicate finishes. For tougher materials, such as concrete or brick, increase the pressure to 2500 PSI or more, ensuring grime and stains are effectively removed.
Always start at a lower setting, especially if you’re unsure. This approach allows you to test the effectiveness without risking damage. If the foam isn’t adhering well or the dirt remains stubborn, incrementally adjust the pressure upwards while monitoring the results.

Remember, a quick adjustment can make a significant difference. I once tackled a particularly grimy patio–initially set the pressure too high, which caused some chipping. After lowering it a notch, the foam clung better and lifted the dirt without any damage.
Check the manufacturer’s recommendations for the specific model in use; they often provide valuable guidelines on pressure settings. Additionally, for more information on related techniques, consider exploring topics like sandblasting with a high pressure cleaner is that possible.
Adjusting the pressure is not just about power; it’s about finesse. Finding the right balance can transform a challenging cleaning session into a successful one, ensuring surfaces are cleaned thoroughly and safely.
Cleaning and Maintaining Your Foamer After Use
After finishing a cleaning task, immediately rinse the attachment with clean water. This prevents soap residue from hardening and clogging the nozzle. I remember one time I neglected this step, and it took me ages to clear the blockage the next time I wanted to get started.
Disassemble the foaming unit carefully. Remove any components that can be taken apart and rinse them separately. Pay special attention to the filter and nozzle, as these areas can accumulate grime quickly. A soft brush works wonders for this. I often keep an old toothbrush handy for such tasks.
Inspect all parts for wear and tear. If you notice any cracks or damages, replace them before the next session. I once had a nozzle break during a job, which not only slowed me down but also left me with a mess to clean up afterwards.
Store the foamer in a cool, dry place. Avoid leaving it in direct sunlight or extreme temperatures, as these conditions can degrade the materials. I learned this lesson the hard way when I found my foam cannon warped after a summer stored in the shed.
Regularly check the hoses for leaks or kinks. Maintaining the integrity of these components ensures consistent performance. If you spot any issues, replace the hoses promptly to avoid further complications.
Finally, consider running a cleaning solution through the system every few uses. This keeps the internal parts clean and functioning optimally. I make a habit of this, and it has significantly extended the lifespan of my equipment.

.jpg)
.jpg)


