


Begin with a thorough inspection of your machine and all attachments. Familiarising yourself with the components can save time and prevent mishaps. Ensure the water inlet filter is clean and free of debris; this simple check can significantly impact performance.
Next, connect the garden hose securely to the inlet. A tight fit prevents leaks and maintains optimal water flow. If you’re using a hose reel, make sure it’s unwound fully to avoid kinks that could restrict water supply. Remember, a steady flow is key to achieving the desired cleaning results.
Before starting the device, select the appropriate nozzle for your task. For tougher grime on surfaces like driveways, opt for a narrower spray pattern. Conversely, a wider spray is ideal for delicate areas such as vehicles or outdoor furniture. Swapping nozzles is effortless and can enhance your cleaning efficiency.
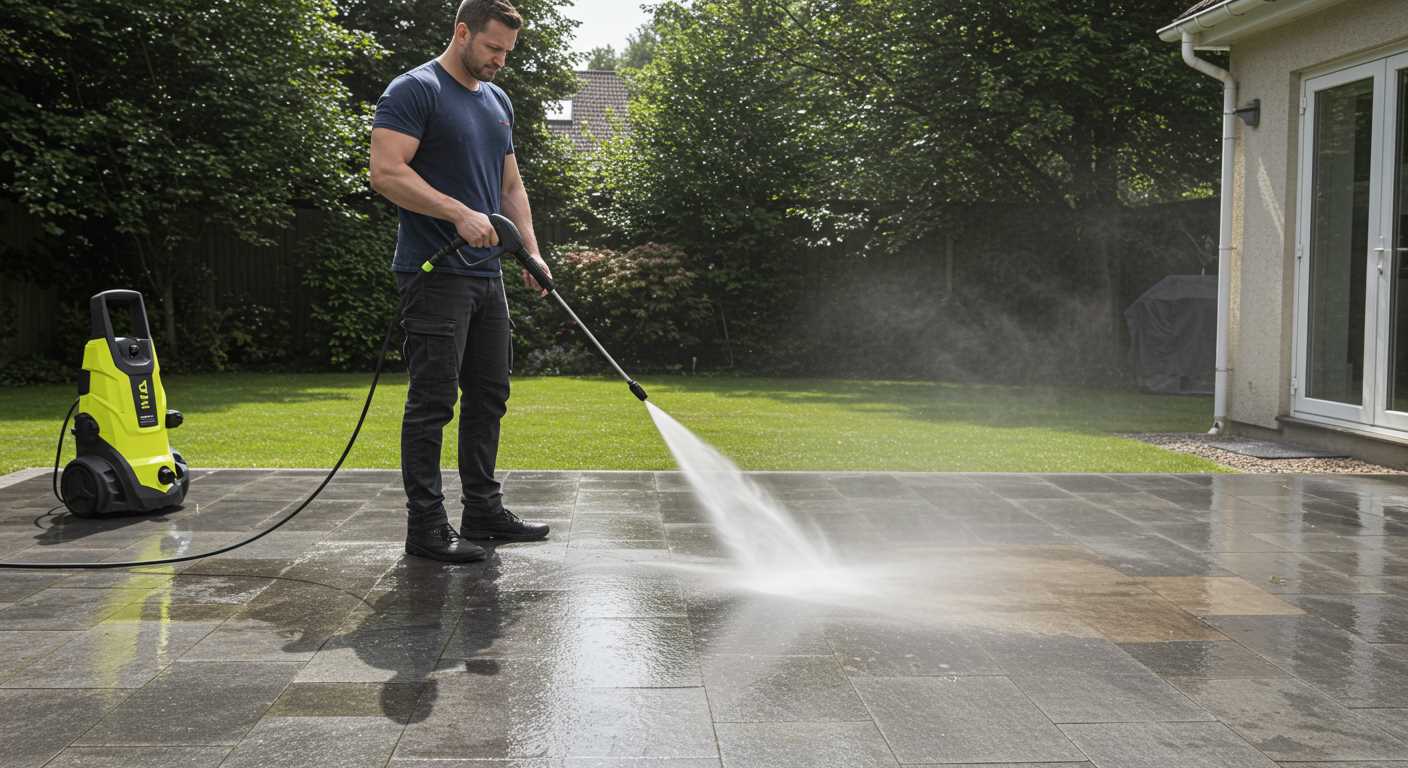
When you begin, hold the wand firmly and maintain a steady distance from the surface. Generally, keeping it around 2 feet away will provide a good balance between pressure and control. Move the spray in a sweeping motion to cover larger areas without missing spots. If you encounter stubborn stains, take your time and approach them at a slower pace.
Post-cleaning, be sure to empty the system. Disconnect the hose and allow any remaining water to drain. This step prevents any potential freezing or buildup that could hinder future performance. Regular maintenance, including storing it in a dry place, will prolong the life of your equipment.
Choosing the Right Nozzle for Your Task
For any cleaning task, selecting the appropriate nozzle can make all the difference. I recall a day when I tackled a particularly stubborn patio covered in grime. I started with a 40-degree nozzle, which was too gentle for the job. It took ages to see any progress. Switching to a 15-degree nozzle transformed the experience, cutting through the dirt in no time.
Each nozzle serves a unique purpose. The 0-degree nozzle delivers a concentrated stream, perfect for removing tough stains like oil or rust. However, it should be used cautiously to avoid damage to delicate surfaces. The 15-degree nozzle provides a more powerful spray and is ideal for concrete driveways or decks. For softer surfaces like wood or vehicles, the 25-degree or 40-degree nozzles are safer options, offering a wider spray that protects while still cleaning effectively.

When working on vehicles, I often opt for a soap nozzle, typically coloured yellow. This nozzle allows for detergent application, ensuring a thorough clean without compromising the paintwork. I remember the satisfaction of seeing my car shine after using the correct nozzle for soap application, followed by a rinsing with a wider nozzle to wash it all away.
Always assess the surface before starting. A good rule of thumb is to begin with the least aggressive option and gradually move to more powerful nozzles if necessary. This approach not only protects your surfaces but also prevents unnecessary wear on the equipment itself. In my experience, having a variety of nozzles on hand makes tackling any cleaning task much smoother.
Setting Up Your Pressure Washer Safely
Ensure a stable and dry location for your machine. I recall a time when I set up on a slightly inclined surface, and it rolled unexpectedly, leading to a minor mishap. Always position your device on a flat area to prevent accidents.
Inspect the power cord for any damage before plugging it in. A frayed or worn cord can lead to electrical hazards. I once had a colleague who ignored this step and faced a shock while working. Don’t skip this check; it’s a small step that can prevent serious injuries.
Connect your water source securely. I learned the hard way that a loose connection can lead to leaks and reduced performance. Make sure that all fittings are tight and that there are no kinks in the hose. This ensures a steady flow and maximises the output.
Wear appropriate safety gear. I often see people underestimate the importance of goggles and gloves. High-pressure streams can cause injury, and I remember a time when a small rock shot out and nearly hit me because I wasn’t wearing protective eyewear. It’s not worth the risk.
Keep your work area clear. I always make it a point to remove any obstacles that could trip me or interfere with my cleaning task. One time, I had a small garden gnome that I didn’t move, and I accidentally knocked it over while moving the wand. A simple clearance can save you from unexpected damage.
Check the nozzle attachment before turning on the machine. I’ve experienced the frustration of a blocked nozzle, which can cause pressure buildup and affect performance. Always ensure that the nozzle is clean and suitable for the job at hand.
Finally, read the manual. I often refer back to the manufacturer’s instructions for specific safety tips and operational guidelines. Each model has its nuances, and familiarising yourself with these details can enhance your experience and safety.
Connecting the Water Supply Properly
Ensure you’re using a garden hose with a minimum diameter of 5/8 inch for optimal water flow. This size prevents any significant pressure loss and maintains a steady supply to the machine. I recall a time when I used a thinner hose, and it caused inadequate performance, leaving me frustrated with the results.
Before connecting, inspect the hose for leaks or kinks that could obstruct the water flow. A simple visual check can save you from a headache later. Once confirmed, attach one end of the hose to the water source, ensuring a tight fit to prevent leaks. I’ve learned the hard way that a loose connection can lead to messy situations, so I always double-check.
Next, connect the other end of the hose to the inlet of your machine. Make sure the connection is secure, as this directly impacts the functionality. In my early days, I neglected this step, which resulted in water spraying everywhere but where I wanted it. Tightening the connection properly can save you time and effort during your cleaning tasks.
Turn on the water supply before starting the motor. This step is crucial; running the unit without water can cause serious damage. I’ve seen many inexperienced users make this mistake, leading to costly repairs. Allow the water to flow for a moment to ensure any air is purged from the system before you switch on the power.
Lastly, if you’re in an area with hard water, consider using a water filter to protect the internal components from mineral buildup. Trust me, taking this precaution can extend the lifespan of your equipment significantly. I’ve seen machines last years longer just because the owner cared for their water supply. Proper setup sets the stage for a successful cleaning experience.
Adjusting Pressure Settings for Different Surfaces
For optimal cleaning, it’s crucial to tailor the pressure settings to match the surface type. Here’s what I’ve learned through years of hands-on experience.
Hard Surfaces
- Concrete: A high setting around 2000-3000 PSI works wonders. It effectively removes tough stains and dirt.
- Pavement: Similar to concrete, aim for 2000 PSI. This tackles embedded grime without damaging the material.
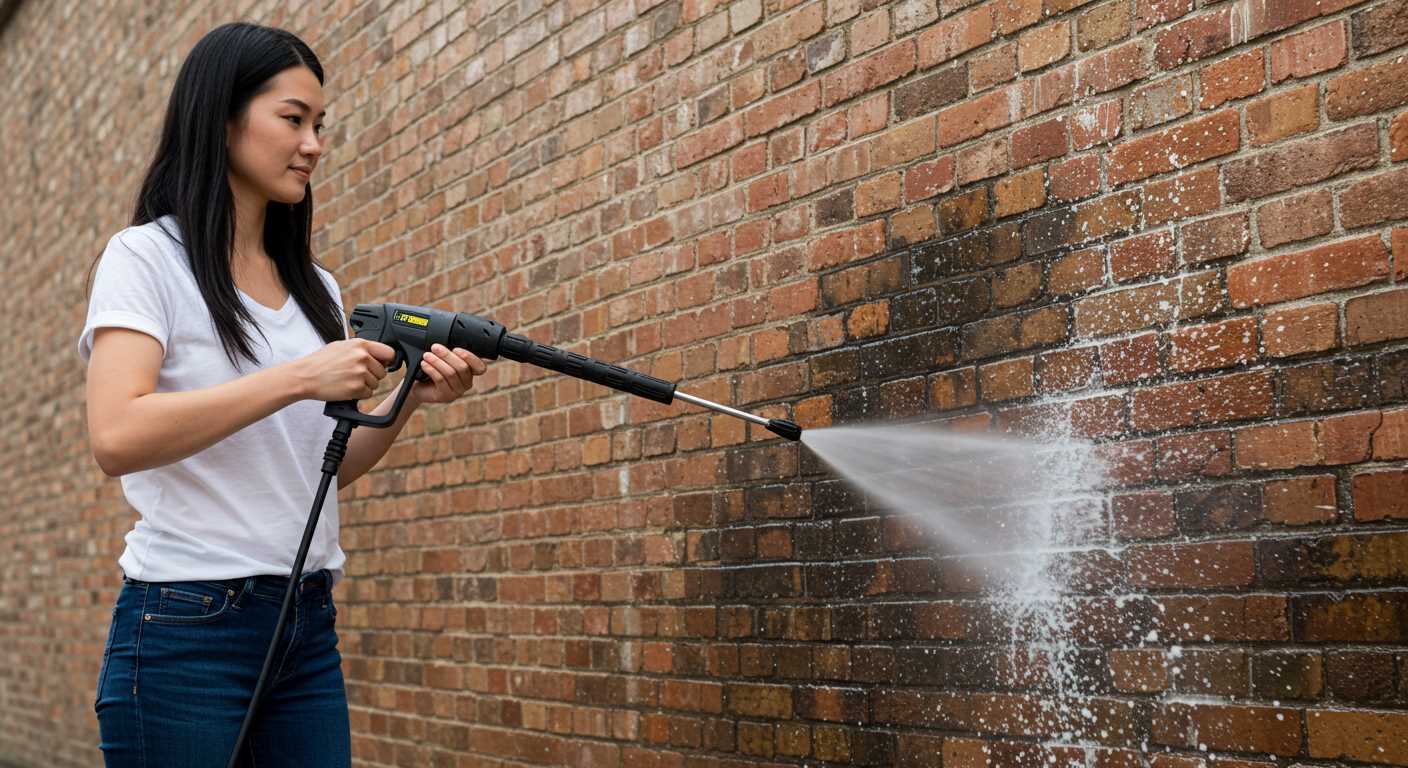
- Brick: Use a medium setting, about 1500-2000 PSI, to clean without risking damage to the mortar.
Delicate Surfaces
- Wood: Lower the pressure to around 1200-1500 PSI. This prevents splintering while still offering effective cleaning.
- Glass: A setting of 1000-1200 PSI is ideal. It cleans without the risk of shattering.
- Painted Surfaces: Keep it at 1200 PSI or lower. Too much pressure can strip paint and damage finishes.
Adjusting the pressure not only enhances cleaning efficiency but also protects the surfaces from potential harm. I’ve seen too many people overlook this, leading to costly repairs or replacements. Always test on a small, inconspicuous area first if unsure.
Maintaining a Steady Cleaning Technique
To achieve optimal results, focus on a consistent motion when applying the cleaning tool. I recommend keeping a steady hand and moving the nozzle in a sweeping pattern. This ensures even coverage and prevents streaks or missed spots. For larger areas, overlap your strokes slightly; this technique guarantees that no section is neglected.
When tackling stubborn grime, avoid lingering too long in one spot, as this can cause damage to surfaces. Instead, maintain a fluid motion, adjusting your distance from the surface as needed. For instance, when dealing with delicate materials like wood, hold the nozzle further away, whereas tougher surfaces like concrete can handle a closer approach.
Additionally, practice varying your speed according to the level of dirt. Slower movements may be necessary for heavily soiled areas, while lighter cleaning can be accomplished with quicker sweeps. This adaptability will enhance your overall efficiency and leave surfaces looking pristine.
Lastly, consider the integration of other tools to complement your efforts. For example, using a best battery garden leaf vacuum can assist in clearing debris before you start the cleaning process, ensuring a more effective outcome.
Cleaning and Storing Your Washer After Use
After finishing your cleaning task, it’s crucial to clean and store your equipment properly to ensure longevity and optimal performance. Here’s a step-by-step guide based on my experiences.
Cleaning Steps
- Turn off the machine and disconnect from the power supply.
- Detach the water hose and nozzle. Rinse both components to remove any soap or debris.
- Flush the system by running clean water through the unit for a few minutes. This helps clear out any leftover detergent.
- Inspect the nozzle for blockages. Use a small tool to clear any clogs if necessary.
- Wipe down the exterior of the unit with a damp cloth to remove dirt and grime.
Storing Your Equipment
- Ensure all components are completely dry before storage to prevent mould and mildew.
- Store in a cool, dry place, away from direct sunlight and extreme temperatures.
- Keep the hose and cord neatly coiled to avoid kinks and damage.
- If you have a dedicated storage space, consider using a cover to protect it from dust and moisture.
For specific surfaces, like porcelain tiles, selecting the right equipment is essential. You can find more information about suitable choices at this link.
By following these cleaning and storage techniques, you’ll prolong the life of your device and ensure it’s ready for your next cleaning project.
Troubleshooting Common Issues During Operation
If you encounter a lack of pressure while cleaning, first check that the water supply is fully connected and turned on. A common mistake is assuming the hose is clear; inspect it for kinks or blockages. I recall a time when I spent ages trying to identify a pressure issue, only to find a small stone lodged in the inlet. It’s always the little things that trip you up!
Motor Not Starting
If the motor doesn’t start, ensure the power cord is securely plugged into a working outlet. I’ve seen many people overlook tripped circuit breakers. If the cord is damaged, it needs replacement before proceeding. Occasionally, the thermal reset button on the device may need to be pressed if it overheated during use.
Water Leaks
Leaks often stem from worn or improperly seated O-rings. After a long day of cleaning, I once found my unit leaking due to a cracked connector. Regularly inspect all connections for wear and replace any damaged parts. Tightening fittings can also resolve minor leaks. If water is seeping from the unit itself, it may require professional servicing.
Understanding Safety Precautions While Using
Always wear protective gear, including goggles and gloves, to shield yourself from debris and high-pressure water. I once neglected this and ended up with a nasty splash in my eye while cleaning a driveway. Never again!
Electrical Safety
Ensure your equipment is plugged into a GFCI (Ground Fault Circuit Interrupter) outlet to prevent electric shocks. If you’re using an extension cord, choose one rated for outdoor use and capable of handling the power of your device. I once used a regular cord, and it melted! A costly mistake.
Environmental Considerations
Be mindful of your surroundings. Avoid using this equipment near electrical outlets, power lines, or areas where children play. I learned this the hard way when I accidentally sprayed water onto a power source, causing a minor outage.
| Precaution | Reason |
|---|---|
| Wear protective goggles | To protect eyes from debris |
| Use gloves | To prevent skin irritation |
| Check for leaks | Avoid slipping hazards |
| Secure hoses and cables | Prevent tripping hazards |
| Keep children and pets away | Minimise risk of injury |
Always read the manufacturer’s manual for specific safety instructions. Each device has its own quirks, and knowing them can save you from accidents. I once ignored a manual and ended up with a malfunction that took hours to fix. Stay informed, stay safe!
FAQ:
What are the basic steps to set up the Greenworks electric pressure washer?
To set up your Greenworks electric pressure washer, first, ensure that you have all the necessary components: the pressure washer unit, hose, nozzle, and any attachments. Begin by connecting the high-pressure hose to the pressure washer’s outlet. Attach the other end of the hose to the spray gun. Next, connect the water supply hose to the water inlet on the pressure washer. Make sure to use a garden hose that is suitable for the water supply. After that, plug the power cord into an electrical outlet. Before you start, check for any leaks in the connections and ensure the water supply is turned on.
How do I choose the right nozzle for different cleaning tasks?
The Greenworks electric pressure washer typically comes with multiple nozzles, each designed for specific cleaning tasks. The zero-degree nozzle is ideal for tough stains on hard surfaces, while the 15-degree nozzle works well for removing grime and dirt from concrete or decks. The 25-degree nozzle is suitable for washing cars or outdoor furniture, and the 40-degree nozzle is best for delicate surfaces like windows or painted areas. Always assess the surface you are cleaning and select the appropriate nozzle to avoid damage.
Can I use detergent with my Greenworks electric pressure washer?
Yes, you can use detergent with your Greenworks electric pressure washer, but it’s important to use a detergent that is specifically designed for pressure washers. These detergents are formulated to work effectively with the machine without causing damage. To use detergent, fill the detergent tank if your model has one, or use a soap nozzle to apply the detergent while washing. Allow the detergent to sit for a few minutes on the surface before rinsing it off with clean water to achieve the best results.
What safety precautions should I take while using the pressure washer?
Safety is paramount when using a pressure washer. First, always wear appropriate personal protective equipment, such as safety goggles and gloves, to protect against debris and water spray. Ensure that the area you are working in is clear of people and pets. Never point the spray gun at yourself or others, and maintain a safe distance from surfaces you are cleaning. Additionally, avoid using the pressure washer on ladders or unstable surfaces, and always follow the manufacturer’s instructions for safe operation.
How do I maintain my Greenworks electric pressure washer for longevity?
To keep your Greenworks electric pressure washer in good condition, regular maintenance is key. After each use, make sure to drain any water from the machine to prevent freezing or damage. Clean the filters and nozzles to ensure optimal performance. Periodically check the power cord and connections for wear or damage. Store the pressure washer in a dry, sheltered area when not in use. Additionally, refer to the user manual for specific maintenance recommendations and schedule routine checks for any signs of wear.
What features should I consider when using a Greenworks electric pressure washer?
When using a Greenworks electric pressure washer, it’s important to look at several key features. Firstly, check the pressure rating, usually measured in PSI (pounds per square inch), which determines how powerful the washer is. A higher PSI means better cleaning capability for tougher stains. Secondly, consider the flow rate, measured in GPM (gallons per minute), which indicates how much water the washer can use. A higher GPM will help you clean larger areas more quickly. Additionally, examine the nozzle options available; different nozzles provide varying spray patterns that can be useful for different cleaning tasks. Lastly, look at the power cord length and hose length to ensure you can reach all necessary areas without needing extra extensions.
How do I maintain my Greenworks electric pressure washer for longevity?
To maintain your Greenworks electric pressure washer and ensure it lasts a long time, follow several simple steps. First, after each use, make sure to clean the nozzle and hose to prevent clogs. You can do this by running water through them until clear. Additionally, check the filter regularly and replace it if it becomes dirty or worn out. It’s also advisable to store the washer in a dry place, away from extreme temperatures, to prevent any damage to the components. Before long periods of inactivity, consider running a cleaning solution through the machine to prevent any buildup. Regularly inspecting the power cord and connections is also crucial to ensure safety and performance. By following these maintenance tips, your pressure washer should function effectively for many seasons.
.jpg)
.jpg)


