


Before anything else, ensure you have the right attachments for the task at hand. Each nozzle serves a distinct purpose, from gentle rinsing to powerful blasting. I still remember the time I tackled a particularly stubborn patio. Switching from a wide spray to a concentrated jet made all the difference, cutting through years of grime effortlessly.
Next, consider the surface you’re working on. Different materials require tailored approaches. For example, delicate surfaces like wood demand a light touch, while concrete can withstand a more aggressive technique. I once made the mistake of going full throttle on a wooden deck, leaving behind damage that took weeks to fix. Always test in an inconspicuous area first.
Water supply is another key factor; make sure your source is sufficient. I learned this the hard way during a DIY project in my garden. The pressure dropped dramatically, and it turned into a frustrating experience. A steady flow not only optimises performance but also saves time.

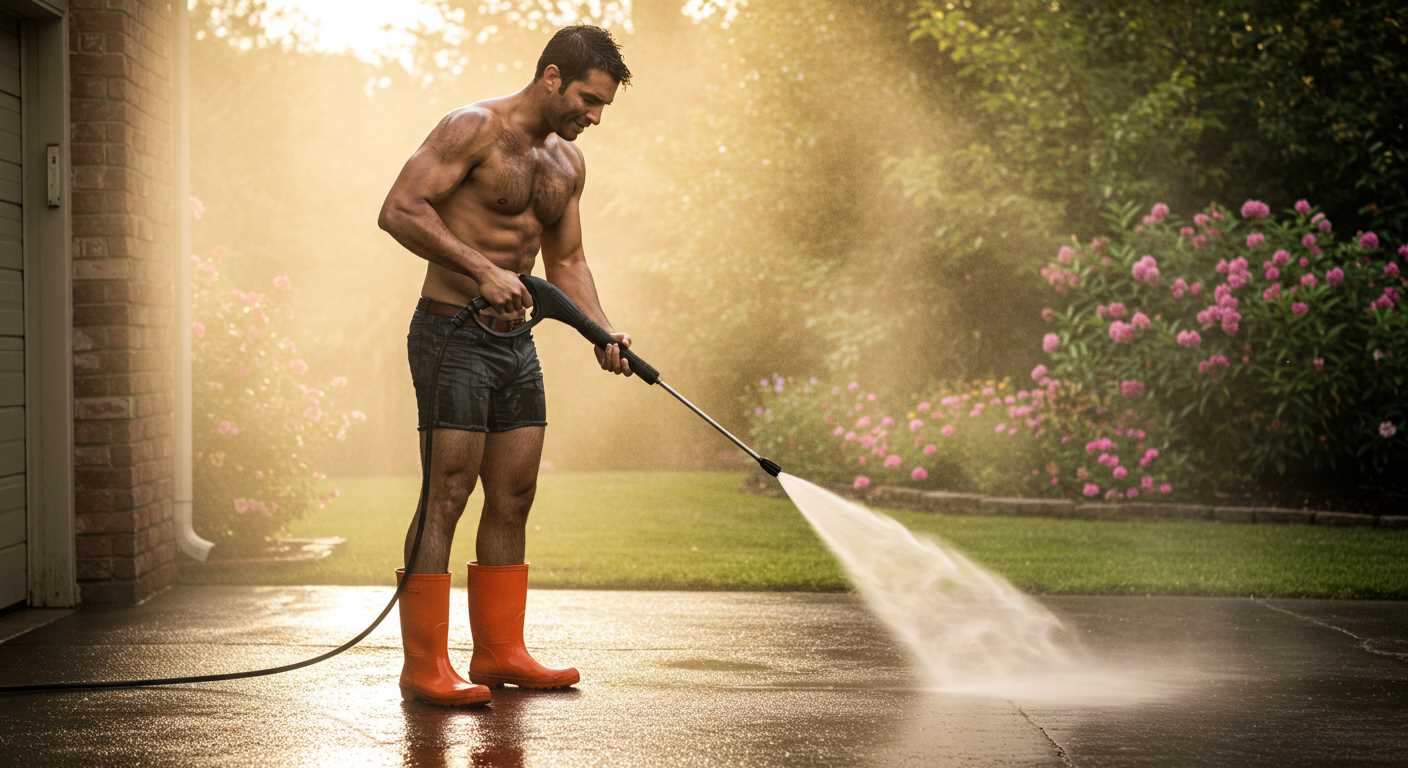
Don’t forget about safety gear. Eye protection and sturdy footwear are non-negotiable. One moment of carelessness can lead to serious injury, especially when dealing with high-velocity streams. I’ve seen it happen, and it’s not a sight I wish to relive.
Lastly, maintain your equipment regularly. Clearing any clogs and checking hoses before starting each task can save you from unexpected breakdowns. I once had to pause a job midway due to a blocked nozzle, which could have easily been avoided with a quick inspection. A little diligence goes a long way.
Selecting the Right Portable Pressure Washer for Your Needs
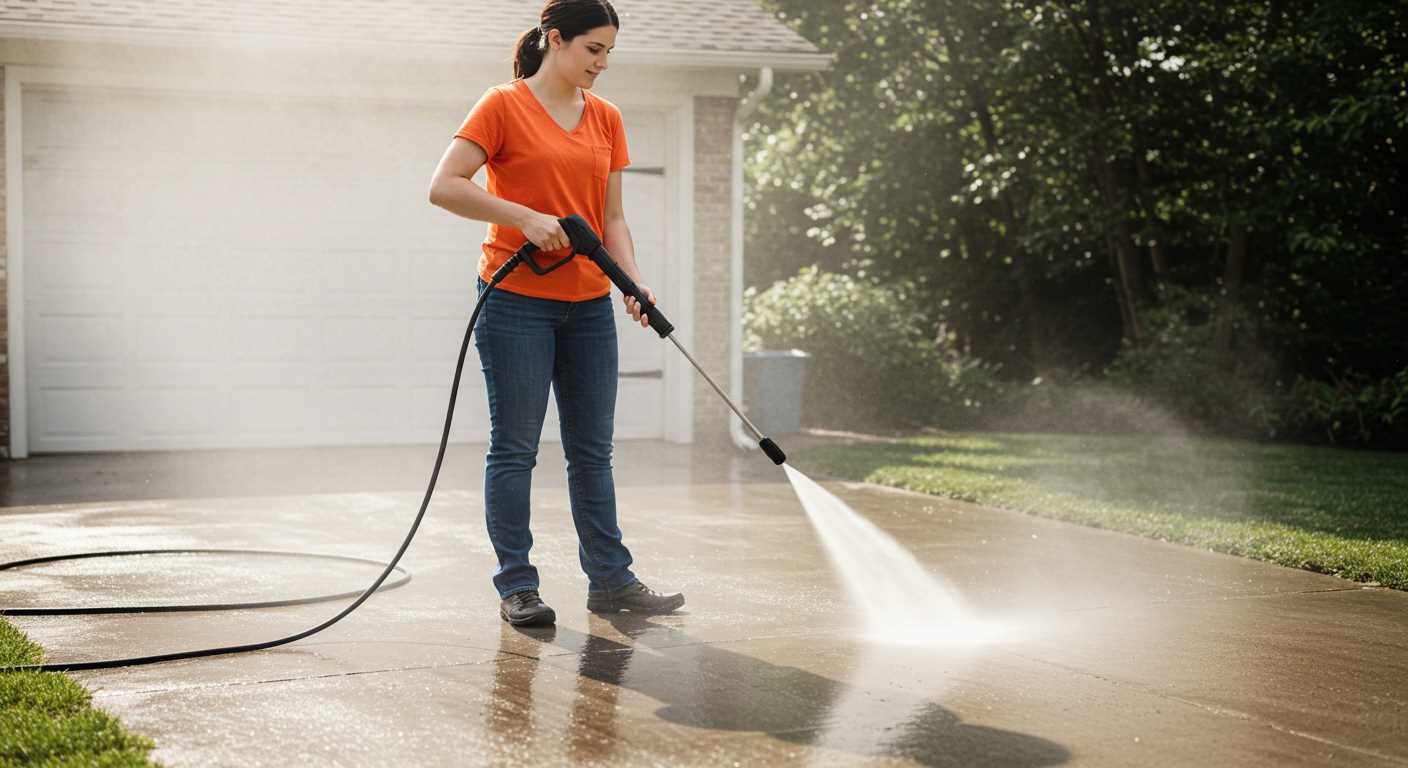
Choosing the right cleaning machine requires understanding your specific tasks. For instance, if you plan to tackle outdoor furniture or vehicles, a model with a pressure rating between 1200 to 2000 PSI will suffice. For tougher jobs like removing grime from driveways, look for units ranging from 2000 to 3000 PSI.
Key Features to Consider
Reflect on the following aspects before making a choice:
| Feature | Considerations |
|---|---|
| Pressure Rating (PSI) | Higher PSI means stronger cleaning power; choose according to surface type. |
| Flow Rate (GPM) | A higher GPM indicates faster cleaning; look for at least 1.5 GPM for most tasks. |
| Nozzle Options | Different nozzles provide versatility; adjustable or interchangeable nozzles are beneficial. |
| Weight and Portability | Consider size and weight; lightweight models are easier to manoeuvre. |
| Power Source | Electric models are quieter, while gas-powered ones offer more power for larger tasks. |
Additional Considerations
Reflect on the frequency of use and storage space. If you plan to clean often, investing in a durable model makes sense. For occasional tasks, a less expensive option could suffice. I recall using a compact unit for weekend projects; it was lightweight yet surprisingly effective. Always check for warranty and customer support options, as this can save headaches later if issues arise.
Preparing the Area for Pressure Washing
Clear the space of any obstacles. Remove furniture, plants, and decorations. This step prevents damage and ensures a thorough clean. I once made the mistake of skipping this and ended up with a broken plant pot. Trust me, it’s not worth the hassle.
Protect Surroundings
Shield windows, doors, and nearby vehicles with tarps or plastic sheeting. The force of the water can cause debris to fly, potentially scratching surfaces. I once had a client who didn’t cover their car, and the results were not pretty.
Assess the Surface
- Identify the type of material: wood, concrete, or brick. Each requires a different approach.
- Check for loose paint or damage. Address these issues beforehand to avoid further complications.
- Look for any electrical outlets or fixtures. They should be covered to prevent water damage.
After prepping, consider the cleaning solutions you may need. For stainless steel surfaces, consult resources like how to clean stainless steel the ultimate guide for effective methods.
Lastly, ensure you have a water source nearby. A hose connected to a tap simplifies the process and saves time.
Connecting the Water Supply and Power Source
Start by ensuring you have a suitable water source. A standard garden hose works well, but check the diameter; a ¾-inch hose is preferable for optimal flow. Always inspect for kinks or leaks before connecting it to your machine. If you’re using a static water supply, like a tank, ensure the water level is sufficient to avoid running dry.
Steps for Water Connection
- Attach the hose securely to the inlet on the unit.
- Turn on the water supply and check for leaks at the connection point.
- Run some water through the system without turning on the motor to purge air from the lines.
For the power source, identify the required voltage. Most models operate on a standard household outlet, but some might need a higher voltage. Always refer to the manufacturer’s specifications. I once used a machine that required a 240V supply and learned the hard way about using the wrong outlet. It’s crucial to avoid any potential damage.
Power Connection Tips
- Use a heavy-duty extension cord if needed, rated for outdoor use and compatible with the amperage of your unit.
- Check for any frays or damage on the cord before plugging it in.
- Make sure to plug into a GFCI (Ground Fault Circuit Interrupter) outlet when working outdoors.
Before starting, double-check all connections to ensure everything is secure. If you’re unsure about the pressure washer pump type, consult the manual or the manufacturer for guidance. This preparation will help avoid interruptions during your cleaning tasks.
Choosing the Appropriate Nozzle for Different Surfaces
For optimal cleaning, selecting the right nozzle is non-negotiable. A well-chosen nozzle can make the difference between a satisfactory result and a frustrating experience. In my years working with various cleaning equipment, I found that understanding the surface type is key to making the right choice.
Understanding Nozzle Types
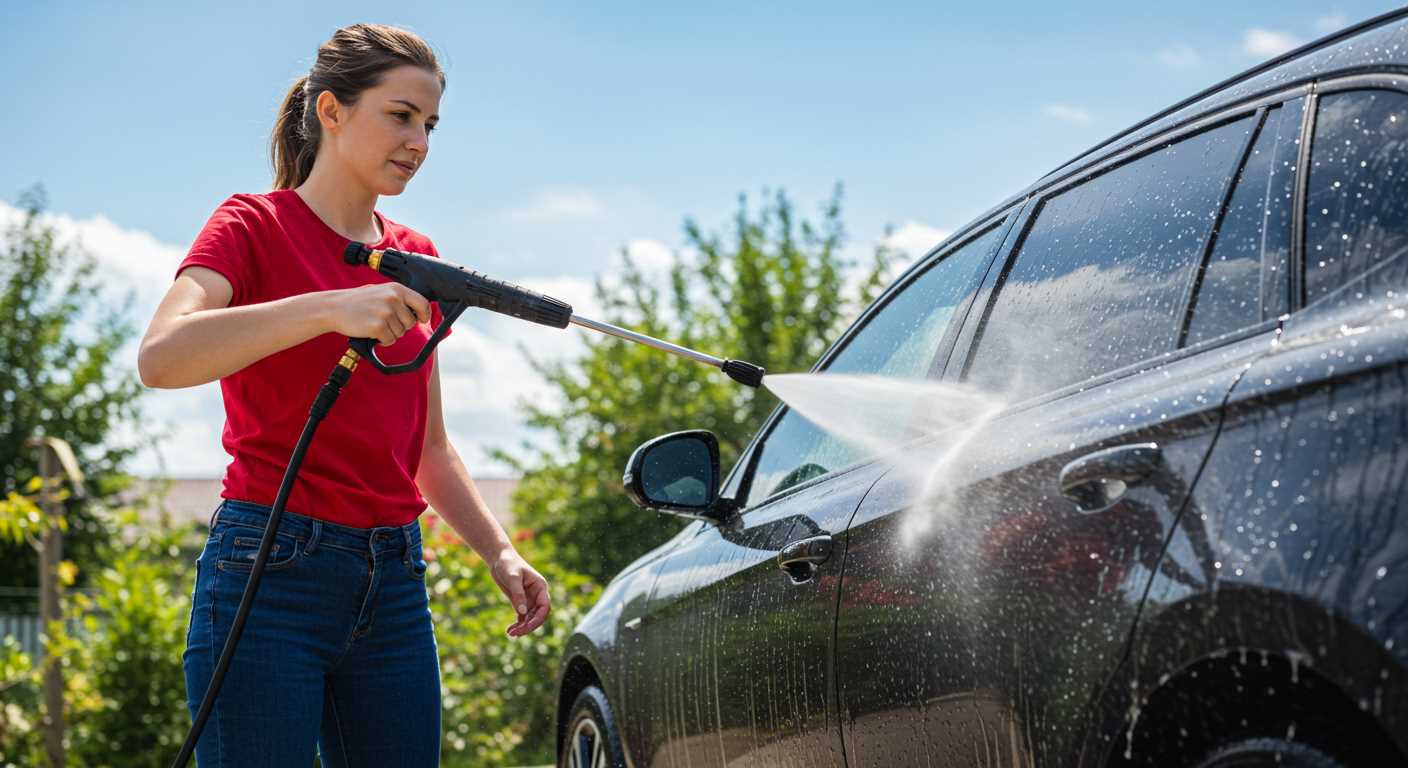
There are typically four main types of nozzles: zero-degree, 15-degree, 25-degree, and 40-degree, each designed for specific tasks. The zero-degree nozzle delivers a concentrated jet, perfect for stubborn stains on concrete or metal surfaces. However, use it with caution, as it can damage softer materials. The 15-degree is great for removing paint or tough grime on decks and patios. The 25-degree nozzle is versatile, working well on driveways and siding, while the 40-degree is ideal for delicate surfaces like cars or outdoor furniture, providing a gentle spray that cleans without causing harm.
Surface-Specific Recommendations
Concrete surfaces benefit from the 15-degree and zero-degree nozzles. I recall a particularly challenging job on a restaurant patio where grease had built up over months. The zero-degree nozzle blasted through the grime effectively, but I ensured to keep it moving to avoid etching the surface. For wooden decks, stick with the 25-degree nozzle to lift dirt without stripping away wood. When cleaning vehicles, the 40-degree nozzle is your best ally, as it provides the necessary cleaning power without scratching the paint.
Lastly, always test a small, inconspicuous area first, especially on delicate materials. This simple practice saved me from potential disasters more times than I can count. The right nozzle not only enhances cleaning efficiency but also preserves the integrity of the surfaces you’re working on.
Understanding Pressure Settings for Various Tasks
For optimal results, match the pressure setting to the task at hand. For instance, delicate surfaces like cars or painted wood should be cleaned at a lower setting, around 1200 to 1900 PSI. This prevents damage while still effectively removing dirt and grime.
When tackling concrete or brick, you can increase the pressure to between 2500 and 3000 PSI. This higher setting is crucial for breaking down stubborn stains or algae. I’ve seen remarkable transformations on driveways when using this level of force.
For cleaning decks or patios, a range of 1500 to 2000 PSI typically works best. This strikes a balance between power and safety, ensuring wood fibres remain intact while achieving a thorough clean.
Windows require a gentler touch; using a setting around 1300 PSI will prevent any risk of shattering glass while still effectively removing dirt. Always keep the nozzle at least 12 inches away from the surface.
Adjusting the pressure is often as simple as turning a dial on your machine. I recall a time when I underestimated the power needed for a wooden fence. Using too high a setting caused splintering, which was easily avoidable had I been mindful of the recommended PSI.
Remember to test a small, inconspicuous area first. This way, you can gauge how the surface reacts before committing to a full clean. A little caution goes a long way in preserving your surfaces while achieving the results you want.
Techniques for Cleaning Different Materials
For brick surfaces, use a 15-degree nozzle and maintain a distance of about 12 inches. This method effectively removes grime without damaging the mortar. I recall working on an old brick patio; with the right angle and distance, the transformation was remarkable, revealing the original colours beneath layers of dirt.
For delicate wood decks, opt for a 25-degree nozzle. Keep the nozzle at least 18 inches away to prevent splintering. I learned this the hard way when I got too close on my first attempt, resulting in some deep grooves. A gentle touch restores the natural beauty without compromising the integrity of the wood.
Metal surfaces, like outdoor furniture, benefit from a soap attachment followed by a rinse with a 40-degree nozzle. This combination cleans effectively and helps avoid streaks. I remember cleaning a set of wrought iron chairs; the soap cut through the rust, and the final rinse brought back their shine.
For concrete pathways, a turbo nozzle works wonders. It increases the impact of the water stream, tackling stubborn stains like oil or grime. I once tackled a driveway covered in grease; the turbo nozzle was a game changer, cutting through the mess in no time.
Glass surfaces, such as windows, require caution. A 40-degree nozzle at a distance of 24 inches prevents cracking. I found that working from the top down helps avoid streaks, ensuring a crystal-clear finish. My own windows sparkled after I perfected this technique.
When addressing vinyl siding, a soap attachment followed by a rinse with a 25-degree nozzle is effective. This method cleans without risking damage to the panels. I remember the satisfaction of seeing years of accumulated dirt wash away, restoring the home’s curb appeal.
Always test a small, inconspicuous area first. This step has saved me countless headaches by revealing how materials react under pressure. Each surface is unique, and understanding the specifics can make all the difference in achieving the desired result.
Maintaining a Safe Distance While Washing
Always maintain a distance of at least 2 to 3 feet from the surface you’re cleaning. This prevents damage from the concentrated stream of water and ensures your safety. I once had a client who got too close to their wooden deck, resulting in deep gouges that required extensive repairs. Keeping that safe space is key to preserving your surfaces and avoiding costly mistakes.
Adjusting Distance Based on Surface Type
Different materials react uniquely to high-velocity streams. For example, when cleaning concrete, you can get closer, around 12 inches, while delicate surfaces like cars and painted fences require you to step back further. I remember using a high-powered unit on a car, and because I maintained a safe distance, the paint job remained intact. Choose your distance wisely based on what you’re cleaning.
Awareness of Surroundings
Always be aware of your environment. Avoid spraying near windows or delicate plants. I’ve seen hoses accidentally shatter glass or uproot flowers. When working in tight spaces, consider where debris might fly; wearing safety glasses can protect your eyes from unexpected projectiles. Remember, it’s not just about the distance to the surface but also about what else is around you.
Establishing and maintaining the correct distance not only enhances your cleaning results but also keeps you and your surroundings safe. Trust me, a little caution goes a long way.

Using Detergent and Cleaning Solutions Effectively
Always dilute detergents according to the manufacturer’s instructions. Using a concentrated solution can lead to residue and streaks on surfaces. I remember a time when I was too eager and didn’t dilute properly; the result was a sticky mess that took longer to rinse off than it would have without the extra concentration.
Choose a detergent specifically formulated for the task at hand. For instance, an all-purpose cleaner works well for general surfaces, but stubborn grime on driveways may require a stronger degreaser. I once tackled an oil-stained garage floor with a standard cleaner, only to find that a dedicated degreaser made the job significantly easier and faster.
Apply the detergent from the bottom up. This prevents streaking and allows the solution to dwell on the surface longer, enhancing its ability to break down tough dirt. I often start at the base and work my way up to ensure a thorough clean without leaving any spots untouched.
Utilise a foam cannon if your equipment supports it. This attachment creates a thick foam that clings to vertical surfaces, allowing the detergent to penetrate more effectively. I’ve had great success using this method on my patio; the foam stayed put, and the cleaning results were impressive.
Always rinse thoroughly after applying any cleaning solution. Residue can attract dirt, leading to quicker re-soiling. I learned this the hard way after neglecting to rinse a treated area; it became a magnet for dust and dirt within days.
Test any cleaning solution on a small, inconspicuous area before full application. This avoids potential damage to materials. I once encountered a reaction between a cleaner and a painted surface, which resulted in peeling paint. A quick test would have saved me from that hassle.
Consider the environmental impact of your cleaning agents. Opt for biodegradable options when possible. I’ve shifted to eco-friendly solutions, and not only do they perform well, but they also give me peace of mind knowing I’m being kinder to the environment.
Lastly, store any leftover detergent properly. Keep it sealed and away from extreme temperatures to maintain its effectiveness. I had a bottle freeze once, and the quality deteriorated, leading to a less effective clean later on.
Post-cleaning care and storage of the pressure cleaner
After finishing a cleaning session, the first step is to disconnect the water supply and power source. This prevents any accidental activation while you’re cleaning up. I remember a time when I forgot to unplug my unit, and it accidentally turned on while I was coiling the hose. That was an unexpected shower!
Next, empty the water from the machine. This is crucial to avoid damage from freezing in colder months. I usually place a bucket beneath the nozzle and let it drain completely. If your model has a detergent tank, make sure to rinse it out thoroughly; leftover soap can cause blockages and affect future performance.
Cleaning and maintenance routine
Wipe down the exterior with a damp cloth to remove any grime or residue. Check the nozzle for clogs–using a pin to clear any debris is a quick fix I often employ. After every few uses, inspect the hoses for cracks or wear. A small tear can lead to leaks that affect efficiency. I’ve had to replace hoses more times than I’d like to admit due to neglecting this simple task.
Storage tips
When it comes to storage, keep the unit in a dry, sheltered place. I recommend a garage or shed, away from direct sunlight, which can degrade the plastic components over time. Coil the hose neatly to prevent kinks, and if possible, hang it on a hook to keep it off the ground. If you have a model with wheels, ensure they’re free from dirt to maintain mobility.
Lastly, check the manual for any specific storage advice. Some models may have unique requirements that could extend their lifespan. Trust me, taking these extra steps can save you time and money in the long run. I’ve seen many machines fall into disrepair simply due to improper care. A little attention goes a long way!
FAQ:
What safety precautions should I take before using a portable pressure washer?
Before using a portable pressure washer, it’s important to wear appropriate safety gear, such as goggles and gloves, to protect yourself from debris and high-pressure water. Ensure that the area is clear of people and pets to prevent accidents. Check the manufacturer’s instructions for specific safety recommendations, and inspect the equipment for any damage or leaks before starting. Additionally, avoid using the pressure washer in wet conditions to prevent electric shock.
How do I choose the right nozzle for my portable pressure washer?
Choosing the correct nozzle for your portable pressure washer is essential for achieving the desired cleaning results. Most pressure washers come with interchangeable nozzles that vary in spray angle and pressure. For light cleaning tasks, such as washing cars or windows, a wider spray angle (25-40 degrees) is suitable. For tougher stains on concrete or brick, a narrower nozzle (0-15 degrees) delivers a more concentrated stream of water. Always refer to the manufacturer’s guide for recommendations on nozzle selection based on the task at hand.
Can I use a portable pressure washer for cleaning my patio?
Yes, a portable pressure washer is very effective for cleaning patios. The high-pressure water can remove dirt, grime, and algae that can accumulate on outdoor surfaces. When cleaning your patio, start with a wider nozzle to cover large areas and then switch to a narrower one for stubborn stains. Keep the nozzle at a safe distance from the surface to avoid damage. It’s also advisable to test a small area first to see how the material reacts to the pressure before proceeding with the entire surface.
What should I do if my portable pressure washer is not working properly?
If your portable pressure washer is not functioning as expected, first check the power supply and ensure it’s properly connected. Inspect hoses and nozzles for any blockages or leaks that could affect performance. If the washer is making unusual sounds or vibrating excessively, it may indicate a mechanical issue. Consult the user manual for troubleshooting tips or consider contacting customer support for assistance. Regular maintenance, such as cleaning filters and checking connections, can also help prevent issues.
How much water does a portable pressure washer use compared to a regular garden hose?
A portable pressure washer typically uses less water than a regular garden hose while providing a more powerful cleaning action. On average, a pressure washer can use about 1.5 to 2 gallons of water per minute, whereas a standard garden hose can use 5 to 10 gallons per minute. This means that using a pressure washer can be more water-efficient for cleaning tasks, making it a better choice for environmentally conscious users. However, the exact water usage may vary depending on the model and the pressure settings used.
What type of surfaces can I clean with a portable pressure washer?
A portable pressure washer is suitable for a variety of surfaces. You can use it to clean driveways, patios, decks, and outdoor furniture. It is also effective on vehicles, including cars, bikes, and boats. However, caution should be exercised with delicate surfaces like painted wood or some types of siding, as high pressure can cause damage.
How do I set up my portable pressure washer for use?
To set up your portable pressure washer, begin by ensuring it is on a stable surface. Connect the water supply hose to the washer and make sure the other end is securely attached to a tap. Next, plug in the power cord if it’s electric, or ensure the fuel tank is filled if it’s gas-powered. After that, attach the desired nozzle to the spray wand based on the cleaning task. Always ensure that you have the right cleaning solution if you plan to use one, and check for any leaks before turning it on.
.jpg)


