
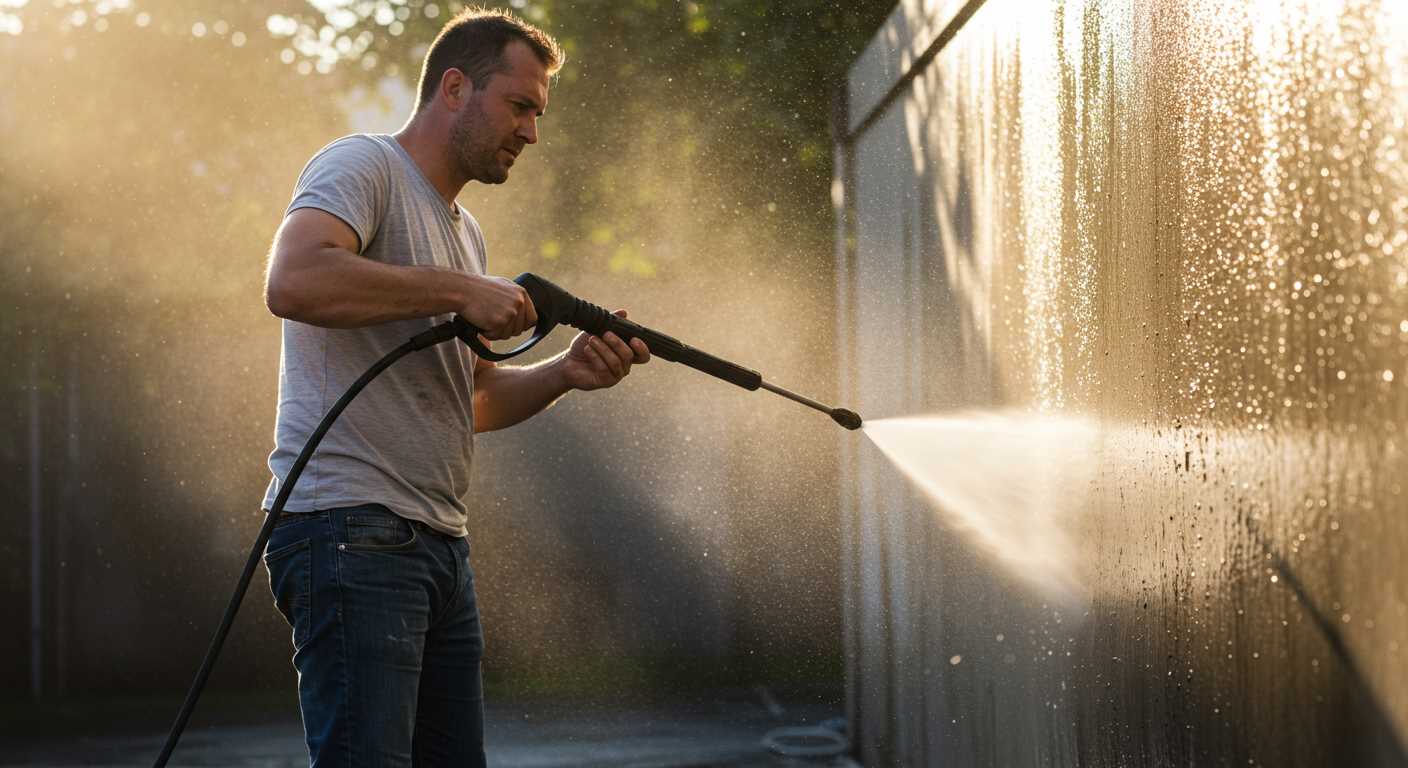


For those looking to elevate their outdoor cleaning tasks, attaching a specialised tool to your high-pressure unit can transform the way you tackle grime. This technique not only speeds up the process but also significantly enhances the effectiveness of the task at hand. I recall a day spent deep-cleaning my driveway. With the right attachment, I managed to remove years of built-up dirt in a fraction of the time it would have taken with a standard nozzle.
Start by ensuring the attachment is compatible with your equipment. I once underestimated this aspect and faced compatibility issues that wasted an hour of my time. Once correctly fitted, adjust the pressure settings according to the surface you are cleaning. For delicate materials like wood decking, a lower pressure can prevent damage, while tougher surfaces like concrete benefit from higher settings. This flexibility has always been a game changer in my cleaning routine.

As you begin, maintain a steady, sweeping motion. I found that lingering too long in one spot can lead to streaking or even etching, especially on softer surfaces. Aim to keep the tool about 30 cm away from the surface for optimal results, which allows for an even application of water and cleaning solution. Mixing a suitable detergent can also work wonders; just make sure it’s safe for the surfaces you’re treating.
Finally, after the cleaning session, take a moment to rinse the area well. I’ve learned the hard way that leaving detergent residue can lead to unsightly discolouration. Proper rinsing not only enhances the appearance but also prolongs the life of the surfaces you’ve cleaned. With these tips in mind, you’ll find that tackling outdoor spaces becomes less of a chore and more of a satisfying achievement.
Selecting the right pressure washer brush for your task
Choosing the appropriate cleaning attachment can significantly enhance your experience and results. I’ve had my fair share of trials and errors, and here’s what I’ve learned.
Types of Brushes and Their Applications
For delicate surfaces like cars or painted walls, a soft bristle attachment is ideal. It prevents scratches while effectively removing dirt. I remember using a soft brush on my classic car, and it left the paintwork flawless without any damage.
If you’re tackling tougher grime on driveways or patios, a stiff bristle option will serve you better. I once faced a particularly stubborn oil stain on my driveway; the stiff bristles worked wonders, lifting the stains effortlessly.
Consider the Size and Shape
The size of the attachment matters too. A larger brush can cover more area quickly, but for intricate spots, a smaller brush is more practical. I often switch between sizes depending on the space I’m cleaning. I once underestimated a small brush while cleaning my garden furniture; it reached into corners that a larger one couldn’t manage.
Compatibility with your machine is non-negotiable. Always check the specifications. I’ve seen friends struggle with attachments that didn’t fit, wasting time and effort. Lastly, consider the material of the bristles; they should be durable and resistant to wear.
Take time to assess your specific needs and choose wisely. A well-chosen attachment can make the task enjoyable and yield impressive results.
Preparing Your High-Pressure Cleaning Equipment for Brush Attachment
Ensure your machine is powered down and unplugged. This simple step prevents accidental activation while you’re working with attachments. Next, check the water supply; a steady flow is crucial. Connect the hose to the inlet and ensure all fittings are tight to avoid leaks. Don’t forget to inspect the brush attachment itself for any damage or debris. A clean attachment guarantees optimal performance.
Adjusting Settings
Before attaching the cleaning head, adjust the settings on your device. Most units have pressure settings; lower the pressure to avoid damaging surfaces, especially delicate ones. If your equipment has a detergent feature, ensure the tank is filled with the appropriate cleaner for your task.
Final Checks
After everything is connected, perform a quick check of all connections. Look for any kinks in the hose that might restrict water flow. Once satisfied, turn on the water supply and power on the machine. Test the brush attachment on a small, inconspicuous area first. This way, you can adjust settings if needed before tackling larger surfaces.
Choosing the Appropriate Cleaning Solution for Your Surface
For optimal results, select a cleaning agent tailored to the specific material you’re treating. For example, when tackling concrete, a degreaser can effectively lift tough stains, while a milder cleanser suffices for softer surfaces like wood or composite decking. Always check the manufacturer’s recommendations for your equipment, as some solutions may affect the longevity of the unit.
Understanding Surface Types
Concrete and brick require robust solutions due to their porous nature. Here, a heavy-duty cleaner can penetrate and remove embedded dirt and grime. On the other hand, vinyl siding or painted surfaces benefit from gentle detergents that avoid damage. Test any solution on a small, inconspicuous area first to gauge its effect.
Environmental Considerations
Choose biodegradable options whenever possible, as these are less harmful to the environment and safer for plants and pets. Many brands offer eco-friendly alternatives that perform well without the harsh chemicals. Always rinse surfaces thoroughly after cleaning to prevent residue buildup, which can attract dirt and negate your efforts.
Adjusting Pressure Settings for Different Surfaces
For optimal results, it’s crucial to modify the pressure level based on the surface type. Here’s a straightforward breakdown of how to adjust settings effectively:
Concrete and Brick
When tackling hard surfaces like concrete or brick, you can increase the pressure to around 2500-3000 PSI. This strength will effectively eliminate stubborn stains, dirt, and mildew.
- Test on an inconspicuous area first to prevent damage.
- Maintain a distance of about 12-18 inches from the surface to avoid etching.
Wood Decks and Fencing
For wooden surfaces, reduce the pressure to between 1200-2000 PSI. Higher settings can splinter the wood, leading to costly repairs.
- Use a fan nozzle instead of a straight jet for even coverage.
- Keep the nozzle at a 45-degree angle to the surface.
Vehicles and Delicate Surfaces
When cleaning cars, boats, or delicate materials, I recommend lowering the pressure to about 1000-1500 PSI. This setting avoids damage to paint and finishes.
- Utilise a wide spray pattern for gentle cleaning.
- Maintain a distance of at least 2 feet from the surface.
Glass and Windows
For glass surfaces, stick to the lower end of the pressure scale, ideally around 1000 PSI. This helps prevent shattering or cracking.
- Always work from the top down to avoid streaks.
- Consider using a soft brush attachment to assist with grime.
Adjusting settings based on the surface type not only enhances cleaning effectiveness but also prolongs the life of your equipment. Always remember to start low and gradually increase pressure as needed. Safety should be a priority, so wear appropriate gear when working with powerful machines.
Techniques for Using a Pressure Washer Brush on Concrete
For tackling stubborn grime on concrete, a systematic approach is key. First, work in sections. Divide the area into manageable parts to ensure thorough cleaning without missing spots. Start at one corner and move methodically to the opposite side, overlapping each stroke slightly for uniform results.
Optimal Angle and Motion
Position the cleaning tool at a 45-degree angle to the surface. This angle maximises cleaning efficiency while minimising the risk of damage. Use a back-and-forth motion, applying even pressure. Avoid lingering too long in one area to prevent etching the concrete.
Technique Adjustments for Stains
For tougher stains, such as oil or rust, incorporate a pre-treatment step. Apply an appropriate cleaning solution directly onto the stain and allow it to sit for a few minutes. Then, return to your cleaning technique, increasing the pressure gradually as needed. Always test a small, inconspicuous area first to ensure compatibility.
After completing each section, rinse thoroughly with clean water to remove any residue. This final step is crucial for achieving a spotless finish.
Cleaning Vehicles with a Pressure Washer Brush
Start by rinsing the vehicle with water to remove loose dirt and debris. This preliminary step makes the cleaning process more effective and prevents scratching the surface. I always recommend using a foam cannon for ryobi electric pressure washer for an even application of cleaning solution. It covers the vehicle with a thick layer of foam, allowing it to sit and break down grime before rinsing.
Attach the appropriate scrub attachment to your machine, ensuring a secure fit. For vehicles, a soft bristle option is best to avoid damaging the paint. Adjust the cleaning solution to a dilution ratio that matches the manufacturer’s instructions; this ensures maximum effectiveness without risking harm to the finish.
When ready, apply the soapy foam from the bottom up. This technique prevents streaking and ensures that the cleaning solution clings to the dirt. Allow the foam to sit for a few minutes, letting it penetrate the grime. Then, using a consistent, gentle motion, scrub the surface in sections, starting from the top and working downwards.
Maintain a safe distance of around 30 cm between the attachment and the vehicle to ensure an even clean without causing damage. If you encounter stubborn spots, spend a little extra time on those areas, but avoid excessive pressure, as it can damage finishes.
After scrubbing, rinse thoroughly from the top down, ensuring all soap and debris are washed away. This step is crucial for a clean finish. Lastly, drying the vehicle with a soft microfiber towel will help prevent water spots and give a polished look.
Maintaining Your Pressure Cleaning Tool for Longevity
Regular upkeep is key to extending the lifespan of your cleaning attachment. After each session, rinse the bristles thoroughly to remove debris and cleaning agents. This simple act prevents build-up that can degrade the fibres over time.
Storing Your Tool Properly
Store your device in a cool, dry place away from direct sunlight. Consider hanging it on a wall or placing it on a shelf to avoid unnecessary stress on the bristles. If you’re using a model with detachable heads, remove them and store them separately to prevent any accidental damage.
Inspecting for Wear and Tear
- Check bristles for fraying or bending after each use.
- Look for any signs of rust or corrosion on metal components.
- Replace worn-out parts immediately to maintain performance.
Investing time in maintenance ensures that your cleaning tool remains at peak performance, saving you from costly replacements down the line. I’ve seen too many people neglect this simple aspect and face issues that could have been easily avoided.
Finally, consider using a soft brush to clean the bristles themselves occasionally. This helps maintain their integrity and enhances the overall cleaning efficiency. Keeping everything in good shape not only improves results but also makes every task smoother and more enjoyable.
Safety Precautions to Follow While Using a Pressure Cleaning Tool
Always wear appropriate protective gear. A pair of safety goggles, gloves, and sturdy footwear can prevent injuries from flying debris or chemicals. Never underestimate the power of the water stream; it can cause cuts or bruises if it hits the skin at high pressure.
Check your surroundings before starting. Ensure there are no bystanders, especially children or pets, within the operational radius. I once had an incident where a curious dog ran into my workspace, and it was a close call. Always be aware of your environment.
Maintain a firm grip on the equipment at all times. A sudden slip can lead to loss of control, resulting in accidents. I’ve seen firsthand how a momentary lapse in concentration can lead to mishaps. Keep your feet firmly planted and be mindful of your stance.
Always point the nozzle away from yourself and others. I’ve made the mistake of getting too close to the surface I was cleaning. The force can ricochet off surfaces, causing unexpected splashes and potential injuries.
Regularly inspect hoses and nozzles for wear and tear. A frayed hose can burst under pressure, leading to dangerous situations. I’ve encountered faulty equipment before, and it’s not something you want to experience mid-cleaning.
Use the right cleaning solution. Some chemicals can react poorly with certain surfaces or materials. I remember using a cleaner on a car that caused damage to the paint. Always read labels and ensure compatibility with your cleaning surface.
| Safety Measure | Description |
|---|---|
| Protective Gear | Wear goggles, gloves, and sturdy footwear to prevent injuries. |
| Work Area | Ensure the area is clear of bystanders and pets before starting. |
| Grip | Maintain a firm grip to prevent loss of control. |
| Nozzle Direction | Always point the nozzle away from yourself and others. |
| Equipment Inspection | Regularly check hoses and nozzles for damage. |
| Cleaning Solutions | Use suitable chemicals to avoid surface damage. |
Familiarise yourself with the machinery before operation. Take the time to read the manual and understand the functions. I once skipped this step and had a frustrating experience trying to figure out the settings on the spot.
Lastly, never aim the stream at electrical outlets or appliances. Water and electricity don’t mix well, and I’ve learned this lesson the hard way while cleaning around outdoor equipment. Always keep a safe distance from any electrical sources.
Common mistakes to avoid when using a pressure cleaning tool with a scrub attachment
Rushing into a task without proper preparation is a common pitfall. Always ensure that the surface is clear of debris and loose dirt before applying any cleaning solution. Failing to do this can lead to scratches and damage to the surface you’re trying to clean.
Ignoring surface compatibility
Another frequent error is using an inappropriate scrub head for specific materials. Soft surfaces like wood or delicate painted finishes require gentler brushes, while tough surfaces can handle stiffer bristles. Always check the manufacturer’s guidelines for recommended attachments to avoid unnecessary wear.
Neglecting pressure adjustments
Using high pressure on surfaces that can’t withstand it can lead to damage, such as peeling paint or surface etching. It’s crucial to adjust the settings based on the material being cleaned. If you’re unsure about the right level, start low and gradually increase until you find the sweet spot. Remember that using a lower pressure with a longer cleaning time often yields better results than cranking it up too high.
Lastly, don’t forget to consult resources like the how to clean solid wood floors complete guide for specific cleaning instructions and tips tailored to various surfaces.
.jpg)


