


Begin with a thorough inspection of the surface that needs attention. Look for areas where the oxidation is most pronounced, as these spots will require a more focused approach. If possible, apply a rust treatment solution beforehand to help lift the corrosion before blasting it away. This pre-treatment can significantly enhance the effectiveness of your cleaning process.
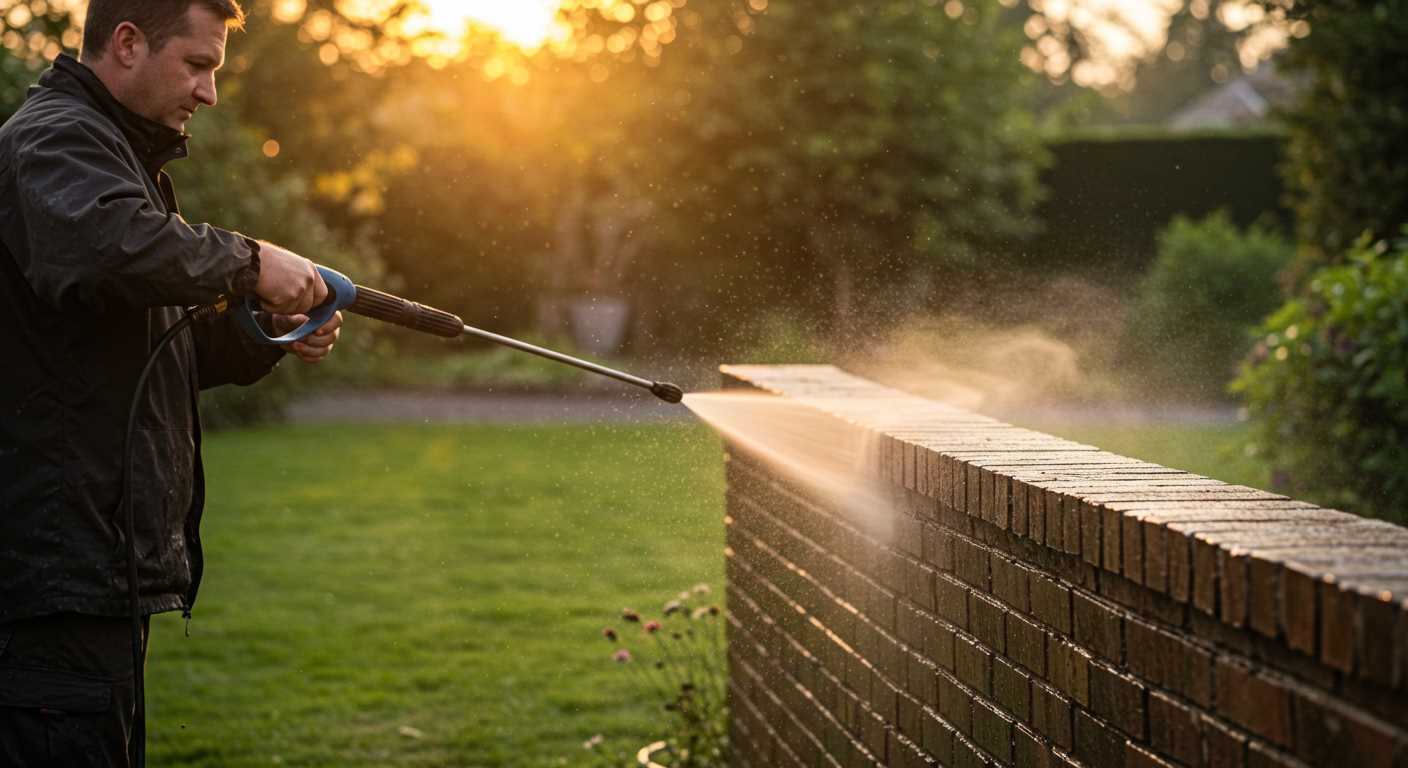
Choosing the right nozzle is crucial. A narrow, high-pressure nozzle will give you better precision and power, allowing you to concentrate on stubborn patches. Keep the nozzle at a consistent distance of about 12 to 18 inches from the surface to avoid damage while ensuring maximum impact. Adjusting the angle can also help target the corrosion without disturbing the surrounding material.

Utilising the right cleaning agents can make a significant difference. A mixture of water with a mild detergent or a specific rust remover will aid in breaking down the corrosion. Apply the solution before using the high-pressure equipment, letting it sit for a few minutes to penetrate the rust layers. This will help in loosening the corrosion, making the subsequent high-pressure cleaning more effective and less time-consuming.
After blasting away the oxidation, it’s important to rinse the area thoroughly. Ensure that no cleaning agents remain on the surface, as they can lead to further issues if left unattended. Following this, consider applying a protective coating to prevent future corrosion. Regular maintenance will help keep surfaces in optimal condition and prolong their lifespan.
Choosing the Right Pressure Washer for Rust Removal
For effective tackling of corrosion, select a model that delivers at least 2000 PSI (pounds per square inch) and 1.8 GPM (gallons per minute). This combination ensures sufficient power to dislodge deeply embedded particles. In my experience, electric units work well for light to moderate tasks, while gas-powered machines excel in heavy-duty scenarios.
Types and Features
Look for a unit equipped with adjustable nozzles. A 15-degree nozzle is particularly beneficial for aggressive cleaning, while a wider nozzle can help with delicate surfaces. I once tested a model with interchangeable tips, and it allowed for a versatile approach, which proved invaluable in different situations.
Another noteworthy feature is the inclusion of a detergent tank. Using a rust-inhibiting cleaner can significantly enhance results. I’ve seen remarkable transformations using a rust remover solution applied with a pressure sprayer before rinsing, which maximises the cleaning potential.
Durability and Portability
Consider the build quality; a robust frame and solid wheels simplify manoeuvrability, especially on uneven surfaces. During a project at a friend’s workshop, I encountered a machine with a lightweight frame that struggled on gravel. A stable, durable design is worth the investment in the long run.
Finally, pay attention to the warranty and customer service reputation. I’ve had instances where prompt support made all the difference when troubleshooting issues. A reliable brand can save you headaches down the line.
Selecting the Appropriate Nozzle for Your Task
For effective cleaning, the right nozzle plays a pivotal role. Each nozzle type offers a unique spray pattern and pressure, making it easier or harder to tackle specific materials. Here’s how to choose wisely:
- Zero-Degree Nozzle: This nozzle produces a concentrated stream, suitable for heavy-duty tasks. Use it sparingly, as it can damage softer surfaces.
- 15-Degree Nozzle: Ideal for stripping paint or addressing stubborn stains. It delivers strong pressure, making it effective against tough debris.
- 25-Degree Nozzle: A versatile option for general cleaning. It provides a wider spray that balances power and control, suitable for various surfaces.
- 40-Degree Nozzle: Best for delicate tasks, such as washing cars or outdoor furniture. The gentle spray prevents damage while still cleaning effectively.
- Soap Nozzle: This nozzle is designed for applying detergent. The low-pressure spray allows for even distribution, making it easier to tackle grime before rinsing.
In my experience, I’ve found that starting with a wider spray can help gauge how well the cleaning is progressing before switching to a more concentrated nozzle if necessary. Always test on a small area first to avoid any unintended damage.
Also, ensure compatibility with your equipment. Some nozzles may not fit all models. It’s wise to check your machine’s specifications. For instance, if you’re considering barriers for safety, you might want to explore if can an electric fence injure dog to ensure your space is secure while you work.
Finally, keep your nozzles clean. Clogged nozzles can lead to uneven pressure and reduced effectiveness. Regular maintenance will extend their lifespan and improve performance.
Preparing the Surface Before Pressure Washing
To achieve optimal results, meticulous preparation of the surface is non-negotiable. Begin by clearing the area of any debris, such as leaves, dirt, and loose particles. This step is crucial for preventing further damage during the cleaning process.
Next, inspect the surface for any large flakes or peeling paint. These should be scraped away to avoid clogging your equipment and to ensure an even clean. A putty knife or a wire brush works wonders here. If the surface is particularly corroded, consider using a rust converter before proceeding, as it can help stabilise the area.
Afterward, it’s wise to conduct a test patch. Choose a small, inconspicuous section and apply your chosen cleaning solution to gauge its effectiveness. This will also determine how the material reacts to the high-pressure stream. If the surface responds well, you’re ready to proceed.
Before starting, ensure that the area is free from electrical outlets or any electrical equipment that could be affected by water. Cover any nearby plants with tarps to protect them from potential damage caused by the cleaning agents.
| Preparation Step | Description |
|---|---|
| Clear Debris | Remove all loose items and dirt from the surface. |
| Scrape Loose Material | Use a putty knife or wire brush to remove peeling paint or rust flakes. |
| Test Patch | Apply cleaner on a small area to check compatibility and effectiveness. |
| Protect Surroundings | Cover plants and electrical outlets to prevent damage. |
Following these steps will set the stage for a successful cleaning operation, ensuring that the equipment works to its fullest potential and delivers the desired results.
Applying Rust Remover: Best Practices and Tips
Begin by selecting a rust treatment that suits the specific metal type you’re working with. Different formulations exist for ferrous and non-ferrous metals. Always read the manufacturer’s instructions to ensure compatibility.
Before applying any solution, wear protective gear such as gloves and goggles. This prevents skin irritation and shields your eyes from splashes. In my experience, safety should never be overlooked; a minor precaution can save a lot of trouble later.
Ensure the surface is dry and clean before application. Moisture can dilute the solution, reducing its effectiveness. I once attempted to treat a surface that had not fully dried, and the results were disappointing. A clean, dry area allows for better adhesion and penetration of the chemicals.
Apply the remover evenly, using a sprayer or brush for larger areas. I’ve found that a brush worked wonders for intricate designs and corners where a sprayer might miss. For large flat surfaces, a sprayer can expedite the process significantly.
Let the solution sit for the recommended time. This step is crucial; rushing can yield subpar results. I remember a time when I was impatient and didn’t allow adequate time for the treatment to work. The difference was stark when I finally followed the guidelines properly.
After waiting, scrub the surface with a stiff brush to agitate and loosen any lingering particles. This step enhances the effectiveness of the treatment. I often use a wire brush for tougher spots, but be careful not to damage the underlying metal.
Rinse thoroughly with clean water after scrubbing. Residue left behind can hinder further treatment or painting. During a project, I once overlooked this step, leading to issues with adhesion of a subsequent protective coat.
Finally, consider applying a protective sealant after the rust treatment. This not only prevents future corrosion but also prolongs the lifespan of the metal. I’ve seen surfaces treated without a sealant deteriorate much faster than those that were properly finished.
Adjusting Pressure Settings for Different Surfaces
For optimal results, it’s crucial to tailor the pressure settings according to the surface being treated. Here’s a practical guide based on my years of experience:
- Concrete and Brick: Use high settings (2500-3000 PSI). These materials can withstand intense force, making it easier to blast away ingrained stains.
- Metal: Moderate pressure (1500-2000 PSI) is ideal. Excessive force can damage the surface, especially if it has a protective coating.
- Wood: Always opt for lower settings (500-1500 PSI) to prevent splintering. Softwoods, in particular, require careful handling to maintain their integrity.
- Glass: Use the lowest setting (below 1000 PSI). The risk of shattering increases significantly with higher pressures.
- Plastic: A mid-range approach (1000-2000 PSI) usually works well. Always test a small area first to gauge the response.
During a recent project, I encountered an old wooden deck that had seen better days. I started at 1200 PSI, which seemed effective, but after some trial and error, I found that reducing it to 800 PSI allowed me to clean without damaging the wood, preserving its natural look.
Always remember to assess the condition of the surface before adjusting. Stubborn spots might require a brief increase in pressure, but be ready to dial it back to avoid harm. Adjusting the settings not only enhances cleaning efficiency but also prolongs the life of the material being treated.
Techniques for Effective Rust Removal with a Pressure Washer
Begin with a thorough inspection of the surface. Identify areas with heavy corrosion and lighter stains. For severe cases, it’s wise to start with a more aggressive approach, employing a rotary nozzle. This attachment concentrates water flow, enhancing impact and helping to dislodge tough particles.
Layered Approach
Adopt a layered technique. Begin by treating the most affected areas, gradually working towards less impacted sections. This method prevents the spread of debris and allows for a more controlled clean. As you progress, alternate between wider and tighter spray patterns for optimal results.
Post-Cleaning Treatment
Once the surface is free from corrosion, it’s beneficial to apply a protective coating. This helps to prevent future deterioration. I’ve found that products designed specifically for metal surfaces work wonders. For additional insights, consider how to powerfully clean paving stones with a high pressure cleaner, as the techniques can often overlap.
Post-Cleaning Care to Prevent Future Rust
After tackling the discolouration, it’s crucial to protect the metal surfaces. A thorough drying process is the first step. Ensure all areas are completely dry to prevent moisture from settling, which promotes further deterioration. I often use a clean cloth or allow items to air dry in a well-ventilated space. For larger surfaces, a fan can expedite this process.
Applying Protective Coatings
A quality primer or rust-inhibiting paint is a game changer. These products create a barrier that shields the metal from environmental elements. During my time testing various coatings, I found that zinc-rich primers offer excellent protection. After applying the primer, a topcoat can enhance the aesthetic while adding another layer of defence. Make sure to follow the manufacturer’s instructions regarding drying times and application methods.
Regular Maintenance


Establishing a routine for inspections and upkeep is vital. I recommend checking for any signs of new corrosion at least once a month, especially in areas prone to moisture. Keeping surfaces clean and dry can significantly reduce the risk of future issues. Additionally, using a wax or sealant on vehicles and outdoor furniture can provide extra protection against moisture and UV damage. Trust me; investing time in regular care saves a lot of hassle down the line.
Safety Measures When Using a Pressure Washer
Always wear protective gear: safety goggles, gloves, and sturdy footwear are non-negotiable. I recall a time when I underestimated the power of the jet and ended up with a painful bruise on my leg. A simple pair of steel-toed boots could have prevented that mishap.
Ensure the working area is clear. Before starting, I always check for any obstacles, loose debris, or fragile items nearby. I once had a close call with a garden ornament that shattered under the force, making cleanup a lot more complicated.
Electrical Safety
Inspect the electrical connections and cords. I’ve seen too many friends overlook this, only to face shocks or damaged equipment. Always work outdoors or in a well-ventilated space to avoid electrocution. If it’s raining, postpone your task; water and electricity don’t mix well.
Proper Handling Techniques
Maintain a firm grip on the wand; the force can jerk it out of your hands. During my early days, I lost control and nearly hit a nearby fence. Always keep the nozzle pointed down and away from yourself and others. Taking a few extra seconds to ensure your stance is stable can save you from disaster.
FAQ:
What type of pressure washer is best for removing rust?
When choosing a pressure washer for rust removal, look for models that offer at least 2000 PSI (pounds per square inch). This level of pressure is typically effective for tackling rust on metal surfaces. Additionally, consider a washer with variable pressure settings, as this allows you to adjust the intensity based on the rust’s severity. Electric pressure washers are quieter and suitable for light rust, while gas-powered models deliver higher pressure, making them ideal for tougher jobs.
How do I prepare the surface before using a pressure washer for rust removal?
Before using a pressure washer, clear the area of any obstacles and debris. It’s advisable to remove loose rust and dirt manually with a wire brush or scraper. This step helps the pressure washer work more effectively. Moreover, consider applying a rust remover solution to the affected area beforehand, allowing it to sit as directed. This can enhance rust removal during the pressure washing process.
Can I use any cleaning solution with my pressure washer for rust removal?
Not all cleaning solutions are suitable for use in pressure washers. It’s best to use products specifically designed for pressure washers, as they won’t damage the equipment. Look for rust removal solutions that are compatible with your washer type. Always follow the manufacturer’s guidelines regarding dilution ratios and application methods to ensure safe and effective use.
What safety precautions should I take while using a pressure washer on rust?
Safety is paramount when using a pressure washer. Always wear protective gear, including safety goggles, gloves, and sturdy footwear to prevent injuries from flying debris or high-pressure water. Ensure the area is free from electrical hazards, especially if using an electric washer. Additionally, maintain a safe distance from the surface while spraying to avoid damaging the material or causing injury. Finally, be mindful of your surroundings and ensure no one is within the spray zone.
How can I prevent rust from returning after using a pressure washer?
To prevent rust from reappearing after removal, it’s crucial to protect the metal surface. Once the rust is cleared, consider applying a rust-inhibiting primer or paint designed for metal surfaces. Regular maintenance, such as cleaning and inspecting for signs of rust, can also help. If the item is outdoors, consider using a protective coating or sealant to shield it from moisture and environmental factors that promote rusting.
What steps should I follow to safely use a pressure washer for rust removal?
To safely use a pressure washer for rust removal, begin by ensuring you have the right equipment and protective gear. Wear safety goggles and gloves to protect yourself from debris. First, select a suitable nozzle; a 15-degree or 25-degree nozzle works well for rust. Next, prepare the surface by removing loose dirt and debris. If the rust is extensive, consider applying a rust remover or a mixture of vinegar and baking soda to help break it down. Set the pressure washer to a low setting initially to avoid damaging the surface, then gradually increase the pressure as needed. Begin washing from a distance of about 2 feet, moving closer if necessary. Rinse the area thoroughly after cleaning and allow it to dry before applying any protective coatings.

.jpg)


