


Start with the right nozzle. Each attachment serves a unique purpose, and selecting the appropriate one can significantly enhance your cleaning results. For example, a 0-degree nozzle is great for tough stains, but it can damage softer surfaces. I recall a time when I accidentally stripped paint off a wooden deck because I chose the wrong attachment–lesson learned!
Next, ensure the water supply is steady before powering up the machine. I’ve encountered situations where inadequate water flow led to overheating. A simple check of your hose and connections can save you from unnecessary repairs. Remember, the cleaner needs a consistent source to operate efficiently.
Pressure settings are also critical. Adjust according to the surface being cleaned; higher pressure is not always better. For instance, while cleaning a concrete driveway, I often start at a lower pressure and gradually increase it to avoid potential damage. Understanding the surface material can help you prevent costly mistakes.
Lastly, regular maintenance is key. Clean the filters and check for clogs in the hose and nozzles after each use. I’ve seen how neglecting this can lead to diminished performance over time. A little care goes a long way in extending the lifespan of your machine.
Effective Operation of a RAC Cleaning Machine
Begin with a thorough inspection of the equipment. Check hoses for leaks, ensure the nozzle is securely attached, and verify that all connections are tight. A well-maintained unit performs better and reduces the risk of accidents.
Preparation Steps
- Choose a suitable area for cleaning, ideally outdoors, with proper drainage.
- Gather protective gear: goggles, gloves, and sturdy footwear.
- Fill the reservoir with the appropriate cleaning solution if applicable.
Before starting, ensure the power source is stable. For electric models, check that the extension cord is rated for outdoor use. If working with a fuel-powered variant, ensure adequate fuel levels.
Cleaning Technique
- Stand at a safe distance from the surface, usually around 2-3 feet.
- Begin with a wide spray pattern to avoid damage to delicate surfaces.
- Gradually move closer as needed, adjusting pressure settings if available.
- Use a sweeping motion to ensure even coverage, avoiding prolonged focus on one spot.
After completing the task, turn off the machine and disconnect the power source. Allow the unit to cool down before storing. Regular cleaning of the nozzle and filters will prolong its lifespan and maintain optimal performance.
Choosing the Right Nozzle for Your Cleaning Task
Selecting the appropriate nozzle can drastically influence the outcome of your cleaning. Each type serves a specific purpose, so understanding their differences is key. I once tackled a particularly stubborn oil stain on a driveway, and the wrong nozzle choice led to minimal results. Switching to a narrower spray made all the difference.
Here are the most common nozzle types you’ll encounter:
| Nozzle Type | Angle | Best For |
|---|---|---|
| 0° (Red) | 0° | Heavy-duty tasks, such as removing paint or stripping surfaces. |
| 15° (Yellow) | 15° | Concrete, brick, and other tough surfaces; effective for grime removal. |
| 25° (Green) | 25° | Most versatile; ideal for patios, decks, and vehicles. |
| 40° (White) | 40° | Gentle cleaning; suitable for delicate surfaces like wood and painted areas. |
| Soap | – | Applying detergent for deep cleaning; great for vehicles and outdoor equipment. |
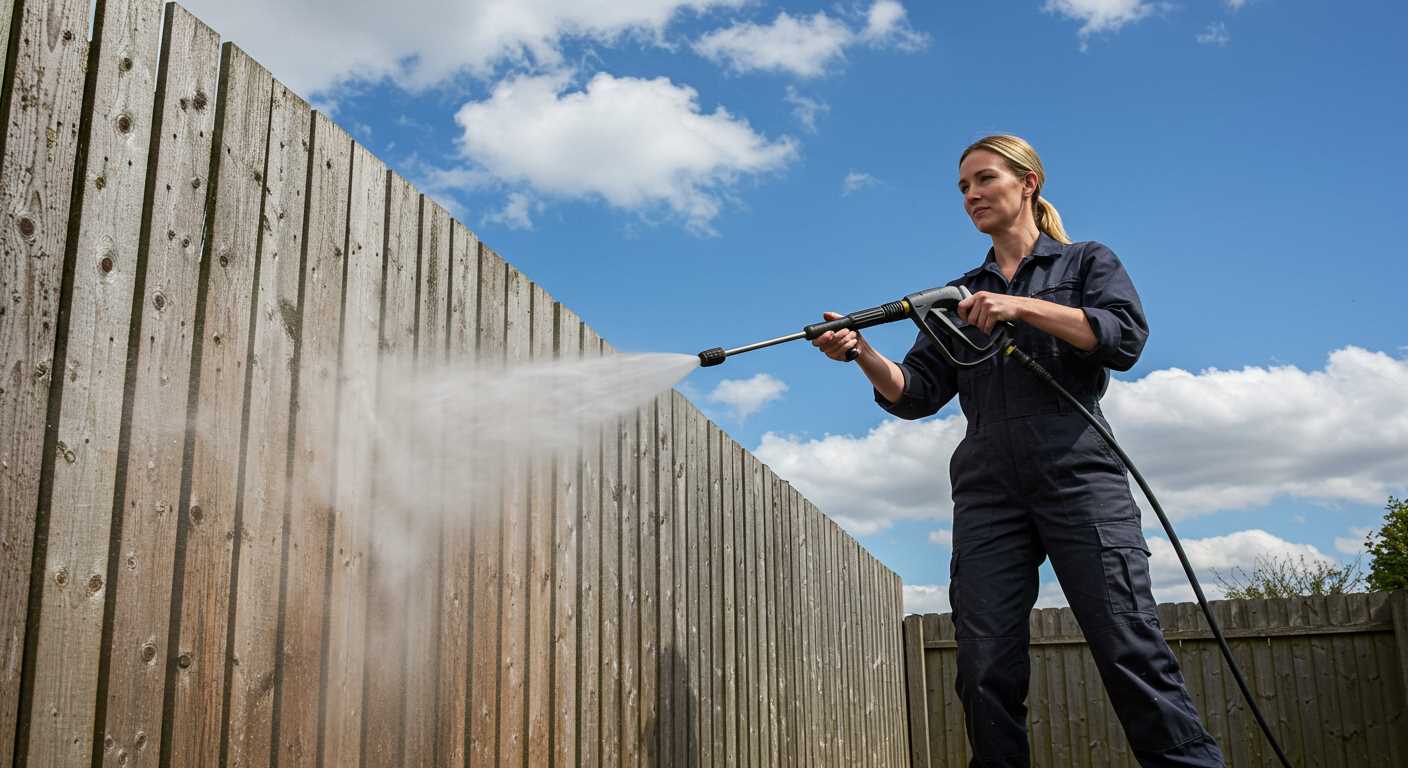
Always start with the widest spray angle to prevent damage, especially on sensitive surfaces. I recall a time when I used a narrow nozzle on a wooden fence and ended up with gouges. It’s easy to get carried away with power, but a gentle approach often yields better results.
For stubborn stains, gradually move to a tighter spray, and keep a safe distance to avoid surface damage. Remember, the nozzle type not only affects cleaning efficiency but also safety, so choose wisely for every task at hand.
Preparing the Area for Pressure Washing
Clear the space of any furniture, vehicles, or delicate items. I recall a time when I overlooked removing a garden statue, and the force of the spray knocked it over, resulting in a costly repair. Protect surrounding plants with tarps or plastic sheeting to prevent damage from high-pressure water or detergent runoff.
Inspect surfaces for loose debris, such as dirt, leaves, or old paint. A quick sweep can make a significant difference in the efficiency of the cleaning process. On one occasion, I saw a colleague waste time struggling with stubborn grime that could have been easily cleared beforehand.
Ensure power sources and hoses are in good condition. I once encountered a frayed extension cord that caused interruptions during a job. It’s wise to check all connections and ensure they’re secure and functioning properly.
Establish a safe distance from walls, windows, and doors. I’ve seen too many instances of windows cracking from the pressure applied too close. Maintain at least a few feet of space to avoid accidents and ensure an even clean.
Identify nearby drainage systems; divert water runoff to avoid pooling. During one of my projects, water accumulated in a corner, creating a muddy mess that took extra time to clean up. A little foresight in directing the water flow can save a lot of hassle.
Lastly, check the weather forecast. Working in rain or extreme heat can affect both the cleaning process and the longevity of the surfaces being treated. I’ve had to postpone jobs due to unforeseen weather changes that could have been easily anticipated.
Connecting the Pressure Cleaner to Water Supply
Before getting started, ensure the water source is clean and free from debris. A garden tap is the most common connection point. Use a high-quality hose that can withstand the required pressure without leaking or bursting.
Begin by attaching one end of the hose to the water supply. Make sure it’s tightly secured to prevent any leaks. I’ve often seen users overlook this step, leading to frustrating interruptions during cleaning tasks.
Next, connect the opposite end of the hose to the inlet on the cleaning device. Again, ensure a tight fit. It’s wise to check for compatibility between the hose and the unit’s inlet size. Some models may require an adapter, so keep a few handy to avoid last-minute scrambles.
Once connected, turn on the water supply slowly. This allows the hose to fill without creating air pockets that could hinder operation. I’ve encountered situations where starting with a fast flow caused splashes, so a gradual approach works best.
Check for any leaks at both connection points. If you notice any, tighten the fittings or adjust the hose as necessary. A small leak can turn into a significant issue, affecting the overall performance of the equipment.
After ensuring everything is secure and leak-free, you’re ready for the next steps. This simple setup can save you time and frustration, letting you focus on the task at hand.
Setting Up the Equipment for Operation
Before diving into any cleaning task, ensure your machinery is prepared correctly. Begin by placing the unit on a flat, stable surface to prevent any tipping or movement during operation. I’ve seen too many people overlook this, and it can lead to mishaps.
Checking Connections
Inspect all hoses and fittings for any signs of wear or damage. A small crack can lead to significant issues when you’re in the thick of a job. Make sure the water inlet is securely connected and the high-pressure hose is tightly fastened to the output. In my experience, a loose connection can result in frustrating leaks that not only waste water but also interrupt your workflow.
Power Source and Safety Precautions
Plugging into a suitable power source is next. Ensure you’re using an outdoor-rated extension cord if the power point is far from your workspace. Always avoid overloading circuits. I’ve occasionally tripped a breaker, and it’s a hassle to reset everything while your cleaning task remains unfinished. Don’t forget to wear safety goggles and sturdy footwear. Protecting yourself should always be a priority, and I’ve learnt this the hard way on a couple of occasions.
Proper Techniques for Pressure Washing Surfaces
Maintaining the correct distance from the surface being cleaned is paramount. For most surfaces, a distance of about 18 to 24 inches is advisable. This prevents damage while ensuring effective removal of dirt and grime. I’ve witnessed too many instances where users got too close and ended up damaging wooden decking or stripping paint off walls.
Angle of Attack
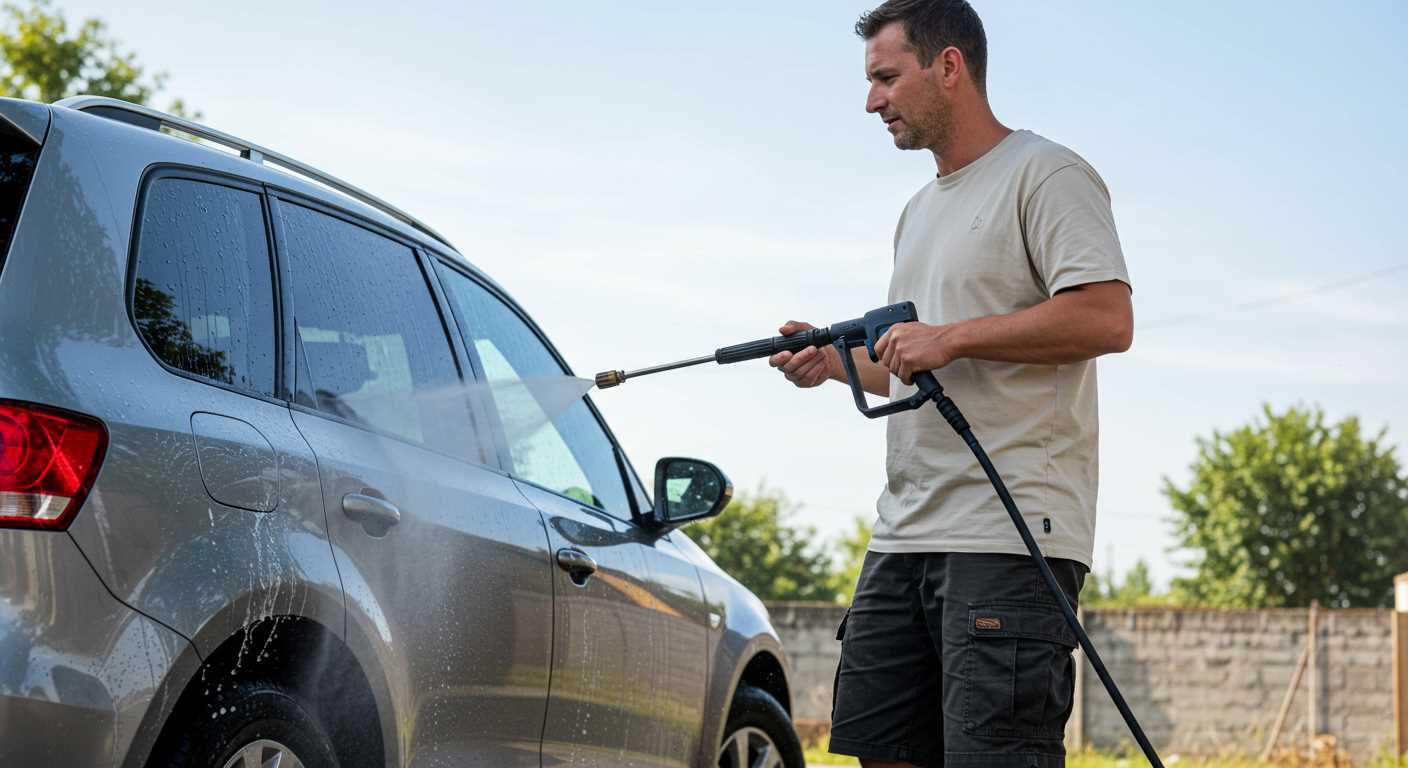
Adjusting the angle of the spray can significantly impact the cleaning results. Aim the nozzle at a 45-degree angle to the surface for optimal cleaning. This technique allows the water to lift dirt away rather than forcing it deeper into the material. I’ve seen this approach work wonders on driveways covered in oil stains.
Use of Cleaning Solutions
Incorporating a suitable cleaning agent can elevate your results. For instance, if you’re tackling mould and mildew, consider a mold and mildew remover for pressure washer. Always apply it before rinsing, allowing a few minutes for it to penetrate the surface. This step is often overlooked, yet it can make a significant difference in achieving a spotless finish.
Keep the nozzle moving steadily across the surface to avoid streaks or uneven cleaning. I advise working in small sections, especially on large areas, to maintain control and ensure thorough cleaning. After completing one section, rinse it immediately to prevent any cleaning solution from drying on the surface.
Maintaining Safe Distance While Cleaning
Always keep a distance of at least 2 to 3 feet from the surface being cleaned. This helps prevent damage to delicate materials and protects you from the powerful stream. I remember the first time I got too close while cleaning a wooden deck; the wood splintered, and I had to spend hours sanding it down. Lesson learned!
Adjust your distance based on the nozzle type. For instance, a narrow spray pattern requires a greater separation compared to a wider fan. I’ve often tested various nozzles, and the difference in impact is significant. The wide nozzle allows for a gentler approach, perfect for surfaces like vehicles or painted areas.
Moving in a steady motion helps maintain consistent pressure without focusing too much on one spot. I’ve seen too many people linger on a single area, resulting in unwanted etching or damage. Keeping a consistent distance while moving smoothly is key to effective cleaning.
Always be aware of your surroundings. Watch out for windows, plants, and other objects that could be affected by the high-pressure stream. I once accidentally blasted a window in my excitement to clean a driveway; it shattered, and I learned the hard way to always assess the area before starting.
Utilise protective gear like goggles and gloves, as debris can be flung back at you. During one particularly intense cleaning session, I neglected to wear goggles and got a bit of grime in my eye. Trust me, it’s not a pleasant experience.
Lastly, if you’re unsure about the right distance for a specific surface, test it out on a small, inconspicuous area first. This simple precaution can save you from costly repairs. For more insights on equipment choices, check out this article on whether are digital cameras better than dslr. It’s not directly related, but it highlights the importance of selecting the right tools for the job.
Cleaning and Storing Your Equipment After Use
After completing your cleaning tasks, it’s crucial to ensure your equipment is properly cleaned and stored. This not only prolongs the lifespan of the machine but also ensures optimal performance for future jobs.
Cleaning Steps
- Disconnect the water source and power supply. Ensure that everything is switched off to prevent any accidental activation.
- Flush the system. Run clean water through the unit for a few minutes to remove any detergent or debris. This helps prevent clogging.
- Clean the nozzles and attachments. Rinse them thoroughly and use a soft brush to remove any stubborn residue. Check for damage or wear, replacing as necessary.
- Wipe down the exterior. Use a damp cloth to clean the body of the machine. Avoid abrasive cleaners that might scratch the surface.
Storage Recommendations
- Store in a dry place. Keep the equipment away from damp environments to avoid rust and corrosion.
- Protect the hose. Coil it neatly and secure it with straps or ties. Avoid tight bends that could cause damage.
- Cover the unit. If possible, use a cover to protect against dust and debris. This will keep it in good condition when not in use.
- Check regularly. Periodically inspect the machine for any signs of wear or damage. Address any issues promptly to avoid larger problems down the line.
By following these steps, you’ll ensure your equipment remains in great shape, ready to tackle the next cleaning project with ease.
.jpg)


