


For an optimal clean, combine a concentrated cleaner with your high-pressure cleaning machine in a 1:10 ratio. This blend ensures a powerful yet gentle approach to tackling grime and stains on various surfaces. I often recommend this mix for those looking to revamp their outdoor spaces without the risk of damaging delicate materials.
During my time in the cleaning equipment industry, I discovered the significance of proper dilution. Too strong a mixture can leave residue, while too weak may not deliver the desired results. A 1:10 ratio strikes the balance, allowing the cleaner to effectively break down dirt while being safe for most surfaces, including wood, concrete, and metal.

Another tip is to apply the solution using a low-pressure nozzle first. This method ensures even distribution across the surface. After letting it sit for a few minutes, switch to a high-pressure setting for a thorough rinse. This two-step technique not only enhances cleaning efficiency but also saves time and effort.
From personal experience, always test a small, inconspicuous area first. This precaution helps to avoid any unwanted surprises, especially on painted or older surfaces. I’ve had my share of mishaps that could have been easily avoided with this simple step.
Selecting the Right Simple Green Product for Your Pressure Cleaning Equipment
Choosing the appropriate cleaning solution can significantly enhance your cleaning results. Here’s what I recommend based on my extensive experience with various formulations.
Types of Products
- All-Purpose Cleaner: Ideal for general cleaning tasks. It’s effective on a variety of surfaces like decks and driveways.
- Floor Cleaner: Specifically designed for hard surfaces. Perfect for garage floors or patios where grime accumulates.
- Heavy-Duty Cleaner: Best for tackling tough stains, such as oil or grease. Works wonders on surfaces that require more power.
Concentration Levels
Pay attention to the concentration of the product. A higher concentration means you can dilute it according to your needs:
- Light Cleaning: Dilute concentration 1:10 for routine maintenance.
- Moderate Cleaning: Use a 1:5 ratio for surfaces with moderate dirt build-up.
- Heavy Cleaning: Apply full strength for stubborn stains.
In my experience, the right selection makes all the difference. A well-chosen solution not only improves performance but also protects surfaces from damage. Consider your specific cleaning needs and the types of surfaces you’ll tackle. That will guide you to the most suitable product for your equipment.
Preparing Your Equipment for Effective Application
Before mixing cleaning solutions, ensure your machine is in optimal condition. Start by checking the water supply; it should be clean and free of debris. A simple inspection of the hose for leaks or blockages can save you time and effort during the cleaning process.
Next, confirm that all connections are secure. Loose fittings can lead to pressure loss or inefficient spraying. If your device features a removable nozzle, choose one that matches the task–narrower for tough spots, wider for larger areas.
Mixing the Cleaning Solution
Follow the manufacturer’s guidelines for dilution ratios. Most cleaners require mixing with water before use. I recommend using a separate container for this; it helps to get the mixture right without risking damage to your machine. Always pour the cleaner into water, not the other way around, to prevent splashing and ensure proper blending.
Final Checks
Lastly, run a quick test. Turn on the machine and let it idle for a minute. This helps to circulate the solution through the system and confirm that everything is functioning correctly. If there are any unusual sounds or leaks, address those issues before proceeding. For tips on maintaining aquariums without disturbing the fish, you might find this resource helpful: how to clean a fish tank without removing the fish.
Mixing Simple Green with Water: The Correct Ratio
For optimal results, combine the cleaning solution with water in a 1:10 ratio. This means one part of the cleaner to ten parts of water. This dilution strikes a perfect balance, ensuring effective cleaning without being too harsh on surfaces.
In my experience, using this mixture not only enhances the cleaning power but also reduces the risk of damaging delicate materials. On one occasion, I tackled a particularly stubborn stain on a wooden deck. By adhering to the 1:10 ratio, I managed to restore the deck’s finish without any adverse effects. It’s a reliable approach that I recommend consistently.
Keep in mind, for extremely tough grime, you might adjust the ratio slightly to a 1:5 mix for a more concentrated solution. However, always test this stronger mix on a small, inconspicuous area first to ensure compatibility with the surface.
Another tip–if you’re storing the mixture for later use, make sure to label it clearly. I once forgot about a batch I mixed up, and it was a hassle trying to identify it after a few weeks. Staying organised goes a long way in maintaining efficiency in your cleaning routine.
Applying Simple Green Solution to Various Surfaces
For optimal results, it’s key to match the cleaning agent to the surface type. Here’s how I approach different materials when working with this cleaner.
On concrete, I’ve found that a diluted solution works wonders. The rugged texture of concrete captures dirt well, so applying a mixture of one part cleaner to four parts water allows it to penetrate effectively. After applying, let it sit for about 5 to 10 minutes to break down grime before rinsing thoroughly.
When it comes to wood decks, a gentler approach is necessary. A ratio of one part cleaner to eight parts water is best. This ensures the integrity of the wood while still lifting stains. Using a lower pressure setting helps prevent damage. I always recommend working in the direction of the wood grain for a more uniform finish.
For vehicles, I prefer a 1:10 ratio to avoid any potential harm to the paint. It’s best to apply it with a wide spray nozzle to disperse the solution evenly. Rinse it off promptly to prevent any residues from drying on the surface.
Here’s a quick reference table for the dilution ratios based on the surface type:
| Surface Type | Recommended Ratio |
|---|---|
| Concrete | 1:4 |
| Wood Decks | 1:8 |
| Vehicles | 1:10 |
Finally, for outdoor furniture, a similar ratio to the vehicles works well, but always test a small area first to ensure compatibility. Keeping surfaces clean extends their life and enhances their appearance. Remember, patience in letting the solution dwell can make a significant difference in your results.
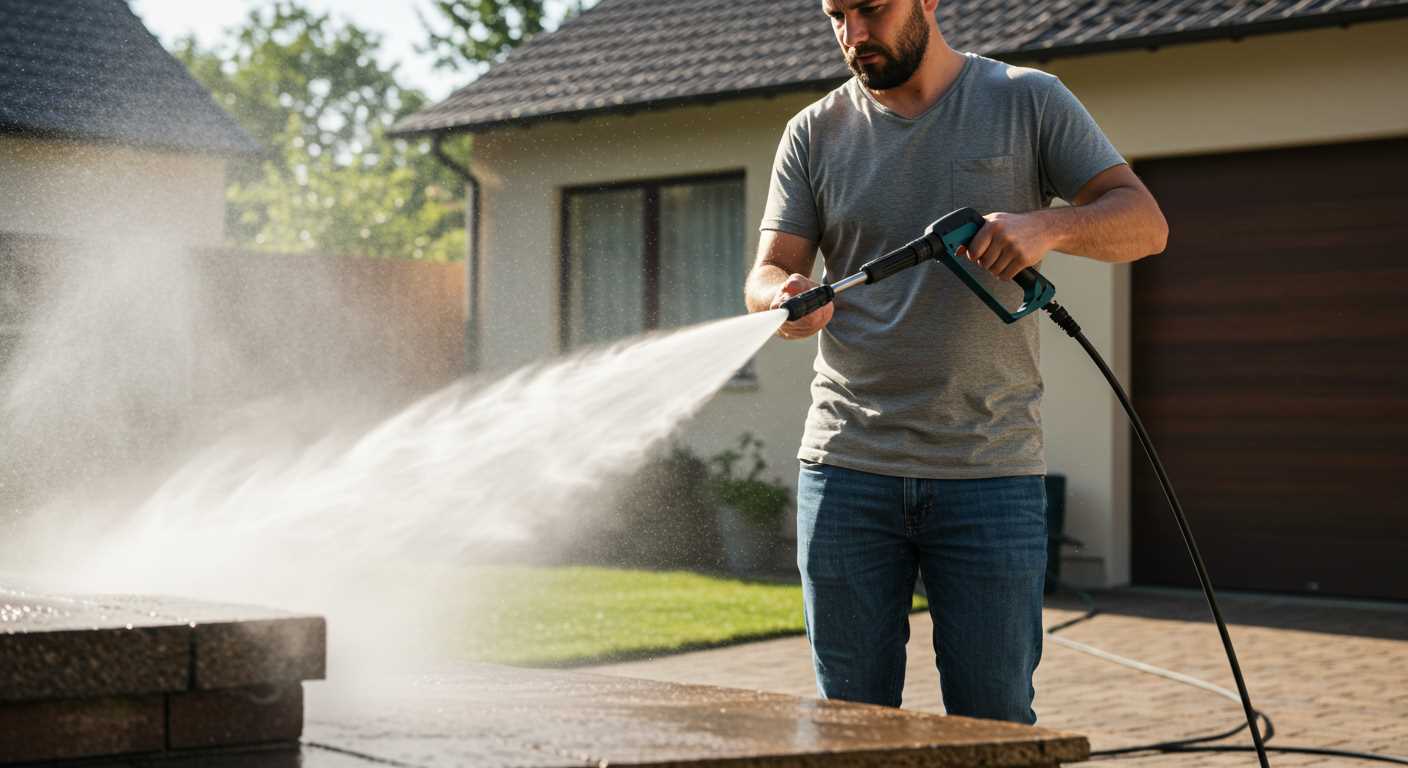
Adjusting Pressure Settings for Optimal Cleaning
Set the pressure level according to the surface you’re tackling. For delicate materials like wood or painted surfaces, aim for a lower setting, usually around 1000-1500 PSI. This prevents damage while still providing thorough cleaning. For tougher surfaces like concrete or brick, you can increase it to 2500-3000 PSI. Always refer to the manufacturer’s guidelines for your machine to avoid exceeding its limits.
Testing Pressure Levels
Before diving into a full cleaning session, take a moment to test the pressure on a small, inconspicuous area. This helps determine if the selected setting is appropriate for the material without causing harm. If you notice any chipping or warping, reduce the pressure until you find the right balance.
Adjusting on the Go
As you clean, be prepared to adjust the pressure. Areas with heavy staining or built-up grime may require a higher PSI, while intricate details or corners should revert to a lower setting. This approach not only protects your surfaces but also maximises the cleaning potential of your solution.
Safety Precautions When Working with Cleaning Solutions in High-Pressure Equipment
Always wear appropriate personal protective equipment (PPE). Safety goggles, gloves, and sturdy footwear are non-negotiable when handling any cleaning agents. The chemical components can cause irritation or harm if they come into contact with skin or eyes.
Preparation Before Starting
- Ensure the working area is well-ventilated. If you’re operating indoors, take extra measures to prevent the accumulation of fumes.
- Keep children and pets at a safe distance. Their safety should be a priority, as the mixture can be hazardous.
- Read product labels carefully. Understanding the specific instructions and warnings will prevent accidents.
Handling and Storage Tips
- Store cleaning solutions in a cool, dry place away from direct sunlight. Heat can degrade the product and potentially lead to leaks or ruptures.
- Never mix different cleaning agents unless specified by the manufacturer. This can result in dangerous reactions.
- In case of spillage, clean immediately with plenty of water to prevent slips or skin contact.
Always test surfaces for compatibility before applying any solution broadly. Some materials may react negatively, leading to damage. If you’re working with a bucket powered device, ensure it is compatible with the cleaning agent to avoid equipment malfunction.
Cleaning and maintaining your equipment after use
After finishing a cleaning session, ensure to disconnect the water supply and release any remaining pressure by squeezing the trigger of the gun. This simple step prevents any accidents and prolongs the lifespan of the equipment.
Next, flush the system with clean water to remove any residue from the cleaning solution. I typically do this by running plain water through the machine for a few minutes. It’s a habit I developed after witnessing how leftover solution can corrode internal components over time.
Inspecting and storing your unit
Take a moment to check all hoses and connectors for wear or leaks. It’s a good practice to replace any damaged parts immediately to avoid bigger issues down the line. After inspection, securely coil the hoses to prevent kinks and store them in a dry place. I’ve learned the hard way that leaving them exposed to the elements can lead to premature deterioration.
Regular maintenance tasks
Make it a routine to clean the filter and nozzle after every few uses. Blockages can affect performance, and I always keep a spare filter on hand. Lastly, consider running a maintenance solution through the unit every few months to keep it in top condition. This little effort can save you from costly repairs and ensure your equipment operates efficiently.
Video:


.jpg)


