


For optimal results, fill the detergent container with a suitable cleaning solution. Always check the manufacturer’s recommendations for compatibility with your equipment to avoid damaging components. I remember my first time using a chemical cleaner; the difference it made in removing grime was astonishing.
Ensure the container is securely attached to the machine. A loose connection can lead to leaks and ineffective application. On one occasion, I learned this the hard way–what a mess it was when I started the machine only to find the solution spraying everywhere but where it was needed!
Adjust the settings on the device to the appropriate low-pressure mode when applying the cleaner. This step is crucial because high pressure can cause the detergent to disperse improperly, reducing its effectiveness. I’ve seen many users make this mistake, thinking more power equals better results. Trust me, a gentle approach works wonders for achieving a consistent application.

Allow the cleaning agent to dwell on the surface for a few minutes before rinsing. This waiting time is essential for breaking down tough stains. I often set a timer during this stage to ensure I don’t get sidetracked, and the results after rinsing are always gratifying–like unveiling a hidden treasure beneath layers of dirt.
Finally, rinse thoroughly with clean water to remove any residue. A thorough rinse not only reveals the true effectiveness of the cleaning agent but also prevents any potential damage to the surfaces cleaned. I once skipped this step and regretted it when I noticed streaks left behind later. A little patience at this stage pays off handsomely.
Choosing the Right Cleaning Solution for Your High-Pressure Equipment
Always opt for solutions specifically designed for your cleaning machine. Products labelled as “compatible with high-pressure systems” ensure safety for both your equipment and the surfaces you’re tackling. Avoid using household cleaners or bleach, as they can damage the internal components and potentially void your warranty.
Consider the Surface Type
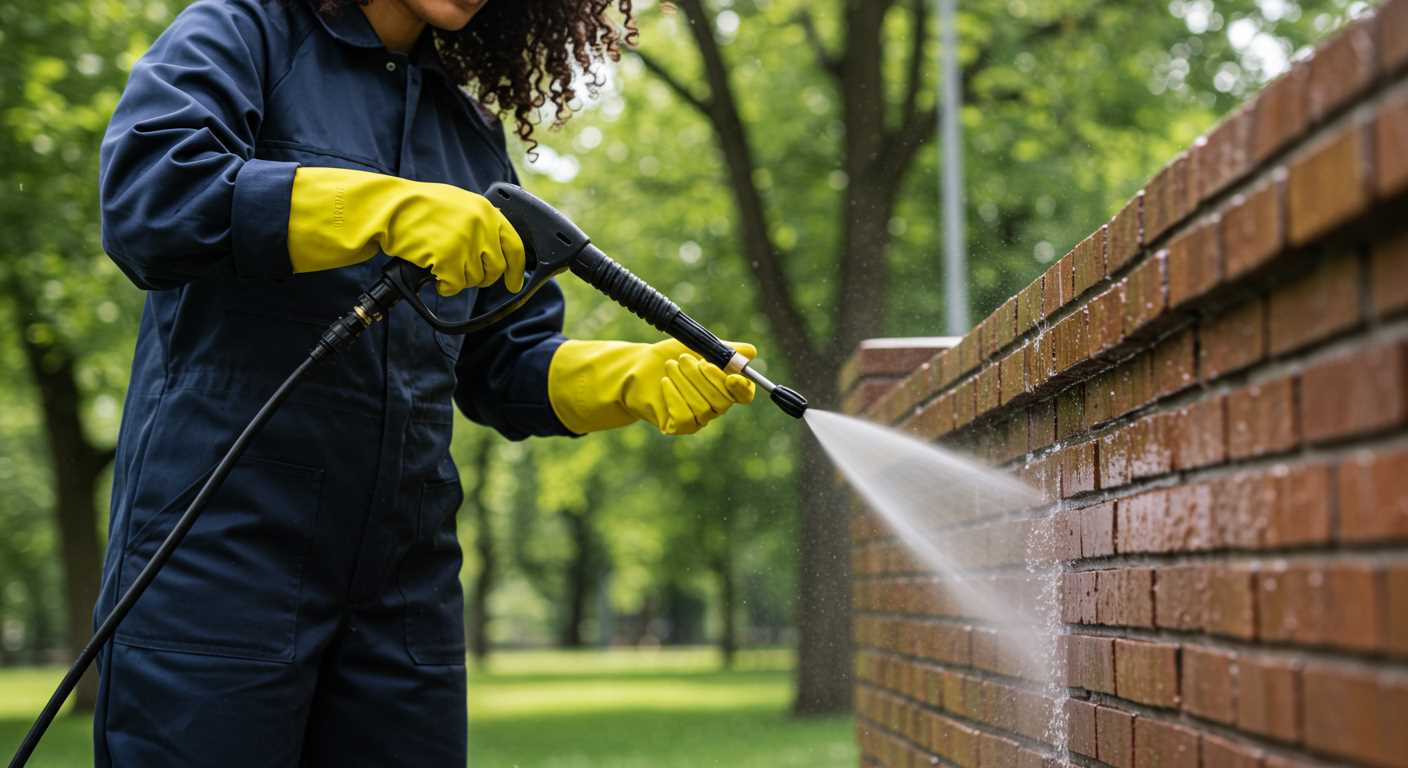
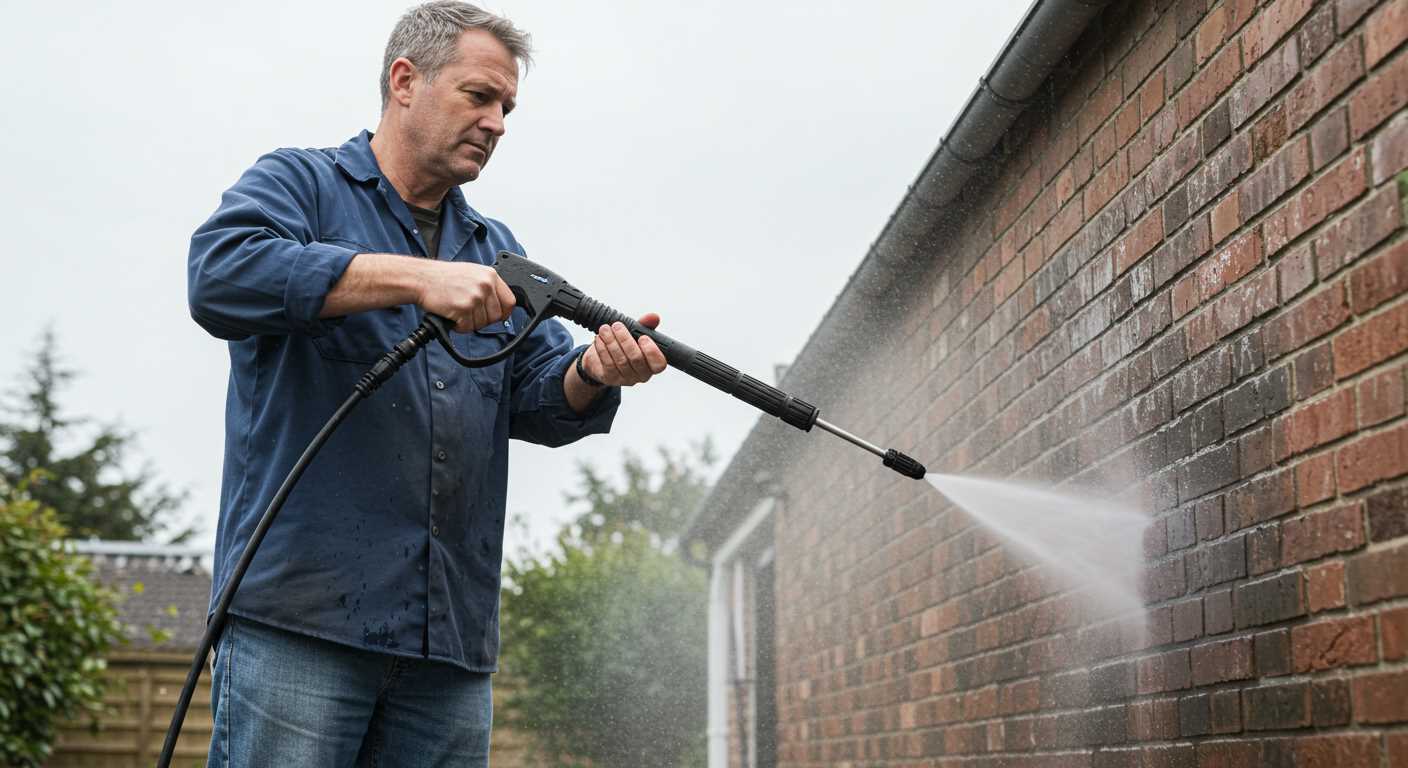
Identify the material of the surface you are cleaning. For instance, a gentle detergent is suitable for painted surfaces, while a more robust formulation may be needed for tough stains on concrete or brick. I once used a heavy-duty cleaner on a delicate wooden deck, which resulted in damage I had to repair later. Always read labels and choose accordingly.
Concentration Matters

Pay attention to the concentration levels of the product. Highly concentrated solutions often require dilution, while ready-to-use formulas are convenient but may be less powerful. I recall a time I misjudged a concentrated cleaner and ended up with a residue on the driveway. Measuring accurately can save time and effort during your cleaning tasks.
Preparing Your Cleaning Machine for Lather Application
Before starting, ensure that the device is switched off and disconnected from the power source to prevent any accidents. Remove any existing attachments, especially those meant for high-pressure rinsing, to avoid interference during the foaming process.
Check the detergent reservoir for cleanliness. Rinse it out if there’s any residue from previous products, as this can affect the performance of the new solution. I once neglected this step and ended up with a mix of two incompatible cleaners that didn’t work well together, leading to a sticky mess.
Confirm that the nozzle is appropriate for foaming. A wide-angle nozzle often works best, as it allows for an even distribution of the liquid across the surface being treated. I learned this the hard way after trying to apply foam with a narrow nozzle, which resulted in uneven coverage and wasted product.
Adjust the settings on the device according to the manufacturer’s recommendations for applying cleaning solutions. Some models have specific settings for different applications, and using the wrong one can reduce the effectiveness of the cleaner. I’ve seen many people overlook this, thinking all settings are interchangeable.
Fill the detergent container carefully, following the dilution instructions provided with your cleaning solution. Over-concentrating the mixture can lead to excessive suds that may not rinse away properly. I once filled the tank too full, and it created a foam volcano that made quite the scene in my driveway.
Finally, perform a quick test run without applying any solution. This helps to ensure everything is functioning correctly and that there are no leaks in the system. It’s a step I rarely skip now, as I’ve had instances where a faulty connection caused a mess right at the start.
Filling the Soap Bottle Correctly
Ensure you have the right mixture for optimal results. Start by measuring the appropriate amount of detergent according to the manufacturer’s guidelines. Typically, a 1:5 ratio of soap to water works well, but check your specific cleaner’s instructions.
- Use a clean container for mixing. Avoid any residues from previous substances that could interfere with the new solution.
- Fill the container with water first, then add the detergent. This method prevents excessive foaming and ensures a smoother mix.
- Mix gently to avoid bubbles. A vigorous shake can create foam that may not dispense properly through the attachment.
Once mixed, pour the solution into the tank. Be careful not to overfill; leaving some space allows for expansion and prevents spillage during operation.
If you’re unsure about the right product, check out options that are compatible with your equipment. For instance, if you’re cleaning flags, consider a pressure washer for jet washing flags to achieve the best results.
Always seal the container tightly after filling to keep the mixture fresh and ready for your next cleaning task. Regularly clean the tank to prevent clogs and ensure efficient operation.
Adjusting the Pressure Washer Settings for Soap Use
Set the nozzle to a low-pressure setting, typically around 40 degrees. This allows the cleaning solution to adhere effectively to surfaces without being blasted away. I recall a time when I was too eager and opted for a higher setting. The result? The foam barely stuck, and I had to redo the whole job.
Changing the Detergent Injector
If your machine has an adjustable detergent injector, switch it to the ‘soap’ setting. This controls the flow rate of the cleaning agent and ensures it mixes adequately with water. I remember the first time I used a unit without adjusting this setting properly. The mixture was too weak, leaving dirt behind and requiring multiple passes to correct my oversight.
Testing the Output
Before you start on the main task, test the output on a small area. This gives you a chance to see how well the mixture is applied and allows for any necessary tweaks. I always recommend checking a less visible spot first. Once, I went straight to a visible area without testing, and the results were less than impressive. A little trial goes a long way in achieving great results.
Applying soap to different surfaces
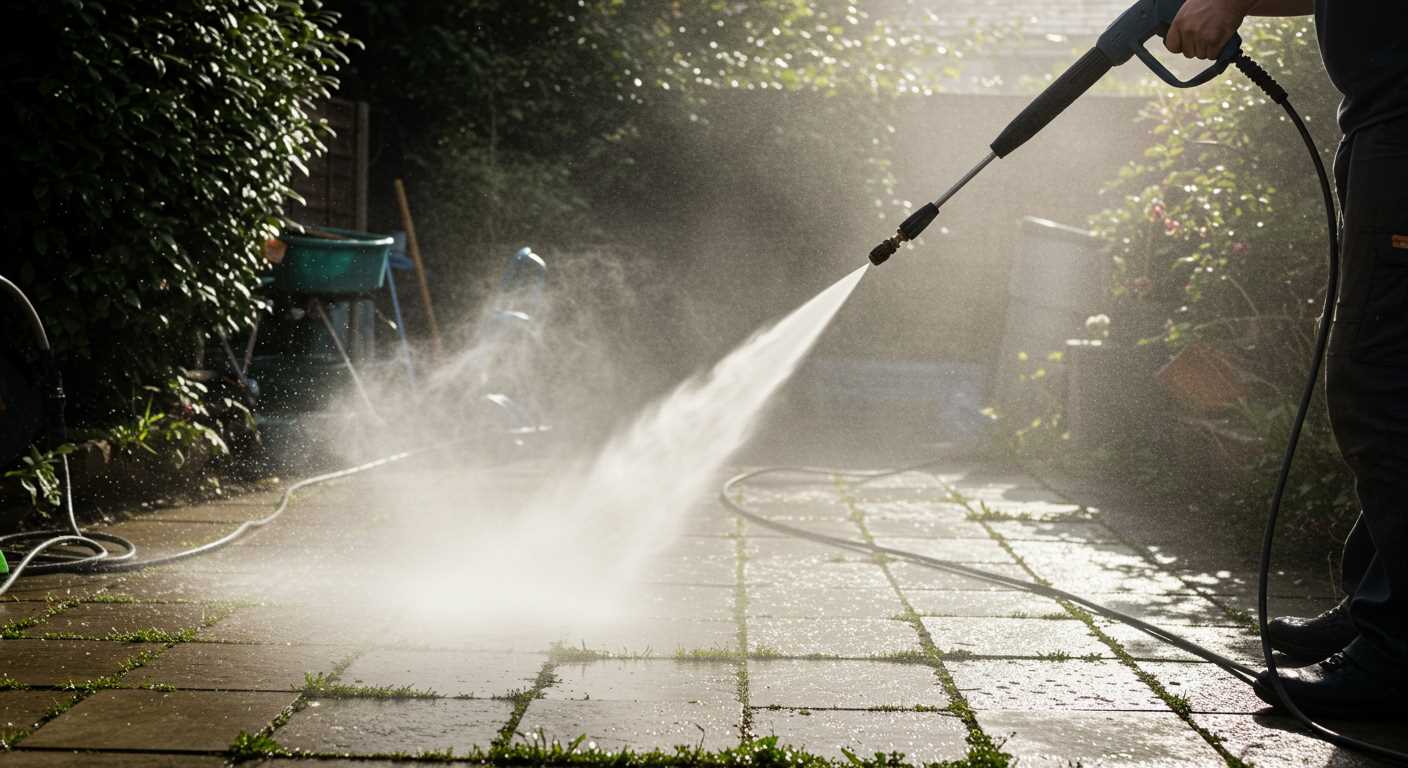
For optimal results, tailor the application technique to the surface being cleaned. For vehicles, a gentle misting approach works best. Start from the top, allowing the cleaner to flow downwards, which helps lift dirt and grime without streaking. Keep the nozzle at least 30 cm away to prevent damage to the paintwork.
On concrete surfaces, like driveways or patios, a more direct application is effective. Use a fan spray pattern to cover larger areas quickly. Allow the cleaning solution to dwell for a few minutes before rinsing, as this enhances its ability to penetrate stubborn stains.
For wooden decks or fences, it’s crucial to apply the mixture with care. A low-pressure setting is recommended to avoid splintering the wood. Move the nozzle in a sweeping motion, keeping it parallel to the surface, and avoid concentrated spots that could lead to damage.
When tackling vinyl siding, a wide-angle spray is advisable. Begin from the bottom and work upwards to prevent streaks caused by runoff. This technique allows the solution to cling effectively to the surface, ensuring a thorough clean.
In areas with delicate surfaces, such as glass or painted trim, it’s wise to test a small, inconspicuous area first. A light application will help gauge the reaction before proceeding with the entire area. Always maintain a safe distance to avoid etching or damage.
Finally, always follow the manufacturer’s instructions for the cleaning agent. Different formulations may have specific application guidelines that enhance their performance across various materials.
Using the Correct Nozzle for Soap Application
To achieve optimal results, selecting the right nozzle for applying cleaning solutions is key. In my experience, the most effective nozzle for this task is the low-pressure option, typically designated as the black nozzle. This nozzle allows for a gentle release of the solution, ensuring even coverage without risking damage to the surface being cleaned.
Types of Nozzles
- Black Nozzle (Low Pressure): Ideal for applying cleaning agents. The wide spray pattern helps distribute the solution evenly.
- Yellow Nozzle (15 degrees): Suitable for rinsing off dirt after the cleaning solution has been applied, but should not be used for initial application.
- Green Nozzle (25 degrees): Can be used for rinsing larger surfaces but remains too powerful for soap application.
Tips for Optimal Application
- Always attach the black nozzle before starting. This avoids accidental damage to sensitive areas.
- Maintain a distance of around 2-3 feet from the surface during application. This helps in preventing streaks and uneven distribution.
- Work from the bottom up. This technique ensures that the cleaning agent can penetrate effectively without running off.
Through trial and error, I’ve learned that taking the time to adjust nozzles appropriately can significantly impact the effectiveness of the cleaning process. The right choice not only enhances cleaning efficiency but also saves time and effort during the task. Remember to rinse thoroughly after applying the cleaning agent to ensure no residue is left behind, which can attract dirt later on.
Rinsing off soap after application
After applying the cleaning solution, the next step is to thoroughly rinse the surface. This ensures that no residue remains that could attract dirt or cause damage over time. Start with a wide spray pattern to cover larger areas quickly. I’ve found that using a fan nozzle works wonders for this task, allowing for an even distribution of water.
Maintain a consistent distance from the surface, ideally around 12 to 18 inches, to prevent any potential damage while still effectively removing the cleaning agent. Move methodically, overlapping each pass slightly to ensure complete coverage. I often recommend rinsing from the top down; this helps to push any remaining solution downwards, away from the cleaned surface.

Adjust the flow rate if your equipment allows; a higher flow can help dislodge stubborn residues. It’s also wise to keep an eye on the water temperature. While cold water is generally sufficient, warm water can enhance cleaning effectiveness, especially on greasy surfaces. Be mindful of the surrounding area, particularly if you’re working near plants or delicate structures. Redirect the stream as necessary to avoid unintentional harm.
Once you finish rinsing, inspect the surface closely. If any areas still appear soapy or dirty, repeat the rinsing process in those spots. This step is crucial to achieving a pristine finish. Trust me, I’ve seen too many people skip it and end up with a less-than-satisfactory result, which only leads to more work down the line. Proper rinsing will not only enhance the cleanliness but also prolong the lifespan of the surface.
For additional safety, ensure that any residue from the cleaning solution is entirely washed away. This is especially pertinent if there are pets around; for instance, if you’re curious about the safety of certain barriers, you might consider checking if can an electric cattle fence hurt a dog. Keeping your environment safe for pets while performing maintenance is just as important as the cleaning itself.
Maintaining Your Equipment After Application
After applying cleaning solutions, it’s crucial to ensure your gear is in good condition for future tasks. I recommend starting with a thorough rinse of the detergent system. To do this, fill the reservoir with clean water and run the unit for a few minutes. This helps clear any residues that could clog the system later.

Next, check the nozzle and connections. Detergents can lead to build-up, so ensure these parts are free from blockages. I often use a soft brush to gently clean the nozzles and the filter, ensuring optimal performance.
Don’t forget to inspect the hoses. Look for any signs of wear or damage after using cleaning agents. If you notice any cracks or leaks, it’s best to replace them immediately to avoid larger issues later.
Lastly, store the equipment properly. Keeping it in a dry place prevents moisture accumulation which can harm internal components. I always recommend detaching the hoses and coiling them loosely to avoid kinks. Regular maintenance like this extends the life of your gear significantly.
| Maintenance Task | Frequency | Notes |
|---|---|---|
| Rinse detergent system | After each use | Run for a few minutes with clean water |
| Inspect nozzles and connections | Weekly | Clean with a soft brush |
| Check hoses for damage | Monthly | Replace if cracks or leaks are found |
| Store properly | After each use | Keep in a dry place, detach hoses |
FAQ:
How do I attach a soap bottle to my pressure washer?
To attach a soap bottle to your pressure washer, first ensure that the machine is turned off and unplugged for safety. Locate the detergent injection system on your pressure washer, which is usually found near the spray wand. Remove the cap from the soap bottle and securely attach it to the designated port or connector. Ensure that it fits tightly to prevent any leaks. Once attached, you can turn on the pressure washer and adjust the settings to the soap mode if available.
What type of soap should I use in my pressure washer’s soap bottle?
It is recommended to use a soap specifically designed for pressure washers. These soaps are formulated to work effectively with high-pressure systems and help in breaking down dirt and grime. Avoid using regular household soaps or detergents, as they may create too much foam or damage the pressure washer. Always check the manufacturer’s guidelines for compatible soaps to ensure optimal performance.
Can I use my pressure washer without a soap bottle?
Yes, you can operate a pressure washer without a soap bottle. The machine can effectively clean surfaces using just water at high pressure. However, using soap can enhance the cleaning process, especially for tough stains or heavily soiled areas. If you choose to go without soap, ensure that you adjust your spray tip to the appropriate setting for the surface you are cleaning.
How do I switch from using soap to plain water in my pressure washer?
To switch from using soap to plain water in your pressure washer, first stop the machine and disconnect the soap bottle. Rinse the soap bottle and hose with clean water to prevent any residue from clogging the system. Reattach the standard spray nozzle suitable for high-pressure cleaning. Then, turn on the pressure washer and test it by spraying a small area to ensure that only water is being dispensed.
What are some common mistakes to avoid when using a soap bottle on a pressure washer?
Some common mistakes include using the wrong type of soap, overfilling the soap bottle, or not rinsing the system properly after use. Using incompatible soaps can lead to poor cleaning results or damage to the machine. Overfilling can cause leaks and excessive foaming, while failing to rinse can result in soap residue clogging the system. Always follow the manufacturer’s instructions and ensure proper maintenance of your equipment for the best results.
.jpg)


