


For optimal results, it’s crucial to ensure that the cleaning agent is properly introduced into the system. First, prepare the solution according to the manufacturer’s instructions, ensuring it’s diluted correctly for your specific task. Over-concentration can lead to residue or damage.
Attach the container designed for the detergent to the designated port. You’ll want to ensure a snug fit to prevent any leaks. In my experience, I’ve found that a little twisting motion while securing the container can enhance the seal, providing a more reliable connection. After that, select the appropriate nozzle from your arsenal, usually a wider spray pattern works well for applying cleaners.

Once everything is set, activate the unit and allow it to build pressure. You’ll notice the mixture being drawn into the stream. Start from the bottom of the surface and work your way up to avoid streaks. This method has served me well over the years, especially on vertical surfaces or vehicles, where gravity can work against you.
After application, allow the cleaning solution to sit for a few minutes to break down grime effectively. Keep an eye on the surface; if it’s particularly dirty, you may need to repeat the process. Once finished, rinse thoroughly to remove all residues. A clear rinse ensures that no cleaning agent remains, which can attract dirt later on.
Understanding the Components of the Cleaning Liquid System
Familiarity with the individual parts of the cleaning solution system enhances both performance and maintenance. The unit consists of several key elements: the container, feed tube, and attachment mechanism. Each component plays a pivotal role in delivering the cleaning agent effectively during operation.
Container
The container holds the cleaning solution. It’s typically marked with measurements, allowing for precise mixing ratios. Always check for cracks or leaks before filling to avoid spills. I once had a mishap with a damaged container, which led to a slippery mess in my garage. Regularly inspect this part to ensure it remains in good condition.
Feed Tube
The feed tube connects the container to the nozzle, transporting the cleaning liquid as required. It’s crucial that this tube is unclogged and properly attached. I’ve encountered instances where blockages hindered the flow, leading to subpar results. Clearing it periodically can prevent such issues and ensure a consistent supply during cleaning tasks.
| Component | Description | Maintenance Tip |
|---|---|---|
| Container | Holds the cleaning solution; typically features measurement markings. | Inspect for cracks and leaks before filling. |
| Feed Tube | Transfers cleaning liquid from the container to the nozzle. | Keep clear of blockages and ensure secure connections. |
| Attachment Mechanism | Secures the container and tube to the main unit. | Check for wear and ensure a tight fit to prevent disconnections. |
Understanding these components allows for more effective operation and maintenance, ensuring that each cleaning task meets expectations. My experiences have shown that small preventative measures lead to smoother operations and better results.
Choosing the Right Cleaning Solution for Your Equipment
For optimal results, selecting the appropriate cleaning agent is key. I recall a time when I tested various formulations during a demonstration. The wrong choice led to streaks and residue, which was frustrating. Always opt for solutions specifically designed for high-performance cleaning machinery. These products effectively break down grime without damaging surfaces.
Concentration Matters
Concentration levels in cleaning solutions can significantly affect performance. I once experimented with a highly concentrated formula that required dilution. Following the manufacturer’s guidelines is crucial; too strong can harm surfaces, while too weak might not clean effectively. A balanced mix guarantees efficiency and safety.
Surface Compatibility
Consider the materials you’ll be cleaning. I once used an all-purpose cleaner on a delicate surface, which resulted in discolouration. Always check compatibility; some agents are designed specifically for vehicles, while others excel on patios or decks. Using the right cleaner preserves the integrity of the surfaces and enhances the overall cleaning experience.
Preparing the Equipment for Foam Application

Ensure the unit is on a stable surface and the water supply is connected securely. Check the hose for any kinks that might restrict flow. I once had a frustrating experience with a blocked hose that resulted in poor performance. Always inspect your attachments; if they’re worn or damaged, replace them before proceeding.
Next, adjust the nozzle to the appropriate spray pattern for the task at hand. I’ve found that a wider angle is typically better for applying cleaning solutions evenly. Set the pressure to a lower setting to prevent damage to more delicate surfaces, as high pressure can strip paint or etch glass.
Before adding the cleaning agent, rinse the tank thoroughly to avoid mixing chemicals. I learned this the hard way when residual cleaner from a previous job caused an unexpected reaction. Fill the container with the recommended solution, following the manufacturer’s guidelines for dilution. Using too concentrated a mixture can clog the system, leading to inefficiencies.
After filling, secure the lid tightly. I’ve seen many instances where a loose lid caused spills, making a mess and wasting product. Finally, perform a quick test run without engaging the cleaning solution to ensure everything is functioning properly. This step can save you time and headaches down the line.
Filling the Liquid Container Correctly
Begin with the container cap; ensure it’s clean and free from debris. Remove it and set it aside. Pour the chosen cleaning solution slowly into the container, avoiding overfilling. Leave some space at the top to allow for mixing if needed.
For optimal results, consider mixing the solution with water, depending on the manufacturer’s instructions. This ensures a balanced application and prevents clogging. Use a measuring cup for accuracy; a typical ratio is one part cleaner to four parts water, but always check the label.
Once filled, securely attach the cap back, ensuring it’s tight to prevent leaks during operation. Shake gently to mix if applicable, but avoid excessive agitation that could create foam. Double-check the fit of the container in its designated spot on the machine before starting.
| Step | Action |
|---|---|
| 1 | Clean the container cap. |
| 2 | Remove the cap and pour in the cleaner. |
| 3 | Mix with water if necessary. |
| 4 | Securely replace the cap. |
| 5 | Check the attachment before use. |
After filling, always rinse the container if there’s any residual cleaner before switching to a different solution. This prevents cross-contamination and ensures the integrity of your cleaning process. Keeping these steps in mind will streamline your cleaning tasks and enhance the overall efficiency of your equipment.
Adjusting the Pressure Settings for Soap Usage
For optimal performance while applying cleaning agents, set the pressure to a lower level. This ensures better coverage and prevents overspray, allowing the solution to adhere effectively to surfaces.
Here’s how to adjust the settings:
- Locate the pressure control dial on your machine.
- Turn the dial to a lower setting, typically around 1000 to 1500 PSI, which is ideal for applying chemicals without damaging delicate surfaces.
- Test the spray pattern on a small area. If the stream is too strong, reduce the pressure further.
In my experience, many users overlook this crucial step, leading to ineffective cleaning and wasted solutions. I once helped a friend who was struggling to get rid of stubborn grime on his patio. After adjusting his unit to a lower pressure, the cleaning agent began to work effectively, lifting dirt with minimal effort.
Keep in mind that different surfaces may require different levels of pressure. For instance:
- Wooden decks benefit from lower settings to avoid splintering.
- Brick or concrete can handle a bit more pressure, but still, start low to gauge the effectiveness.
Finding the right balance between pressure and application is key. If you notice the solution isn’t spreading evenly, take a moment to readjust the pressure again. This trial and error can save you time and ensure better results.
Always prioritise safety; wear protective gear and maintain a safe distance from the surface being treated. This way, you’ll achieve a thorough clean while safeguarding both yourself and your equipment.
Connecting the soap nozzle for application
First, ensure the machine is off and the hose is disconnected. Locate the soap nozzle in your accessories. This nozzle typically has a wider opening compared to the standard ones. It’s designed to draw the cleaning solution effectively.
Remove the regular spray nozzle by twisting it counterclockwise. Next, align the soap nozzle with the lance and twist it on until secure. You should feel a firm connection; this ensures no leaks occur during operation.
Once attached, check the solution tank to confirm it’s filled adequately. If you haven’t already, now’s the time to prepare the unit for operation. After that, connect the hose to a water source and power on the unit. Adjust the settings on the unit to the appropriate level for the task at hand.
Before you start cleaning, perform a test spray on a small, inconspicuous area to ensure the solution disperses correctly. If everything looks good, you can proceed with the cleaning task. Remember, a steady sweeping motion works best for thorough coverage.
Applying detergent to surfaces effectively
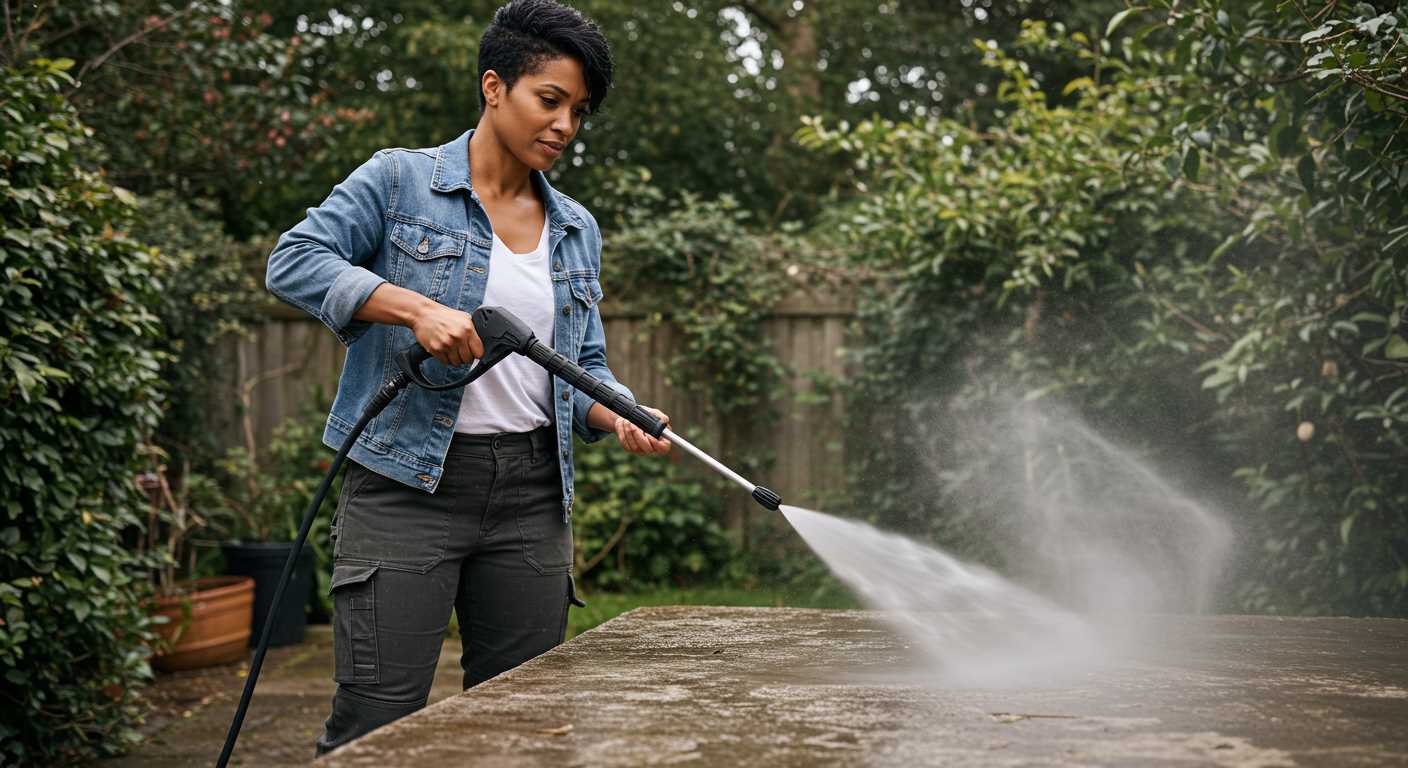
For optimal results, apply cleaning solution from the bottom upwards. This method ensures that the liquid adheres properly to vertical surfaces and allows gravity to aid in the cleaning process. Start at the base of the area you’re addressing and work your way up to prevent streaks and drips.
Maintain a consistent distance of approximately 2 to 3 feet from the surface. This range allows the cleaning agent to reach the surface without being too concentrated, which can lead to residue build-up. Adjusting your distance helps achieve an even application across the entire area.
Consider applying in sections. For larger surfaces, break down the area into manageable parts. This approach allows you to monitor the effectiveness of the cleaning solution on each section before moving on to the next. It also gives you time to scrub or agitate stubborn stains in a targeted manner.
If the surface allows, let the mixture sit for a few minutes after application. This dwell time is crucial for breaking down grime and stains. However, avoid letting it dry completely, as this can lead to hardened deposits. Rinse off each section thoroughly after letting it sit.
For textured surfaces, such as driveways or patios, consider using a brush to work the solution into the grooves. This extra step ensures that the cleaner penetrates effectively, maximising its cleaning potential. Follow up with rinsing to remove any loosened dirt and debris.
Finally, keep an eye on the weather. Avoid applying during windy conditions or when rain is imminent, as this can lead to uneven drying or washing away of the cleaning agent before it has had a chance to work effectively. Timing your cleaning tasks with the forecast can enhance the overall outcome.
Flushing the System After Soap Application
After applying the cleaning solution, it’s critical to flush the system to prevent any residue from causing clogs or damage. Follow these steps for optimal results:
- Switch Nozzles: Replace the soap application nozzle with a high-pressure nozzle. This ensures a powerful spray for rinsing.
- Activate the Unit: Turn on the equipment and let it run for a few seconds without any cleaning solution. This helps to clear out any remaining liquid.
- Use Fresh Water: Connect a water source and allow clean water to flow through the system. It’s advisable to run the unit for 2-3 minutes to ensure thorough flushing.
- Inspect the Nozzle: Regularly check the nozzle for blockages. If the spray pattern appears uneven or weak, clean the nozzle according to the manufacturer’s guidelines.
- Check for Residue: After flushing, inspect the system for any leftover cleaning agent. If residue is visible, it may require additional flushing until the water runs clear.
- Maintenance: Regularly maintain the hoses and connections to prevent build-up and prolong the life of your equipment.
In my experience, neglecting this step can lead to costly repairs. I once had a colleague who didn’t flush his unit after a heavy-duty job. A few weeks later, he faced significant performance issues. It reinforced the importance of this routine.
For those looking for effective tools to complement their cleaning tasks, check out the best corded garden vacuum options for added efficiency.
Maintaining the soap dispenser for longevity
Regular upkeep is key to extending the life of your cleaning system’s liquid applicator. Here are some practical steps I’ve learned over the years:
- Rinse after every use: Immediately after applying detergent, flush the container with clean water. This prevents residue build-up that can clog the system.
- Inspect seals and connections: Regularly check for wear and tear on seals and fittings. A tight seal ensures that no liquid leaks out and that the pressure remains consistent.
- Store in a cool, dry place: Extreme temperatures can damage components. Keeping the unit sheltered from direct sunlight and frost will help maintain its integrity.
- Use compatible cleaning solutions: Always opt for detergents that are formulated for your specific equipment. Using the wrong type can lead to corrosion or damage. For car care, consider checking out this car hampoo for pressure washer.
- Clean filters regularly: If your system has any filters, ensure they are free from debris. A clogged filter can hinder performance and cause undue strain on the pump.
Incorporating these practices into your routine will significantly enhance the durability of your liquid applicator. I’ve seen many users overlook these details, leading to premature failures. A little attention goes a long way.
FAQ:
How do I attach the soap dispenser to my Ryobi pressure washer?
To attach the soap dispenser to your Ryobi pressure washer, first ensure the machine is turned off and unplugged. Locate the detergent inlet on the pressure washer, which is typically found near the trigger gun connection. Align the soap dispenser’s connector with the inlet and push it in until it clicks securely into place. Once attached, you can fill the dispenser with your chosen soap.
What type of soap should I use in the dispenser?
It is recommended to use a soap specifically designed for pressure washers. These soaps are formulated to work effectively with high-pressure water and will not damage your pressure washer. Avoid using regular detergents, as they may not produce the desired cleaning results and could potentially harm the machine. Check the label on the soap for compatibility with pressure washers.
How do I adjust the soap flow when using the dispenser?
The soap flow can usually be adjusted via a dial or control on the pressure washer or the soap dispenser itself. Look for a setting that allows you to increase or decrease the amount of soap being dispensed. Start with a lower setting to see how it performs, and adjust as needed based on the cleaning task at hand. This helps to ensure that you use just the right amount of soap for effective cleaning.
Can I use the soap dispenser while the pressure washer is in use?
Yes, you can use the soap dispenser while the pressure washer is operating. However, ensure that the detergent is properly mixed with the water flow. To do this, switch the pressure washer to the soap setting (if applicable) and begin spraying. It’s best to apply soap to the surface you are cleaning before rinsing with plain water to achieve optimal results.
What should I do if the soap dispenser is not working properly?
If the soap dispenser is not functioning as expected, first check for clogs in the hose or dispenser. Ensure that the soap is not too thick or gel-like, as this can hinder flow. Clean any blockages and, if necessary, dilute the soap with water. If the problem persists, inspect the connections to ensure they are secure and that there are no leaks. Refer to the user manual for troubleshooting tips specific to your model.

.jpg)


