
.jpg)


.jpg "How to use soap with craftsman pressure washer")
Before you even think about starting your cleaning task, ensure you select the right detergent that is compatible with your high-pressure apparatus. I’ve seen too many people grab just any soap, only to find it clogs the nozzle or damages the machine. Always opt for a pH-neutral cleaner designed specifically for outdoor surfaces. This simple choice can save you time and prevent costly repairs.
Once you have your detergent ready, the next step involves mixing it correctly. Follow the manufacturer’s instructions on dilution rates; too concentrated can lead to residue build-up, while too diluted won’t provide the desired cleaning effect. I recall a time when I used a mixture that was too weak. The dirt remained stubbornly stuck, and I ended up spending more time redoing the work.
When it comes to application, utilize the dedicated detergent nozzle on your equipment. This attachment allows for a controlled and even distribution of the cleaning solution. I often find that starting from the bottom and working upwards helps to avoid streaks and ensures that the grime is lifted away effectively. Once the soap is applied, let it sit for a few minutes; this soaking time is crucial for breaking down tough stains.
Finally, always rinse thoroughly after cleaning. Use a low-pressure setting to remove the soap without damaging the surface underneath. I learned this lesson the hard way after failing to rinse properly, leaving a soapy residue that attracted dirt like a magnet. A thorough rinse ensures the area is clean and ready for use.
Selecting the Right Soap for Your Pressure Washer
For optimal results, always opt for products specifically designed for high-pressure cleaning devices. These formulations ensure compatibility and prevent damage to your equipment. I recall a time when I hastily used a standard dish detergent. The results were less than satisfactory, and I ended up with a clogged nozzle and a foamy mess everywhere.
Look for biodegradable options. Not only do they break down easily in the environment, but they also don’t leave harmful residues on surfaces. During my years of testing, I found that eco-friendly cleaners often performed just as well as their harsher counterparts, if not better.
Consider the type of surface you’re treating. For instance, concrete driveways benefit from a stronger cleaner, while painted surfaces require something milder to avoid damage. I once chose an aggressive cleaner for a wooden deck, thinking it would enhance the outcome. Instead, it stripped the finish and left me with more problems to solve.
Pay attention to the dilution ratios specified on the label. Many products require mixing with water before application. I learned this the hard way when I used a concentrated solution straight from the bottle; it resulted in excessive foaming and wasted product. Following the manufacturer’s guidelines ensures efficiency and effectiveness.
Lastly, don’t forget to test a small, inconspicuous area first. This simple step can save you from potential mishaps. I always make it a point to check how a cleaner reacts on a hidden spot before proceeding with the entire surface. It’s a habit that has saved me countless hours of rework.
Preparing Your Pressure Washer for Soap Application

Begin by ensuring the machine is powered off and unplugged. This step is crucial for safety before any adjustments or preparations. Next, inspect the detergent tank for any residue from previous use. If present, clean it thoroughly to avoid contamination of the new cleaning solution.
Fill the tank with the recommended cleaning agent, ensuring it is diluted as per the manufacturer’s guidelines. Over-concentration can lead to damage or reduced efficiency. After adding the solution, securely close the tank lid to prevent any spills during operation.
Attach a suitable nozzle for low-pressure cleaning. Typically, a soap nozzle is wider and allows for even distribution of the cleaning agent. If unsure which nozzle to use, refer to your user manual for guidance. It’s always better to check than to risk damaging surfaces.
Before starting, connect the water supply to the machine and turn it on to flush any air from the system. This ensures a smooth flow of water and cleaning agent when you begin. After flushing, switch the washer to the detergent setting, if available.
Finally, do a quick test spray on a small, inconspicuous area to confirm that everything is functioning correctly. This step helps ensure the right amount of cleaner is being applied and that the surface can handle it without damage.
If you’re interested in photography while working on your projects, check out this article on are digital cameras better than cell phones for tips on capturing your creations.
Setting Up the Soap Injector System
To initiate the soap application process, ensure your injector system is correctly configured. Follow these precise steps:
- Locate the soap injector, typically situated on the machine near the high-pressure hose connection.
- Attach the appropriate soap tube to the injector. Ensure it is secure to prevent leaks.
- Fill the soap container with your chosen cleaning solution. Avoid using undiluted products unless specified by the manufacturer.
- Switch the nozzle to a low-pressure setting, often marked as a soap or detergent setting, to allow the solution to flow properly.
In my experience, using a retractable pressure washer hose reel can significantly enhance convenience during this setup, making it easier to manage the hose and ensure it remains tangle-free.
Once the system is set, test the injector by pulling the trigger briefly. If the solution flows, you’re ready to commence the cleaning process. If not, double-check all connections and the soap level in the container.
Regular maintenance of the injector system is also advisable. After each use, run clean water through the injector to prevent clogging from residue buildup.
Adjusting Pressure Settings for Soap Application
Set the pressure according to the surface type. For delicate areas like cars or painted surfaces, lower settings between 1200 to 1500 PSI are ideal. For tougher surfaces such as concrete, increase it to around 2000 PSI. Always start low and gradually increase to avoid damage.
- Check your unit’s manual for specific recommendations on pressure levels for different tasks.
- Adjust the nozzle type based on the pressure setting. A wider nozzle (like a 25-degree) disperses the cleaning solution gently, while a narrower nozzle (like a 15-degree) intensifies the pressure for stubborn stains.
Ensure the soap injector is functioning correctly by observing the flow. If the solution is not mixing properly, reduce the pressure slightly to allow for better soap dispersion. A consistent flow of cleaning agent ensures thorough coverage.
- Begin with a lower pressure to assess the surface’s response.
- Increase pressure incrementally while monitoring the cleaning effectiveness.
- If streaks or marks appear, revert to a lower setting.
Adjusting pressure is not only about effectiveness but also about protecting surfaces. I recall a time when I used too high a setting on a wooden deck, resulting in splintering. Learning from this, I always recommend caution when dealing with varied materials.
- Consider the environmental conditions. Wet surfaces may require less pressure compared to dry ones.
- Frequent adjustments might be necessary during the task based on the surface’s response.
Ultimately, achieving the right balance between pressure and cleaning solution application leads to optimal results. Regular practice and adjustments will enhance your technique over time.
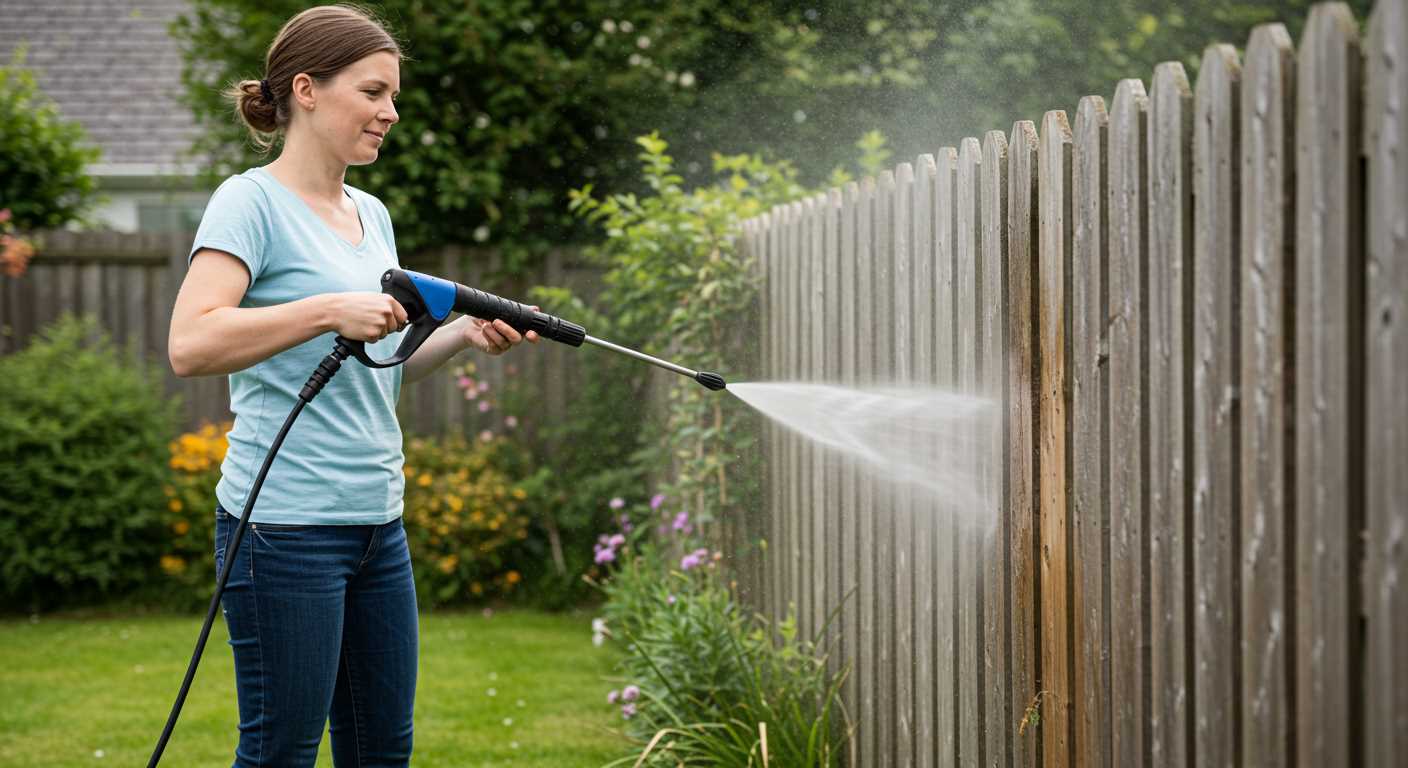
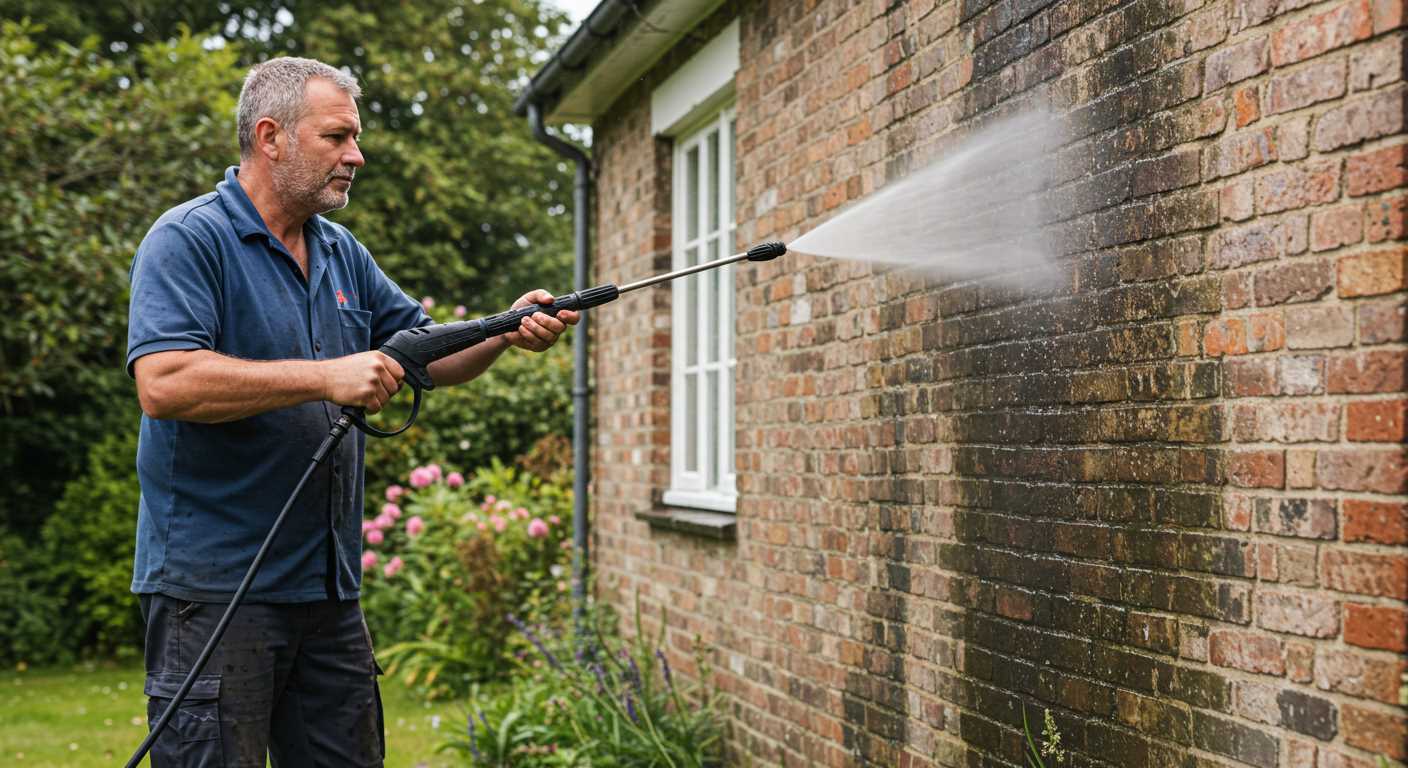
Applying Soap to Different Surfaces
For optimal cleaning, adjust your approach based on the surface type. Here’s a breakdown based on my experience:
| Surface Type | Recommended Technique |
|---|---|
| Concrete | Apply a generous amount of cleaning solution, allowing it to sit for about 5–10 minutes before rinsing. This helps break down tough stains. |
| Wood Decking | Use a diluted mixture to prevent damage. A low-pressure setting is crucial. Apply lightly and rinse immediately to avoid residue. |
| Vehicles | Choose a car-specific cleaning agent. Use a wide-angle nozzle to cover more area while keeping a safe distance to prevent damage. |
| Vinyl Siding | Utilise a mild cleaning solution. Apply from the bottom up to prevent streaking, and rinse from the top down to ensure thorough cleaning. |
| Brick and Stone | Opt for a heavy-duty cleaner. Apply generously and allow it to soak in. Use a high-pressure setting to remove dirt and grime effectively. |
Always test a small, inconspicuous area first, especially on delicate surfaces, to avoid any unwanted damage. Adjustments to the cleaning solution concentration may be necessary based on surface condition and type.
Remember, patience pays off. Allow the cleaning solution to work its magic before rinsing for the best results.
Rinsing Off Soap Properly After Use
Start by switching the device to the high-pressure setting. This ensures that any residue is effectively removed. I recommend using a wide spray nozzle, typically 25 degrees, as it provides a good balance between coverage and pressure, preventing potential damage to softer surfaces.
Begin rinsing from the top of the surface downwards. This method allows any remaining suds and grime to flow down and off, preventing them from reattaching to cleaned areas. Maintain a distance of about 12-18 inches from the surface to avoid any unintended harm.
As you rinse, keep moving the nozzle in a consistent sweeping motion. This technique helps ensure that every part receives adequate attention and that no area is overlooked. For stubborn spots, you may want to focus the spray for a moment longer, but be cautious not to linger too long in one spot to avoid etching.
After the initial rinse, inspect the area closely. If you notice any lingering suds, repeat the rinsing process. I’ve had instances where a second pass made all the difference, especially on textured surfaces where residue can hide.
Finally, allow the surface to dry naturally. This not only helps in revealing any missed spots but also ensures that any remaining moisture evaporates, preventing streaks or spots from forming. In my experience, a thorough rinse followed by a careful inspection saves time in the long run, keeping everything looking sharp and clean.
Maintaining Your Washer After Soap Application
After applying cleaning solution, flushing the system is crucial. Begin by running clear water through the unit for several minutes. This removes any residual cleaner, preventing potential damage to internal components.
Cleaning the Nozzle
Inspect the nozzle for clogs. A simple rinse under warm water usually suffices. If you notice stubborn blockages, use a soft brush or a small pin to carefully clear any debris. Keeping the nozzle clean ensures optimal flow and performance during future tasks.
Storing Your Equipment
After rinsing, store the machine in a dry place. Disconnect all attachments and ensure that hoses are coiled neatly to avoid kinks. If you have a detergent tank, make sure it’s empty and rinsed as well. I’ve seen machines fail due to leftover chemicals corroding parts over time.
Check the oil level if your model requires it. Regular oil changes can prolong the life of your unit. I recommend doing this every few months or as specified in the manufacturer’s manual. A well-maintained engine runs smoother and more efficiently.
Lastly, wipe down the exterior with a damp cloth to remove any splashes or residue. This simple step keeps your equipment looking tidy and ready for the next task.
FAQ:
Can I use soap in my Craftsman pressure washer?
Yes, you can use soap in your Craftsman pressure washer. However, it is important to use a soap specifically designed for pressure washers. Using the wrong type of soap can damage the machine or affect its performance.
How do I add soap to my Craftsman pressure washer?
To add soap to your Craftsman pressure washer, locate the detergent tank, which is usually found on the side of the machine. Fill the tank with the appropriate pressure washer soap, ensuring not to overfill. Once filled, you can switch to the soap nozzle to begin applying the detergent while washing.
What type of soap should I use with my Craftsman pressure washer?
It is recommended to use a biodegradable soap that is specifically formulated for pressure washers. These types of soaps are designed to work effectively with the pressure and help prevent any damage to the machine while providing good cleaning results. Avoid using dish soap or other household cleaners, as they can harm the pressure washer.
How much soap should I use in a pressure wash session?
The amount of soap needed can vary depending on the size of the area you are cleaning and the level of dirt. Generally, fill the detergent tank to the recommended level indicated in your pressure washer manual. For larger jobs, you may need to refill the tank during the cleaning process. Always follow the manufacturer’s guidelines for the best results.
Can I mix different soaps in my Craftsman pressure washer?
It is not advisable to mix different soaps in your Craftsman pressure washer. Combining different types of detergent can lead to chemical reactions that may be harmful to your machine or reduce the cleaning effectiveness. Stick to one type of soap at a time to ensure proper performance.
Can I use soap with my Craftsman pressure washer, and if so, how do I do it properly?
Yes, you can use soap with your Craftsman pressure washer to enhance cleaning results. To do this, first check if your pressure washer is equipped with a soap nozzle or a detergent tank. If it has a detergent tank, fill it with the appropriate pressure washer soap, which is usually a specially formulated cleaner. If your model uses a soap nozzle, ensure you switch to that nozzle after applying soap. Adjust the pressure settings to a lower level to prevent excessive foam and allow the soap to cling to the surface for a few minutes before rinsing it off with clean water.
What type of soap should I use with my Craftsman pressure washer?
When using soap with your Craftsman pressure washer, it’s best to select a detergent specifically designed for pressure washers. These soaps are formulated to work effectively under high pressure and won’t damage your equipment. Look for products labelled as biodegradable and safe for the environment. Avoid using household soaps or detergents as they may not provide the same cleaning power and could potentially harm the pressure washer’s components. Always read the manufacturer’s recommendations to ensure compatibility with your specific model.
.jpg)


