


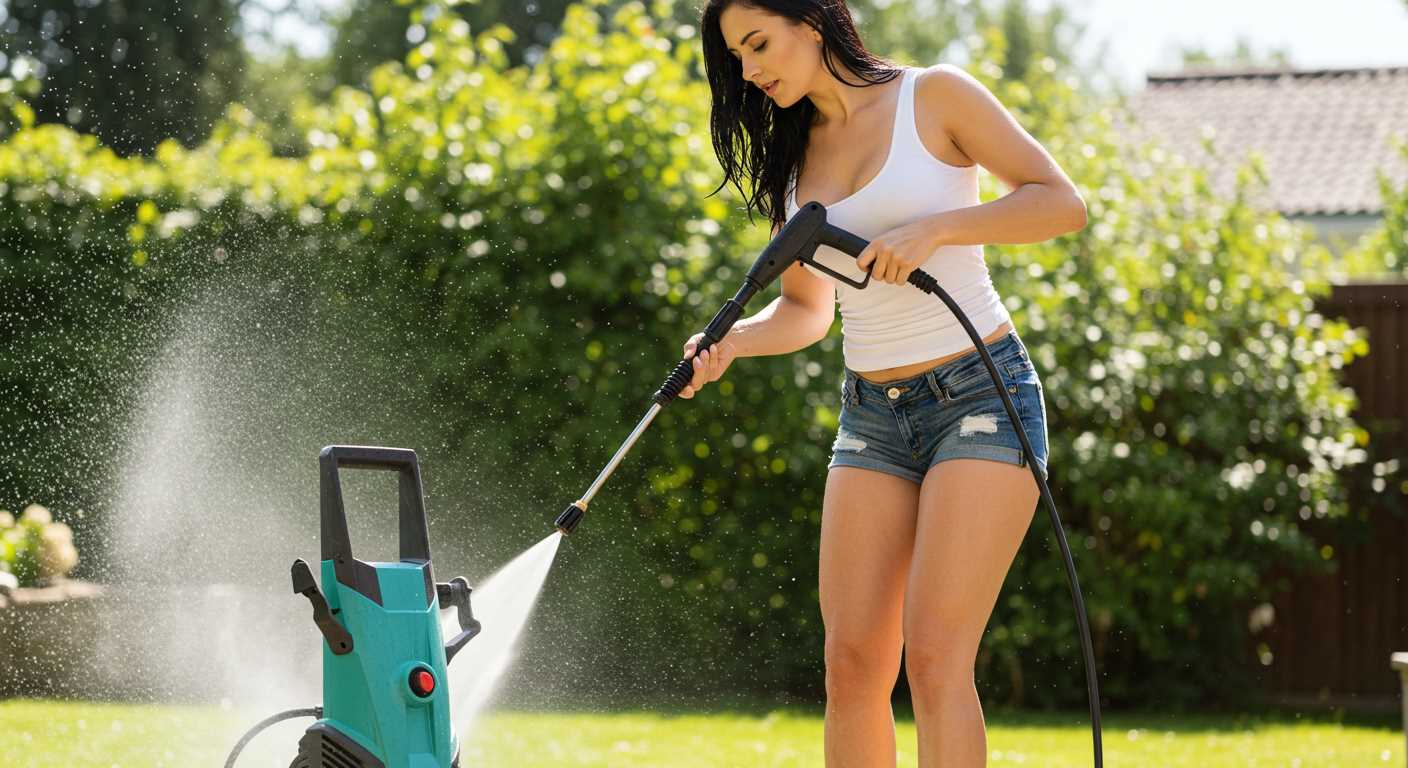
For optimal performance, connect the water supply tightly to prevent leaks and ensure a steady flow. I recall a time when I overlooked this simple step, resulting in an underwhelming clean and a frustrating experience. Proper water attachment is crucial for achieving the desired results.
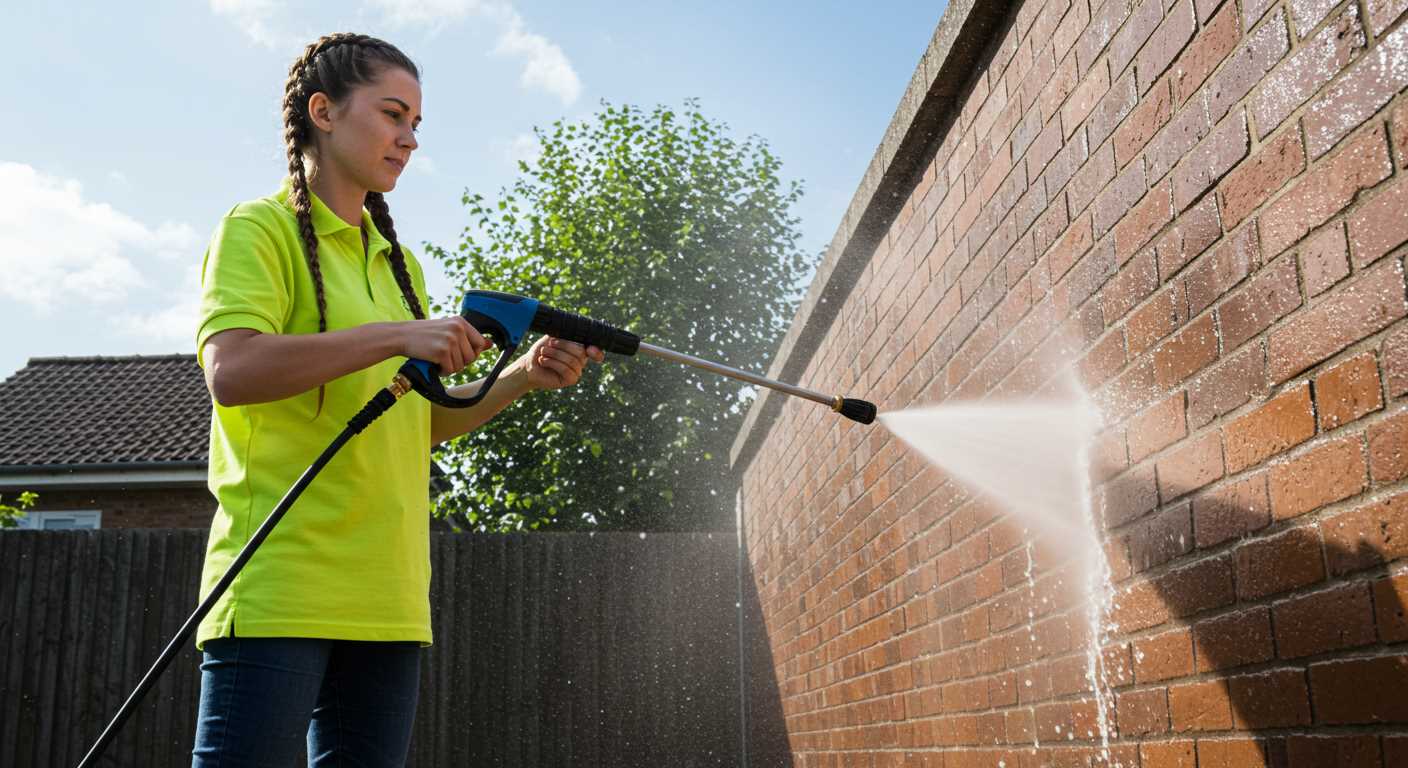
Before starting, it’s wise to choose the appropriate nozzle. Each nozzle serves a distinct purpose; for instance, the fan nozzle works wonders on large areas, while the pinpoint nozzle is perfect for stubborn stains. I often switch nozzles mid-task, depending on the surface and the level of grime I encounter.

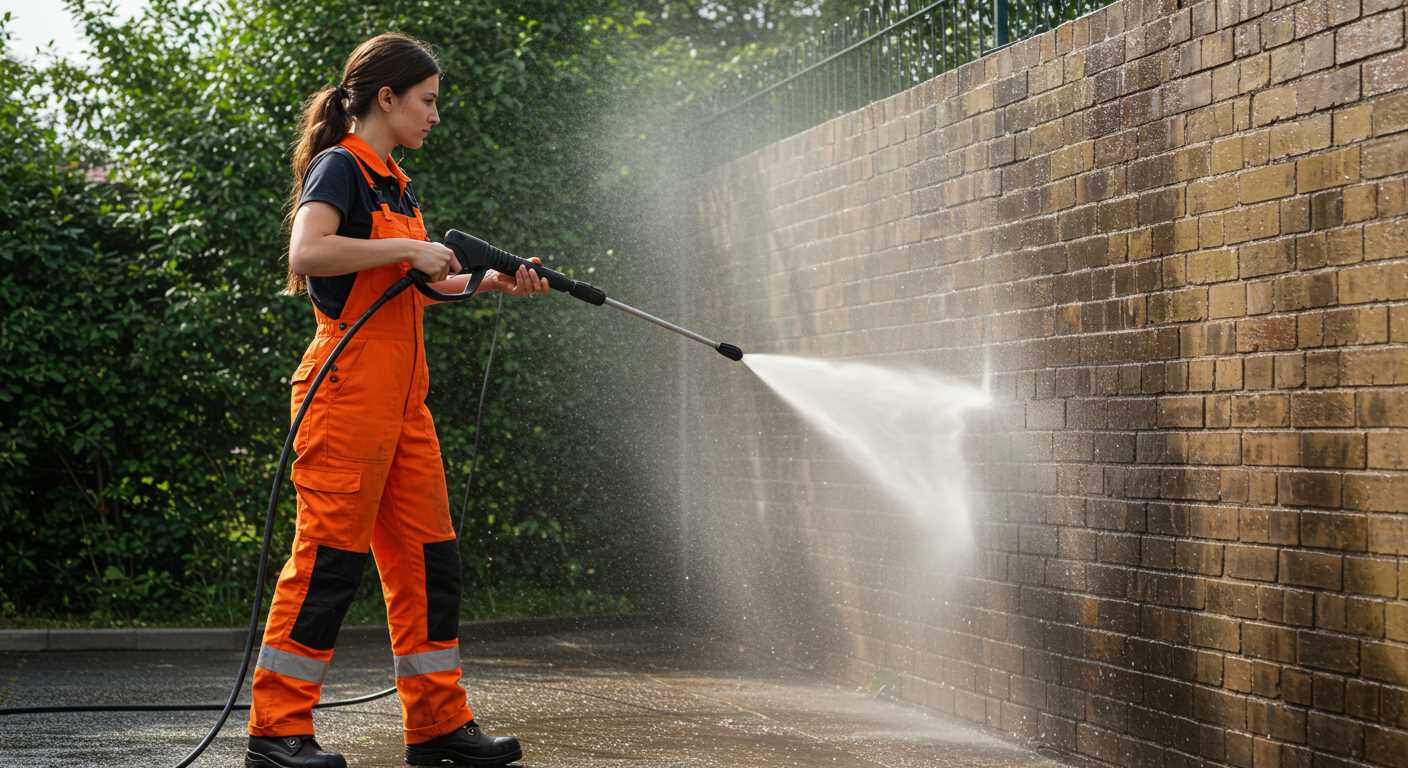
Always remember to maintain a safe distance from the surface being cleaned. Aiming too close can damage delicate materials, a lesson I learned the hard way while attempting to clean an old wooden deck. Keeping a distance of at least 30 cm allows for effective cleaning without causing harm.
Finally, don’t forget to plan your cleaning path. Start from the top of the surface and work your way downwards. This strategy not only helps in avoiding streaks but also makes it easier to manage the water runoff. I’ve found that tackling the task methodically saves time and ensures thoroughness.
Operating a Subaru Cleaning Machine
Begin by ensuring the device is placed on a stable, flat surface. Check that the water supply is connected securely to avoid leaks. I recall a time when I overlooked this detail, and it resulted in an inconvenient mess. Always double-check your connections before powering up.
Next, adjust the nozzle based on the task at hand. For delicate surfaces like vehicles, a wide fan spray is preferable. I learned this the hard way when I used a narrow jet on my car and ended up with unwanted scratches. Conversely, for tougher grime on concrete, a more focused stream works wonders.
Fill the detergent tank if necessary. I recommend using a manufacturer-approved cleaning solution to prevent any damage. On one occasion, I opted for a generic brand that caused clogging, leading to a frustrating delay in my project. Stick with what’s recommended for optimal results.
Before starting, ensure that the safety features are engaged. I once had a close call due to a lapse in this area. Engage the trigger lock when not in use–this simple action can prevent accidents. Remember to hold the wand firmly; a strong grip is critical for control, especially when dealing with high-pressure water.
Once everything is set, turn on the machine and allow it to build pressure. I often find it helpful to wait a moment before pulling the trigger, as this ensures a steady flow. When ready, begin cleaning from the top down to avoid dirty water running over areas already cleaned. This technique saves time and effort.
After completing your task, switch off the unit and disconnect the water supply. Release any remaining pressure by pulling the trigger before storing it away. I’ve made it a habit to clean the nozzle after each use to prevent blockages, a trick I wish I had learned earlier in my experience.
Regular maintenance is key to longevity. Inspect hoses and connections for wear and tear periodically. I’ve seen too many machines fail prematurely due to neglect. A little care goes a long way in ensuring your equipment remains in good shape for years to come.
Choosing the Right Nozzle for Your Cleaning Task
For optimal results, selecting the correct nozzle is paramount. Each nozzle type serves a specific purpose, and knowing which to use can save time and enhance cleaning efficiency.
The 0-degree nozzle produces a concentrated stream, ideal for tough stains on surfaces like concrete. I remember tackling my driveway after a harsh winter; using this nozzle made quick work of the embedded grime. Just ensure to keep a safe distance as the force can damage softer materials.
The 15-degree variant is perfect for stripping paint or cleaning metal surfaces. I once helped a friend restore an old garden gate. This nozzle removed layers of paint effortlessly without harming the metal beneath.
Switching to the 25-degree nozzle, it’s great for general cleaning tasks like patios and decks. It provides a wider spray that covers more area without being overly aggressive. I often choose this for cleaning outdoor furniture or siding, as it balances power and safety well.
The 40-degree nozzle is the gentlest option, suitable for delicate surfaces such as vehicles or windows. I used this when washing my car, ensuring no scratches or damage occurred during the process. It’s fantastic for rinsing off soap without leaving streaks.
Finally, consider using a soap nozzle for applying cleaning solutions. This nozzle has a wider spray pattern and lower pressure, allowing for even distribution of soap. I’ve found it invaluable when tackling large surfaces that need extra care.
Always evaluate the surface and the nature of the task before selecting a nozzle. Testing on a small, inconspicuous area first can save headaches later. With the right nozzle in hand, you’ll find your cleaning tasks become more streamlined and effective.
Preparing the Equipment for Operation
Ensure the tank is filled with the appropriate fuel, using fresh gasoline to avoid engine issues. I remember a time when I used old fuel; it led to frustrating starting problems that could have easily been avoided.
Check the oil level in the engine. Low oil can lead to serious damage. I always keep a spare bottle of the recommended oil type handy for quick top-ups before I begin. After all, a well-lubricated machine runs smoother and lasts longer.
Inspect the hoses and connections for any signs of wear or damage. A small crack can lead to significant pressure loss. I once overlooked a tiny fissure, and it cost me valuable time during a job. Ensure all connections are secure to prevent leaks while in operation.
Before commencing work, connect the water supply. Make sure the hose is free from kinks and properly attached to the inlet. I’ve had instances where a loose connection led to a frustrating lack of water flow. It’s crucial to have a steady supply for optimal results.
Turn on the water before starting the machine to prime the pump. This step prevents air pockets that can cause issues. I learned this the hard way after experiencing a sputtering start; now, it’s part of my routine.
Finally, check the power source. Ensure it’s plugged in securely or, if using a battery-operated model, confirm it’s fully charged. I’ve had days interrupted by a dead battery, which is always a letdown when you’re ready to tackle a big cleaning project.
Connecting the Water Supply and Power Source
Ensure you have a sturdy garden hose with a secure connection for the water inlet. Attach one end of the hose to your tap and the other to the pressure cleaner’s designated water input. Check for any leaks; a tight fit is crucial to prevent water from escaping during operation.
Next, position the machine near a power source. If your unit is electric, use a grounded outlet to avoid any electrical hazards. I recommend a heavy-duty extension cord if the outlet is far, ensuring it can handle the power requirements of the device. Avoid using lightweight cords, as they can overheat and pose a risk.
Water Supply Considerations
Confirm that your water supply is turned on before starting. Low water pressure can affect performance significantly. If the unit has a built-in water filter, check it for clogs to ensure a smooth flow. My experience shows that clean filters enhance efficiency and longevity.
Power Source Safety
Always ensure the power source is dry when connecting the cable. I remember a time when I overlooked this, and it resulted in an unpleasant shock. Keeping the area around the outlet clear of water is simple but often forgotten. A little caution goes a long way in ensuring a safe and effective cleaning experience.
Adjusting Pressure Settings for Different Surfaces
For concrete, set the pressure between 2500-3000 PSI. This level effectively removes grime and stains without damaging the surface. I recall a time when I tackled a particularly stubborn oil stain on a driveway; the higher setting made quick work of it, leaving the concrete looking fresh.
For wood surfaces, like decks or fences, reduce the pressure to around 1500-2000 PSI. Higher settings can splinter the wood, which I learned the hard way while cleaning my garden patio. Lowering the pressure saved the wood’s integrity and made the job safer.
When cleaning vehicles, keeping it at 1200-1800 PSI is ideal. This ensures that the paintwork is protected while still effectively removing dirt. I’ve seen too many instances where excessive pressure led to scratches and damage on car surfaces. It’s best to err on the side of caution.
For delicate surfaces, such as windows or siding, aim for 1000-1500 PSI. I’ve had the misfortune of cracking a window due to improper settings, so trust me, being gentle pays off. A low-pressure setting paired with a suitable nozzle can clean without risk.
Here’s a handy reference table for quick adjustments:
| Surface Type | Recommended Pressure (PSI) |
|---|---|
| Concrete | 2500-3000 |
| Wood | 1500-2000 |
| Vehicles | 1200-1800 |
| Windows/Siding | 1000-1500 |
Always start with the lowest setting and gradually increase it as needed. This approach prevents damage and helps you gauge the effectiveness on various surfaces. Each cleaning task is unique, and fine-tuning the pressure can make all the difference in achieving excellent results.
Techniques for Optimal Cleaning with a Pressure Washer
For effective cleaning, always maintain a consistent distance from the surface. A distance of around 18 to 24 inches typically prevents damage while ensuring adequate force for dirt removal. I remember tackling a particularly stubborn driveway stain; staying too close resulted in etching on the surface, which took weeks to repair.

Begin with a sweeping motion. Start from one side and work your way across, overlapping each pass slightly. This technique guarantees even coverage and prevents streaks. During my time testing various models, I found that this method significantly reduced the need for touch-ups.
Adjust your angle to maximise the impact. A 45-degree angle is ideal for vertical surfaces like walls, while a 0-degree angle is best for horizontal surfaces. I once aimed directly at a wall without adjusting the angle, which led to water pooling instead of effective cleaning.
Use a wide spray pattern for larger areas and switch to a narrow jet for tougher spots. I often found that the right nozzle can make all the difference. For instance, I tackled a greasy barbecue grill with a narrow jet, which cut through the grime effectively, saving me time and effort.
Incorporate detergents for stubborn stains. Pre-soaking the area can enhance cleaning power. I recall a particularly dirty patio where a pre-soak made the subsequent wash much easier, allowing me to achieve a pristine finish without excessive scrubbing.
Don’t forget to keep the nozzle moving. Staying in one spot can cause damage or leave behind unwanted marks. I learned this the hard way after focusing too long on a single area, leading to a patchy finish on a wooden deck.
Finally, remember to rinse thoroughly. Residue can attract dirt over time. After cleaning my car, I made it a habit to double-check for any soap remnants, ensuring everything was spotless and ready for the road ahead.
Safety Precautions to Follow While Using the Washer
Always wear appropriate personal protective equipment (PPE). This includes safety goggles to protect your eyes from debris, sturdy gloves to shield your hands, and closed-toe shoes to prevent injuries from falling objects or slippery surfaces.

Preparation Steps
- Inspect the equipment before starting. Check for leaks, damaged hoses, or any other wear that could pose a risk.
- Ensure the area is free from bystanders, especially children and pets. Maintain a safe distance of at least 10 feet from others while operating.
- Clear the work area of obstacles that could cause tripping or accidents. Remove any items that can be damaged by water or pressure.
Operational Guidelines
- Never point the nozzle at yourself or others, regardless of whether the device is operational.
- Keep both hands on the handle while in operation for better control. This prevents accidental slips that could lead to injuries.
- Always operate on stable ground. Avoid using the equipment on ladders or unstable surfaces.
- Be cautious around electrical connections. Ensure that the extension cord is rated for outdoor use and avoid water exposure.
After completing your task, disconnect the water supply and power source before performing any maintenance. Always allow the unit to cool down before handling.
By following these guidelines, you can significantly reduce the risk of accidents and injuries, making your cleaning experience safer and more enjoyable.
Proper Maintenance After Pressure Washing
After completing your cleaning task, it’s important to perform a few simple steps to ensure longevity and optimal performance of your equipment. First, disconnect the water supply and release any remaining pressure by pulling the trigger of the gun. This will prevent any unexpected bursts of water when you start disassembling the unit.
Cleaning and Storing Equipment
Rinse off any detergent or debris from the exterior of the machine, especially around the nozzle and hoses. I recommend using a soft cloth to wipe down surfaces, as this prevents scratches and keeps everything looking new. Once cleaned, coil the hoses properly to avoid kinks and store them in a dry place. If you notice any leaks or wear and tear, address these issues immediately to avoid further damage.
Regular Check-Ups
Make it a habit to check the oil level and change it if necessary, particularly if you’ve used the equipment frequently. Additionally, inspect the filter and clean or replace it as needed. Neglecting these small tasks can lead to larger problems down the line. If your machine fails to build up pressure, it’s often a sign that maintenance was overlooked. For more on this, you can check out this resource.
Finally, always refer to the manufacturer’s guidelines for specific maintenance tasks. Staying proactive will keep your gear in top condition, ready for the next job!
Troubleshooting Common Issues with Subaru Pressure Washers
Encountering issues while operating high-pressure cleaning equipment can be frustrating. Here are some common problems and their solutions based on my years of hands-on experience.
- Machine Won’t Start: Ensure that the power supply is connected and functioning. Check the on/off switch and any safety features that may prevent operation. A tripped circuit breaker can also cause this issue.
- Low Pressure: This can stem from a clogged nozzle or filter. Regularly clean these components to maintain optimal performance. Additionally, check for leaks in hoses or connections that could be affecting pressure levels.
- Water Leaking: Inspect all hoses and connections for cracks or loose fittings. Replacing damaged parts immediately is crucial to prevent further issues.
- Unusual Noises: If the unit is making strange sounds, it may indicate a problem with the motor or pump. Turn off the equipment and let it cool down. Listen for any irregularities upon restarting, which may require professional servicing.
- Overheating: Continuous use without breaks can cause overheating. Allow the machine to cool down periodically. Ensure proper water flow and check for blockages in the intake.
- Stalling: This could happen due to a dirty air filter or fuel issues. Regular maintenance, including replacing filters and checking fuel quality, helps prevent this.
Keeping a close eye on the equipment’s performance and conducting regular maintenance can save a lot of time and frustration. If persistent issues arise, consider consulting a professional. Remember, having the right tools for the job makes a significant difference. For those who work on vehicles, investing in the best air compressor for car tools can complement your cleaning efforts effectively.
.jpg)


