


Begin by connecting the garden hose to your machine, ensuring a snug fit to avoid any leaks. There’s nothing worse than starting a cleaning session only to find water spraying from an unintended place. I recommend checking the hose for any wear or damage before attaching it; a little prevention goes a long way in ensuring smooth operation.
Next, select the appropriate nozzle for your task. Throughout my years of testing various models, I’ve found that different nozzles can dramatically alter the effectiveness of your cleaning efforts. For tough stains on concrete, a narrow jet nozzle works wonders, while a wider spray is ideal for more delicate surfaces like wood. Always keep a few different nozzles on hand; this versatility has saved me countless hours of scrubbing.
Before turning the device on, ensure the detergent tank is filled with a suitable cleaning solution. I’ve experimented with numerous products, and I can’t stress enough how the right detergent can boost your results. For example, oil-based stains on driveways require a specific type of cleaner that breaks down grease effectively. Never underestimate the power of chemistry in achieving spotless surfaces.
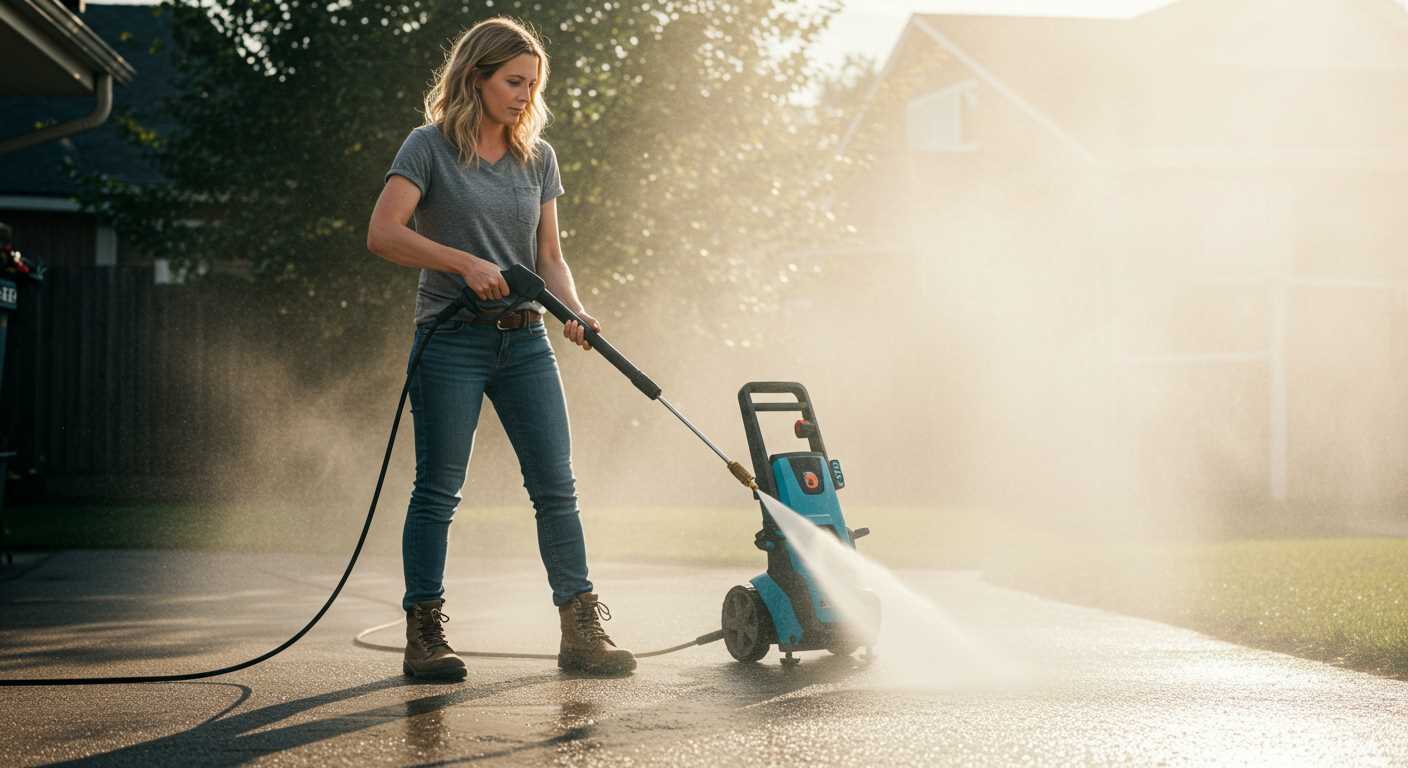
Once everything is set up, activate the machine while standing at a safe distance. It’s easy to get overzealous, but starting at a distance allows you to gauge the pressure and adjust accordingly. I remember the first time I got too close to a wooden fence; the results were less than desirable. Maintain a consistent distance to avoid any accidental damage while still achieving a thorough clean.
After you’ve finished, take the time to properly store the device. Empty any remaining detergent and disconnect all hoses. I’ve learned from experience that neglecting this step can lead to clogs or damage, particularly in colder months. A little care during cleanup ensures longevity and reliable performance for your next cleaning session.
Utilising Your Macallister Cleaning Device
Begin with a solid surface. Ensure the area is clear of debris and obstacles. It’s crucial to choose the right nozzle for your task; different tasks demand different spray patterns. For example, a wide spray is excellent for cleaning patios, while a concentrated jet works wonders on stubborn stains.
Connect the water supply securely before starting the machine. Check for any leaks in the hose or connections. If you spot any, tighten them to avoid interruptions during operation. Always ensure the device is filled with the appropriate detergent if required for your task.
Prioritise safety by wearing protective gear. Goggles and sturdy footwear are non-negotiable. Stand at a safe distance from the surface being cleaned to avoid injury from high-velocity water. Experiment with the distance to find the optimal range that effectively removes dirt without damaging the surface.
Adjust the pressure settings according to the material you’re cleaning. For delicate surfaces like wood, reduce the pressure to prevent damage. On more durable surfaces, such as concrete, you can increase the force for better results. Always start at a lower setting and gradually increase if necessary.
After completing your cleaning task, turn off the water supply before shutting down the device. This prevents any residual water from leaking out. Disconnect the hoses and clean the nozzles to prevent clogs. Store everything in a dry place to prolong the lifespan of your equipment.
| Task | Nozzle Type | Pressure Setting |
|---|---|---|
| Patio Cleaning | Wide Spray | Medium |
| Car Washing | Fan Spray | Low |
| Concrete Stains | Concentrated Jet | High |
| Wood Decking | Adjustable Spray | Low |
Regular maintenance is key to keeping your device in prime condition. Check the filter and clean it periodically. This practice not only optimises performance but also extends the unit’s lifespan, saving you time and money in the long run.
Understanding the Pressure Washer Components
Familiarity with key components enhances your experience with this cleaning device. The motor or engine is the powerhouse, converting energy into pressure. Electric models are quieter and easier to start, while gas-powered versions provide more mobility and power for tougher jobs. Choose based on your needs.
Pump
The pump is another critical element, responsible for generating high pressure. In my experience, an axial cam pump is common for residential models, offering good performance for light to medium tasks. If you’re tackling heavy-duty cleaning, consider a triplex pump, as it handles high pressures and extended use better.
Hose and Nozzles
Your choice of hose affects reach and flexibility. A longer hose gives you more freedom but can lead to pressure loss if it’s too long or narrow. Nozzles vary in spray patterns – a wide fan for rinsing large areas and a narrow jet for stubborn stains. I recommend experimenting with different nozzles to find out which suits your cleaning tasks best. For those looking for a portable option, check out this portable pressure washer for horses that offers versatility.
Preparing the Area for Cleaning
Begin by clearing the space of any obstacles. Remove furniture, planters, and decorations that could get in the way or sustain damage. This creates a safe and efficient environment for the task ahead. I remember a time when I neglected this step and ended up splattering paint on a neighbour’s flower pots. Lesson learned!
Secure Surroundings
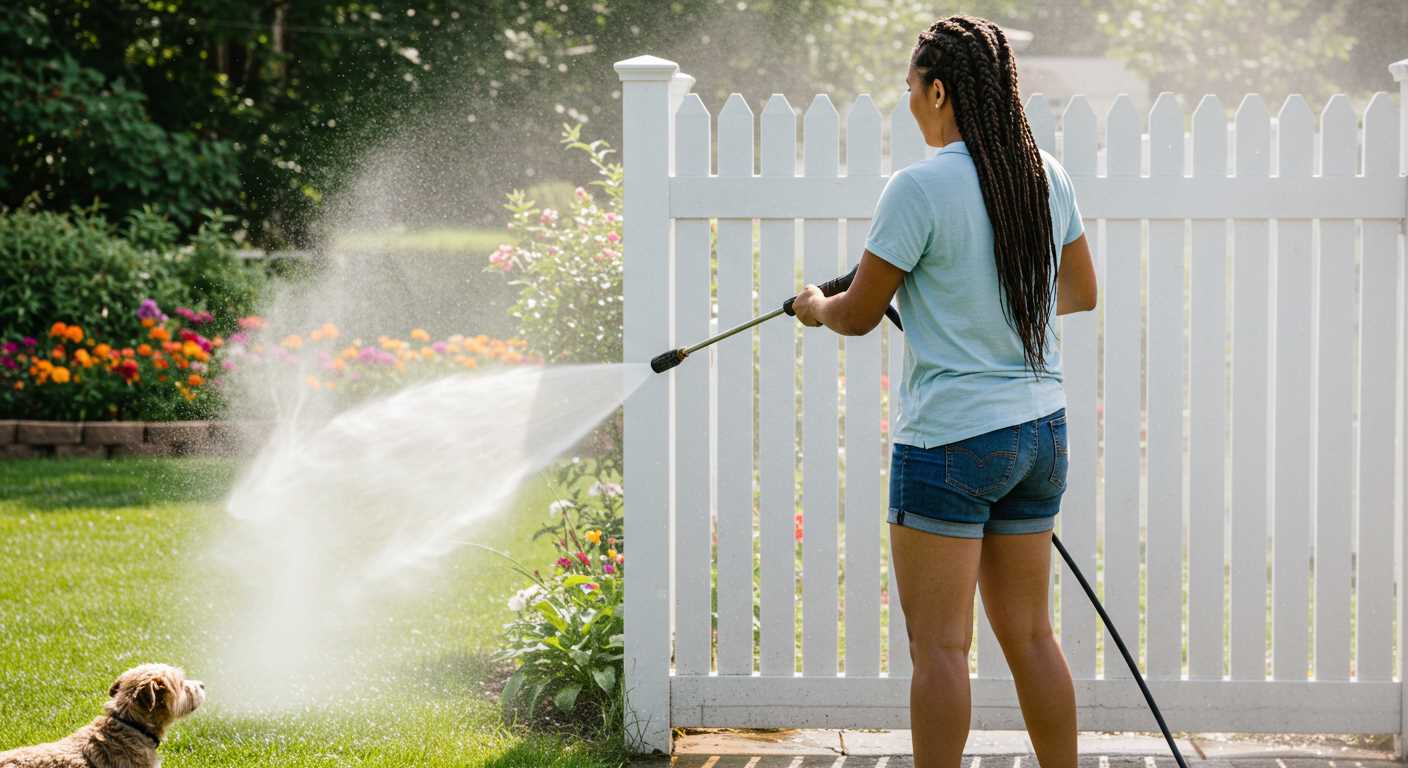
Next, ensure that windows and doors are closed tightly. This prevents any unwanted spray from entering your home. If you’re working near delicate plants, consider covering them with tarps or plastic sheeting to offer protection from high-velocity water. I once had a client who lost a prized rose bush because we overlooked this precaution. Take it from me, it’s not worth the risk!
Check the Drainage
Inspect the area for proper drainage. If water accumulates, it can create a hazardous situation. Look for any storm drains or areas where water can flow away from the surface you’re cleaning. On one occasion, I found myself battling a mini lake after washing a driveway without considering how the water would disperse. Keep an eye on where the water goes; it makes a world of difference.
Lastly, think about your safety. Wear appropriate footwear with good grip to avoid slips, and protective eyewear can prevent debris from getting in your eyes. Trust me, it’s easy to overlook these details until it’s too late. Preparation is half the battle and can significantly affect your results.
Selecting the Appropriate Nozzle
Choosing the right nozzle is crucial for achieving optimal results. Each nozzle type delivers a different spray pattern and pressure, tailored for specific tasks. Based on my experience, selecting the right one can save time and enhance cleaning efficiency.
Nozzle Types
There are generally four nozzle types, each identified by a colour code that indicates the spray angle:
| Colour | Angle | Use Case |
|---|---|---|
| Red | 0° | For tough stains on hard surfaces |
| Yellow | 15° | Ideal for heavy-duty cleaning and stripping paint |
| Green | 25° | Great for general cleaning tasks like driveways or patios |
| White | 40° | Perfect for delicate surfaces such as vehicles or outdoor furniture |
Personal Recommendations
For instance, during a recent project cleaning my patio, I opted for the green nozzle. It provided sufficient power to remove grime without damaging the surface. Conversely, while preparing a wooden deck for staining, the white nozzle proved ideal, ensuring a gentle clean. I often keep all nozzles handy, as switching between them based on the task can significantly improve outcomes.
Remember, using the wrong nozzle can lead to damage. Always test a small area first, adjusting as necessary to find the perfect fit for your cleaning challenge.
Connecting to Water Supply
Begin with a reliable garden hose. Ensure it’s in good condition, free from kinks or leaks. Connect one end to your water source, typically a tap, while the other end attaches to the inlet on your cleaning unit. Check for a tight fit to prevent any water loss during operation.
Water Flow Considerations
Verify the water flow rate meets the specifications outlined in the user manual. Insufficient flow can lead to performance issues. If you notice a significant drop in pressure or the machine struggling, it might be worth checking the hose diameter and length. A shorter, wider hose generally facilitates better water flow.
Filters and Screens
Inspect the inlet filter or screen regularly. Debris can clog it, affecting performance. Cleaning or replacing these components ensures a consistent water supply to your equipment. It’s a small step that can save you from bigger headaches down the line.
Setting Up the Power Source Safely
Always ensure that your energy supply is properly grounded. This helps prevent electrical shocks during operation. For outdoor use, employ a Ground Fault Circuit Interrupter (GFCI) outlet to enhance safety.
Choosing the Right Extension Cord
If you need to extend the reach of your device, select an extension cord rated for outdoor use and compatible with the power requirements of your equipment. Here are some tips:
- Use a 12-gauge or 14-gauge cord for optimal performance.
- Avoid using multiple cords; instead, opt for a single, longer extension.
- Check the cord for any damage before connecting.
Power Connection Steps
- Ensure the machine is switched off before plugging it in.
- Connect the power cord to the designated outlet, ensuring a snug fit.
- Verify that all connections are secure and free from moisture.
Once everything is set, do a quick inspection of the area around the power source. Look for any potential hazards like water puddles or loose debris that could lead to accidents.
Adjusting the Pressure Settings for Different Surfaces
Begin by understanding the surface you’re tackling. Each material requires a specific pressure level to avoid damage while ensuring effective cleaning.
Concrete and Brick
For hard surfaces like concrete or brick, set the device to a higher pressure, typically between 2000 to 3000 PSI. These surfaces can withstand the intensity and benefit from thorough cleaning.
Wood and Decks
When cleaning wood, particularly decks, lower the pressure to around 1200 to 1500 PSI. This prevents splintering and preserves the wood’s integrity.
Cars and Vehicles
For vehicles, adjust to a gentle setting of about 1300 to 1600 PSI. Use a wide spray pattern to avoid damaging paintwork and sensitive components.
Windows and Glass
For glass surfaces, maintain a pressure of 1000 to 1200 PSI. Always hold the nozzle at a safe distance to prevent breakage.
Adjusting Technique
- Start with the highest recommended PSI for the surface type.
- Test a small area first to gauge effectiveness and safety.
- Gradually reduce pressure if you notice damage or if the cleaning isn’t effective.
- Keep the nozzle moving to avoid concentrating pressure on one spot.
Remember, it’s always wiser to err on the side of caution. A lower pressure can still achieve great results without risking damage. Adjust as necessary based on the condition of the surface and the type of dirt or grime you’re facing.
Techniques for Effective Cleaning
Achieving optimal results involves more than just pointing and spraying. Focus on specific techniques to maximise your efforts and ensure surfaces are thoroughly cleaned.
Surface Preparation
Before starting, always clear the area of debris, furniture, and any items that could obstruct your cleaning path. This helps avoid damage and allows for a more thorough clean.
- Inspect for loose paint, grime build-up, or mould on surfaces. These may require pre-treatment with appropriate cleaning solutions.
- Wet down plants and surrounding areas to prevent damage from chemicals or strong water pressure.
Cleaning Technique
Adjust your approach based on the type of surface you are cleaning. Here are a few methods I’ve found effective:
- Start from the top: When cleaning walls or vertical surfaces, begin at the highest point and work your way down. This prevents dirty water from running onto already cleaned areas.
- Use a sweeping motion: Move the nozzle in a side-to-side motion, keeping a consistent distance from the surface. This promotes even coverage and prevents streaks.
- Maintain a steady distance: Generally, keep the nozzle 30-60 cm away from the surface. Adjust closer for tough stains, but avoid contact to prevent damage.
- Overlap strokes: For larger areas, overlap each stroke by about 30%. This ensures no spots are missed and achieves uniform cleaning.
For particularly stubborn stains, consider using a rotating nozzle attachment. It combines high pressure with a scrubbing action, making short work of tough grime.
Post-Cleaning Care
After finishing, rinse the area thoroughly to remove any residues from cleaning agents. This step is crucial for driveways or patios where residues can create slippery conditions.
- Inspect the surface for missed spots and reapply pressure where necessary.
- Take time to clean your equipment after use to prolong its lifespan and maintain performance.
Mastering these techniques will transform your cleaning experience, making it more productive and satisfying. Every surface presents its own challenges, but with the right approach, achieving pristine results is always within reach.
Maintaining the Pressure Washer After Use
Always disconnect the water supply first. This simple step prevents backflow and potential damage. After that, release any remaining water pressure by pulling the trigger on the gun. I often forget this part, and it can lead to unexpected sprays that can be quite messy.
Inspect all hoses and connections for any signs of wear or leaks. I recall a time when I neglected this and ended up with a small burst in a hose, which caused a hassle during my next cleaning session. Replace any damaged components immediately to ensure optimal performance.
Cleaning the nozzle is crucial. I usually soak it in soapy water and use a soft brush to remove debris. A clogged nozzle reduces effectiveness and can even cause damage. I learned this the hard way when a blocked nozzle led to uneven cleaning results.
After every session, I recommend running clean water through the system to flush out any detergent residues. This practice has saved my equipment from internal build-up that could affect its longevity. I make it a habit to do this, and it pays off in the long run.
Storing the unit properly is equally important. I always keep it in a dry place, away from extreme temperatures. Make sure to wind the hose carefully to prevent kinks and damage. I’ve seen hoses that were improperly stored develop permanent bends, which diminished their functionality.
Lastly, I suggest checking the oil level if applicable. Regular oil changes are necessary for models that require it. I once overlooked this and faced starting issues later. A quick check can save you time and trouble down the road.
Troubleshooting Common Issues
For inconsistent water flow, check for clogs in the nozzle or hose. A simple rinse can often clear debris. If the water pressure is low, ensure the water supply is adequate and the inlet filter is clean. I’ve found that a blocked filter can significantly hinder performance.
Power Problems
If the motor won’t start, inspect the power source. Ensure all connections are secure and that the outlet is functional. In my experience, a tripped circuit breaker is a common culprit. Also, check the extension cord if used; it must be rated for the equipment’s wattage.
Leakage Issues
Leaks from the pump or hoses can usually be traced back to loose fittings or worn seals. Tightening connections often resolves the issue. If leaks persist, I recommend replacing the affected hoses or seals, as they can wear out over time. Always keep a spare set on hand for quick fixes. And for those who enjoy detailing their cars, consider adding a best car wash high pressure spray gun to your toolkit for enhanced efficiency.
.jpg)


