


For optimal results, always mix the cleaner with water according to the manufacturer’s guidelines. A common ratio is one part cleaner to four parts water, but adjusting this based on the level of grime is key. I recall tackling my patio after a particularly rainy season; a stronger mix transformed the surface from a muddy mess to a pristine space in no time.
Before starting, ensure the surface is free from loose debris. A quick sweep or rinse can save you time and enhance the effectiveness of your cleaning solution. I learned this lesson the hard way when I attempted to clean my driveway without clearing away leaves and dirt first–what a disaster! The cleaner struggled to penetrate the layers of muck.
Utilising the correct nozzle is crucial for varying tasks. For delicate surfaces, a wide fan spray prevents damage, while a narrow jet is perfect for stubborn stains. I vividly remember using the wrong nozzle on my wooden deck; the narrow spray left marks that required additional work to fix. Always test on a small area first to gauge the impact.

Don’t forget to rinse thoroughly after application. Leftover cleaner can lead to streaks or residue. I often set a timer to ensure I don’t get distracted and skip this step–which I did once, resulting in a less-than-stellar finish. A final rinse not only enhances appearance but also protects the surfaces from any potential damage.
Lastly, maintain your equipment regularly. Clean filters and hoses extend the life of your unit and ensure it operates at peak performance. I’ve seen machines fail due to neglect; a simple routine check can save you from costly repairs. A well-maintained device makes the entire cleaning process smoother and more satisfying.
Choosing the Right Zep Pressure Washer Cleaner for Your Needs
To select the most suitable cleaning solution, first identify the surface you’ll be treating. For instance, if tackling a concrete driveway, opt for a heavy-duty formulation designed to cut through oil stains and grime. I recall tackling a friend’s garage floor; the right cleaner made all the difference, breaking down years of built-up dirt effortlessly.
For vehicles, a gentle but effective product is necessary to prevent damage to the paintwork. During a car wash at home, I discovered that a pH-balanced cleaner not only lifted dirt but also left a streak-free finish. Always check the label for compatibility with automotive surfaces.
Outdoor furniture presents another challenge. A biodegradable cleaner can be ideal for patio sets, especially if they’re made of wood or delicate materials. I once used an eco-friendly option on my garden chairs, and they emerged looking brand new without any harsh residues.
For decks and patios, a cleaner with mould and mildew-fighting properties is crucial, particularly in damp climates. I once underestimated the importance of this feature until I faced a slippery deck post-rain. The right choice not only cleaned but also helped prevent regrowth.
Consider the size of the job as well. For large areas, a concentrated solution can provide better value. Mixing it properly, as per the instructions, ensures you achieve optimal results. I learned this the hard way while cleaning a large outdoor space; too little cleaner meant additional passes and wasted time.
Lastly, always read customer reviews for insights on performance. A product that worked wonders for one person may not suit your needs. I’ve had my share of disappointments, and now I always do my homework before purchasing.
Preparing Your Equipment for Cleaning
Before starting any cleaning task, ensure your machine is ready for optimal performance. Here’s a straightforward checklist to get everything in order:
1. Inspect the Unit
- Check for any visible damage, such as cracks in the casing or hoses.
- Ensure all connections are tight and secure to prevent leaks.
- Look over the power cord for any frays or wear that could pose a safety risk.
2. Set Up the Area
- Clear the workspace of obstacles to allow for free movement.
- Protect any nearby plants, furniture, or delicate surfaces with tarps or plastic sheeting.
- Ensure proper drainage to avoid flooding or water pooling.
3. Gather Your Supplies
- Have your chosen cleaning solution nearby. Make sure it’s compatible with your machine.
- Keep brushes, nozzles, and any other accessories ready for use.
- Fill a bucket with clean water for rinsing and mixing solutions.
Once you have everything prepared, take a moment to familiarise yourself with the control settings. Adjust the pressure according to the surface you will be tackling. This way, you’ll avoid any damage to delicate materials while achieving the best results. In my experience, taking these preparatory steps saves time and enhances the effectiveness of the cleaning process.
Mixing Cleaner with Water: The Correct Ratios
For optimal results, I recommend starting with a dilution of 1:10 for general cleaning tasks. This means one part of the solution to ten parts water. For tougher stains like oil or mildew, consider a stronger mix of 1:5. Adjusting the ratio depends on the severity of the grime you’re tackling.
When I first began working with these products, I often mixed too strong, thinking it would boost cleaning power. Instead, I found that a well-balanced ratio not only enhanced the cleaning but also protected surfaces from potential damage. Always refer to the manufacturer’s instructions, as different formulations can have specific guidelines.
After mixing, it’s wise to test on a small, inconspicuous area before proceeding with the entire surface. This step can save a lot of headaches if the cleaner is more potent than expected. Remember, the goal is to achieve a clean surface without compromising its integrity.
Additionally, always use warm water when mixing, as it helps activate the cleaning agents more effectively. This little tip has made a significant difference in my cleaning routine, especially during colder months.
Lastly, consider using a measuring cup for accuracy. It might seem trivial, but precise measurements can greatly influence the outcome. Keeping a consistent method ensures that each cleaning session is as effective as possible, just like I learned during my years in the field.
Applying Cleaner with a Pressure Washer: Techniques and Tips
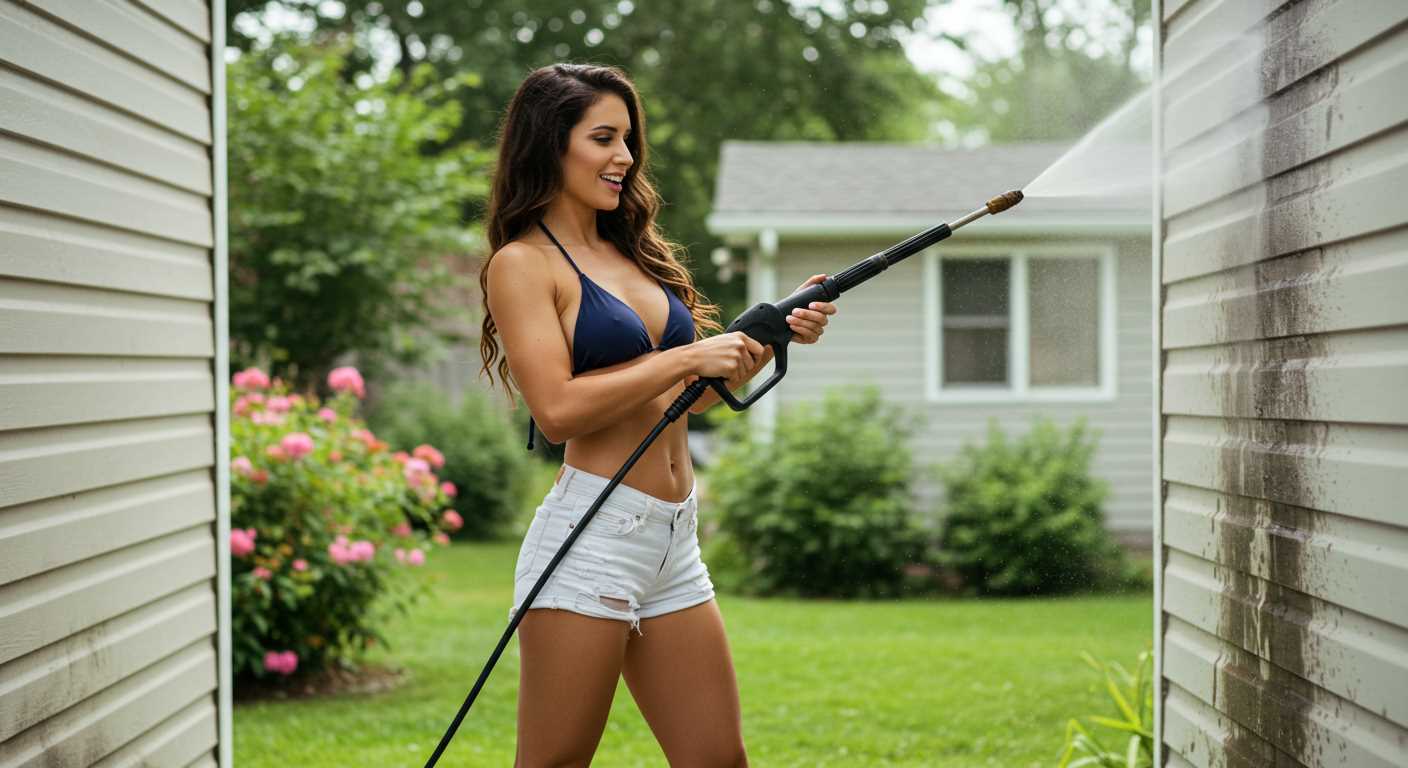
For optimal results, always begin by selecting the right nozzle. I’ve found that using a wider spray pattern, like a 25-degree nozzle, prevents damage while still providing ample cleaning power. This setting is particularly effective for surfaces like driveways and patios, where dirt accumulates over time.
Before applying the solution, ensure the surface is free from loose debris. I often take a broom to sweep away dirt and leaves. This simple step enhances the efficiency of the cleaning agent and reduces the need for excessive scrubbing.
When you’re ready to apply the mixture, start from the top and work your way down. This technique ensures that the solution flows downwards, allowing it to cling to surfaces longer. I’ve seen too many people making the mistake of starting from the bottom, which can lead to streaks and uneven cleaning.
Apply the cleaner in sections. I usually tackle a 10×10 foot area at a time. This allows me to scrub thoroughly before rinsing, ensuring that the solution has time to break down grime effectively. I recommend letting the solution sit for about 5 to 10 minutes, but don’t let it dry out, as this can lead to streaks.
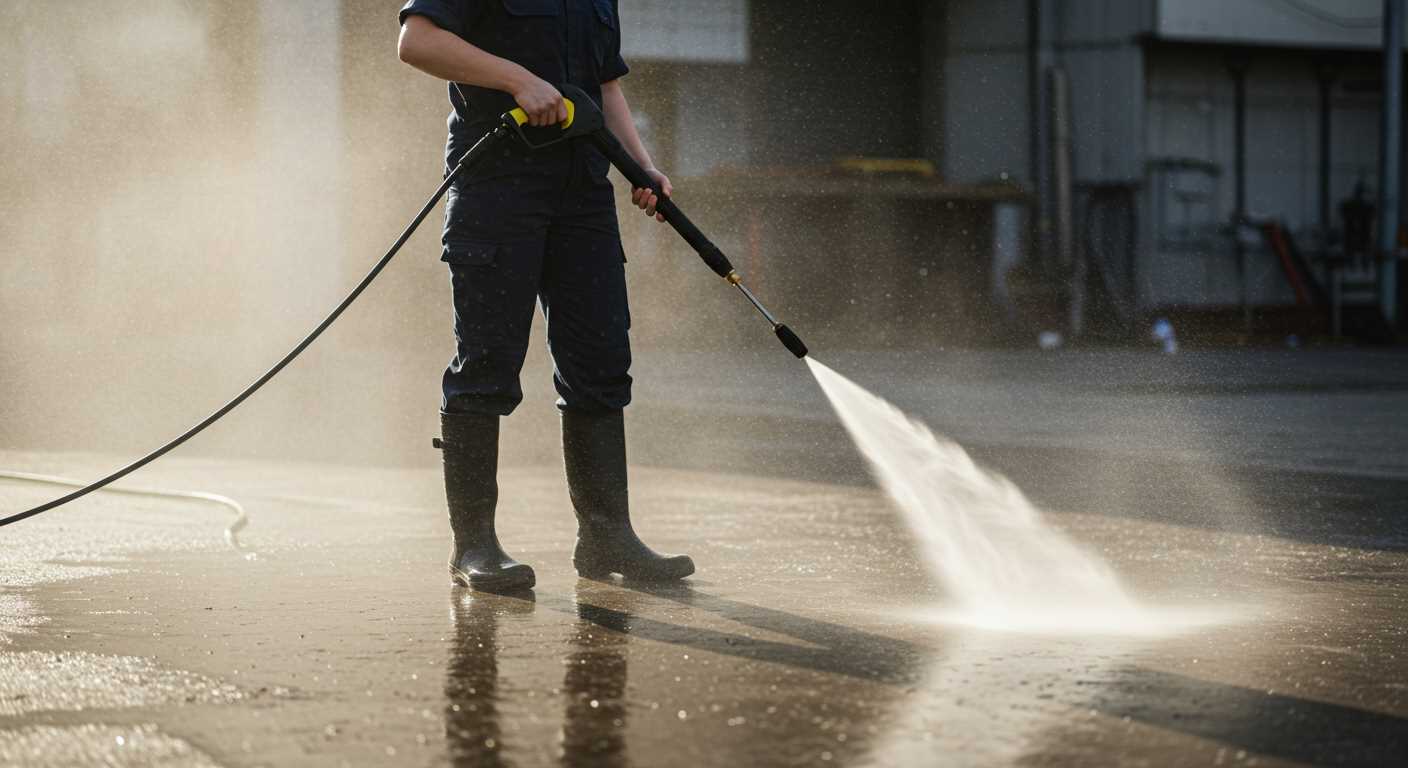
After the dwell time, switch to a high-pressure setting to rinse off the solution. Keep the nozzle at a consistent distance of about 12 to 18 inches from the surface. This distance prevents any potential damage while still providing sufficient force to remove any remaining dirt.
If you find stubborn stains, consider using a rotating nozzle attachment. My experience has shown that this adds extra scrubbing power without the need for excessive manual work. It’s a game-changer for tough spots.
In specific cases, such as cleaning vehicles, it’s best to use a lower pressure and a foam cannon attachment. This technique provides a thick layer of foam that clings to the surface, allowing the cleaner to penetrate and lift dirt without the risk of damaging the paint.
Lastly, always rinse the equipment thoroughly after use. I’ve learned the hard way that a quick rinse can prolong the life of your gear. Residual cleaning agents can cause damage over time, so taking a few extra minutes for maintenance pays off in the long run.
Adjusting Pressure Settings for Different Surfaces
For optimal results, set the pressure according to the surface being treated. Hard surfaces like concrete and brick can handle higher pressures, typically around 2500 to 3000 PSI. This setting effectively removes stubborn stains and grime. However, be cautious with painted or soft surfaces; reduce the pressure to around 1300 to 1500 PSI to avoid damage.
When cleaning delicate materials such as wood or vinyl siding, I always recommend starting at the lowest setting. Gradually increase the pressure until you find the most effective level without risking harm. A gentle approach often yields better results while preserving the integrity of the material.
Adjusting the nozzle also plays a crucial role. Use a wider spray angle for areas that need gentle cleaning and a narrow angle for targeted spots. This combination of pressure and nozzle selection can significantly enhance efficiency.
In my experience, understanding the surface type is key. For instance, while treating pavement slabs, higher pressures can strip away dirt, but they can also dislodge joint sand, leading to further issues. If you want to learn more about this, check out the guide on cleaning pavement slabs with or without a pressure washer.
Always remember to test a small, inconspicuous area first. This simple step can save you from costly mistakes and ensure that your approach is tailored to the specific requirements of the surface you’re working on.
Rinsing and Finishing: Best Practices After Cleaning
After completing the cleaning process, rinsing is crucial for achieving the best results. I always recommend using a wide-angle nozzle during this phase. It helps to ensure a thorough rinse without damaging the surface. For most applications, a 25-degree nozzle works effectively to wash away any remaining detergent and dirt.
Technique for Rinsing
Start from the top of the surface and work your way down. This prevents dirty water from running over previously cleaned areas. Maintain a consistent distance of around 12 to 18 inches from the surface to avoid any potential damage. If you’re tackling vertical surfaces, I often use a side-to-side motion to ensure even coverage.

Final Touches
Once rinsing is complete, inspect the area for any missed spots. A quick second pass can effectively remove any lingering residues. For surfaces like driveways or patios, consider using a surface cleaner attachment; it provides uniform results by covering a larger area without streaks.
After rinsing, allow the surface to dry completely before applying any sealants or finishes. This wait time ensures that no moisture interferes with the adhesion of protective coatings. From experience, I can assure you that this step is often overlooked but makes a significant difference in the longevity of your clean.
Finally, always clean your equipment after every use. Rinse the hoses and nozzles to prevent blockages and maintain optimal performance for future tasks. A little maintenance goes a long way in extending the life of your gear.
Safety Precautions When Using Zep Pressure Washer Cleaner
Always wear protective eyewear. I recall a day when I neglected this simple step and ended up with debris in my eye. It’s not worth the risk. A good pair of goggles will shield your vision from any splashes or flying particles.
Protective Gear
- Gloves: Use heavy-duty gloves to protect your hands from harsh chemicals and high-pressure water.
- Footwear: Waterproof boots are a must. Slip-resistant soles provide stability on wet surfaces.
- Clothing: Long sleeves and trousers can prevent skin irritation from chemicals and injuries from debris.
Area Preparation
- Clear the vicinity: Remove any obstacles, furniture, or fragile items that could be damaged during the cleaning process.
- Check for electrical hazards: Ensure no electrical connections are near the area being cleaned. Water mixed with electricity is a dangerous combination.
- Secure pets and children: Keep areas off-limits to avoid accidents and ensure everyone’s safety.
Before beginning, inspect all equipment for damage. A faulty nozzle or hose can cause unexpected reactions. I’ve seen hoses burst under pressure, leading to a messy situation. If you notice any wear and tear, replace parts before starting.
Additionally, be cautious with the cleaning solution. Always read labels carefully. I once mixed a cleaner without checking compatibility, which caused a nasty reaction. Always dilute according to instructions and never mix different products.
Lastly, maintain a safe distance from surfaces. High-pressure streams can cause damage if aimed too closely. I learned this the hard way on a wooden deck that needed a gentle touch.
Storing Cleaner and Maintaining Your Equipment
After finishing your cleaning tasks, proper storage of your solution and equipment is crucial for longevity and performance. First, ensure that any remaining solution is sealed tightly in its original container. Store it in a cool, dry place away from direct sunlight and extreme temperatures to prevent degradation.
For the cleaning apparatus, follow these steps to maintain its condition:
| Step | Action |
|---|---|
| 1 | Disconnect all hoses and nozzles. This prevents wear and tear. |
| 2 | Drain any remaining water or solution from the system to avoid freezing or clogging. |
| 3 | Clean the filter and any attachments to ensure optimal performance for future tasks. |
| 4 | Store the unit upright in a dry location, preferably indoors, to prolong its life. |
| 5 | Regularly check seals and connections for wear; replace them as necessary. |
From my experience, neglecting these maintenance steps can lead to costly repairs or replacements. I once overlooked drainage during winter, resulting in frozen components that required professional servicing. Lesson learned! Keeping everything clean and properly stored not only ensures effective future cleaning but significantly extends the lifespan of your equipment.
For those interested in photography equipment, you might be curious about how different formats compare. Check out this interesting read on are digital cameras better than film cameras.
.jpg)
.jpg)


