


For a truly remarkable clean, begin at the wheels. Use a wide-angle nozzle to blast away grime and brake dust, getting into every nook and cranny. This step not only enhances the appearance but also prepares the surface for the rest of the process.
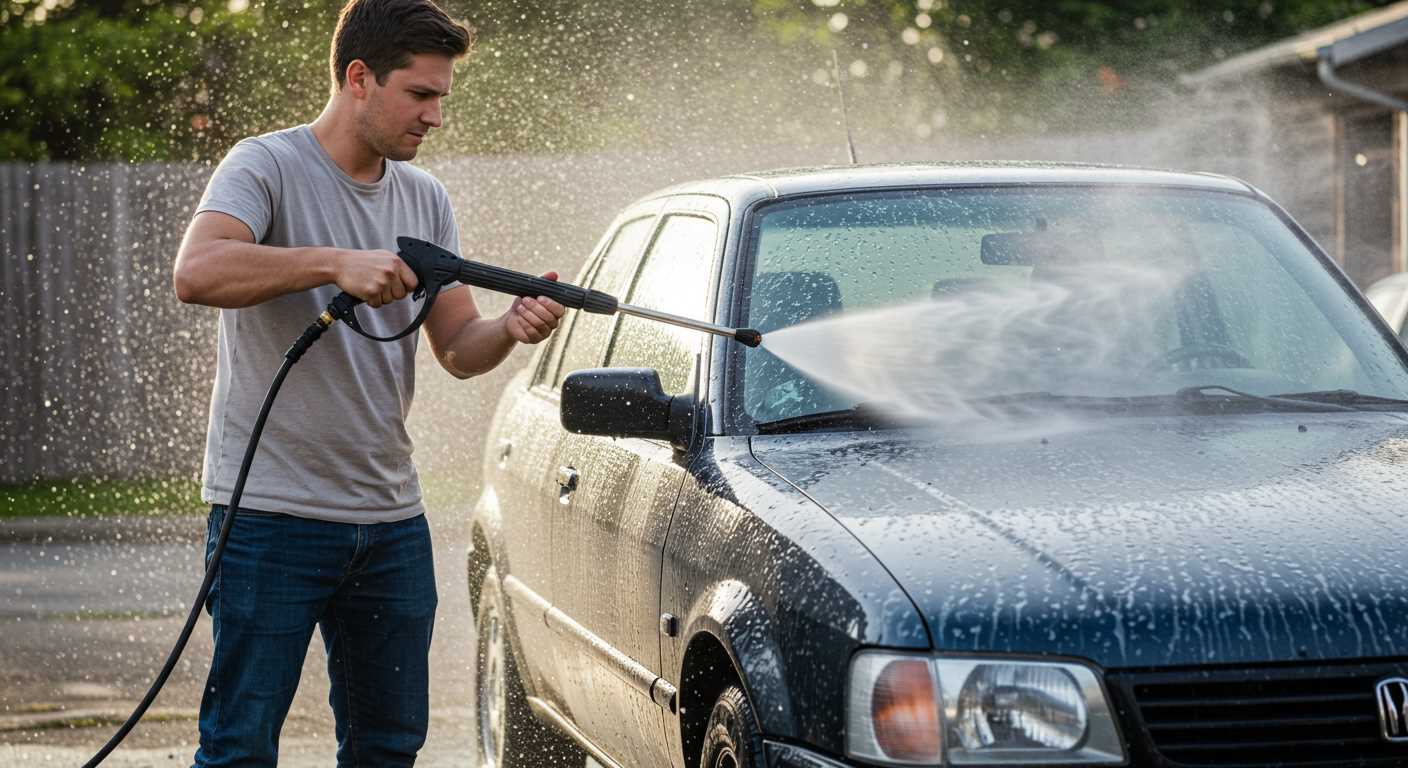
Next, move on to the bodywork. A good practice is to start from the top and work your way down. This method prevents dirty water from running onto already cleaned sections. Keep the nozzle at a distance of about 30 centimetres to avoid damage while ensuring optimal cleaning power.
Don’t skip the undercarriage. A dedicated attachment can reach the hidden areas that often accumulate dirt and salt, especially in winter months. Regular attention here extends the life of your vehicle by preventing rust and corrosion.
Finally, finish with a rinse to remove any remaining soap or cleaning agents. A gentle touch is key; the aim is to leave a spotless finish without creating streaks. Consider applying a wax after drying for a protective layer that enhances shine.
Every step contributes to maintaining your vehicle’s aesthetic appeal and longevity. Consistency is key; make this a part of your regular maintenance routine for optimal results.
Washing Your Vehicle with a High-Pressure Cleaner
Begin by selecting a nozzle that delivers a fan spray. A 25-degree nozzle is typically ideal for removing grime without damaging surfaces. Adjust the distance between the nozzle and the paintwork to around 2 feet to prevent scratches.
Follow these steps for optimal results:
- Rinse the vehicle thoroughly to remove loose dirt. Start from the top and work your way down, ensuring that all areas are covered.
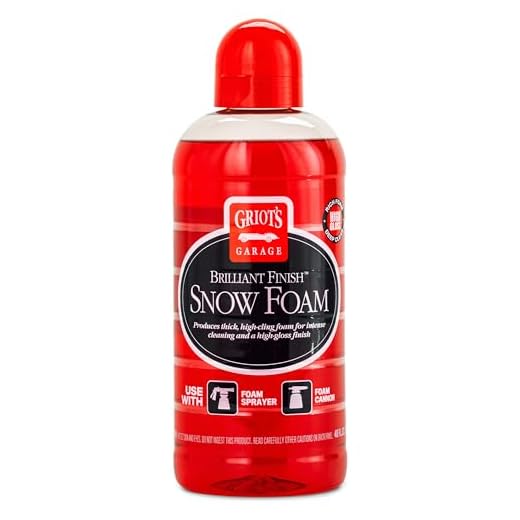
- Apply a pre-wash solution to the exterior. Use a foam cannon attached to the high-pressure device for an even application. Allow it to dwell for a few minutes to break down stubborn contaminants.
- After the dwell time, rinse off the soap, again starting from the top. This process helps to wash away the loosened dirt.
- For stubborn spots, such as bird droppings or tree sap, use a microfiber cloth or sponge soaked in a suitable cleaner. Avoid using abrasive materials that could scratch the surface.
- Once rinsed, dry your vehicle using a soft drying towel or chamois. This prevents water spots from forming.
- Consider applying a wax or sealant after drying for added protection. This step enhances shine and makes future cleaning easier.
Remember to check the manufacturer’s guidelines of your vehicle before starting. Some finishes may require gentler techniques or specific products. Regular maintenance will keep your vehicle looking its best while prolonging the life of its exterior.
Choosing the Right Pressure Washer for Car Washing
Opt for a unit with a pressure range of 1200 to 1900 PSI. This level is sufficient for removing dirt and grime without risking damage to the paintwork. I’ve seen too many individuals choose models that are too powerful, leading to chipped finishes and unnecessary repairs.
Electric models are usually quieter and lighter, making them ideal for residential use. I recall a friend who went for a gas-powered variant, thinking it would be more robust. It turned out to be cumbersome and noisy, making the washing experience less enjoyable. If you’re washing at home, stick with electric; it’s easier to manage.
Pay attention to the flow rate, measured in gallons per minute (GPM). A higher GPM means quicker cleaning. Look for at least 1.2 GPM to ensure you can rinse off soap effectively. I once used a model with a lower GPM, and it took ages to do a decent job because I had to repeatedly go over sections.
Consider portability. A lightweight model with wheels will save you from unnecessary hassle. I’ve had the misfortune of dragging heavy units around my driveway, which can be exhausting. Look for options with good quality wheels and a sturdy handle.
Lastly, check for included accessories. A foam cannon is a game-changer for thorough cleaning. I remember my first time using one; it transformed the way I approached washing. It clings to the surface, giving you extra time to scrub away dirt. Make sure your chosen device is compatible with such attachments.
Preparing Your Vehicle for the Wash
Before tackling the cleaning process, ensure the vehicle is parked in a shaded area. Direct sunlight can cause soap to dry too quickly, leaving streaks. Always inspect the exterior for loose dirt and debris; a quick rinse is advisable to dislodge any particles that might scratch the paint during the cleaning phase.
Gather Necessary Supplies
Collect all required items beforehand. This includes a foam lance, detergent suitable for automotive use, wheel cleaner, and microfiber cloths. Having everything within reach saves time and enhances the washing experience.
Protect Sensitive Areas
Cover any sensitive components such as the air intake, electrical connections, and exposed engine parts. Use plastic bags or waterproof covers to shield these areas from water and detergent. This precaution prevents potential damage and ensures a safe cleaning process.
| Item | Purpose |
|---|---|
| Foam Lance | Applies a thick layer of detergent for effective cleaning |
| Detergent | Breaks down dirt and grime |
| Wheel Cleaner | Targets brake dust and road grime on wheels |
| Microfiber Cloths | Wipes down surfaces without scratching |
Lastly, ensure the water source is ready and that the hose is free of kinks to facilitate a steady flow. Preparing in this manner sets the stage for a thorough cleaning experience, minimising complications and enhancing results.
Applying the Soap Solution with a Pressure Washer
Utilise a dedicated soap nozzle or foam cannon for optimal application of the cleaning solution. These attachments create a thick foam that clings to the surface, enhancing the cleaning process. From my experience, the foam stays longer, allowing the cleaner to break down grime effectively.
Mix the soap according to the manufacturer’s instructions. Too much concentrate can lead to residue, while too little may not provide adequate cleaning. I usually recommend a 1:10 ratio as a starting point, adjusting based on the level of dirt.
Begin at the top of the vehicle and work downwards. This ensures that any dirt and soap run off without leaving streaks. I’ve found that applying the solution in sections helps manage the cleaning process better. Allow the foam to sit for a few minutes, but avoid letting it dry out; it can become more challenging to remove if it dries on the surface.
Keep the nozzle at a distance of about 18 inches from the surface to prevent damage. I’ve seen firsthand how getting too close can lead to scratches or paint damage. A steady, sweeping motion while applying the foam prevents concentrated spots and promotes even coverage.
After application, I always rinse thoroughly with clean water. This step is vital to ensure all soap is removed. Leaving soap residue can lead to streaking and attract dirt faster. I recommend checking for missed spots during the rinse to ensure a pristine finish.
Techniques for Rinsing Off Soap and Dirt
To effectively remove soap and grime, start by adjusting the nozzle to a wider spray pattern. This ensures a broader coverage and reduces the risk of causing damage to the surface. I recommend using a fan spray, as it provides a balance between pressure and area. During my years of experience, I’ve found that a distance of about two feet from the surface prevents excessive force while still maintaining efficacy.
Rinsing Strategy
Begin rinsing from the top down. This method prevents dirty water from running over already cleaned areas. Use a sweeping motion as you work your way down each section. Focus on the edges and crevices where soap tends to accumulate. For stubborn spots, a direct spray can help, but be cautious not to linger too long on any one area to avoid damaging the paint.
Final Touches
After the initial rinse, it’s beneficial to do a final, thorough rinse using clean water. This ensures all soap residues are completely washed away. If you notice any remnants, a second pass over those areas may be necessary. For a sparkling finish, consider drying the surface with a microfiber towel to prevent water spots. If you’re looking for tips on maintaining other surfaces, check out this guide on how to clean a fish tank without removing the fish.
Drying Your Vehicle After Pressure Washing
After rinsing, the next step is to dry the surface effectively. I recommend using a soft, absorbent microfiber towel for this task. It’s gentle on the paint and minimizes the risk of scratches. Start from the top and work your way down, allowing gravity to assist in removing excess water.
Pay special attention to crevices and areas where water tends to collect, such as around mirrors, door handles, and the underside of the vehicle. A detailing blower can be a great addition here; it blasts air into tight spots, ensuring no moisture is left behind. I’ve found this technique particularly useful after a thorough clean, as it helps prevent water spots and streaks.
For larger surfaces, you can employ the “squeegee” method with a rubber blade. This approach allows for quick removal of water without much fuss. Just be sure to avoid dragging the blade across the paint directly; lift it off the surface after each stroke to prevent any potential abrasions.
If you’re looking for a quick drying solution, I’ve had success using a water-repellent spray after drying. It not only speeds up the drying process but also adds a layer of protection against dirt and grime. Just make sure it’s suitable for the finish of your vehicle.
Once you’ve dried everything thoroughly, take a moment to inspect the surface for any missed spots or remaining water beads. A second pass with a clean towel can catch those sneaky areas. Finally, treat your vehicle to a quick detail spray for a lustrous finish.
For those interested in maintaining cleanliness beyond the vehicle, check out this resource on cleaning the pool floor 4 techniques at a glance. It offers insights that can be beneficial for various cleaning tasks.
Maintaining Your Pressure Washer for Future Use
Regular upkeep of your cleaning device is key to ensuring longevity and optimal performance. After each use, it’s crucial to flush out any soap residue or debris. Run clean water through the system for a few minutes to prevent clogs and maintain the pump’s integrity. Always check the nozzle for blockages; a simple step like this can save you from costly repairs down the line.
Storing Properly
When the washing session wraps up, don’t just stow it away. Ensure that the unit is completely dry to avoid mildew and corrosion. If your model has a removable hose, detach it and hang it up. Store in a cool, dry place, ideally indoors, away from extreme temperatures. If you live in a colder climate, consider using antifreeze solutions specifically designed for these machines to protect the internal components.
Regular Inspections
Make it a habit to inspect your device regularly. Check for signs of wear and tear, especially on hoses and connectors. Look for leaks, as these can indicate a larger issue. Replace worn parts promptly. Keeping spare parts on hand can save you time and hassle when something needs replacing. A little proactive maintenance can prevent a lot of headaches later.
FAQ:
What equipment do I need to wash my car with a pressure washer?
To wash your car with a pressure washer, you will need a pressure washer itself, preferably one with adjustable pressure settings. Additionally, a suitable nozzle attachment, such as a fan or soap nozzle, can help apply soap evenly. You should also have a car wash soap specifically designed for pressure washers, a bucket, a sponge or wash mitt, and a drying towel or chamois for after cleaning.
Can using a pressure washer damage my car’s paintwork?
Yes, using a pressure washer can potentially damage your car’s paintwork if not done correctly. It’s important to maintain a safe distance from the car surface, ideally around 2-3 feet. Using a high-pressure setting too close can cause chips or scratches. Always use the appropriate nozzle and avoid direct spray on sensitive areas like the edges of panels and around windows.
What is the recommended pressure setting for washing a car?
The recommended pressure setting for washing a car typically ranges from 1200 to 1900 PSI (pounds per square inch). This range is powerful enough to remove dirt and grime without risking damage to the paintwork. If your pressure washer has adjustable settings, start at the lower end of this range and increase if necessary, ensuring you keep a safe distance from the vehicle’s surface.
Should I use hot or cold water when washing my car with a pressure washer?
Using cold water is generally sufficient for washing a car with a pressure washer. Hot water can aid in breaking down grease and stubborn dirt, but it is not necessary for regular maintenance. Most car wash soaps are designed to work effectively with cold water. However, if your pressure washer allows for hot water use, it can enhance cleaning efficiency, especially for heavily soiled vehicles.
How do I prevent water spots after pressure washing my car?
To prevent water spots after pressure washing your car, it is crucial to dry the car as soon as possible after rinsing. Use a microfiber drying towel or chamois to absorb the water and prevent mineral deposits from forming on the surface. Additionally, washing your car in the shade can help reduce the chances of water spots, as direct sunlight can cause water to evaporate quickly, leaving spots behind.
What equipment do I need to wash my car with a pressure washer?
To wash your car with a pressure washer, you will need a few key pieces of equipment. Firstly, a pressure washer itself is necessary; ensure it has an adjustable pressure setting, ideally between 1200 to 1900 PSI, which is suitable for car washing. Secondly, a foam cannon or a detergent attachment can help apply soap evenly. You will also need car wash soap specifically designed for automotive finishes to avoid damaging the paint. Additionally, make sure to have a soft brush or sponge for scrubbing, as well as microfiber towels for drying. Finally, use a hose to rinse off any excess soap and debris before starting with the pressure washer.



.jpg)


