
.jpg)


.jpg "How to wash car with greenworks pressure washer")
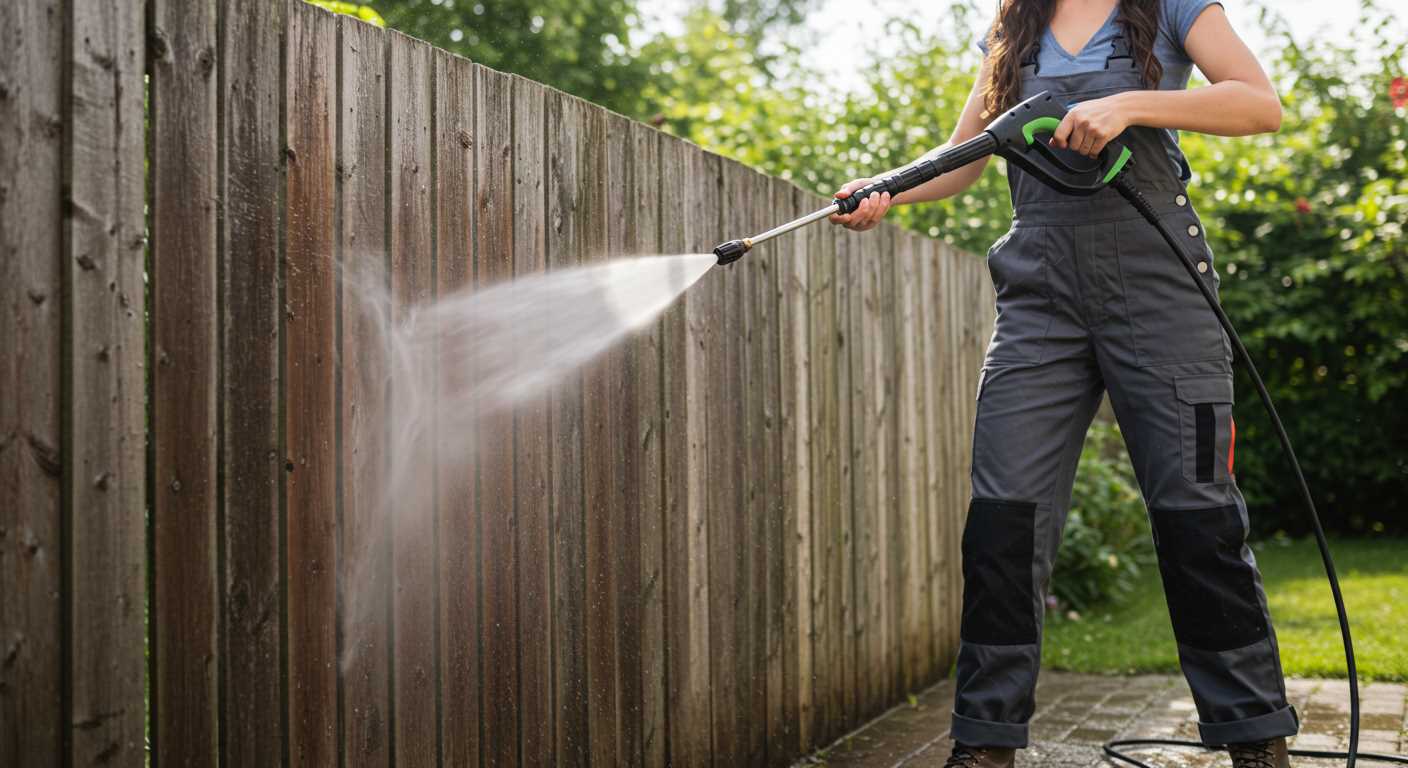
Begin by selecting a suitable nozzle for your task; I recommend the 25-degree nozzle for general cleaning. This option provides a balanced spray pattern that effectively removes dirt without risking damage to surfaces. Attach the nozzle securely before connecting the unit to a water source.
Next, ensure you have a quality detergent designed for pressure washing. I’ve experimented with various brands, and a biodegradable option not only protects the environment but also enhances cleaning results. Mix it according to the instructions and use a detergent injection system if your model supports it. This step makes a noticeable difference in tackling stubborn grime.

Once the equipment is set up, start from the top and work your way down. I’ve found that this technique prevents dirt from running down over already cleaned areas. Maintain a distance of about 2 feet from the surface to avoid etching or damaging paint. Consistent movement is key; lingering too long in one spot can lead to unwanted results.
After rinsing, observe the surface for any missed spots. It’s common to overlook areas, especially around wheel wells or undercarriages. A quick second pass with the same nozzle can ensure a thorough clean. Wrapping up with a good rinse will leave everything spotless, ready for drying or waxing.
Guidelines for Cleaning Your Vehicle Using a High-Pressure Device
Begin by selecting the correct nozzle for your task. A 25-degree nozzle is ideal for general cleaning, while the 40-degree option is gentler, perfect for delicate surfaces. Always test a small area first to ensure compatibility.
Preparation Steps
Ensure the vehicle is parked in a shaded area to prevent soap from drying too quickly. Remove any loose dirt or debris using a soft brush. Gather your supplies: a suitable detergent, a bucket, a sponge, and a microfiber towel for drying. Mix the detergent with water in a bucket according to the manufacturer’s instructions.
Cleaning Process
Start by rinsing the vehicle from top to bottom to remove loose grime. Keep the nozzle at least 2 feet away from the surface to avoid damage. Apply the soapy solution using a sponge, making sure to cover all areas, including wheels and arches. Allow the soap to sit for a few minutes before rinsing it off thoroughly. Follow up with a final rinse to ensure no detergent residue remains.
| Step | Action |
|---|---|
| 1 | Select appropriate nozzle. |
| 2 | Prepare the vehicle and gather materials. |
| 3 | Rinse the vehicle from top to bottom. |
| 4 | Apply soap using a sponge. |
| 5 | Rinse off the soap thoroughly. |
Finally, dry the vehicle with a microfiber towel to prevent water spots. Regular maintenance will keep your ride looking pristine and extend its lifespan. Trust me, it’s worth the effort.
Choosing the Right Nozzle for Your Pressure Washer
Selecting the correct nozzle significantly impacts the outcome of your cleaning task. Each nozzle type serves a specific purpose, ensuring you achieve the best results without damaging surfaces.
Understanding Nozzle Types
- 0-degree (Red): Produces a concentrated jet, ideal for removing tough stains on hard surfaces but risky for delicate areas.
- 15-degree (Yellow): A powerful option for stripping paint or cleaning concrete. Use with caution on softer materials.
- 25-degree (Green): A versatile choice for general cleaning. Suitable for patios, driveways, and vehicles.
- 40-degree (White): Gentle spray for rinsing surfaces or cleaning vehicles without risk of damage.
- Soap (Black): Dispenses detergent effectively. Ideal for pre-treating surfaces before using a higher pressure nozzle.
Choosing Based on Surface
Consider the material you aim to clean:
- Concrete and Brick: Opt for 15 or 25-degree nozzles for deep cleaning.
- Wood: A 25-degree is safer, while the 40-degree is best for rinsing.
- Vehicles: The 40-degree is your best bet to avoid scratches.
- Glass: Always use a 40-degree for a gentle touch.
In my experience, using the wrong nozzle can lead to surface damage or insufficient cleaning. Always test in an inconspicuous area first to gauge the effect. Each cleaning job is unique; adapt your approach accordingly for optimal results.
Preparing Your Vehicle for a High-Pressure Clean
Before you begin, ensure your vehicle is parked in a shaded area. Direct sunlight can cause soap and water to dry too quickly, leaving streaks and spots. Remove any personal items from the interior and ensure the windows are closed tightly to prevent water from entering.
Inspect for Damage
Examine the exterior for any scratches, dents, or weak spots in the paint. If there are any areas that need attention, address them before applying water. This prevents further damage during the cleaning process. Pay special attention to areas around trims and decals; these can be delicate and might require extra care.
Secure Loose Parts
Check for loose or hanging parts, such as mud flaps or spoilers. If anything appears unstable, consider removing it temporarily. This step reduces the risk of them being dislodged or damaged by the force of the water. Additionally, ensure that your lights and mirrors are intact and properly secured.
Lastly, prepare your washing solution and any additional cleaning products you’ll need on hand. Having everything ready allows for a smoother and more enjoyable experience. Trust me, a little preparation goes a long way in achieving that pristine finish you’re after.
Setting Up the Greenworks Pressure Washer
Always start by placing the unit on a stable, flat surface. This ensures stability and prevents any accidental tipping during operation. Check the water inlet filter for debris; a clean filter is crucial for optimal performance. Make sure to connect a garden hose securely to the water inlet valve. Tighten it by hand to avoid leaks. Ensure that the hose is free from kinks to maintain a steady water flow.
Power Connection
For electric models, plug the cord into a grounded outlet. Avoid using extension cords if possible, as they can reduce power and efficiency. If you must use one, ensure it’s rated for outdoor use and can handle the wattage of your machine. After powering up, let the device run for a minute to purge any air from the system before usage.
Choosing the Right Settings
Refer to the user manual for specific settings tailored for different tasks. Adjusting the pressure settings according to the job at hand can make all the difference. For delicate surfaces, lower pressure is advisable, while tougher grime may require a higher setting. Always test on a small, inconspicuous area first to gauge the impact.
Applying Soap and Cleaning Solutions
To achieve a spotless finish, select a suitable soap specifically formulated for automotive surfaces. Avoid household cleaners; they can damage paint and finishes. I recommend using a pH-balanced car soap that gently lifts dirt without stripping wax or sealants.
Utilise a foam cannon or soap dispenser attachment for a thorough application. Fill the container with the recommended dilution of soap and connect it to your machine. The foam cannon creates thick suds that cling to surfaces, making it easier to break down grime.
Technique for Application
Begin at the top and work your way down. This method prevents dirt from running down onto already cleaned areas. Apply the foam generously, allowing it to sit for a few minutes to penetrate the dirt. Remember, don’t let it dry out! If necessary, reapply foam to maintain moisture.
Rinsing Off
After the dwell time, switch to a nozzle that provides a wide spray pattern to rinse. Start from the roof and progress downward, ensuring all soap is thoroughly removed. Pay close attention to crevices and wheel arches where soap can linger. A clean rinse leaves surfaces ready for drying and final inspection.
Washing Different Areas of the Vehicle
Start at the top and work your way down. This method prevents dirt and grime from running down onto clean areas. For the roof, use a wide fan nozzle to cover more surface area efficiently.
Windows and Mirrors
Utilise a dedicated glass cleaner after rinsing. The pressure can remove most debris but may leave streaks. Apply the cleaner with a microfiber cloth for a spotless finish.
Wheels and Tyres

- Use a narrow nozzle to direct the jet precisely at the brake dust and grime.
- Consider a wheel cleaner spray beforehand to loosen stubborn dirt.
- After rinsing, use a brush to scrub the tyres for maximum cleanliness.
Ensure to rinse thoroughly to remove any chemical residue that can affect tyre longevity.
Bodywork and Trim
- Apply cleaning solution directly onto the surface.
- Use a medium-pressure setting to avoid damage while ensuring effective cleaning.
- Pay special attention to crevices where dirt accumulates.
After cleaning, rinse from the top down, ensuring all soap is removed to prevent streaks.
Undercarriage
Utilise a dedicated undercarriage attachment if available. This area often collects the most grime, especially in winter conditions. Use a sweeping motion to cover the entire length.
Rinse thoroughly to prevent rust and corrosion from accumulating due to trapped debris.
After completing each section, dry with a soft cloth to avoid water spots and maintain a polished appearance.
Rinsing Techniques to Avoid Damage
Always maintain a distance of at least 2 feet from the surface while rinsing. This distance helps prevent the risk of paint damage and ensures that the water pressure does not strip away protective coatings. I once got too close and ended up with a small chip in the paint; a lesson learned the hard way.
Utilise a sweeping motion while directing the water. Rather than concentrating on one spot, move the nozzle side to side. This distributes the pressure evenly and minimises the chances of harm. I often use this technique around edges and areas with delicate trim, as I’ve noticed it greatly reduces the risk of issues.
Avoiding Sensitive Areas
Steer clear of direct water pressure on sensitive components like electronic parts, sensors, and seals. These areas can be vulnerable, and even a brief blast of high pressure can cause malfunctions. I tend to cover these spots with plastic or a cloth when rinsing; it’s a simple precaution that has served me well.
Using the Correct Angle
Adjust the nozzle to a wider spray angle when rinsing. A wider fan helps reduce the intensity of the water pressure impacting the surface. I’ve found that a 25-degree nozzle works wonders for rinsing, providing sufficient force to remove soap without the risk of damage. It’s all about finding that balance between cleanliness and care.
Finishing Touches: Drying and Detailing
After completing the thorough cleansing process, the next step involves ensuring your vehicle is impeccably dry. I recommend using a soft, absorbent microfibre towel. Start from the top and work your way down, preventing any potential streaks or water spots. This method not only helps in drying but also ensures that you catch any missed areas.
Detailing Your Vehicle
Once dried, focus on detailing to enhance the overall appearance. Apply a quality wax or sealant to add a protective layer and give your vehicle a brilliant shine. I learned that using a foam applicator pad ensures even distribution and prevents swirl marks. Pay special attention to areas like the headlights and taillights, as these can greatly affect the aesthetic appeal. For a finishing touch, consider applying a tyre shine product to elevate the look of your wheels.
Final Checks
Conduct a final inspection for any missed spots or imperfections. Inspect the windows and mirrors for clarity; a good glass cleaner can make a significant difference. If you’re curious about additional uses for high-pressure equipment, check out this informative piece on how does a pressure washer work. And for those who enjoy cooking, I’ve found that the same attention to detail in cleaning can apply to culinary tasks, such as knowing how long to roast a chicken in pressure cooker.
Maintaining Your Pressure Washer After Use
After completing a thorough clean, proper care for your equipment is paramount. Begin by disconnecting the water supply and releasing any remaining pressure in the hose. This simple step prevents potential damage to the internal components.
Cleaning Filters and Nozzles
Regularly inspect and clean the filters and nozzles. Clogged filters can lead to reduced performance. Remove the nozzle and rinse it under warm water, using a soft brush to dislodge any debris. For the filter, detach it and cleanse it gently, ensuring no residue obstructs water flow.
Storage and Protection
Once everything is cleaned, store the apparatus in a dry place. Avoid leaving it exposed to harsh weather conditions. If you have winter months, consider using a pump protector to prevent freezing and potential damage. Wipe down the exterior with a soft cloth to remove any moisture, ensuring longevity.
.jpg)


