


Start by selecting the right nozzle; a 25-degree or 40-degree tip typically works best for delicate surfaces. I once made the mistake of using a narrow nozzle on a fragile pane and ended up with some chips. Angle the lance at about 45 degrees to ensure water hits the surface evenly without causing damage.
Before you begin, ensure any loose debris or dirt is cleared away. I often use a soft brush to gently agitate stubborn grime. This preparation phase saves time and avoids streaks later. Remember, it’s all about the prep work.
Maintaining a consistent distance is also key. I’ve found that keeping the nozzle approximately 3 feet away from the glass prevents excessive pressure that could lead to cracking. Move in sweeping motions, overlapping slightly to ensure complete coverage. This technique not only enhances the finish but also reduces the risk of missed spots.
Lastly, I recommend a thorough rinse. Just like after washing a car, a final spray ensures that no detergent residues remain. This simple step can make all the difference in achieving that crystal-clear result you’re aiming for.
Techniques for Cleaning Glass Surfaces Using High-Pressure Equipment
Begin with a 25-degree nozzle; this offers a balance between force and safety. Stand at a distance of approximately two feet from the glass to avoid damage. Always angle the spray towards the ground to prevent water from seeping into the frames or seals.
Use a dedicated cleaning solution specifically designed for glass. These products enhance clarity and help break down grime. Apply the solution generously across the surface before rinsing. This pre-treatment makes the job far easier and yields a streak-free finish.
For stubborn stains like bird droppings or tree sap, allow the cleaning agent to sit for a few minutes. This dwell time allows the solution to penetrate the debris, making it easier to remove. Afterward, use a soft brush attachment to agitate the area gently.
After applying the cleaner, move the nozzle in a sweeping motion from the top to the bottom. This technique ensures that the dirty water flows downwards, minimising the chance of streaks. For larger panes, work in sections to maintain control and visibility.
Finally, rinse thoroughly with clean water. It’s essential to ensure all cleaning agents are washed away to prevent residue from forming. If you notice any streaks after the surface dries, a microfiber cloth can help buff these out for a flawless finish.
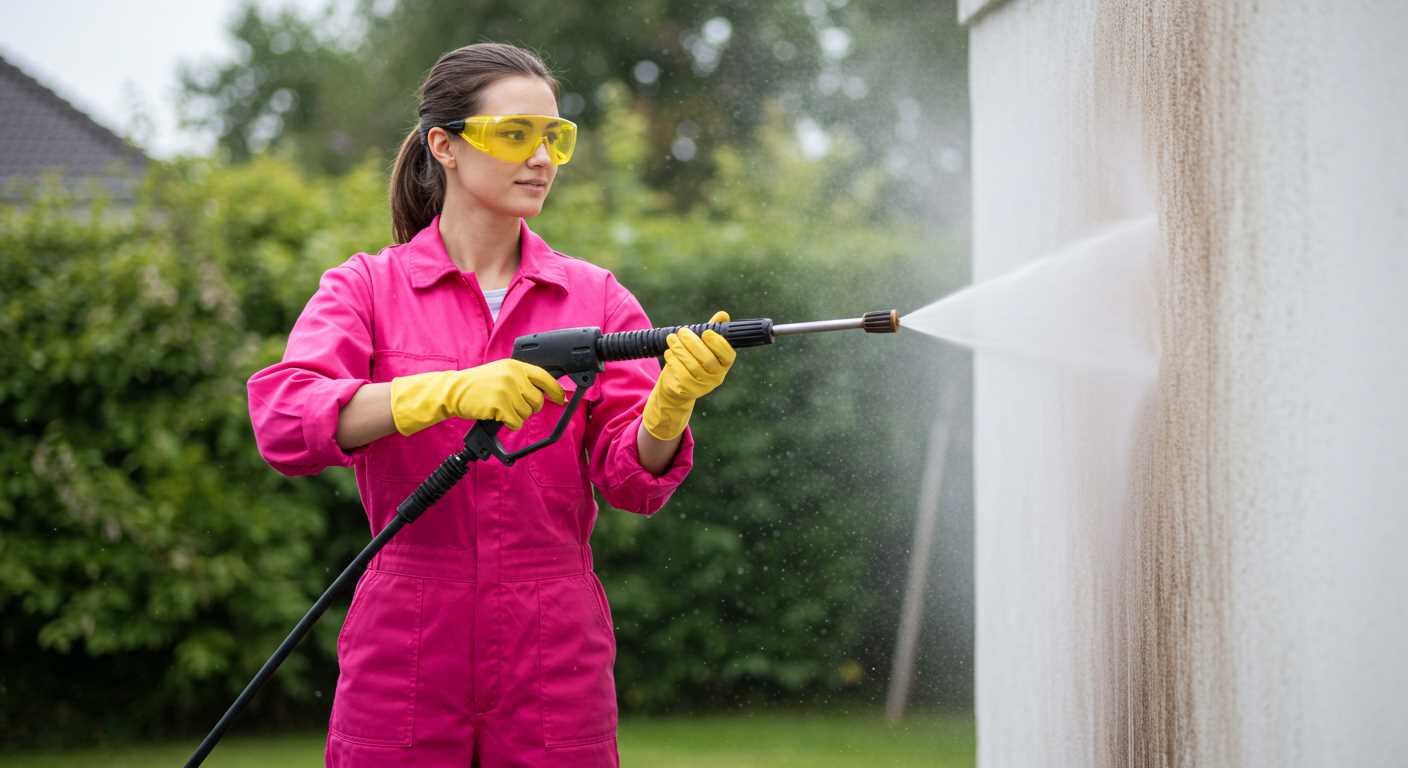
Safety is paramount. Always wear protective eyewear and consider using a harness if working on elevated surfaces. These precautions reduce the risk of accidents while operating high-pressure equipment.
Choosing the Right Pressure Washer for Window Cleaning
For effective cleaning, selecting the appropriate device is crucial. Look for a model that offers adjustable pressure settings. A unit with a pressure range of 1000 to 2000 PSI is ideal for delicate surfaces like glass. This flexibility allows you to manage the force applied, reducing the risk of damage.

Key Features to Consider
Pay attention to the nozzle options. A fan spray nozzle works wonders for reaching higher areas without leaving streaks. Opt for a rotary nozzle for an extra boost when tackling tough grime. Ensure the equipment is lightweight and portable for ease of handling, especially if you’re working on multi-storey buildings.
Additional Tips
Invest in a model with a detergent tank. This feature simplifies the application of cleaning solutions, enhancing the cleaning process. Brands like Kärcher and Sun Joe have solid reputations and offer various options to suit different needs.
In my experience, a well-chosen device makes the job smoother and more enjoyable. Always remember to consider safety gear, as maintaining a safe distance from the surface is paramount. For additional insights, check out this link: are digital cameras and scanners input or output devices.
Preparing Your Windows for Pressure Washing
Begin by ensuring the area around the glass is clear of obstacles. Remove any furniture, planters, or decorations that might obstruct access. This simple step saves time and allows for a thorough clean.
Inspect the frames and seals for any damage. If you notice cracks or deterioration, consider repairing them before proceeding. A damaged frame can lead to water intrusion, causing further issues down the line.
Next, check for loose or broken glass. If any panes are compromised, it’s best to replace them prior to starting the cleaning process. An ounce of prevention here can prevent injury and additional costs.
Consider the weather conditions. Avoid tackling this task during high winds or freezing temperatures, as these can affect both safety and the quality of the cleaning. Aim for a dry day when temperatures are mild.
Finally, gather your cleaning supplies. Here’s a quick checklist to ensure you have everything at hand:
| Supplies | Purpose |
|---|---|
| Soft brush | To remove loose dirt and debris |
| Microfiber cloths | For drying and polishing |
| Soap solution | To break down grime |
| Garden hose | For rinsing |
| Safety goggles | To protect eyes from debris |
| Gloves | To protect hands while cleaning |
By following these steps, you’ll set yourself up for success and ensure a clean and safe environment for the task ahead.
Selecting the Appropriate Nozzle and Pressure Settings
For optimal results during your cleaning task, choosing the right nozzle and adjusting the pressure settings is non-negotiable. A 25-degree or 40-degree nozzle works best for softer surfaces, providing a wider spray that is less likely to cause damage. For stubborn grime, a 15-degree nozzle can be applied, but be cautious; it’s more concentrated and can harm delicate materials.
Nozzle Types
I recall a time when I was tackling a particularly grimy storefront. I started with a 15-degree nozzle. It did the job but left some streaks behind. Switching to a 25-degree nozzle made a significant difference, allowing me to cover more area efficiently while reducing the risk of damage. Always keep a few different nozzles on hand; they each serve a unique purpose depending on the surface texture and dirt type.
Pressure Settings
Adjusting the pressure is just as critical. Generally, a setting between 1200 to 2000 PSI is sufficient for most tasks. I remember one instance where I mistakenly cranked the pressure too high, resulting in chipped paint on a client’s building. That was a lesson learned! Start at a lower setting and test it; you can always increase it if necessary, but you can’t undo any damage caused by excessive force.
Always maintain a safe distance of at least 2-3 feet from the surface, gradually moving closer if needed. This approach minimizes the likelihood of etching or damaging the material. Remember, less is often more in these situations; a careful balance of nozzle type and pressure will yield the best and safest results.
Mixing the Cleaning Solution for Crystal Clear Results
For outstanding results, the right cleaning mixture is paramount. Start with a base solution of warm water. Around 4-5 litres should suffice for a standard job. Incorporate a dedicated glass cleaner or a gentle detergent. I recommend using a product specifically designed for this type of task–it’s less abrasive and ensures a streak-free finish.
Recommended Ratios
- 1 cup of glass cleaner or mild detergent per 4 litres of water.
- If using concentrated formulas, follow the manufacturer’s instructions for dilution.
Mix thoroughly to ensure even distribution of the cleaning agent. This helps prevent residue build-up on your surfaces. A clean bucket is crucial; any leftover substances can interfere with the effectiveness of your solution.
Additional Tips for Enhanced Cleaning
- For tough grime, consider adding a splash of vinegar. This natural cleaner boosts the solution’s power against stubborn stains.
- For a pleasant scent, a few drops of essential oil can transform the experience–just ensure they’re compatible with your cleaning agents.
Before applying the mixture, test it on a small, inconspicuous area to ensure it won’t cause any damage. This step can save you from unpleasant surprises later on. Once satisfied, fill the pressure sprayer with your solution, and you’re ready to tackle those surfaces effectively.
Safety Precautions When Using a Pressure Washer
Always wear safety goggles to protect your eyes from flying debris or splashes. I remember a time when I neglected this and ended up with a small piece of dirt lodged in my eye. It wasn’t pleasant.
Protect your skin by wearing long sleeves and sturdy gloves. The force of the spray can easily cause injuries. On one occasion, I got a nasty bruise after misjudging the distance while cleaning a surface. Ensure your clothing is snug-fitting to prevent it from getting caught in any moving parts.
Always check the area where you plan to operate the equipment. Remove any obstacles or items that could become projectiles. I once lost a ceramic pot due to an unexpected blast. Secure or cover fragile items nearby to avoid accidents.
Maintain a safe distance from electrical outlets, power lines, and other utilities. Water and electricity do not mix well. I learned this the hard way when I accidentally sprayed too close to an outdoor socket, leading to a small shock. Always keep an eye on your surroundings.
Follow the manufacturer’s guidelines regarding the correct pressure settings for different surfaces. Using too high a setting can damage your materials. I once ruined a decorative panel by not adjusting the pressure correctly, leading to costly repairs.
Never point the nozzle at people, pets, or yourself. It’s easy to forget in the heat of the moment, but I’ve seen firsthand how a momentary lapse can cause serious harm. Always maintain control of the equipment and ensure your area is clear.
Ensure the washer is stable while in use. I had a close call when the unit tipped over due to uneven ground. Use it on a level surface to prevent accidents.
Finally, keep a first aid kit handy. Accidents can happen, and being prepared is always wise. I once had a small cut from a sharp edge while cleaning and was thankful for having supplies nearby. Stay safe out there!
Washing Windows: Step-by-Step Guide
Begin by ensuring the area around the glass is clear of any obstructions. Move furniture or decorations away from the perimeter to prevent damage during the cleaning process. This simple step can save you from headaches later.
Next, assess the glass surface for any visible dirt or grime. If there are heavy deposits, pre-treat those areas using a gentle brush or cloth before proceeding with the high-pressure equipment. This helps to avoid streaks and ensures a more thorough clean.
Once you have prepared the area, assemble the cleaning apparatus. Attach the desired nozzle based on the severity of the dirt. For most situations, a fan nozzle works best to spread the water evenly without causing damage. Always start at the top and work downwards, allowing the dirty water to flow away from the cleaned surfaces.
Adjust the intensity of the stream to the lowest effective setting to avoid risking any breakage. It’s tempting to crank up the power for a quick job, but trust me, a gentler approach is usually more effective for glass. The right balance is key.
As you work, move the lance steadily side to side, ensuring that you cover each section adequately without lingering too long in one spot. This technique prevents the water from etching into the glass or causing any unwanted marks.
After you have finished, consider rinsing the area with clean water to remove any residual cleaning solution. This step can prevent streaks from forming as the glass dries. If you notice any remaining spots, a quick wipe down with a microfiber cloth can do wonders.
Finally, always evaluate your equipment’s performance. If you find that your current setup isn’t meeting your expectations, you may want to explore options like a pressure washer for roofs that might offer better results for high-up surfaces.
Dealing with Stubborn Stains and Residue
For those tough marks like bird droppings, tree sap, or mineral deposits, a little extra effort can make a significant difference. Here’s my go-to approach after years of experience in the field.
Pre-Treatment Techniques
- Soak the Stain: Before starting, apply a pre-treatment solution directly onto the stain. Use a mixture of water and a mild detergent, allowing it to sit for 10-15 minutes. This loosens the grime.
- Scrubbing: For particularly stubborn spots, a soft-bristle brush can help. Gently scrub the area to lift the residue before rinsing.
Adjusting Your Equipment
- Switch Nozzles: If the usual nozzle isn’t cutting it, try a narrower spray angle. A 15-degree nozzle provides a concentrated jet that can break through tough residues.
- Increase Pressure: If safe for your glass, slightly increase the pressure setting. Always test on a small area first to avoid damage.
After these steps, give the area a thorough rinse. If any stains remain, repeat the process. Consistency is key, and sometimes, persistence pays off. Stains are often more manageable when approached with the right techniques and tools.
In my experience, tackling difficult marks promptly saves time and effort in the long run. Don’t let stubborn spots discourage you; a methodical approach will yield results.
Post-Cleaning Care and Maintenance for Windows
After completing the task of revitalising your glass surfaces, it’s crucial to ensure they remain pristine. A quick rinse with clean water can help remove any leftover cleaning solution or debris that may have settled during the process.
Inspect thoroughly for any remaining streaks or marks. If you spot any, a soft, lint-free cloth or microfiber towel is ideal for buffing them away. This not only enhances clarity but also prevents future build-up of grime.
Consider applying a protective coating specifically designed for glass. This can create a hydrophobic barrier, making it harder for dirt and water to adhere. I recall using such a product on my own home and noticed that cleaning became significantly easier over time.
Regular inspection is key. Check for any signs of damage, such as cracks or chips. Addressing these promptly prevents further issues and maintains the integrity of the glass.
Don’t forget the frames! A quick wipe down of the window frames prevents the accumulation of dust and mildew, enhancing the overall appearance. A simple solution of warm soapy water is usually sufficient.
Lastly, keep your cleaning tools in good condition. Rinse any nozzles or attachments after use and store them properly. This extends their lifespan and ensures they perform optimally for your next cleaning adventure.
.jpg)


