


Begin by gathering the necessary tools: a reliable high-pressure cleaner, appropriate nozzles, a bucket, and quality car shampoo. Selecting a wide-angle nozzle will prevent damage to the paint while ensuring adequate coverage. I once made the mistake of using a narrow nozzle on my own vehicle, and it left marks that took days to polish out.
Before you start, rinse the surface thoroughly to remove loose dirt and debris. This step is crucial, as it prevents scratches during the actual cleaning process. I recall a time when I skipped this, thinking I could save a few minutes. The result was an unsightly scratch that could have easily been avoided.
Once rinsed, mix the shampoo according to the instructions, ensuring it’s compatible with your cleaner. Apply the soapy solution using the cleaner, starting from the top and working your way down. This method helps in preventing soap from dripping onto already cleaned areas. I’ve found that doing this in sections keeps things organised and ensures a consistent clean.

After applying the soap, let it sit for a few minutes to break down any stubborn grime. Then, rinse off with the cleaner, again starting from the top. Always keep the nozzle at a safe distance–about 30 cm–from the surface to avoid any damage. I learned this the hard way when I got too close, causing some paint to peel.
Lastly, dry the vehicle using a soft microfiber cloth to prevent water spots. This step may seem trivial, but it’s one I never skip. After all, the effort put into cleaning deserves a proper finish. Taking the time to do it right will leave your vehicle looking its best and protected from the elements.
Cleaning Techniques for Optimal Results
Begin by selecting the right nozzle. A 25-degree or 40-degree nozzle is ideal for gentle cleaning, preventing damage to paintwork. Adjust the distance between the nozzle and the surface; maintaining a distance of around 2 feet helps avoid scratches while ensuring effective dirt removal.
Utilise detergent designed for automotive surfaces. Apply it using a foam cannon or a dedicated detergent nozzle. Allow the solution to dwell for a few minutes to break down grime before rinsing. This method enhances the cleaning process and reduces the need for excessive scrubbing.
Pay attention to the wheel wells and undercarriage. A narrow nozzle can effectively reach these areas, ensuring all dirt and debris are removed. This is often overlooked, yet it’s essential for maintaining overall vehicle condition.
After rinsing, dry the exterior with a microfiber towel. This prevents water spots and streaks, ensuring a polished finish. For best results, consider using a blower for hard-to-reach areas, such as around mirrors and trims.
If you’re in the market for equipment, I recommend checking out ryobi pressure washers. They offer a great balance of power and ease of use, perfect for tackling any task efficiently.
Choosing the Right Pressure Washer for Car Cleaning
Opt for a model with a PSI range between 1200 and 1900 for optimal results. Higher pressure can damage sensitive surfaces, while lower pressure may not lift stubborn grime effectively.
Types of Pressure Cleaners
- Electric Units: Ideal for home use, these machines are lightweight and easy to manoeuvre. They operate quietly and are perfect for gentle cleaning tasks.
- Gas-Powered Models: More powerful and suited for heavy-duty tasks, these types are great for larger vehicles or tough stains. However, they are noisier and require more maintenance.
Key Features to Consider
- Nozzle Options: Look for versatile nozzles, including fan and rotary types. This allows for adjustments according to the cleaning task.
- Water Flow Rate: Choose a unit with a minimum of 1.2 GPM (gallons per minute) for effective rinsing. Higher GPM helps in rinsing soap and dirt more efficiently.
- Weight and Portability: If you’re moving around a lot, lightweight options will save you hassle. Consider models with wheels for easier transport.
- Accessories: Foam cannons and brushes can enhance the cleaning experience, allowing for thorough application of soaps and waxes.
From my experience, having the right equipment makes a significant difference. I once struggled with a high-pressure cleaner that lacked adjustable nozzles, leading to uneven results. Switching to a model with multiple settings allowed me to customise the flow based on the areas I was tackling, resulting in a spotless finish.
Preparing Your Vehicle for Pressure Cleaning
Before tackling the task, ensure you remove any personal belongings from the interior. Items left inside can become damaged or dislodged during the cleaning process. I once had a friend who forgot to take out his sunglasses, and they ended up covered in soap and dirt, requiring a thorough wipe down afterward.
Next, inspect the exterior for any loose parts or accessories. Things like mirrors, trim, or even bumpers can be susceptible to damage from high-velocity water. I recall a time when I had a client whose rear spoiler detached during a wash, resulting in an unexpected trip to the repair shop.
Check for any existing scratches, dents, or paint imperfections. Documenting these beforehand helps to avoid confusion about whether they were there initially or caused by the cleaning process. I always take a few photos to keep track of the vehicle’s condition.
Make sure to close all windows and sunroofs tightly. A small gap can lead to water entering the cabin, potentially ruining upholstery or electronics. I learned this the hard way when I had to deal with a soaked interior after forgetting to check the sunroof on my own vehicle.
Lastly, consider pre-treating stubborn stains or dirty areas. Applying a suitable cleaning solution to spots like the wheels or lower panels can yield better results. I often keep a dedicated brush handy for these areas, as it makes a noticeable difference in the end result.
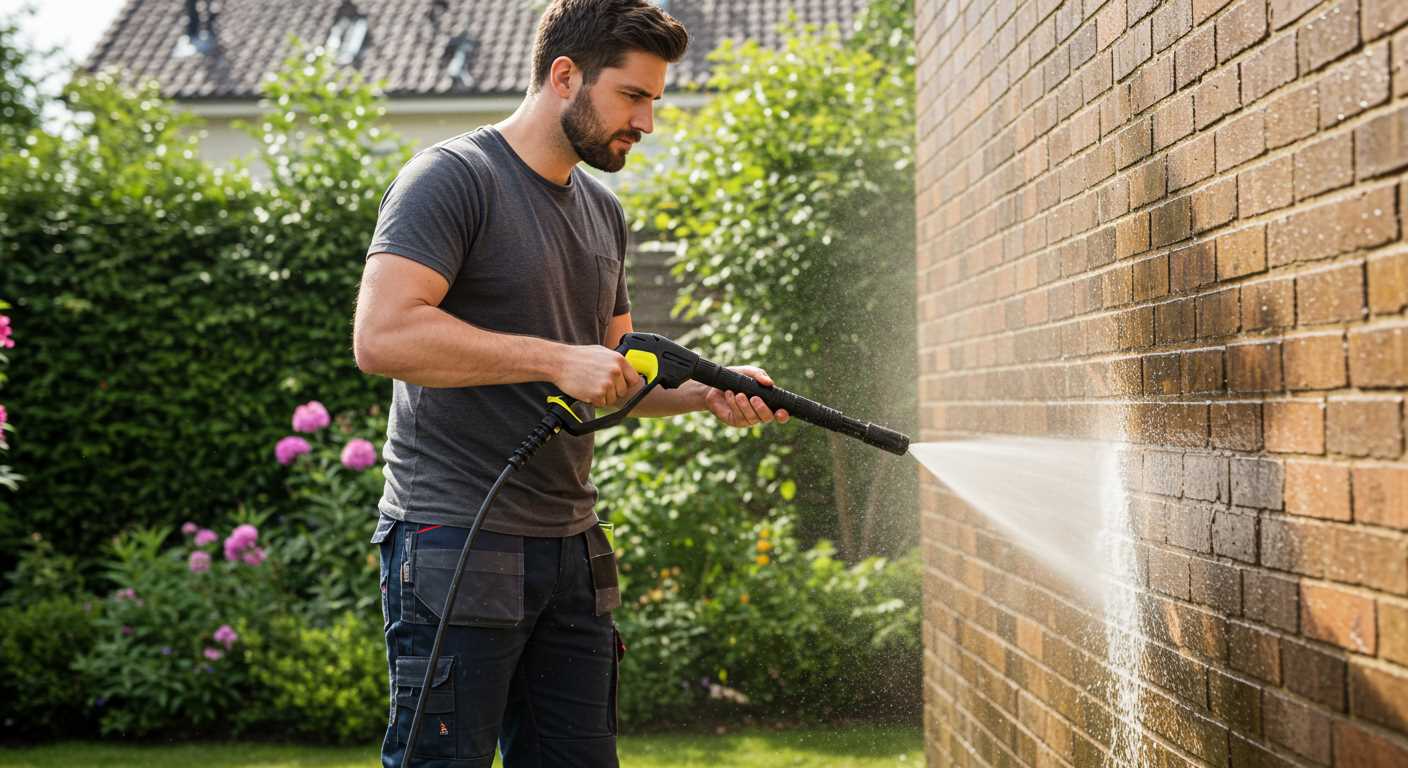
Selecting the Appropriate Nozzle for Your Pressure Washer

Opt for a 25-degree or 40-degree nozzle for delicate surfaces. The wider spray pattern disperses water gently, minimising the risk of damage. During my years testing various models, I found this to be the best choice for most automotive finishes.
If stubborn grime persists, switch to a 15-degree nozzle. This narrower stream increases pressure, making it more effective against heavy dirt. However, use it cautiously to avoid harming paintwork. I once made the mistake of using it too close, resulting in a minor scratch. Lesson learned!
For those equipped with adjustable nozzles, take advantage of the versatility they offer. Adjusting the spray angle allows you to transition from gentle rinsing to intense cleaning without changing attachments. This feature has saved me countless minutes during detailing sessions.
Never underestimate the power of the foam cannon. It attaches to your sprayer and creates a thick layer of soap that clings to surfaces, loosening contaminants before rinsing. I’ve found that pre-soaking with foam significantly reduces the effort required during the actual cleaning process.
Always check the manufacturer’s recommendations for nozzle compatibility. Some units may require specific fittings or have limitations on nozzle types that can be used. Adhering to these guidelines ensures optimal performance and longevity of your equipment.
Finally, remember to keep your nozzles clean. Debris can affect spray patterns and reduce effectiveness. Regular maintenance not only improves results but extends the life of your nozzles, saving you money in the long run.
Using Detergents Safely with a Pressure Washer
Always select a detergent specifically formulated for high-pressure equipment. Regular car soaps can create excessive foam, which might clog the machine. I’ve learned this the hard way. A few years back, I used a standard soap, and it took hours to clear the system.
Prepare a mixture according to the manufacturer’s instructions. Dilution ratios can vary significantly between products. Miscalculating can lead to either weak cleaning power or damage to surfaces. I remember a colleague who didn’t dilute a strong cleaner properly; it stripped the wax off his vehicle’s finish.

Before applying, test the detergent on a small, inconspicuous area. This ensures compatibility without risking damage to the paint or other surfaces. I always keep a spare cloth handy for this purpose. If the detergent isn’t suitable, it’s better to find out early.
Use the right attachment for detergent application. Many units come with a dedicated soap nozzle, which has a broader spray pattern and lower pressure. This is especially helpful to avoid over-saturating specific areas. I’ve seen people use standard nozzles, only to have soap splatter everywhere, creating a mess.
After applying the cleaner, allow it to dwell for a few minutes. This time lets the product break down dirt and grime effectively. However, don’t let it dry on the surface, as this can cause streaking. I once walked away for too long while cleaning a friend’s vehicle, and the result was not pretty.
Always rinse thoroughly. Residual detergent can attract dirt and create unsightly marks. A good rinse ensures a clean finish without streaks. I often double-check my work by inspecting the surface closely after rinsing.
| Detergent Type | Usage Tips |
|---|---|
| Car Wash Soap | Use a dedicated car wash soap for optimal results. |
| Degreasers | Only apply to heavily soiled areas; test first. |
| All-Purpose Cleaners | Dilute as per the instructions; avoid sensitive areas. |
Lastly, always store detergents in a cool, dry place. Extreme temperatures can alter their effectiveness. I’ve had bottles freeze in the garage during winter, leading to wasted product and mess. Keep everything organised, and you’ll save time and effort in the long run.
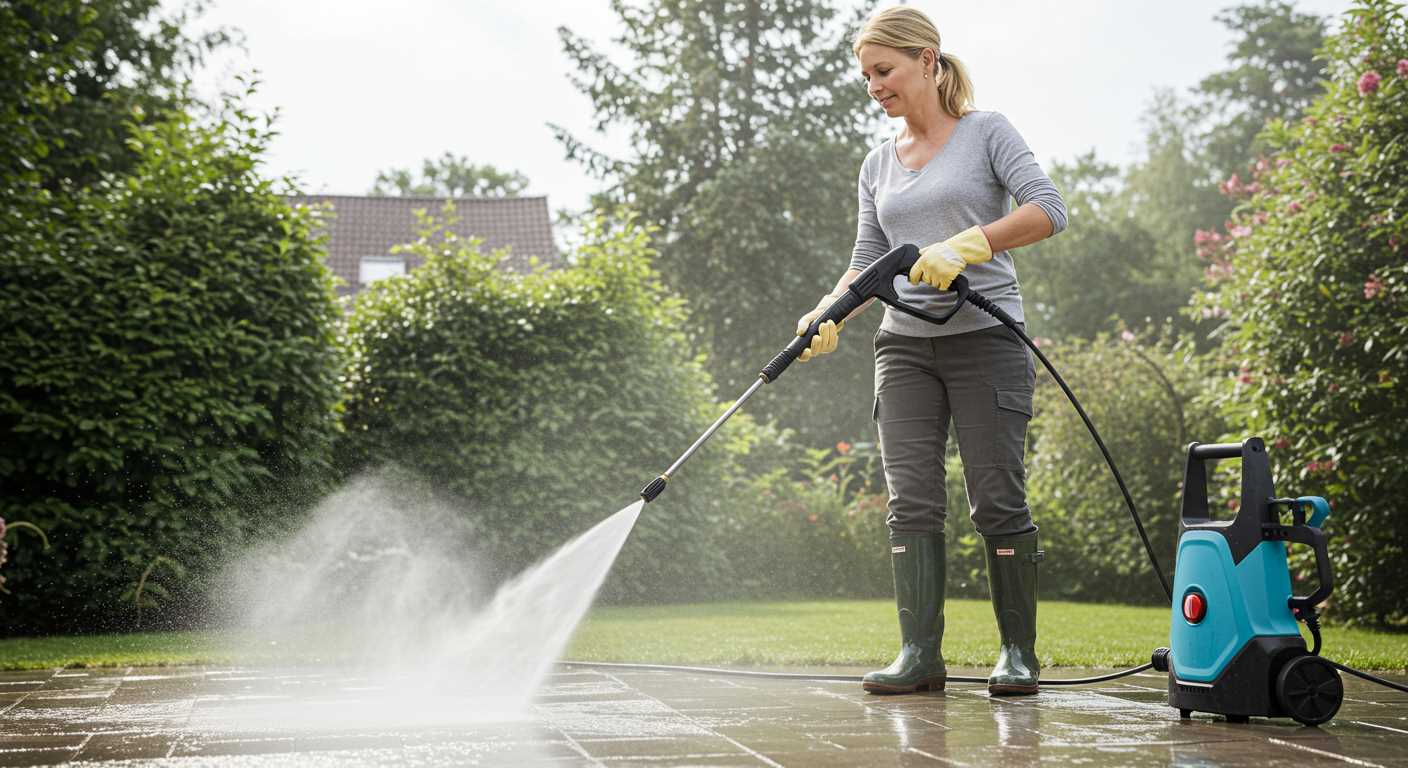
Techniques for Pre-Washing Your Vehicle
Start by rinsing off loose dirt and debris using a gentle spray. This initial step helps to avoid scratches during the cleaning process. I often recommend standing about two feet away from the surface to prevent high-pressure water from causing damage.
Next, apply a foam pre-wash solution. I’ve experimented with various products over the years, and those with a thick foam consistency cling better to surfaces, allowing for more effective dirt breakdown. Use a foam cannon or a garden sprayer for an even distribution, covering every inch of the exterior.

Let the foam sit for several minutes. This dwell time is key; it allows the surfactants in the cleaner to penetrate and loosen grime. I’ve found that products designed specifically for automotive surfaces yield the best results, as they’re formulated to lift contaminants without damaging paint.
After the foam has had time to work, return with the gentle spray to rinse it all away. Ensure you start from the top and work your way down, allowing the dirty water to flow off the vehicle. I often advise using a wide-angle nozzle for this step to disperse water more effectively.
Inspect the surface for any stubborn spots. For those areas, I suggest using a soft brush or microfiber cloth to gently agitate the surface. This extra attention can be the difference between a mediocre clean and a pristine finish.
Once completed, it’s wise to check the wheel arches and undercarriage. These areas accumulate a lot of grime and are often overlooked. A dedicated wheel cleaner or degreaser can be applied here to tackle the tougher deposits before the main cleaning process begins.
Proper Techniques for Exterior Care
Begin at the top of the vehicle, working your way downwards. This ensures that any dirt and grime flows down and doesn’t re-soil cleaner areas. Use a wide spray pattern to cover larger surfaces efficiently. Keep the nozzle at least two feet away from the surface to avoid damage, especially on delicate paintwork.
When treating stubborn spots like bird droppings or tree sap, apply a dedicated automotive cleaner first. Allow it to sit for a few minutes to break down the debris before rinsing. This prevents the need for excessive scrubbing, which can harm the finish.
For deeper cleaning, a two-bucket method is advisable. One bucket should contain clean water, while the other holds soapy water. Use a wash mitt, dipping it into the soapy water and then rinsing it in the clean bucket frequently. This helps to remove grit and prevents swirl marks on the finish.
Don’t forget the wheels and tyres. A separate brush with stiff bristles can effectively remove brake dust and grime. After cleaning, consider applying a tyre dressing for a polished look. This also helps protect the rubber from UV damage.
After rinsing, dry the surface using a microfibre cloth or a chamois. This prevents water spots from forming. I often have a friend assist me; one person can rinse while the other dries, making the process quicker and more enjoyable.
Lastly, consider a protective wax or sealant after the wash. This creates a barrier against contaminants and enhances shine. Think of it like how a digital camera uses pixels for capturing clarity; a good wax captures that pristine finish and keeps it intact longer.
Cleaning Hard-to-Reach Areas on Your Vehicle
To effectively tackle those tricky spots, begin by focusing on the wheel arches. A dedicated nozzle attachment can help direct the stream into these narrow spaces, dislodging dirt and brake dust that often accumulate there. I’ve found that angling the nozzle at about 45 degrees allows for better penetration and cleaning power.
Next, pay attention to undercarriage areas. Many people overlook this part, but it’s essential for preventing rust and corrosion. Using a low-pressure setting, spray the underside thoroughly. If your equipment has an undercarriage cleaner attachment, it will make this process even simpler. I recommend starting from the back and working your way forward to ensure you cover everything.
For the grille and air intakes, a fan nozzle is particularly useful. This attachment allows you to get into the intricate mesh without causing damage. I always angle the spray to blow debris out rather than pushing it further in. A soft brush can also be handy here for stubborn grime.
Don’t forget about the wiper arms and the areas around them. A targeted spray can clear away dirt that might hinder their operation. I often use a narrow jet setting to get in close without splashing water everywhere.
Finally, inspect the seams and edges where panels meet. A concentrated stream can help lift dirt from these crevices that can trap moisture and lead to rust. I usually run my hand along these edges to feel for any lingering dirt before moving on.
Rinsing and Drying Techniques After High-Pressure Cleaning
Start rinsing the vehicle immediately after applying any cleaning agents. Use a wide-angle nozzle to ensure an even distribution of water, avoiding concentrated streams that can damage the finish. Begin from the top and work your way down, allowing dirt and soap to flow off the surface rather than pushing it around.
Optimal Rinsing Strategies
For the best results, maintain a distance of about 2 feet between the nozzle and the surface. This helps prevent water spots and streaks. Pay special attention to areas where soap may linger, such as around the trims and emblems. A second pass with clean water ensures that all residues are thoroughly removed.
Effective Drying Methods
Once rinsed, drying is crucial to prevent water spots. Microfibre towels are ideal for this task. I usually recommend using a soft, absorbent cloth to gently blot the surface instead of dragging it across the paint. This reduces the risk of scratching.
For larger vehicles or those with intricate designs, a car drier can be beneficial. These blowers expel air to remove excess moisture, especially in hard-to-reach areas like wheel wells and undercarriage. After drying, a quick inspection for any remaining spots allows for touch-ups before finishing off with a protective wax or sealant for added shine.
Maintaining Your Pressure Washer for Longevity
Regular maintenance is key to keeping a high-pressure cleaner in top condition. After years of testing various models, I’ve found a few straightforward practices that can significantly extend the lifespan of your equipment.
Routine Checks
- Inspect the hoses for cracks or wear. A damaged hose can lead to leaks and reduced performance.
- Examine the nozzle for clogs. Clear any debris to ensure optimal flow and pressure.
- Check the oil levels if your unit is gasoline-powered. Change it according to the manufacturer’s recommendations.
Storage Tips
- Store the machine in a dry place, sheltered from extreme temperatures. Cold weather can cause water to freeze in the pump.
- Use a nozzle cover to protect the spray tip from dirt and damage.
- Drain any remaining water from the system before storing. This prevents corrosion and blockages.
From personal experience, I learned that regularly cleaning the air filter can also prevent overheating and prolong the motor’s life. A clean unit not only performs better but often requires fewer repairs over time. Additionally, using the right detergent can prevent buildup in the system, which is a common issue I’ve encountered with cheaper soaps.
Finally, following the manufacturer’s service schedule can save you from unexpected breakdowns. It’s always worth investing a bit of time for maintenance to avoid costly repairs later.

.jpg)


