


For a thorough clean, grab a bucket and a soft sponge. It’s all about the right technique rather than relying solely on machinery. A basic mixture of water and car shampoo can work wonders. I remember the first time I experimented with this method; I was amazed at how effective it was in lifting grime and dirt.
Start by rinsing the surface with a hose to remove loose debris. This initial step is crucial, as it helps prevent scratches during the scrubbing phase. After that, dip your sponge into the soapy solution and begin at the top, working your way down. This approach ensures that the dirt flows downwards, away from already cleaned areas.

For stubborn spots, a dedicated wheel cleaner applied with a brush can make a significant difference. I’ve found that tackling the wheels separately not only saves time but also gives a more polished finish overall. Don’t forget to rinse each section before the soap dries to avoid streaks. Trust me, this simple routine has kept my vehicles looking pristine over the years.
Effective Techniques for a Thorough Vehicle Clean
Use a high-quality sponge or microfiber cloth for scrubbing surfaces. These materials lift dirt effectively and reduce the risk of scratches. Combine a bucket of warm water with a gentle car shampoo for optimal results.
For wheels, a dedicated wheel cleaner paired with a stiff brush works wonders. Ensure to tackle the rims and tyres separately, as they require a stronger solution to break down grime and brake dust. Rinse thoroughly after scrubbing.
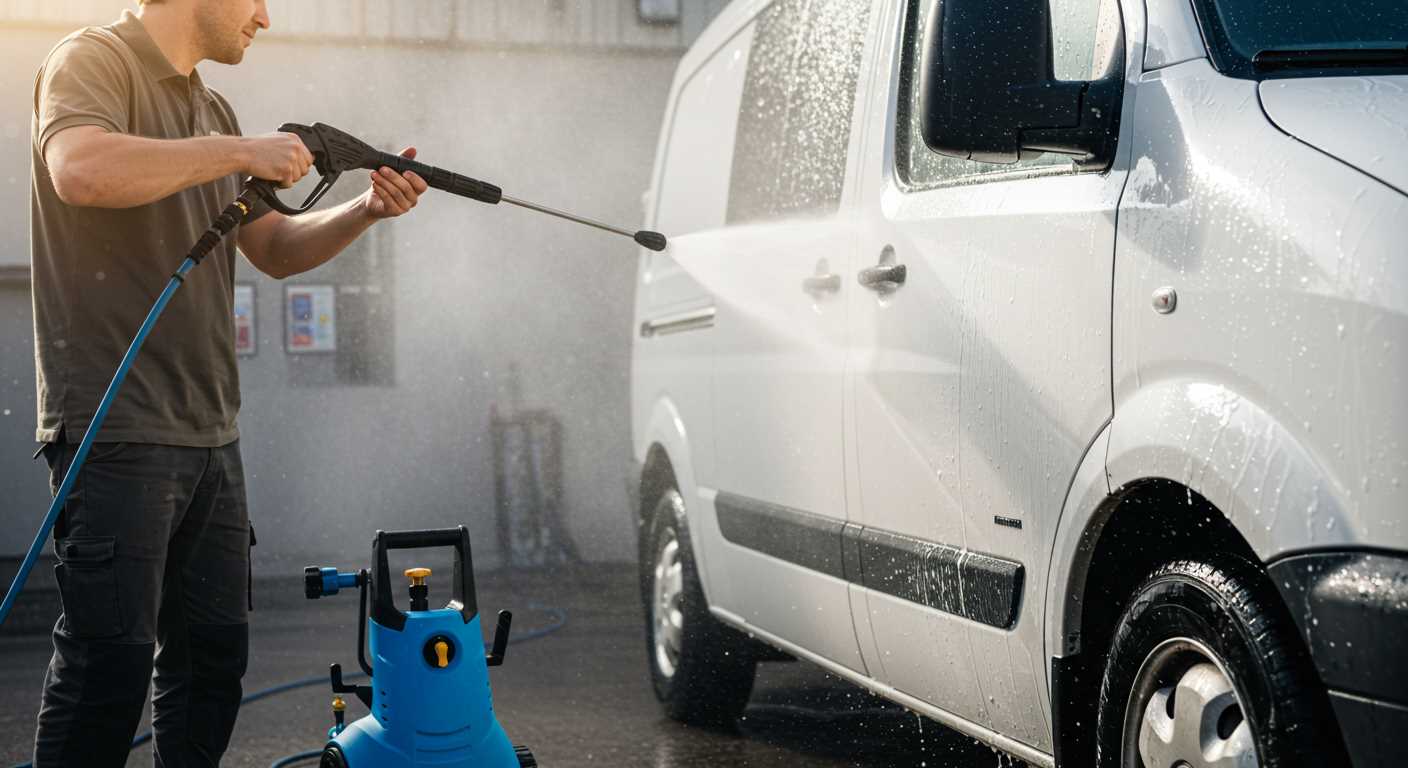
Utilise a hose with a spray nozzle for controlled rinsing. Start from the top and work downwards. This method prevents dirt from running back onto clean areas. If a nozzle is unavailable, simply use a standard hose, ensuring to maintain a steady flow.
For stubborn spots, a clay bar helps to remove embedded contaminants. Lubricate the surface with a detail spray, then glide the clay over the paint to lift impurities. Follow up with a polish to restore shine.
Consider leveraging a motorcycle pressure washer foam for an extra layer of cleanliness. This foam clings to surfaces, breaking down dirt effectively while being gentle on the finish.
Finally, dry with a large microfiber towel to prevent water spots. Pat rather than wipe to avoid scratches. Regular maintenance not only keeps your vehicle looking pristine but also preserves its value over time.
Gathering Necessary Supplies for a Hand Wash
Start with a high-quality bucket, preferably a large one to hold enough water and soap mixture. A two-bucket system is useful: one for soapy water and the other for rinsing your sponge or mitt. This method prevents dirt from returning to the surface.
Choose a suitable cleaning solution. Look for pH-neutral formulas designed specifically for automotive finishes. Avoid dish soap as it can strip wax and damage surfaces over time.
A soft sponge or microfiber mitt is a must. These materials are gentle on paint and help lift dirt without scratching. Microfiber towels will be handy for drying and buffing, as they absorb moisture effectively and leave fewer streaks.
For wheels and tyres, a stiff brush and a dedicated wheel cleaner will do the trick. These areas require more scrubbing power due to brake dust and grime accumulation.
Don’t forget a hose with a spray nozzle. A nozzle with adjustable settings allows you to switch between gentle misting for rinsing and a stronger stream for pre-soaking. This flexibility is beneficial for tackling stubborn spots.
Lastly, consider a wax or sealant for post-cleaning protection. Applying a layer after drying enhances shine and provides a barrier against future dirt and contaminants.
Choosing the Right Location for Cleaning Your Vehicle
Select a shaded area to avoid direct sunlight. It helps prevent soap from drying too quickly, which can lead to streaks and spots. Look for a location with ample space, allowing you to move freely around the vehicle without obstructions.
Consider the Ground Surface
A flat, solid surface is ideal. Avoid gravel or uneven terrain, which can make the process cumbersome and lead to spills. Concrete or asphalt driveways work well, as they support equipment and supplies without the risk of sinking or instability.
Water Drainage and Environmental Impact
- Choose a spot with good drainage to avoid puddles that can attract insects or create muddy conditions.
- Be mindful of local regulations regarding water run-off. Some areas have restrictions to protect the environment.
- Setting up near a garden or plants can be beneficial, as long as you consider the potential impact of cleaning agents on vegetation.
Positioning matters; ensure you have easy access to water sources while being considerate of neighbours. A good location will enhance the experience and yield better results.
Preparing Your Vehicle for a Thorough Clean
Before starting the cleaning process, ensure you remove all personal items from the interior and trunk. This prevents any damage to belongings and allows for a more thorough interior cleaning afterwards.
Inspect the exterior for any notable issues such as scratches or chips. Taking note of these will help in addressing them properly post-cleaning. Consider applying a wax or sealant after the wash for added protection and shine.
It’s also wise to check the weather forecast. A clear day is ideal to avoid water spots from drying too quickly. If the forecast suggests rain, choose another day for this task.
Gather all required materials and place them close to your working area. This includes buckets, sponges, and car-safe cleaning solutions. Having everything at hand streamlines the process, allowing for a more enjoyable experience.
Lastly, if you’re dealing with hard-to-reach areas, consider using tools like extension wands. For those interested in such equipment, I recommend checking the best pressure washer extension wands for future reference, even if you’re not using a high-pressure system now.
| Checklist for Preparation |
|---|
| Remove personal items |
| Inspect for scratches and chips |
| Check weather conditions |
| Gather cleaning supplies |
| Consider extension tools for hard-to-reach areas |
Step-by-Step Process of Hand Washing Your Vehicle
Begin by rinsing the exterior with clean water. Use a bucket filled with warm water and a soft sponge or cloth to eliminate loose dirt and debris. This initial step prepares the surface for deeper cleaning.
Technique for Effective Cleaning
Mix a high-quality automotive shampoo with water in a separate bucket according to the manufacturer’s instructions. Dip your sponge into the soapy solution and start at the top, working your way down. This method prevents dirt from being pushed back onto areas you’ve already cleaned. Rinse the sponge frequently to avoid scratching the paint.
Finishing Touches
After the entire surface has been treated, rinse thoroughly with clean water to remove any soap residue. Use a drying towel or chamois to gently dry the vehicle, starting from the top again. Pay special attention to areas where water might collect, such as door sills and mirrors, to prevent water spots.
Techniques for Drying Your Vehicle Without Streaks


Microfibre towels are your best ally. I recommend using a high-quality, plush microfibre towel specifically designed for drying. They absorb water effectively and minimise the risk of scratches. Use one towel for the roof and upper surfaces and another for the lower sections to prevent dirt transfer.
For optimal results, employ the “blotting” technique rather than wiping. Gently press the towel against the surface to soak up water without dragging dirt across the paint. This method reduces streaks and protects the finish. You might find it helpful to fold the towel into quarters; this way, you always have a clean section to work with.
Consider using a drying aid or spray wax to enhance the drying process. These products create a barrier that helps repel water and adds a layer of shine. Lightly mist the surface as you dry; this will also help prevent streaks. I’ve used this trick countless times and noticed a significant difference in the finish.
Always dry in sections, starting from the top and working your way down. This approach ensures that water doesn’t run down onto areas you’ve already dried, which can lead to streaking. If you notice spots of water remaining, don’t hesitate to go back with your towel to address those areas.
Finally, a quick detail spray can be a game changer. After drying, a light mist of detail spray can add gloss and further eliminate any lingering streaks. This simple step elevates the overall appearance, giving your vehicle a freshly polished look.
Maintaining Your Car’s Shine After Washing
Applying a quality wax or sealant immediately after drying is key. This layer not only enhances the gloss but also protects the paint from environmental elements. I recommend opting for a synthetic sealant for longevity; it can last several months with proper maintenance.
Regularly using a detail spray can help maintain that freshly cleaned appearance. A quick mist and wipe down can remove light dust and fingerprints, keeping the finish looking pristine between thorough cleans. I’ve found that using a microfiber cloth for this task yields the best results, as it prevents scratches.

Pay attention to the wheels and tyres as well. Applying a dedicated tyre shine not only enhances their look but also prevents cracking and fading caused by UV exposure. I always treat the wheels with a dedicated cleaner and follow up with a protective coating to make future cleaning easier.
Consider parking in shaded areas or using a car cover when not in use to protect against harsh sunlight, which can fade paint and damage the interior. I’ve noticed that cars parked in the shade retain their brilliance much longer.
Lastly, keeping the interior clean contributes to the overall presentation. Regularly vacuuming and using a suitable interior cleaner on surfaces helps maintain that fresh feel. A well-cared-for interior complements the exterior shine and enhances the overall driving experience.

.jpg)


