


Begin by draining all water from the unit. This simple action prevents freezing and subsequent damage to internal components. Disconnect the water supply and start the machine for a few moments to clear any residual fluid. You’ll want to ensure that no moisture lingers in the pump or hoses.
Next, introduce a suitable antifreeze solution into the system. A non-toxic antifreeze specifically designed for cleaning devices is ideal. Pour it into the inlet and run the machine briefly to circulate the fluid, safeguarding the pump and seals from the harsh winter chill.

Inspect and clean the filter and nozzle. A clean filter ensures optimal performance when you start using the equipment again in spring. Remove any debris or buildup that may have accumulated and store these components in a safe, dry place.
Lastly, store the machine in a sheltered environment, ideally indoors. If that’s not possible, cover it with a protective tarp to shield it from snow and ice. This will prolong its lifespan and maintain performance for years to come.
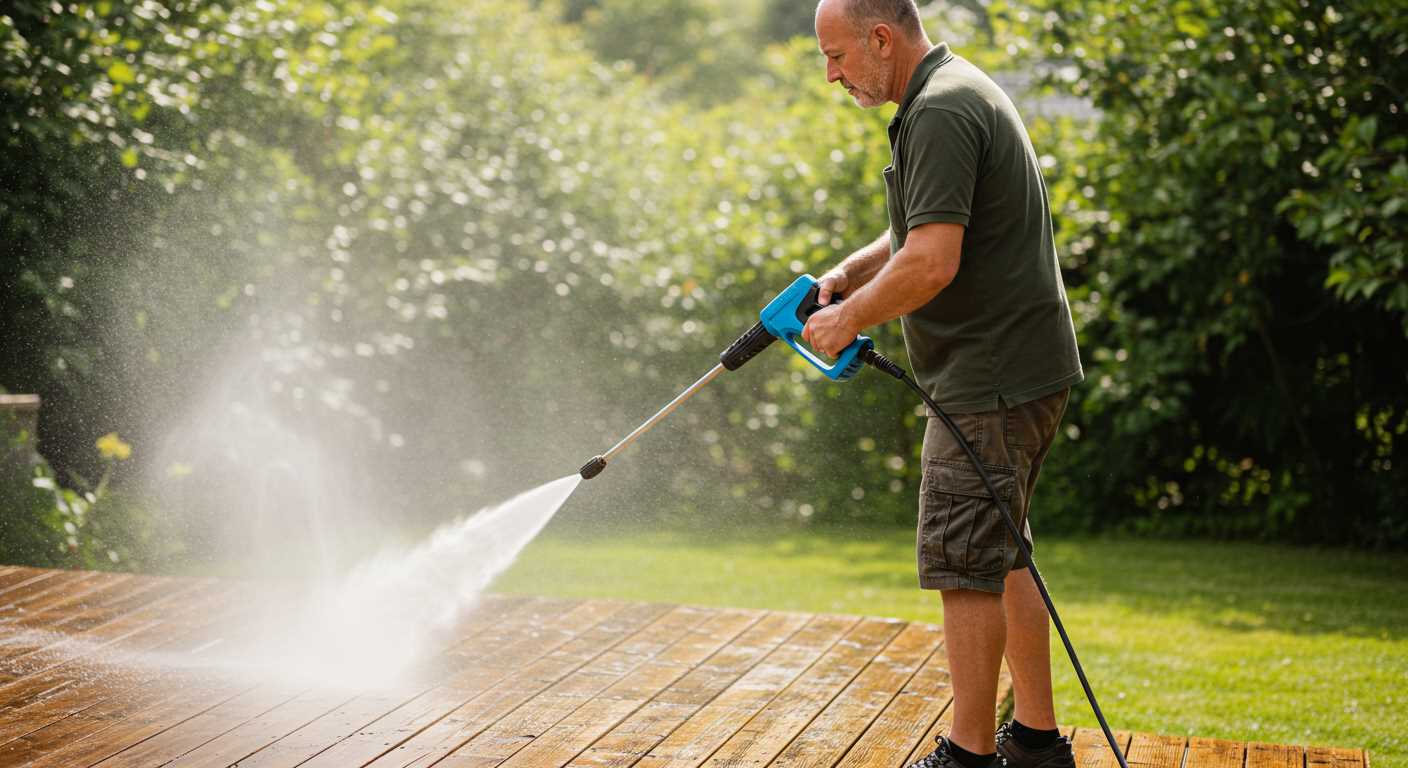
Steps for Protecting Your Pressure Cleaning Equipment
First off, drain all remaining liquid from the system. Disconnect the garden hose and spray gun, then run the machine briefly to expel any water left in the pump. This is crucial; moisture can lead to freeze damage, which is something you definitely want to avoid.
Next, introduce a stabiliser into the fuel tank. I always opt for a high-quality product designed specifically for small engines. This prevents fuel from deteriorating and gumming up the carburettor. After adding the stabiliser, run the engine for about five minutes to ensure it circulates throughout the system.
Don’t forget to check and clean the filters. Over time, dirt and debris can accumulate, affecting performance. Removing and cleaning these components not only keeps everything functioning smoothly but also extends the equipment’s lifespan.
Another tip: inspect the hoses and connections. Look for any signs of wear or damage. It’s wise to replace any frayed hoses before the cold sets in, as they can become brittle and crack during freezing temperatures.
Finally, store the unit in a dry, sheltered location. If possible, keep it inside a garage or shed where temperatures remain moderate. Covering it with a breathable tarp can also help protect it from dust and moisture.
Drain the Water from the Pump
To protect the pump from freezing and potential damage, it’s crucial to remove all water. First, disconnect the garden hose and any attachments. This prevents residual water from causing issues.
- Locate the drain plug, typically situated on the underside or side of the pump. You may need to consult the user manual for its exact position.
- Place a bucket or container beneath the drain plug to catch any water that may flow out.
- Carefully remove the drain plug using a wrench or your hand, depending on the design. Allow the water to fully drain into the container.
- After draining, replace the drain plug securely to avoid any dust or debris entering the pump during storage.
In my experience, I’ve found that some users forget to drain the water, leading to costly repairs. Always double-check that no water remains in the system. If you have a model with a siphon tube, consider using it to further ensure all liquid is expelled. This extra step has saved me from headaches in the past.
Once you’ve completed these steps, your pump will be much safer during the colder months. Trust me; a little effort now can prevent big problems later on.
Remove and Clean the Filters
Start by detaching the water inlet filter from the machine. This component plays a vital role in ensuring that debris does not enter the pump. You might need a pair of pliers to loosen it if it’s tightly fitted. Once removed, inspect it for any build-up of dirt or grime.
To clean the filter, use a soft brush or a cloth to remove any accumulated particles. If the filter appears heavily soiled, soak it in warm, soapy water for a few minutes before scrubbing. Rinse thoroughly with clean water to ensure no soap residue remains. Allow it to dry completely before reinstallation.
Next, check the high-pressure hose filter. This filter is often overlooked, but it’s equally important. Unscrew the filter cap and gently pull out the filter. Similar to the water inlet filter, clean it with a brush and rinse well. Make sure no debris is left behind before placing it back in the machine.
| Filter Type | Cleaning Method | Drying Time |
|---|---|---|
| Water Inlet Filter | Brush or soak in warm, soapy water | 1-2 hours |
| High-Pressure Hose Filter | Brush and rinse thoroughly | 1-2 hours |
After cleaning, reinstall both filters securely. Checking these components regularly can prevent future issues and ensure optimal performance when you’re ready to use your equipment again. A well-maintained filter system extends the life of your machine and enhances its efficiency.
Add Pump Saver or Antifreeze
Incorporating pump saver or antifreeze is a critical step for protecting your equipment during the colder months. I always recommend using a dedicated pump saver, as it’s specially formulated to lubricate seals and prevent freezing. Simply pour the product into the inlet of the pump after draining the water. This will create a protective barrier against ice formation.
Choosing the Right Product
Not all antifreeze solutions are created equal. Look for one that is non-toxic and specifically designed for pressure cleaning units. In my experience, a quality pump saver not only prevents freezing but also helps maintain the longevity of internal components. Always check the manufacturer’s recommendations to ensure compatibility.
Application Process
After you’ve added the antifreeze, run the pump briefly to circulate the solution throughout the system. This ensures that every part of the pump is coated. I often set a timer for about 30 seconds, just enough to cover all the interior surfaces. This simple step has saved me from costly repairs more times than I can count.
Disconnect and Store the Hoses
Begin by carefully detaching both the high-pressure and the water supply hoses from the unit. Ensure that the water supply is turned off before you start this process to prevent any leaks. I always keep a towel handy to wipe off any residual water from the fittings as I disconnect them. This prevents any moisture from lingering, which could lead to mould or mildew during storage.
After disconnecting, examine the hoses for any signs of wear or damage. It’s a good time to replace any frayed or cracked sections, as these can become problematic when the equipment is brought back into use. I recall a situation where a small crack went unnoticed until I was ready to use the equipment again, resulting in an unnecessary mess.
Next, drain any residual water from the hoses. Hang them up or lay them flat in a warm area to ensure they dry completely. Storing damp hoses can lead to corrosion or nasty odours. Once dry, neatly coil the hoses, securing them with a tie or strap to prevent kinks. I prefer using Velcro straps as they are easy to manage and don’t damage the hose material.
For storage, keep the hoses in a sheltered location, ideally indoors, away from extreme temperatures. I use a designated storage bin for mine, which keeps everything organised and protected from dust and dirt. If you have a long hose, consider a hose reel to prevent tangling. This not only keeps them tidy but also prolongs their lifespan.
Clean the Nozzle and Spray Gun
Begin by removing the nozzle from the spray gun. This is a straightforward process; just twist and pull gently. Inspect the nozzle for any debris or buildup. I once encountered a stubborn blockage that hindered performance significantly. A simple soak in warm, soapy water for a few minutes often does the trick. After soaking, use a soft brush or a toothpick to dislodge any remaining particles. Be careful not to scratch the surface.
Next, flush the nozzle with clean water to ensure all soap and loosened debris are washed away. It’s surprising how much crud can accumulate, even in a short period. Once thoroughly rinsed, dry it with a clean cloth to prevent water spots. This step not only prolongs the life of the nozzle but also ensures a consistent spray pattern for your future cleaning tasks.
Now, turn your attention to the spray gun itself. Check the connection points and the trigger mechanism for any signs of wear or damage. I’ve had a few instances where a worn trigger led to leaks, which can be quite frustrating during use. If you find any issues, consider replacing the spray gun to maintain optimal performance.
Finally, reassemble the nozzle and spray gun once everything is clean and dry. This simple routine can save you from hassles in the field and keep your equipment in top condition for the next season. Regular maintenance like this can make a noticeable difference in how well your cleaning tasks are executed.
Protect the Engine and Fuel System
Start by adding a fuel stabiliser to the tank. This prevents the gasoline from breaking down and forming gum and varnish that can clog the fuel system. I recall a time when I neglected this step; the engine wouldn’t start the following spring, and I had to clean the carburettor extensively. Measure the stabiliser according to the instructions on the bottle and run the engine for a few minutes to ensure it circulates through the entire system.
Next, drain any fuel left in the tank if you plan to store the unit for an extended period. This helps avoid water condensation that can lead to rust inside the tank. I remember a colleague who left fuel in his machine, and by the next season, he had to replace several components due to corrosion. If you decide to keep fuel in the tank, ensure it’s a fresh mix with stabiliser added.
Don’t overlook the oil. Change the engine oil before storage to remove contaminants that can cause damage over time. I’ve seen engines with old oil develop sludge, affecting performance. Use the recommended oil type and fill it to the proper level.
Additionally, consider checking the air filter. A clean air filter ensures optimal performance and extends the engine’s life. Remove it, clean it if it’s reusable, or replace it if it’s too dirty. I’ve often found that a simple filter change can improve starting reliability significantly.
Finally, store the equipment in a dry, covered area to protect it from moisture and temperature fluctuations. If you have a garden vacuum, make sure it’s also stored properly. You can find recommendations for the best corded garden vacuum to complement your cleaning needs. Proper storage is key to ensuring everything is ready to go when you need it again.
Store the Pressure Washer in a Safe Location
Place the cleaning machine in a dry, sheltered area, away from extreme temperatures and moisture. A garage or shed works well, as long as it’s clean and free from pests. Ensure the space is well-ventilated to prevent any build-up of fumes from residual fuel in the engine.
Preparation Steps

- Before storing, clean the surroundings to deter insects and rodents.
- Keep the area organised to avoid accidents or damage to the device.
- Consider using a cover specifically designed for your model to protect against dust and dirt.
Considerations for Accessibility
- Store it in a location where you can easily access it in warmer months.
- If you have multiple cleaning tools, ensure the pressure cleaner is easily identifiable for quick retrieval.
- A dedicated shelf or pegboard can help keep everything in order and ready for use.
For those looking to maintain optimal performance when the time comes to use it again, remember that the right location is key. You might also want to check out pressure washer for sidewalks for any additional tips on safe storage practices.

.jpg)


