


Ensure your cleaning device is properly assembled before use. I’ve encountered many situations where users rushed through the setup, leading to subpar results and unnecessary frustration. Take the time to read the manual and double-check connections, as a secure fit is crucial for optimal operation.
Adjust the nozzle according to the task at hand. I recall a day spent battling stubborn grime on a patio; switching from a wide spray to a narrow jet made all the difference. The right nozzle not only speeds up the process but also prevents potential damage to surfaces.
Regular maintenance is non-negotiable. After a season of heavy use, I learned the hard way that neglecting to clean filters and check hoses can lead to performance issues. Make it a habit to inspect your equipment before and after use to prolong its lifespan and maintain efficiency.
Pay attention to the water supply. I once faced a frustrating delay during a job due to low water pressure. Always ensure your source can handle the demands of your device; this simple check can save you time and energy in the long run.
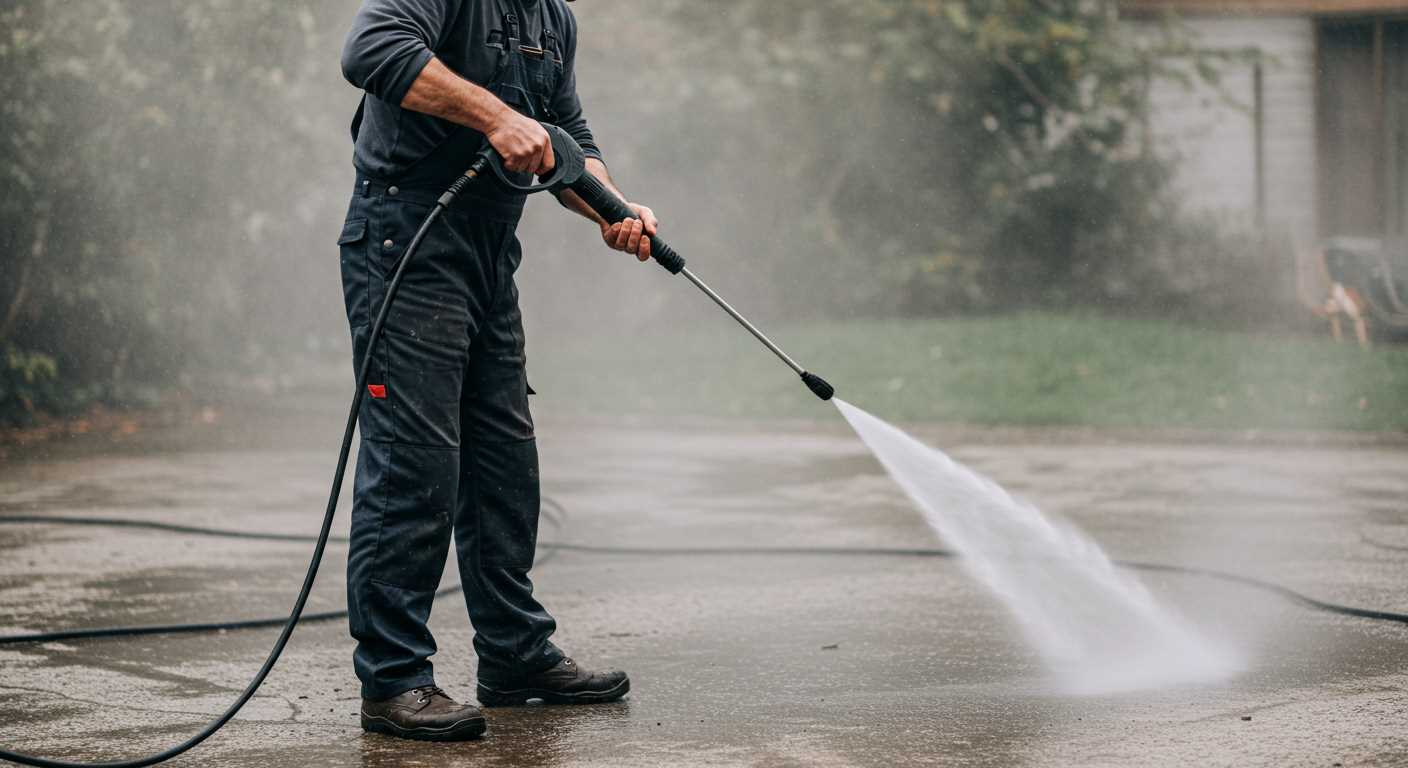
Lastly, consider your technique. I’ve found that the angle and distance from the surface significantly affect results. Holding the nozzle at a consistent 45-degree angle and maintaining a distance of about 10-12 inches can yield cleaner outcomes while protecting surfaces from damage.
How to Calculate Performance of a High-Pressure Cleaning Device
Start by determining the flow rate and pressure output of the equipment. These two metrics are critical in assessing capability. Flow rate is measured in litres per minute (L/min), while pressure is typically given in bars or PSI (pounds per square inch).

Assessing Flow Rate
To evaluate the flow rate, check the manufacturer’s specifications or perform a simple test:
- Fill a container of known volume (e.g., 10 litres).
- Time how long it takes to fill the container.
- Calculate the flow rate using the formula: Flow Rate (L/min) = (Volume in Litres / Time in Minutes).
Determining Pressure Output
Pressure can be measured using a gauge attached to the lance or nozzle. If unavailable, refer to technical documentation. The output pressure determines the cleaning power:
- For tough stains, a higher pressure is needed.
- For delicate surfaces, lower pressure is advisable.
Combine these figures to get a clear picture of operational strength. For example, a unit with a flow rate of 12 L/min and a pressure of 150 bar offers substantial cleaning capabilities, ideal for heavy-duty tasks.
In my experience, finding the right balance between flow rate and pressure is key. A unit with high pressure but low flow may struggle with certain jobs, while a high flow rate with insufficient pressure may not effectively remove grime.
Regular maintenance is crucial for maintaining performance. Clean filters and check hoses periodically to ensure optimal functioning.
Understanding the Basics of Pir Pressure Washers
To maximise the performance of high-pressure cleaning units, familiarity with their key components is essential. Let’s break down the fundamental aspects that dictate their efficiency.
Key Components
- Motor: The heart of the unit. An electric motor is quieter and requires less maintenance, while a petrol engine offers more power for larger tasks.
- Pump: This component pressurises the water. Different pump types, like axial or triplex, provide varying levels of longevity and performance.
- Nozzles: The spray nozzle determines the water’s pattern and pressure. Nozzles are interchangeable, allowing you to adjust the output for different surfaces.
- Hose: A high-pressure hose should be durable and resistant to kinks. Length can affect reach and ease of use.
Understanding Pressure Ratings
Pressure ratings are crucial for selecting the right equipment for specific tasks. Ratings are measured in PSI (pounds per square inch) and GPM (gallons per minute).
- PSI: Higher figures indicate greater cleaning power, suitable for stubborn stains or large areas.
- GPM: This measures water flow. Higher GPM signifies quicker cleaning, as more water is used per minute.
When selecting a unit, consider the intended use. For residential tasks, models with 1300-2000 PSI are typically sufficient. Commercial applications may require units exceeding 3000 PSI.
In my experience, understanding these fundamentals helps in making informed choices, ensuring efficient and effective cleaning sessions. Always match the equipment to the job at hand to achieve the best results.
Choosing the Right Nozzle for Your Cleaning Task
For optimal results, selecting the correct nozzle is paramount. Each attachment serves a unique purpose, catering to various surfaces and grime types. I recall a day spent cleaning an old patio; switching between nozzles made all the difference.
The 0-degree nozzle delivers a concentrated jet, perfect for tough stains on hard surfaces like concrete. However, I’ve learned to handle it with care; it can damage softer materials if you’re not cautious.
For broader areas or more delicate tasks, the 25-degree nozzle is a favourite of mine. It strikes a balance, effectively removing dirt while being gentle enough for painted surfaces. I’ve used it on garden furniture with great success, leaving them spotless without any damage.
When dealing with vehicles, the 40-degree nozzle is ideal. It provides a wider spray that rinses without risk of scratches. I often recommend this for washing cars, as it efficiently removes dirt while preserving the paintwork.
Lastly, the soap nozzle is indispensable for pre-treatment. It allows for a wider spray, enabling the detergent to cover more area. I’ve found that letting the soap sit for a few minutes before rinsing yields impressive results.
Choosing the right nozzle transforms the cleaning experience. Each time I switch, I’m reminded of the importance of the right tool for the job. Pay attention to your surface and the grime at hand, and you’ll see remarkable improvements in your cleaning tasks.
Preparing Your Surface Before Using the Pressure Cleaner
Remove any loose debris, such as leaves, dirt, and rocks, from the area you intend to clean. I remember a time when I neglected this step and ended up accidentally blasting a pebble into a nearby window, which resulted in an expensive repair.
Consider covering delicate plants and outdoor furniture with tarps or plastic sheets. I once forgot to protect my flower beds before starting a cleaning session. The results were devastating as the force of the water stripped away the soil and damaged the plants.
Inspect the surface for damage or wear. Look for cracks, loose paint, or other issues that could worsen with high-pressure cleaning. On one occasion, I underestimated the impact on an old wooden deck, which led to splintering and the need for extensive repairs later.
Test a small, inconspicuous area first to gauge how the surface reacts to the power of the stream. This precaution saved me from making a costly mistake on a tiled patio that had a delicate finish.
Ensure that any fixtures, such as lights or electrical outlets, are properly sealed or covered. A friend of mine didn’t consider this and ended up with water damage that could have been easily avoided with a little preparation.
Clear the area of furniture and obstacles to allow for safe movement and effective cleaning. I learned this the hard way when I had to navigate around a garden gnome while trying to reach a stubborn stain, which only complicated the task.
Lastly, check the weather forecast. Avoiding wet surfaces or windy conditions can prevent accidents and ensure that cleaning is both safe and successful. I’ve had to halt my efforts due to unexpected rain, which can undo all the hard work I put in. Proper preparation makes all the difference in achieving optimal results.
Setting Up the Pressure Washer for Use
Attach the garden hose to the inlet connector of the machine, ensuring a tight fit to prevent leaks. I’ve seen too many users overlook this step, leading to unnecessary frustrations. Make sure to run water through the hose before connecting it to purge any air; this ensures a smoother operation once you start the unit.
Next, connect the spray wand to the machine. Different models may have varying attachment mechanisms, so follow the manufacturer’s guidelines. I once struggled with a stubborn attachment, only to learn that a simple twist-lock feature was the solution.
Check the detergent tank if your model has one. Pour in the appropriate cleaning solution, mixing it with water according to the instructions on the product label. I recall a time when I didn’t dilute the detergent properly, resulting in a foam disaster that took ages to rinse off.
Adjust the pressure settings based on your cleaning task. Most units offer a range from low to high pressure. For delicate surfaces like wood, keep it low to avoid damage. I’ve witnessed a seemingly harmless setting turn a nice fence into splinters in seconds.
Before switching on, ensure your surroundings are clear of obstacles, and always check for any loose items that could fly away under high force. I’ve had my fair share of surprises when a small pebble turned into a projectile. Safety goggles and gloves can provide extra protection.
Finally, plug in the machine or connect it to the power source. If it’s electric, ensure the cord is intact and safely positioned to avoid tripping. If it’s gas-powered, double-check the fuel and oil levels. I once overlooked this, leading to an embarrassing stall in the middle of a job.
Now you’re ready to start your cleaning adventure, equipped with a well-set-up machine. Remember, attention to detail in the setup can save a lot of hassle later on.
Adjusting Pressure Settings for Different Surfaces
Set the pressure according to the material you’re cleaning. For delicate surfaces like wood, a lower setting of around 1200-1500 PSI suffices. This prevents damage while still providing adequate cleaning. For concrete or brick, increase the pressure to 2500-3000 PSI to tackle tough stains and grime.

Recommended Settings for Various Materials
| Surface Type | Recommended PSI | Nozzle Type |
|---|---|---|
| Wood Decks | 1200-1500 | 25-degree |
| Cars | 1300-1900 | 40-degree |
| Concrete Driveways | 2500-3000 | 15-degree |
| Brick Patios | 2000-2500 | 25-degree |
| Vinyl Siding | 1500-2000 | 40-degree |
Additional Tips for Surface Care
Always test a small, inconspicuous area first. This ensures that the pressure and nozzle combination works effectively without causing damage. For surfaces with heavy algae or mildew, consider using an additional cleaning solution, like a best algae scrubber for reef tank, before rinsing with the pressure system.
Adjustments are key. If you notice paint peeling or wood splintering, reduce the PSI immediately. Conversely, if dirt remains stubborn, incrementally increase the pressure while maintaining a safe distance from the surface to avoid damage.
Techniques for Effective Cleaning with a Pressure Washer
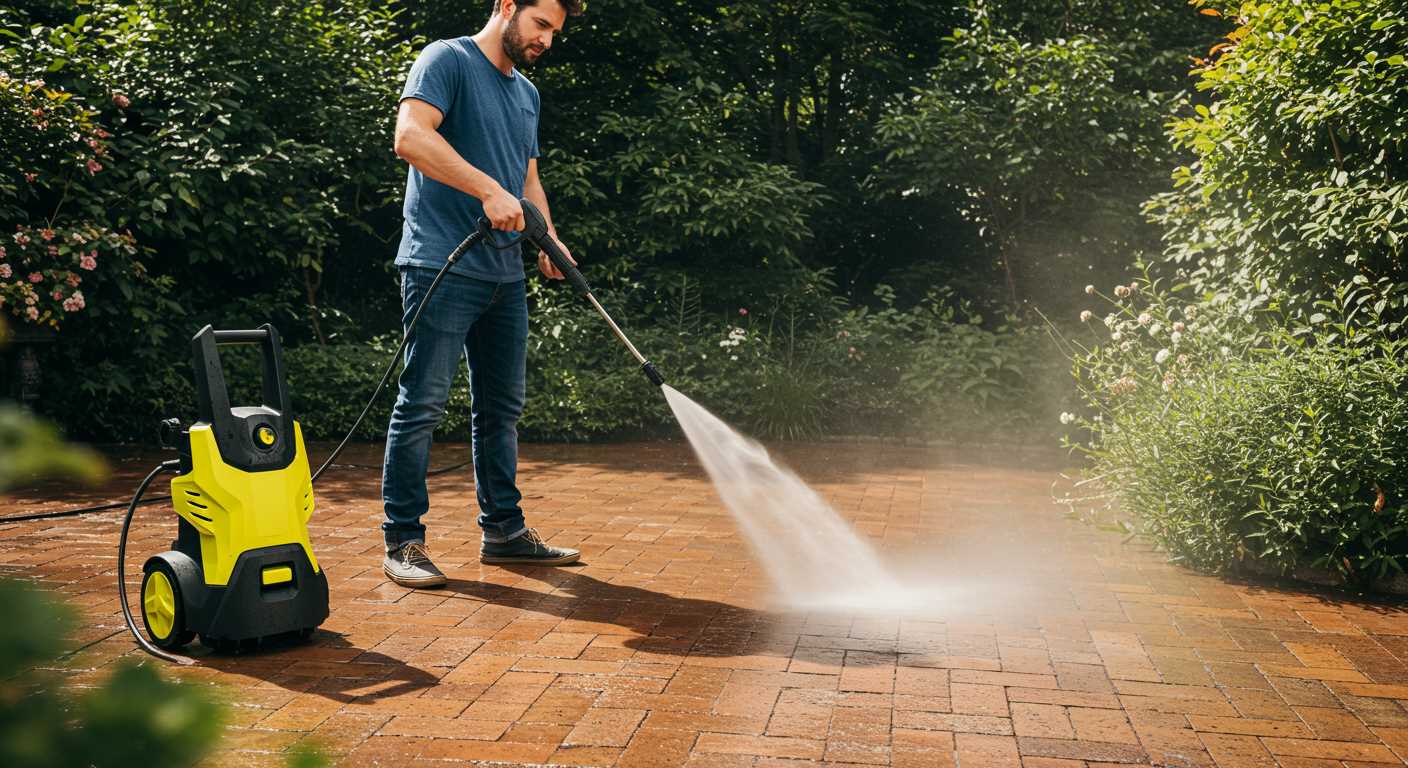
For optimal results, always maintain a consistent distance from the surface being cleaned. Typically, 30–50 cm is ideal for most tasks. This prevents damage while ensuring a thorough clean.
- Start with a Test Area: Before tackling large surfaces, test on a small, inconspicuous section. This helps gauge the impact of the spray and adjust as necessary.
- Use a Sweeping Motion: Move the nozzle in a back-and-forth sweeping motion. This distributes the water evenly and avoids streaks.
- Work from Top to Bottom: Clean high surfaces first–like gutters or walls–then work your way down. This method prevents dirt from washing onto already cleaned areas.
- Keep the Nozzle Moving: Holding the spray in one spot can damage surfaces. Keep the nozzle moving to ensure a gentle yet thorough clean.
In my experience, different tasks require unique approaches. For instance, when cleaning a driveway, I prefer a lower angle to effectively remove embedded grime.

- Adjust the Spray Angle: For flat surfaces, a 25-degree nozzle works best, while for vertical surfaces, a 15-degree nozzle is more effective.
- Use Detergents Wisely: When tackling tough stains, apply detergent and let it sit for 5–10 minutes before rinsing. This enhances the cleaning process.
- Stay Hydrated: If you’re working outdoors, keep water nearby. Staying refreshed helps maintain focus and efficiency.
Consider the type of surface as well. Wooden decks require a gentler touch, while concrete can withstand more force. Always adapt your technique to the material at hand.
- Watch for Surroundings: Be mindful of windows, plants, and other delicate items nearby. Protect them with tarps or plastic sheeting.
- Maintain Equipment: Regularly check hoses and connections to prevent leaks. A well-maintained unit performs significantly better.
In my years of experience, I’ve encountered various challenges. One time, I faced a particularly stubborn oil stain on a patio. By combining a targeted nozzle and a suitable cleaner, the result was impressive. The key is persistence and knowing when to adjust your strategy.
Maintaining Safety While Operating the Pressure Washer
Always wear protective gear, including safety goggles, gloves, and non-slip footwear. I recall a time when I was caught off guard by a sudden kickback while cleaning a patio; my lack of proper footwear led to a slip and a near miss with the equipment. Never underestimate the power of safety attire.
Before starting, inspect the area for hazards. Look for loose debris, pets, or children nearby. I once had a close call when I didn’t notice a garden hose in my path. Tripping over it sent me tumbling forward, and I narrowly avoided a collision with the machine. Clear the surroundings to ensure a safe working environment.
Handling the Equipment with Care
Always keep a firm grip on the trigger gun. A sudden release can cause the wand to whip around, posing a risk. I learned this the hard way during a demonstration; a friend lost control for just a moment, and the spray hit a nearby fence. Thankfully, it was only a minor inconvenience, but it taught me to respect the power of the device.
Never point the nozzle at yourself or others. This seems obvious, but I’ve seen it happen. The high-velocity water can cause serious injuries. During one session, a friend jokingly aimed the wand at his foot, and it left a nasty bruise. Always maintain focus and treat the equipment with the respect it deserves.
Proper Shutdown Procedures
After use, ensure the machine is completely shut down and depressurised. I once skipped this step and ended up with a spray of water when disconnecting the hose. It’s easy to forget, but taking a moment to double-check can save you from a soggy surprise.
Store the unit in a dry, safe place, away from children. I’ve seen too many accidents occur simply because equipment was left out. Protect both the machine and those around you by following these basic safety protocols. They may seem trivial, but they can make a significant difference in preventing accidents and ensuring a smooth cleaning process.
Cleaning and Storing Your Pressure Washer After Use
After every session, give your cleaning machine a thorough rinse. Start by disconnecting the water supply and running the unit for a minute without the nozzle attached. This empties any residual water and prevents internal damage.
Next, clean the nozzle with a pin if it’s clogged. A clogged spray tip can affect performance and lead to uneven cleaning. So, make it a habit to check and clear the nozzle after every use.
For the body, a simple wipe with a damp cloth will suffice. Avoid using abrasive materials, as they can scratch the surface. Pay special attention to the wheels and handles, as dirt tends to accumulate there.
Once cleaned, store the equipment in a dry and cool area. Ideally, keep it in a dedicated storage space, away from direct sunlight, to prevent any deterioration of the components. Use a cover to protect it from dust and potential contaminants.
Here’s a quick reference table to summarise the cleaning and storing steps:
| Action | Details |
|---|---|
| Disconnect Water Supply | Prevent pressure buildup and internal damage. |
| Run Unit Without Nozzle | Clear residual water from the system. |
| Clean Nozzle | Use a pin to remove any blockages. |
| Wipe Down Body | Use a damp cloth; avoid abrasives. |
| Store Properly | Keep in a dry, cool place and cover it. |
Following these steps not only extends the lifespan of your equipment but also ensures it’s ready for the next cleaning task. From my experience, a well-maintained machine performs significantly better and gives satisfactory results each time.
Troubleshooting Common Issues with Pir Pressure Washers
For a unit that won’t start, check the power source first. Ensure the plug is securely connected and the outlet is functioning. A blown fuse or tripped circuit breaker can also cut power. If your model has a fuel tank, ensure it’s filled with fresh fuel.
If you encounter low water pressure, inspect the inlet filter for clogs. Debris can restrict water flow, leading to decreased performance. Also, check the hose for kinks or leaks. Any damage can affect the pressure output significantly.
Inconsistent spray patterns often stem from nozzle blockages. Remove the nozzle and clean it thoroughly, ensuring that any debris is cleared. If the nozzle is damaged, replacing it can restore optimal functionality.
Leaks around the connections may indicate loose fittings. Tighten these securely, and inspect the O-rings for wear. Replacing damaged seals can prevent further water loss and maintain pressure.
For units that run but fail to build pressure, look at the pump. Air trapped in the system can lead to this issue. Try priming the pump by allowing water to flow through the system without a nozzle attached. This can help remove any air pockets.
If you notice excessive vibration, it might be due to an unbalanced pump or loose components. Check that all parts are secured and consider consulting the manual for specific troubleshooting steps.
Finally, regular maintenance is key to longevity. Clean filters, inspect hoses, and ensure all fittings are tight after each use. For enhanced cleaning capabilities, consider using a rotary surface cleaner for pressure washer to tackle larger areas efficiently.

.jpg)


