


Adjusting the release mechanism on your high-pressure cleaning device can significantly improve its performance and longevity. My years of experience have shown that an improperly configured mechanism can lead to various issues, including reduced efficiency and potential damage to the unit. Begin by locating the adjustment knob, usually situated near the pump. This knob often features markings that indicate the pressure settings.
Next, ensure the machine is off and disconnected from the power source before making any adjustments. Carefully turn the knob to the desired setting, typically between 2000 to 3000 PSI, depending on the model and intended use. Remember to consult the manufacturer’s specifications for optimal settings. Once adjusted, power on the device and conduct a test run. Observe any fluctuations in water flow or pressure, which might indicate the need for further tweaks.
In my experience, a common mistake is to set the mechanism too high, causing excessive wear on the components. If you notice any unusual sounds or vibrations, it’s wise to lower the setting gradually until the performance stabilises. Regular checks will ensure your device operates smoothly and efficiently, allowing you to tackle any cleaning task with ease.
Setting the Safety Mechanism on Your Cleaning Device
Begin by locating the adjustment mechanism on your equipment, usually found near the pump. It’s often marked for easy identification. Before making any changes, ensure the machine is powered off and disconnected from the water source.
Adjustment Steps
- Using a suitable wrench or screwdriver, gently loosen the locking nut surrounding the adjustment screw.
- Turn the screw clockwise to increase the limit or counterclockwise to decrease it. Start with small increments; a quarter turn is usually sufficient to see if it meets your needs.
- Tighten the locking nut securely after adjusting, ensuring it doesn’t move during operation.
Testing the Configuration
Reconnect the water supply and power up the unit. Test the settings by running a quick cycle. Observe the performance; if the output is inconsistent or seems too high, repeat the adjustment process. It’s best to err on the side of caution–better to start low and increase gradually than risk damage.
- Check for leaks around the adjustment area after testing.
- Listen for any unusual noises that might indicate an issue.
- Review the user manual for any specific recommendations related to your model.
In my experience, fine-tuning this aspect can significantly enhance the performance and longevity of your machine. A properly adjusted mechanism not only optimises efficiency but also prevents wear and tear. Happy cleaning!
Understanding the Role of the Excess Pressure Valve
Setting the right parameters on your machine is crucial for optimal performance. The component in question plays a pivotal role in maintaining the balance between power and safety during operation. Its primary function is to regulate the force exerted by the water flow, preventing damage to internal parts and ensuring longevity.
When I first started working with these machines, I quickly realised that improper settings could lead to leaks or, worse, mechanical failures. I recall a day when a colleague neglected to adjust this mechanism properly, and we ended up with a malfunctioning unit that required extensive repairs. From that moment, I made it a point to double-check these settings before any task.
An important aspect to consider is the type of surface you are cleaning. For instance, if you’re using a pressure washer for stucco, you must be particularly cautious. The wrong settings can easily strip away the material, leading to costly repairs. Always match the force to the task at hand, ensuring the device operates within safe limits.
In my experience, regular maintenance and checks can prevent many issues related to this component. Make it a habit to inspect it for any signs of wear or malfunction. This small step can save you from larger headaches down the road.
Identifying the Right Settings for Your Cleaner
Start with the manufacturer’s guidelines. Each model has a recommended range for optimal operation. I remember the first time I ignored this and cranked up the force too high, only to end up damaging the surface I was cleaning. It’s a hard lesson that stuck with me.
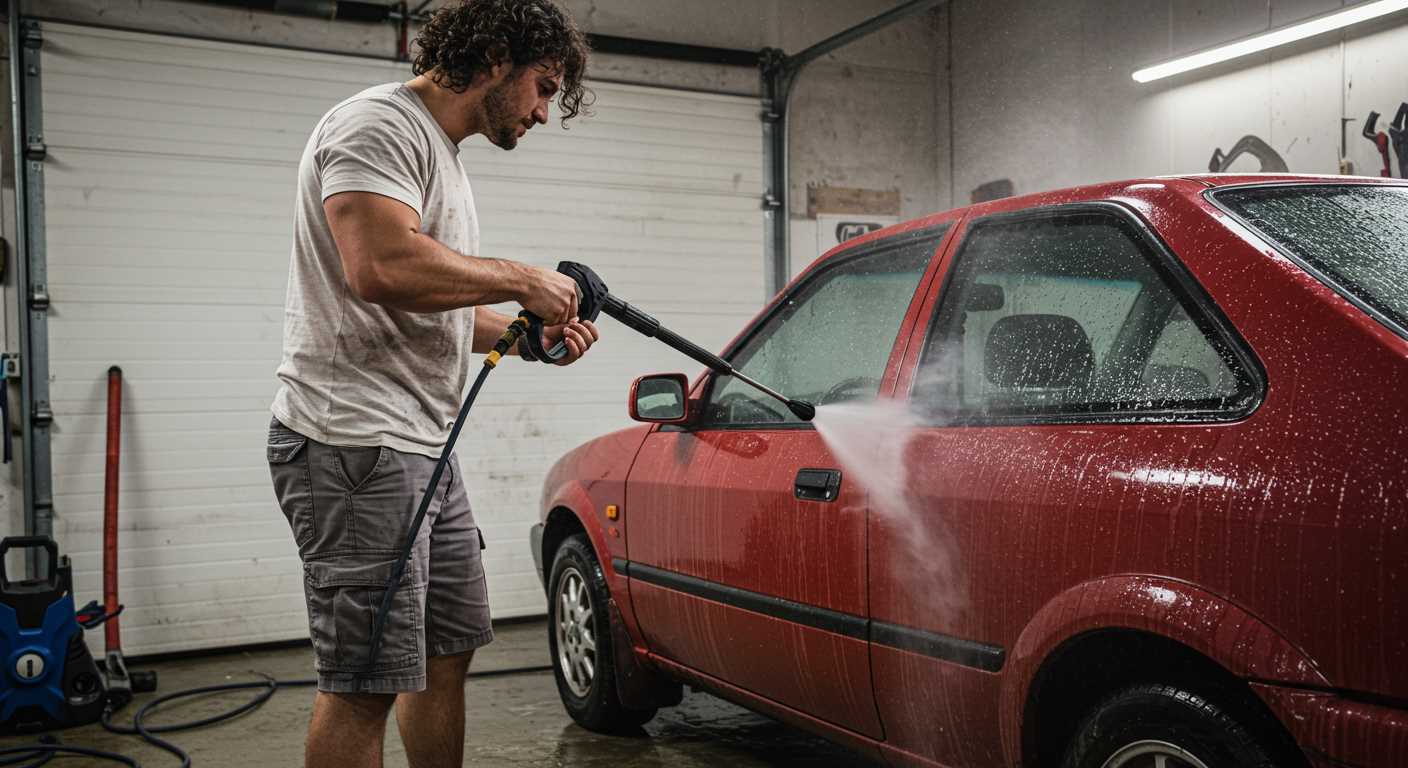
Next, assess the job at hand. For delicate surfaces, such as vehicles or wooden decks, lower settings are ideal. I often use around 1200 to 1500 PSI for cars to avoid scratches while still achieving a thorough clean. Conversely, for tougher tasks like concrete driveways, I push it up to 3000 PSI.
Testing is crucial. I usually start with a mid-range setting and adjust based on the results. If dirt and grime come off easily, I know I’m in the right zone. If not, I increase the intensity incrementally. Trust your instincts and experience; you’ll develop a feel for what works over time.
Don’t forget about nozzle selection. The type of spray pattern significantly influences effectiveness. A wider pattern is better for gentler cleaning, while a concentrated stream is ideal for stubborn stains. I often switch nozzles during a job to adapt to different surfaces.
Lastly, consider the distance from the surface. Holding the nozzle too close can cause damage, while too far away might not yield satisfactory results. I’ve found that keeping it about two feet away typically gives me the best balance between power and safety.
Gathering Necessary Tools for Adjustment
Begin with a simple checklist of tools that will aid in making precise modifications. Here’s what you’ll need:
| Tool | Purpose |
|---|---|
| Wrench Set | For loosening and tightening fittings |
| Screwdriver | To access adjustment screws |
| Pressure Gauge | To monitor the fluid dynamics during adjustments |
| Safety Goggles | Protection from potential spray |
| Work Gloves | To ensure a firm grip and protect your hands |
| Container | For any excess fluid or debris |
During my years in the industry, I’ve learned that having the right tools at hand makes a world of difference. For instance, using a pressure gauge that’s calibrated correctly allows you to see real-time adjustments and avoid over-tightening, which can lead to unnecessary wear on components. Safety gear is often overlooked, but I can’t stress enough how important it is to protect your eyes and hands when dealing with high-pressure equipment.
As you gather these tools, ensure they are in good working condition. A worn wrench can slip, causing frustration and potential injury. I’ve had my share of close calls, and a good-quality tool has saved me more than once. Take the time to check your equipment before you start–it’s a small step that pays off significantly in the long run.
Steps to Access the Excess Pressure Valve
First, ensure the unit is completely powered off and disconnected from the electrical source. Safety is paramount, and this step cannot be overlooked. Locate the housing that covers the adjustment mechanism; it’s typically near the motor or pump assembly. You may need a screwdriver to remove screws or clips securing this cover.
Once the cover is removed, identify the adjustment component. It’s usually marked clearly and may have a numbered dial or a rotating knob. If this is your first time, consult the user manual for visual references. Familiarity with the layout can expedite the process significantly.
Next, check for any obstructions around the adjustment area. Sometimes, debris can gather and hinder access. A small brush or compressed air can help clear these away, ensuring you have a clean workspace.
After clearing the area, inspect the adjustment mechanism for any signs of wear or damage. If you notice anything unusual, it might be wise to consult a technician or consider replacing the part before proceeding. This can save you future headaches.
Once everything looks good, you can make the necessary adjustments to suit your cleaning needs. Remember to keep a close eye on the readings to avoid any unintended outcomes. If you’re looking for tools to enhance your washing efficiency, consider checking out the best car wash high pressure spray gun for optimal results.
Adjusting the Valve for Optimal Performance
To achieve peak performance from your cleaning machine, fine-tuning the control mechanism is key. Start with a pressure gauge to monitor readings accurately while making adjustments. This allows you to pinpoint the ideal setting for your specific tasks.
Steps for Effective Adjustment
- Ensure the equipment is turned off and disconnected from the power supply.
- Locate the control mechanism, typically situated near the pump.
- Using a wrench, gently loosen the adjustment screw or knob.
- Turn the screw clockwise to increase the output or counterclockwise to decrease it. Make small adjustments, about a quarter turn at a time.
- Reconnect the power and run the machine at idle to check the reading on the gauge.
- Repeat the adjustment as necessary until you reach the desired output.
Maintaining Consistency
After establishing the optimal setting, check the controls regularly. Environmental factors and wear can affect the output over time. Document any changes in performance and re-adjust as needed to maintain consistency.
- Keep a record of the settings for different tasks.
- Inspect the machine for any leaks or worn components that may affect performance.
- Regularly clean the intake filter to ensure smooth operation.
With precise adjustments and diligent maintenance, your cleaning equipment will deliver impressive results and extend its lifespan significantly.
Testing Pressure Settings After Adjustment
After making adjustments to the safety mechanism, the first test should be a simple one: turn the machine on and observe the gauge. If it indicates a stable reading within the desired range, you’re off to a good start. However, it’s crucial to validate the settings under actual working conditions.
Begin by selecting a cleaning task that requires different levels of intensity. I often start with a surface that needs light rinsing before moving on to tougher stains. This lets you assess how well the equipment responds to the new settings. If the output feels too weak or excessively forceful, it’s time to fine-tune again.
While testing, listen for any unusual sounds. A hissing noise could indicate a leak, while a change in the sound of the motor might suggest it’s struggling with the current settings. Both scenarios require immediate attention.
Another effective method is to observe the cleaning results. If dirt and grime are being removed efficiently at the adjusted level, that’s a positive sign. If not, don’t hesitate to revert to the previous settings or try a different configuration. I recall a time when a minor tweak made all the difference; it turned a frustrating wash into a quick and satisfying task.
Don’t forget to check the nozzle type used during testing. Different nozzles can significantly affect performance. Switching to a nozzle designed for heavier tasks might require you to adjust the mechanism further. Always have a selection on hand for various projects.
Lastly, document the settings that yield the best results. Keeping a log helps in future adjustments and serves as a reference for various jobs. I’ve often referred back to my notes, saving time and avoiding guesswork. Remember, fine-tuning is an ongoing process; every machine has its quirks, and familiarity with yours will lead to optimal outcomes.
Common Issues and Troubleshooting Tips
One persistent problem I’ve encountered is inconsistent water flow. This often stems from blockages in the intake filter or hose. Regularly inspect these components, clearing any debris. If the water supply is insufficient, check for kinks in the hose that could impede flow.
Another frequent concern is the unit not starting. Ensure the power source is functioning properly; sometimes, it’s simply a matter of a tripped breaker. I’ve seen units fail to engage due to a faulty power cord, so inspect it for any visible damage.
Unexpected Shut-Offs
Unexpected shut-offs can be frustrating. This issue often arises from overheating. Allow the machine to cool down if it has been in use for an extended period. Additionally, check the pump oil levels; low oil can cause the unit to shut off automatically to prevent damage.
Pressure Fluctuations
Inconsistent output can signal a malfunctioning pump. I’ve encountered this with various models, and it’s often due to wear and tear on the internal components. Regular maintenance can extend the life of the pump; consider replacing worn seals and gaskets. If problems persist, contacting a technician may be necessary.
Lastly, if you experience leaks, inspect all connections and seals. Tighten any loose fittings and replace damaged O-rings. In my experience, many leaks can be resolved with simple adjustments, saving you time and money on repairs.

.jpg)


