


For anyone looking to enhance their cleaning routine, the correct location for your cleaning solution is paramount. Start by locating the detergent tank, which is typically integrated into the unit itself. This tank is specifically designed to hold the cleaning agent, ensuring a seamless blend with the water during operation.
In some models, you might find a separate attachment for dispensing the cleaning fluid. If your device features this, ensure it is securely connected and free of any clogs. I once encountered a situation where a friend’s equipment failed to dispense the solution properly due to a blocked nozzle. A quick clean-up resolved the issue, allowing for a smoother and more effective wash.

Always follow the manufacturer’s guidelines regarding the type and dilution of the cleaning product. I remember testing various solutions, and certain brands worked wonders while others fell short. The right mixture not only optimises the cleaning process but also protects your machinery from potential damage caused by harsh chemicals. Stick to recommended products to safeguard both your surfaces and the equipment itself.
Finally, ensure that the intake hose is submerged properly in the solution before you start. A friend of mine neglected this step, leading to an ineffective clean and wasted time. Taking these small but critical steps can significantly enhance your cleaning experience.
Where to Store Cleaning Solution in Your Equipment
For optimal usage of your cleaning solution, ensure it’s placed in the designated reservoir of your device. Most models feature a built-in compartment specifically engineered for this purpose. If you’re unsure, consult your user manual for guidance.
- Check for a clear marking indicating the soap compartment on your machine.
- Don’t overfill; adhere to the recommended level to prevent leaks or performance issues.
- If your model doesn’t have a soap tank, consider using an external injection system compatible with your unit.
During my years working with various machines, I found that using the correct dilution ratio is key. Many solutions require mixing with water before application. Always refer to the product label for specific instructions. This can significantly enhance cleaning effectiveness and protect surfaces.
- Mix the solution in a separate container if necessary, following the provided ratios.
- Pour the mixed solution into the reservoir carefully, avoiding spills.
- Attach the appropriate nozzle; a low-pressure spray is often recommended for applying the soap.
After application, rinse thoroughly to remove any residue. This step is crucial to prevent any potential damage to surfaces or lingering streaks.
Remember, if you’re trying a new product, it’s wise to test it on a small, inconspicuous area first. I learned this the hard way; a potent cleaner once caused unexpected discolouration on a customer’s patio. Always prioritise safety and compatibility with the surface you’re cleaning.
Understanding the Types of Pressure Washer Shampoo
Choosing the right cleaning solution is crucial for achieving optimal results. Various formulas cater to specific needs, and understanding these can enhance your cleaning efficiency. Here’s a breakdown of the main types of cleaning agents available.
Types of Cleaning Solutions
| Type | Description | Best For |
|---|---|---|
| Alkaline Cleaners | These are effective at breaking down grease and oil, making them ideal for heavy-duty tasks. | Cars, driveways, and oily machinery |
| Acidic Cleaners | Designed to remove mineral deposits, rust, and hard water stains, these solutions are powerful against tough residues. | Brick, concrete, and metal surfaces |
| Biodegradable Cleaners | Environmentally friendly options that are safe for use around plants and animals, yet still effective. | Residential areas and sensitive environments |
| Foaming Solutions | These create a thick foam that clings to surfaces, allowing for longer dwell time and improved cleaning. | Vehicles, boats, and delicate surfaces |
Choosing the Right Formula
My experience tells me that selecting the right cleaner significantly impacts your results. For instance, I once tackled a friend’s grimy patio with an alkaline solution. The results were astonishing; the grime lifted effortlessly, revealing the original colour of the stone beneath. Conversely, trying an acidic cleaner on a painted surface resulted in damage, so always assess the material before application.
For those with mobile homes, using a gentle yet effective cleaner is paramount. A pressure washer for mobile homes can be paired with biodegradable formulas to ensure safety and effectiveness without harming the environment. Each type of cleaner has its strengths, and understanding them will help you achieve the best outcomes for your cleaning projects.
Identifying the Right Shampoo for Your Pressure Washer Model
Choosing the correct cleaning solution for your specific model can dramatically impact your results. I’ve experienced firsthand how the right formulation can enhance cleaning efficiency, while the wrong one can lead to disappointing outcomes. Always consult your user manual for compatibility details; it usually outlines the best products to use.
For instance, some machines operate optimally with concentrated formulations that require dilution, while others need ready-to-use mixtures. I once used a highly concentrated mix with a model that needed a standard solution, and the result was a foamy mess that did little to clean the surface.
Consider the materials you are cleaning. Many manufacturers create special solutions tailored for different surfaces, like wood, concrete, or vehicles. I recall using a car-specific blend on my driveway, thinking it would work wonders. The result was less than stellar, as it didn’t address the grime effectively.
Check for the manufacturer’s recommendations regarding pH levels. Products that are too acidic or alkaline can damage certain surfaces. I learned this the hard way when a powerful cleaner I used on my patio left unsightly marks on the stonework. Always opt for neutral pH solutions for sensitive surfaces.
Lastly, look for eco-friendly options if you’re concerned about the environment. Many brands now offer biodegradable formulations that are just as effective. I’ve switched to these options in my own routine and have seen no compromise in cleaning power, plus it gives me peace of mind knowing I’m making a responsible choice.
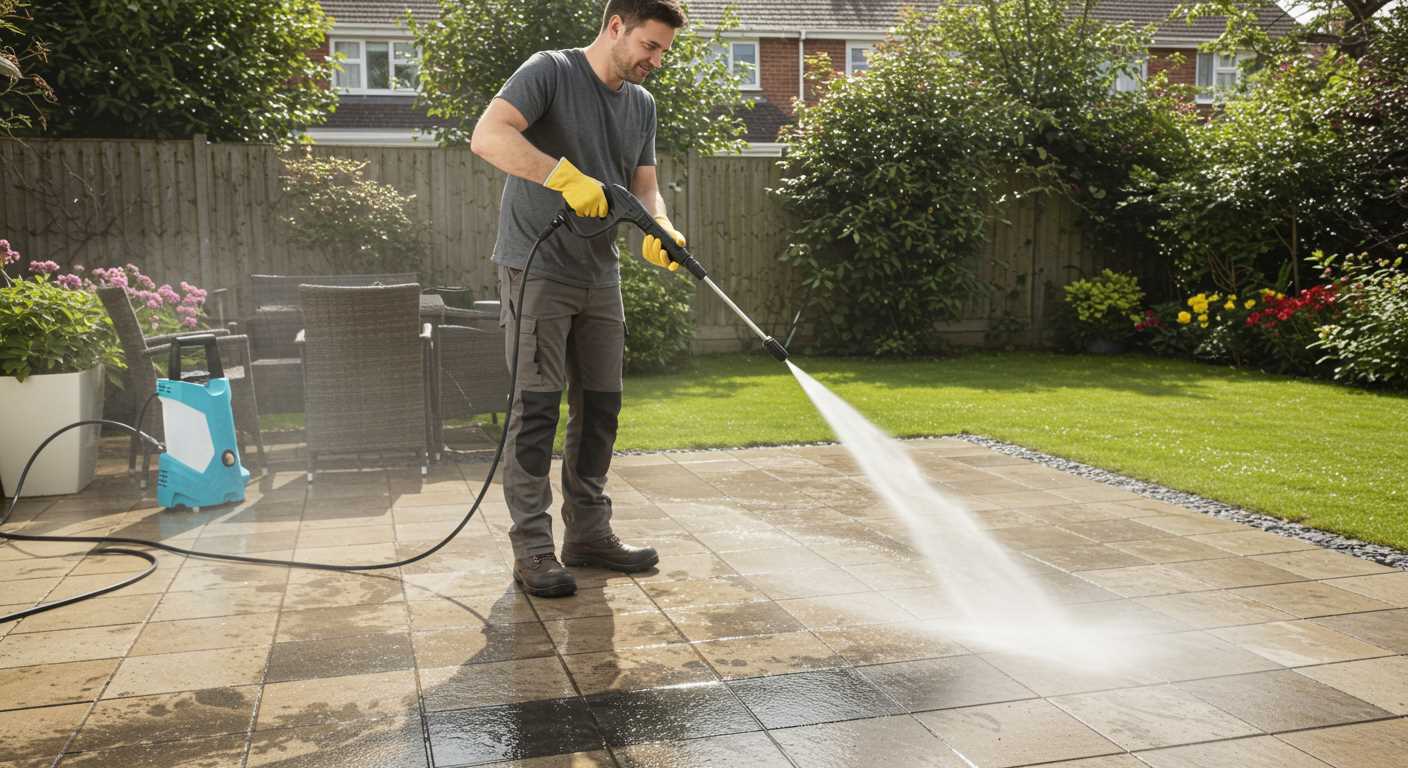
How to Locate the Shampoo Tank on Your Pressure Washer
Check the user manual first. It often contains diagrams or descriptions that pinpoint the location of the tank. In many models, it’s situated near the pump or on the side of the unit.
For those with a detergent injector system, look for a small container attached to the machine’s frame. It may be a translucent plastic tank, making it easier to see the liquid level inside.
If your device has a removable tank, it will usually be designed for straightforward access, often bearing a clear label. Some machines feature a built-in system where the cleaning solution is drawn directly from a bottle connected to the injector. In this case, you’ll find the connection point typically near the high-pressure hose.
On certain models, the tank can be integrated into the lance itself. Check the lance for a compartment that allows you to insert a cleaning solution directly. This setup can simplify the process, as everything is contained in one unit.
When I first started using these machines, I spent hours searching for the tank on a friend’s model. It turned out to be cleverly hidden beneath a cover. It taught me to always check for hidden compartments or covers that might not be immediately obvious. Take that extra moment to inspect your equipment closely.
If still uncertain, online forums or videos specific to your model can provide valuable insights from other users who have faced the same challenge. Engaging with the community can often lead to quicker solutions.
Step-by-Step Guide to Adding Shampoo to the Tank
Begin by ensuring your machine is switched off and disconnected from any power source. Safety first! Next, locate the container designed for cleaning solution; it’s usually found at the rear or side of the unit.
Gather Your Supplies
Grab the cleaning product compatible with your model. Always check the label for recommendations. You’ll also need a funnel to avoid spills. If you don’t have one, a steady hand will work, but a funnel makes the process tidier.
Filling the Container
With the funnel in place, carefully pour the cleaning liquid into the tank. Fill it to the designated level indicated inside the tank, ensuring you don’t overfill. An excessive amount can lead to unwanted leaks during operation.
After filling, secure the cap tightly. This prevents any contamination and ensures the solution doesn’t evaporate or spill during use. Now, your equipment is ready for action! Follow the manufacturer’s instructions for mixing ratios if required.
Lastly, before powering on your machine, double-check that everything is secure and in place. A quick once-over ensures a smooth cleaning experience without unexpected interruptions.
Using a Foamer or Soap Nozzle for Shampoo Application
For optimal distribution of cleaning agents, I recommend using a foamer or soap nozzle. These attachments allow for a thick, even layer of product, ensuring all surfaces receive adequate coverage. In my experience, the foam created by these nozzles clings better to vertical surfaces, enhancing the cleaning process.
When employing a foamer, be sure to mix the cleaning solution according to the manufacturer’s guidelines. A common ratio is one part cleaning agent to four parts water, but this can vary based on the specific formula. Always test on a small area first to avoid any adverse reactions with the surface material.
Using a soap nozzle is straightforward. Attach it to the lance, fill the detergent reservoir as directed, and adjust the nozzle to the desired spray pattern. A wider spray is great for larger areas, while a narrower pattern allows for targeted application on tough spots. During my time in the field, I found that starting from the bottom and working upwards helps prevent streaking.
As you apply the foam, give it a few minutes to dwell on the surface. This dwell time allows the cleaning agents to break down grime and dirt effectively. Afterward, rinse thoroughly with clean water to remove any residue. In cases of heavy soil, a second application might be necessary.
Remember, maintaining your foamer or soap nozzle is key. Regular cleaning after use prevents clogs and ensures consistent performance for future cleaning tasks. From my experience, a little maintenance goes a long way in prolonging the life of your equipment.
Adjusting the Soap Ratio for Different Cleaning Tasks
For optimal results, fine-tuning the concentration of your cleaning solution is key. Each task demands a specific mix to tackle different surfaces and types of grime effectively.
For light cleaning, such as washing vehicles or outdoor furniture, a diluted solution often suffices. I recommend a mix ratio of 1:10 (one part cleaner to ten parts water). This gentle approach preserves the finish while still providing adequate cleaning power.
When dealing with more stubborn dirt, like oil stains on driveways or mould on patios, consider a stronger blend. A 1:5 ratio works well here. It strikes a balance, ensuring thorough cleaning without risking damage to the surface.
For heavy-duty tasks, such as restoring a deck or cleaning heavily soiled surfaces, you might opt for a 1:3 ratio. This potent solution can break down tough grime, but it’s crucial to test it on a small, inconspicuous area first to avoid any adverse effects.
| Task | Recommended Ratio | Notes |
|---|---|---|
| Light Cleaning (Cars, Furniture) | 1:10 | Gentle on surfaces, effective against light dirt. |
| Medium Cleaning (Patios, Oil Stains) | 1:5 | Stronger solution for more stubborn grime. |
| Heavy-Duty Cleaning (Decks, Heavy Soil) | 1:3 | Potent mix, test on small area first. |
Adjusting the blend isn’t merely about how dirty the surface is; consider the material as well. For instance, wooden surfaces often require a gentler solution compared to concrete. Experience teaches the importance of experimenting to find the perfect balance for each unique cleaning job.
Common Mistakes When Adding Shampoo to Your Pressure Washer
One frequent blunder is neglecting to read the manufacturer’s instructions. Each model has specific requirements for cleaning solutions, and using an incompatible product can damage components. Always check the guidelines before proceeding.
Overfilling the Tank
Another common error involves overfilling the container. Too much fluid can lead to leaks and inefficient performance. Aim for the recommended fill line, ensuring optimal function and preventing mess.
Ignoring the Mixing Ratio
Many users fail to adjust the mix according to the task. Different surfaces require varying concentrations of cleaning agents. For instance, delicate areas may need a lower ratio than tougher stains. Always tailor your mixture to match the cleaning needs.
- For light cleaning: 1 part cleaner to 10 parts water.
- For heavy-duty tasks: 1 part cleaner to 4 parts water.
Additionally, not using the correct nozzle can hinder results. A soap nozzle is designed for maximum foam application, while a standard nozzle may dilute the cleaning power. Always switch to the appropriate attachment for the best outcome.
For those looking for tips beyond cleaning, consider exploring how to can carrots with a pressure cooker. It’s a great way to make the most of your kitchen tools.
Neglecting Maintenance
Failing to clean the tank and hoses after use can result in residue build-up, affecting future performance. After every cleaning session, rinse the system to ensure longevity and efficiency.
By avoiding these pitfalls, you’ll enhance the cleaning experience and prolong the life of your equipment. Every detail counts when it comes to achieving the best results.
Cleaning and Maintenance Tips for Shampoo Tanks

Regularly inspect the tank for residue. After every use, rinse it out with clean water to prevent buildup. I’ve found that a simple flush with water while the system is running can dislodge any stubborn remnants. This little practice goes a long way in keeping everything fresh.
Use a soft brush to scrub the inside of the tank gently. I once neglected this step, and it led to a nasty clog. A quick scrub with a brush helps remove any deposits that might form over time. Be sure the bristles are soft enough to avoid scratching the interior.
Keep an eye on the seals and gaskets around the tank. If you notice any wear or damage, replacing them promptly can prevent leaks. I once ignored a small leak, thinking it was insignificant, but it led to a more extensive issue down the line.
When switching between different cleaning solutions, thoroughly clean the tank to avoid cross-contamination. I learned this the hard way when I mixed two products that didn’t react well, resulting in a foamy disaster during a job.
Store your equipment in a cool, dry place to prevent any products left in the tank from degrading. I’ve seen shampoos thicken and become ineffective when left in a hot garage. Keeping everything well-stored ensures optimal performance for your next cleaning session.
If you’re using concentrated solutions, dilute them in a separate container before pouring them into the tank. This helps to maintain consistency in the mixture and avoids clogging at the intake. I’ve seen people pour straight concentrates, only to end up with clogged nozzles.
Lastly, always check the user manual for specific cleaning instructions. Each model can have unique requirements that, if overlooked, might lead to maintenance headaches. I’ve often referred back to the manual to ensure I’m following the best practices for longevity and efficiency.

.jpg)


