


Absolutely, tackling that greasy residue on your driveway or patio can be accomplished with the right approach. In my years of experience with various cleaning equipment, I’ve discovered that utilising a high-velocity stream of water can effectively dislodge and clear away such unwanted marks. However, simply blasting away won’t always yield perfect results, so a few extra steps can make all the difference.
First, pre-treating the area with a degreasing solution enhances the cleaning process significantly. I’ve often paired a commercial degreaser with a strong water jet. Allowing the solution to dwell for a short period helps break down the oily substance, making it easier to lift during the washing phase. From my experiments, I’ve seen remarkable results when using a degreaser that’s specifically formulated for tough residues.
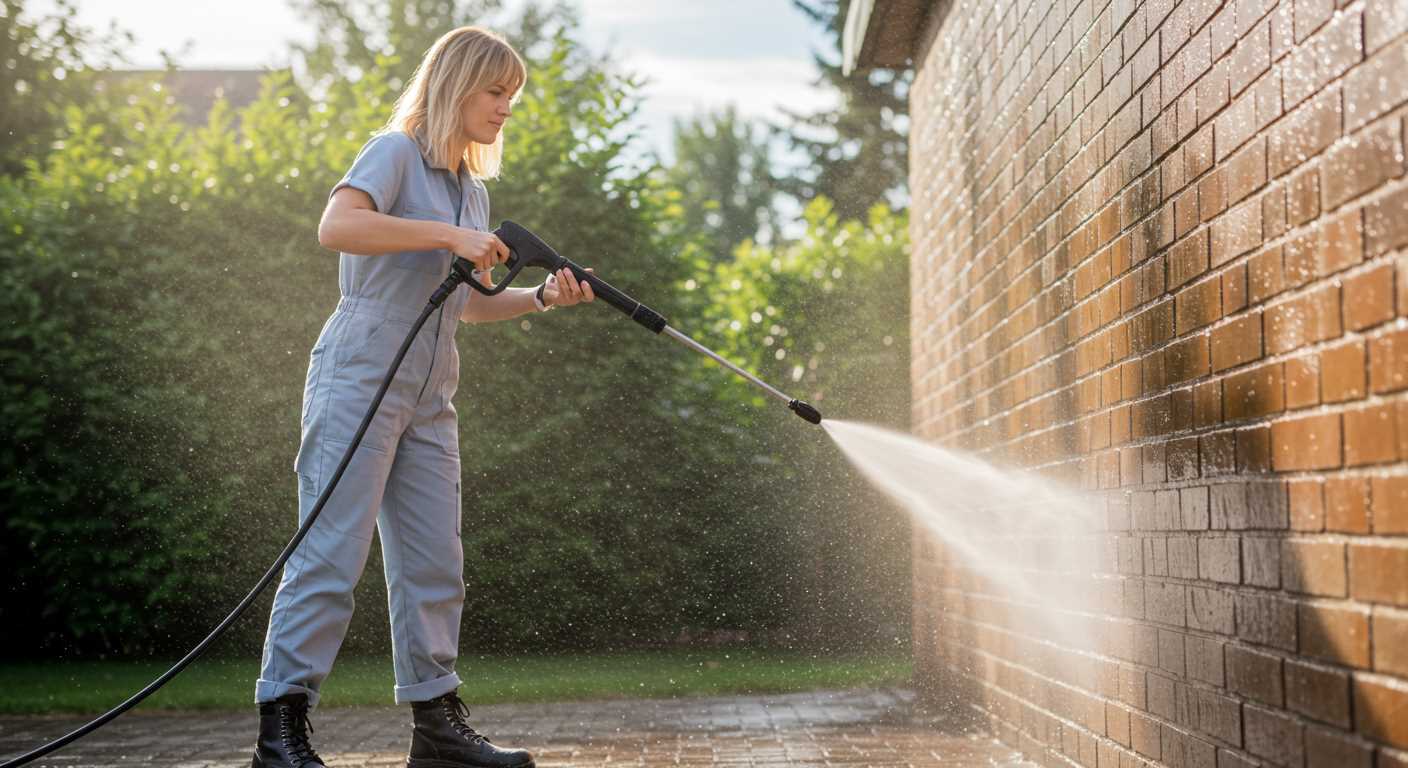
When you do start the cleaning, maintaining an appropriate distance and angle is key. I typically recommend keeping the nozzle at least 12 inches from the surface and using a 25-degree nozzle for a wider spray pattern. This not only ensures thorough coverage but also minimises the risk of damaging the surface beneath. Remember, patience pays off; sometimes, you might need to go over the area multiple times to achieve that spotless finish.
Can a High-Intensity Cleaner Tackle Grease Marks?
Absolutely, a high-intensity cleaner can be effective against greasy marks, but the success largely depends on the type of surface and the severity of the deposits. For instance, porous materials like concrete may require a bit more than just water pressure to achieve a clean finish. In my experience, I’ve found that pre-treating the area with a degreasing agent can enhance results significantly. Spraying the solution on the affected area and letting it sit for 10-15 minutes allows it to penetrate deeply.
Techniques for Success
When using a high-intensity cleaner, always start with a wider nozzle to avoid damaging the surface, especially if it’s delicate. Gradually switch to a narrower nozzle for a more concentrated force on stubborn spots. It’s crucial to maintain a consistent distance from the surface–around 12 to 18 inches is ideal. After treating the grease marks, rinsing with clean water helps to wash away the loosened residue effectively.
Additional Tips
For tough grime on non-porous surfaces, such as metal or plastic, consider incorporating a brush attachment. This can help scrub away remaining residue after the initial rinse. If you’re also dealing with algae or other stubborn contaminants, you might want to check out this guide on how to clean algae off plastic aquarium plants, as some techniques are transferable. Always remember to wear protective gear and test a small area first, especially on sensitive surfaces.
Understanding Oil Stains and Their Composition
To effectively tackle these blemishes, you must grasp their nature. Composed primarily of hydrocarbons, these marks originate from various sources, including vehicles and machinery. The specific makeup can vary based on the origin; for instance, motor oil contains additives that can alter its adhesive properties over time.

When assessing a mark, consider its age. Fresh spills are often easier to manage than older ones, which may have penetrated deeper into surfaces. The porosity of the material in question also plays a significant role; concrete absorbs these substances more readily than asphalt or tiles, making extraction more challenging.
In my experience, I’ve found that the type of surface significantly influences the success of any cleaning method. For instance, porous surfaces can trap residue, necessitating a combination of techniques for effective cleaning. Using a degreaser specifically formulated for the type of surface can enhance the overall outcome.
Understanding the environmental impact is equally important. Some cleaning agents can be harmful to vegetation and water sources, so always opt for eco-friendly products when possible. This not only protects your surroundings but also aids in achieving a more sustainable cleaning process.
In my years of working with various cleaning devices, I’ve realised that preliminary treatment, such as applying a suitable solvent, can make a considerable difference. It loosens the grip of the substances, allowing for a more thorough cleansing experience later on.
How Pressure Cleaners Work: A Technical Overview
Understanding the mechanics behind a high-powered cleaning device can be fascinating. These machines operate using a simple yet effective principle involving water flow and force. The heart of the system is an electric or petrol engine that drives a pump, which pressurises the water. This pressurised stream is then directed through a nozzle, creating a concentrated jet capable of dislodging debris and grime.
The Pump Mechanism
The pump is the core component that determines performance. There are two main types of pumps: axial and triplex. Axial pumps are common in lower-end models, suitable for light tasks. Triplex pumps, on the other hand, are more robust, designed for heavy-duty use. They feature three pistons that provide a more consistent flow and higher pressure, making them ideal for tougher jobs.
Nozzle Types and Their Impact

The nozzle plays a crucial role in controlling the water’s impact. Various nozzle types allow for adjustments in spray pattern and intensity. For instance, a 0-degree nozzle produces a narrow, intense stream suitable for stubborn dirt, while a 40-degree nozzle disperses water over a wider area, perfect for rinsing off surfaces. Choosing the right nozzle can make a significant difference in cleaning efficiency.
| Nozzle Type | Spray Angle | Best For |
|---|---|---|
| 0-degree | 0° | Stubborn grime and tough surfaces |
| 15-degree | 15° | Concrete and stone |
| 25-degree | 25° | Wood and vehicles |
| 40-degree | 40° | Washing cars, light cleaning |
In my experience, experimenting with different nozzles has often yielded surprising results. One time, I was tackling a particularly stubborn stain on a driveway. Switching from a 25-degree to a 15-degree nozzle made all the difference, cutting through the grime in no time. It’s these little adjustments that can elevate the cleaning process significantly.
Types of Pressure Washers Suitable for Oil Stains
For tackling greasy spots, I recommend using hot water units, as they excel in breaking down tough residues. The heat helps to dissolve the hydrocarbons found in these marks. A machine with a temperature range of 150°F to 200°F is ideal for optimal results. In my experience, these models often come with a higher flow rate, which aids in rinsing away remnants effectively.
Electric versus Gas Models
Electric machines are convenient for smaller tasks and residential use. They’re quieter and easier to handle, making them suitable for minor spills. However, for larger areas or more stubborn marks, gas models provide superior power and mobility. I’ve worked with a variety of gas-powered units that deliver over 3000 PSI, which can significantly enhance the cleaning process in garages or driveways.
Rotary and Surface Cleaners
Using a rotary attachment or surface cleaner can also speed up the job. These tools distribute water evenly across the surface, ensuring thorough treatment. I’ve seen remarkable results when combining a hot water unit with a rotary cleaner–it can cut down cleaning time dramatically while ensuring no residue is left behind. This method is particularly effective when dealing with extensive areas covered in grease.
Best Cleaning Solutions to Use with a Pressure Washer
For tackling stubborn marks, I’ve found that specific cleaning agents significantly enhance results. A degreaser is a must when dealing with greasy surfaces. Opt for a biodegradable variety to protect the environment while effectively breaking down the grime. I’ve tested several brands, and I often recommend those that contain citrus-based ingredients for their powerful yet pleasant scent.
For concrete and asphalt surfaces, a diluted solution of sodium hypochlorite works wonders. It not only eliminates unsightly marks but also tackles mould and mildew that can thrive in damp conditions. Just ensure you follow up with a rinse to prevent any residue from lingering.
Another effective option is a specially formulated alkaline cleaner. These are particularly useful for automotive or industrial applications, cutting through tough residues. I once tackled a garage floor covered in automotive spills using this method, and the results were impressive. The alkaline solution penetrated deep, loosening the grime for easy removal.
Remember to always mix these solutions according to the manufacturer’s instructions. Over-concentration can lead to damage on certain surfaces. I learned this the hard way when I accidentally used too strong a mixture on a wooden deck, resulting in discolouration.
Lastly, consider using a foaming agent. This not only helps the cleaner adhere to the surface longer but also allows for better penetration into tough marks. I often use a foam cannon attachment for a more even application, ensuring every inch is treated effectively.
In summary, the choice of cleaning solutions can significantly enhance the performance of your equipment. Each type has its unique strengths, and selecting the right one based on the surface and type of mark can lead to outstanding results. Trust me; your surfaces will thank you for it!
Preparation Steps Before Using a Pressure Washer
Before getting started, it’s crucial to gather all necessary supplies. Ensure you have the right cleaning solution compatible with your equipment. Having a degreaser on hand can significantly enhance the cleaning process.
Next, assess the area you’ll be working in. Remove any loose items or obstacles that might get in the way. This includes furniture, vehicles, and any delicate plants nearby. I once overlooked a garden gnome, which unfortunately didn’t survive the experience.
Consider the type of surface you’ll be dealing with. Different materials respond uniquely to high water flow. For instance, concrete can handle higher intensities compared to wood or painted surfaces. I learned this the hard way when a wooden deck got stripped of its finish after an overly aggressive wash.
Check the weather conditions. Ideally, choose a dry day with mild temperatures. High humidity can lead to quick drying, leaving residue behind. I remember attempting to clean a driveway on a damp day, only to find that the grime had not budged, and I had to repeat the process.
It’s wise to perform a test on a small, inconspicuous area. This allows you to gauge how the surface reacts and adjust your technique accordingly. I often test settings on the corner of a patio before proceeding with the entire area.
Lastly, wear appropriate safety gear. Goggles and gloves are must-haves to protect yourself from debris and splashes. I once had a stone chip hit my arm while working without gloves, which was a painful reminder to prioritise safety.
Techniques for Targeting Oil Stains Effectively
Start with a pre-treatment solution to break down the grime. A solvent specifically designed for automotive fluids works wonders. Apply it directly onto the affected area and let it sit for at least 15 minutes. This allows the chemicals to penetrate and loosen the gunk.
Next, use a surface cleaner attachment, if available. This tool offers a wider cleaning path and helps maintain an even distance from the surface. It prevents streaking and ensures a more uniform clean.
Utilise the appropriate nozzle. A 25-degree nozzle is generally recommended for most surfaces, but for tougher spots, consider a 15-degree nozzle. This narrower spray increases pressure concentration, making it easier to lift stubborn residues.
Maintain a consistent distance of approximately 12 to 18 inches from the surface. Too close can damage the material, while too far reduces effectiveness. Adjust as needed based on the surface type.
Incorporate a scrubbing action while rinsing. Move the wand in a back-and-forth motion to agitate the surface, allowing the cleaning solution to work its magic. This manual intervention significantly enhances the outcome.
Rinse thoroughly with clean water after treatment. Residual cleaning agents can attract dirt if left to dry on the surface. Ensure you remove all traces to maintain a pristine finish.
Finally, consider using absorbent materials to soak up any remaining moisture or fluid. This step is particularly crucial for porous surfaces like concrete, which can retain remnants even after thorough washing.
Here’s a quick checklist for targeting those pesky spots:
- Apply a suitable pre-treatment solution.
- Use a surface cleaner attachment if possible.
- Choose the right nozzle for the job.
- Maintain the correct distance from the surface.
- Incorporate scrubbing motions during rinsing.
- Rinse thoroughly to avoid residue.
- Use absorbent materials for final touch-ups.
Common Mistakes to Avoid When Using a Pressure Washer
One critical mistake I often see is using the wrong nozzle. Each nozzle serves a different purpose, and selecting one that’s too narrow can cause damage to surfaces. Always start with a wider angle, such as 25 degrees, to gauge the effect.

- Incorrect Distance: Maintaining the right distance from the surface is key. Standing too close can lead to etching, while being too far reduces effectiveness.
- Neglecting Safety Gear: Skipping safety equipment, like goggles or gloves, can result in injuries. Always protect yourself from debris and chemicals.
- Ignoring Surface Preparation: A thorough clean-up of loose debris before starting can significantly enhance results. It’s worth the extra few minutes.
- Inadequate Cleaning Solutions: Using the wrong detergent can hinder the cleaning process. Opt for solutions specifically designed for the task at hand.
- Overusing the Equipment: Prolonged use without breaks can lead to overheating. Allow the machine to rest periodically to avoid damage.
From my experience, many people underestimate the importance of proper technique. For example, spraying too aggressively can cause splatter and make a mess rather than achieving a clean surface.
Another common error is failing to check the equipment before use. Inspect hoses, connections, and filters to avoid interruptions during cleaning. Regular maintenance extends the life of your machine.
If you’re looking for a reliable option for unblocking drains, consider a petrol pressure washer to unblock drains. They offer robust performance and are great for tough jobs.
Lastly, avoid rushing through the process. Taking your time ensures thorough cleaning and reduces the risk of making mistakes that can lead to damage or unsatisfactory results.
Alternative Methods for Removing Oil Stains
For persistent marks, consider these tried and tested methods that can effectively tackle the issue without relying solely on high-pressure equipment.
1. Absorbent Materials
Utilising absorbent materials can be a straightforward approach:

- Baking Soda: Sprinkle generously over the affected area. Let it sit for at least 30 minutes to absorb the residue, then sweep or vacuum it up.
- Cat Litter: Use non-clumping cat litter for larger spills. Spread it over the stain, allow it to absorb for several hours, and then sweep away.
- Paper Towels: Lay them over the stain immediately to absorb excess liquid. Replace them as needed until no more oil is being absorbed.
2. Homemade Cleaning Solutions
Creating your own cleaning solutions can be both economical and effective:
- Dish Soap and Hot Water: Mix a few drops of dish soap in hot water. Apply to the stain using a scrub brush. Rinse thoroughly with clean water.
- Vinegar and Baking Soda: This combination can break down greasy marks. Apply vinegar first, then sprinkle baking soda. Let it fizz for a few minutes before scrubbing and rinsing.
- Commercial Degreasers: Look for products specifically designed to cut through grease. Follow the manufacturer’s instructions for application and rinsing.
With these methods, you can effectively address troublesome marks without the need for high-pressure techniques. Each solution has its own strengths, so choose based on your specific situation and preferences.
Maintenance Tips for Your Cleaning Equipment After Use
After finishing a job, it’s crucial to take a few moments to maintain your cleaning equipment. This not only prolongs its life but also ensures optimal performance for future tasks. One of the first steps I recommend is to flush the system with clean water. This removes any residues from cleaning solutions or debris that could clog the nozzles or hoses.
Steps for Proper Maintenance
Follow these steps to keep your equipment in top shape:
- Disconnect the water supply and power source to prevent any accidents.
- Run clean water through the machine for several minutes. This helps clear out any leftover cleaning agents.
- Inspect the nozzle and gun for blockages. A simple cleaning can prevent future issues.
- Check the hoses for any signs of wear or damage. Replace if necessary to avoid leaks during your next use.
- Store the machine in a dry place, away from extreme temperatures, to prevent damage to components.
Regular Check-ups
Every few months, conduct a more thorough inspection. I always recommend checking the oil levels (if applicable) and replacing filters as required. Keeping an eye on these details can save you from costly repairs down the line.
| Component | Maintenance Frequency | Action |
|---|---|---|
| Nozzle | After each use | Clean and inspect for clogs |
| Hoses | Monthly | Inspect for wear and replace if damaged |
| Oil (if applicable) | Every 6 months | Check levels and replace as needed |
| Filters | Quarterly | Replace to ensure optimal performance |
Implementing these maintenance practices has helped me avoid many headaches and unexpected breakdowns over the years. Your equipment deserves care to keep it running smoothly for all those tough cleaning challenges ahead.
.jpg)

.jpg)


