


Yes, a high-pressure cleaner can effectively strip coatings from timber surfaces, provided the right technique and settings are used. In my decade of experience, I’ve discovered that the success of this task hinges on pressure settings, nozzle type, and distance from the surface.
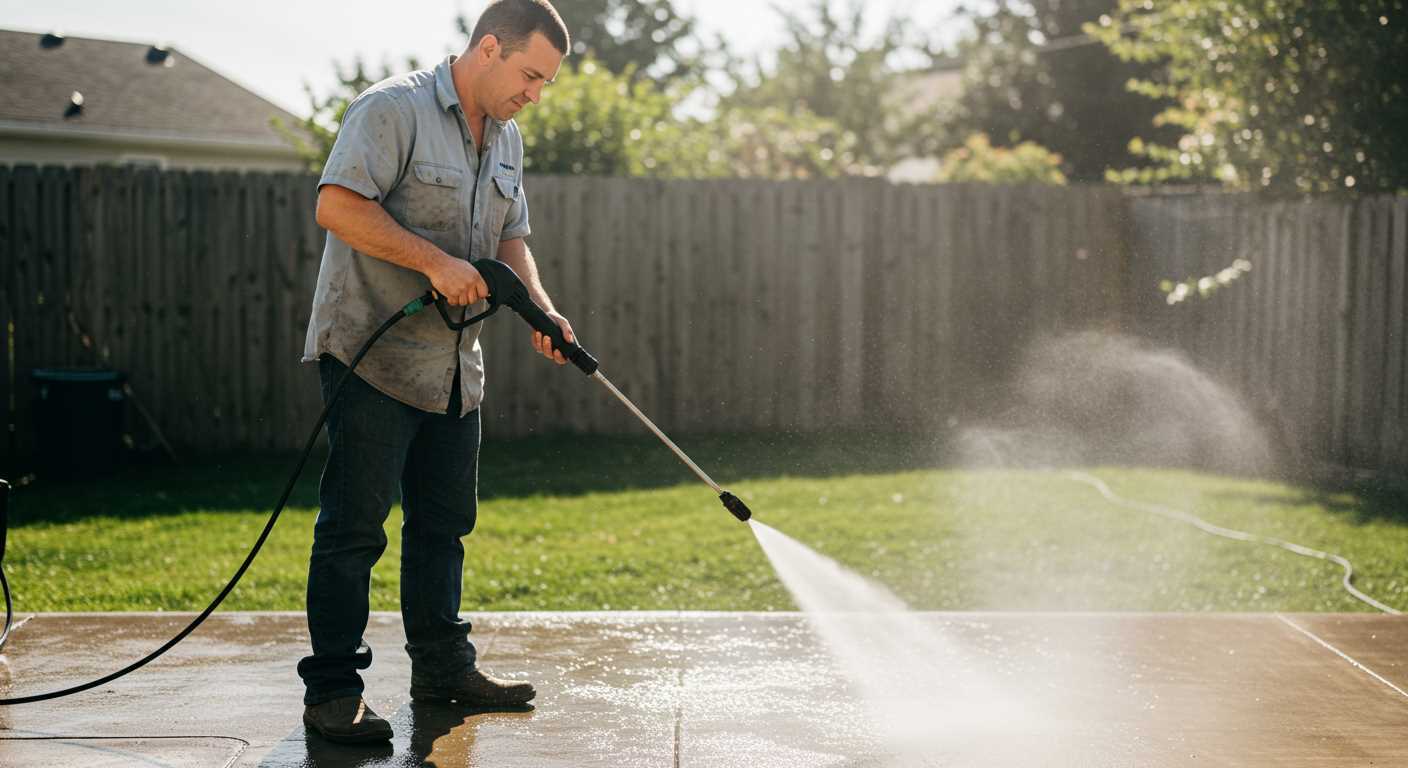
During my time in the industry, I had a memorable encounter with an old wooden deck that had seen better days. The previous owners had applied multiple layers of varnish, making it look dull and lifeless. Armed with a high-pressure cleaner, I set to work. I used a fan nozzle to disperse the water evenly and adjusted the pressure to a moderate setting. This approach allowed me to lift the old finish without damaging the timber underneath.
Choosing the correct distance is equally vital. Standing too close can gouge the wood, while being too far reduces effectiveness. I found that maintaining a distance of around 30 cm typically yields the best results. Additionally, moving the nozzle in a consistent, sweeping motion helps to avoid focused wear on any one area.

It’s also essential to consider the type of wood and the condition of the surface. Softer woods like pine respond differently compared to hardwoods. I recall another project where I tackled a hardwood fence. A lower pressure setting was necessary to prevent splintering. Patience and a gentle touch can often yield superior results.
For those considering this method, I recommend conducting a spot test on a small, inconspicuous area first. This way, you can observe the effect on the timber and adjust your technique accordingly. With the right approach, revitalising timber surfaces can be both satisfying and rewarding.
Can a High-Pressure Cleaner Strip Coatings from Timber?
Absolutely, a high-pressure cleaner can effectively strip coatings from timber surfaces, provided the correct technique and settings are used. During my years working with various models, I often found that the right nozzle and pressure settings made all the difference. Using a 15-degree nozzle typically offered the best balance between force and control, ensuring that I could tackle stubborn layers without damaging the underlying material.
It’s crucial to maintain a safe distance–around 12 to 18 inches–from the surface. Getting too close can easily gouge the timber, leaving it rough and uneven. I recall one project where a client wanted to rejuvenate an old deck. By maintaining the proper distance and angle, we successfully stripped the old finish without harming the wood grain.
Temperature can also play a role. Warmer water can enhance the cleaning process, allowing for better removal of stubborn residues. I often used heated water when available, which not only increased effectiveness but also reduced the time needed for the task.
Before starting, always test a small, inconspicuous area. This step helps gauge how the timber reacts and adjusts the technique as needed. I once encountered a unique type of timber that reacted poorly to high pressure, requiring a gentler approach. A little caution goes a long way in ensuring that the surface remains intact.
Lastly, consider following up with a wood conditioner or sealer after the task is complete. This not only protects the timber but also enhances its appearance, making the effort worthwhile. My experience has shown that taking these extra steps leads to a beautifully restored surface that lasts longer.
Understanding the Basics of Pressure Washing
Choosing the right equipment is paramount. Opt for a unit that offers adjustable settings. This allows you to tailor the intensity based on the task at hand. For sensitive surfaces, lower settings prevent damage, while tougher jobs may require higher settings.
Familiarise yourself with the various nozzle types. Each nozzle serves a specific purpose. A wider spray pattern suits delicate tasks, while a narrow stream tackles stubborn grime effectively. During my years in the industry, I learned that selecting the appropriate nozzle can significantly impact the outcome.
Water temperature plays a crucial role. Hot water enhances cleaning efficacy, especially for oily or greasy surfaces. My experience shows that many people underutilise this feature, leading to less satisfactory results. If your machine allows, utilise hot water for maximum impact.
Safety gear is non-negotiable. Always wear protective eyewear and sturdy footwear. High-speed water jets can cause injury if not handled properly. I recall a colleague who disregarded safety measures and ended up with a nasty injury. That served as a stark reminder of the importance of protection.
Before starting, clear the area of obstacles and debris. This not only prevents accidents but also allows for more effective cleaning. I often found that spending a few moments preparing the space leads to a smoother and quicker process.
| Aspect | Recommendation |
|---|---|
| Equipment Selection | Choose a unit with adjustable settings |
| Nozzle Types | Use appropriate nozzles for specific tasks |
| Water Temperature | Hot water for oily surfaces |
| Safety Gear | Wear protective eyewear and sturdy footwear |
| Site Preparation | Clear the area of obstacles |
Regular maintenance of the equipment ensures longevity. Clean filters and check for clogs routinely. I’ve seen machines fail due to neglect, leading to frustrating delays. A little upkeep goes a long way.
Lastly, practice makes perfect. Spend time familiarising yourself with the equipment before tackling larger projects. The more comfortable you become, the better the results you’ll achieve. In my experience, this is one of the key factors in successful cleaning tasks.
How Different Types of Paint Respond to Pressure Washing
Understanding how various coatings react to high-pressure cleaning is crucial for achieving optimal results while safeguarding the underlying surface. In my years of testing, I’ve encountered a range of finishes, each with its unique characteristics.
- Latex Paint: This water-based option typically holds up well against vigorous techniques. It often loosens quickly, allowing for effective removal without much effort. However, exercise caution, as excessive force can compromise the wood beneath.
- Oil-Based Paint: More resilient, oil-based coatings require a bit more finesse. They tend to adhere strongly and may need multiple passes to see significant results. Keep the nozzle at a safe distance to avoid damaging the substrate.
- Chalk Paint: This popular choice for vintage looks can be tricky. Its porous nature means it can absorb water. Therefore, a gentler approach is advised to prevent any unintended degradation.
- Stain: Semi-transparent stains can react variably. While some may lift easily, others cling tightly. Testing a small area first is wise to gauge how the material will respond.
- Enamel Paint: Known for its durability, enamel often requires a combination of techniques to fully strip it away. Direct pressure may not be effective, so consider using a chemical remover first.
Always perform a patch test on an inconspicuous section to assess the reaction before proceeding with larger areas. For those involved in specific projects, such as screen printing, selecting the right equipment is paramount. Check out this pressure washer for screen printing to ensure you have the best tool for your needs.
In conclusion, knowing the type of finish you’re dealing with will guide your approach and help preserve the integrity of the surface beneath. Each type of coating requires a tailored method to achieve the desired outcome effectively.
Choosing the Right Pressure Washer for Paint Removal
For effective stripping of coatings, a unit with a minimum of 2000 PSI is advisable. In my experience, machines in this range deliver sufficient force without damaging the underlying material. A higher PSI can be beneficial, but always consider the nature of the surface you’re working on.
Flow Rate Matters
Alongside pressure, the gallons per minute (GPM) rating significantly impacts your success. A higher GPM results in better cleaning efficiency, as more water means better coverage and faster work. For optimal outcomes, a model with at least 2.5 GPM should be on your radar. I recall a project where a lower GPM machine left a lot of residue; switching to one with a higher flow made a noticeable difference.
Types of Nozzles
Nozzles play a vital role in the process. A 15-degree nozzle is generally the go-to for tough tasks, providing a concentrated stream that effectively lifts away coatings. Conversely, a wider nozzle is better for rinsing and preparing surfaces post-stripping. I always keep a variety in my toolkit; it allows for flexibility based on the material and condition of the surface.
Electric models are easier to handle for lighter jobs, while gas-powered variants offer more power for extensive tasks. Based on my testing, gas units are preferable for larger areas or tougher coatings. Always consider the weight and manoeuvrability, especially if you plan to work on vertical surfaces.
Lastly, ensure you invest in a unit with an adjustable pressure feature. This helps tailor the cleaning power to different situations, reducing the risk of damage to softer surfaces. I’ve seen many novices struggle with this aspect; an adjustable model can save both time and frustration.
Recommended Pressure Settings for Wood Surfaces
For optimal results on timber surfaces, set the device between 800 to 1200 psi. This range effectively tackles stubborn residues without risking damage to the substrate.
Specific Tips for Different Wood Types
- Pine: Use around 1000 psi, ensuring a balance between cleaning and preserving the wood’s integrity.
- Cedar: A lower setting of 800 psi is ideal, as cedar is softer and can be easily marked.
- Hardwoods: For oak or maple, 1200 psi may be necessary, but maintain a distance of at least 12 inches to prevent gouging.
Distance and Technique
Maintaining the correct distance is crucial. Keep the nozzle approximately 12 to 24 inches away from the surface. Hold the lance at a slight angle to avoid direct hits that may cause etching.
For best outcomes, work in sections. Overlap your strokes to ensure uniformity, and avoid prolonged exposure to the same area.
Lastly, ensure your equipment is in good condition to achieve consistent results. If you’re considering additional tools, check out the best air compressor for cold weather for any supplementary needs while working outdoors.
Techniques for Safely Removing Coatings from Wood
Start by selecting the appropriate nozzle for your task; a wide spray pattern can prevent damage to the surface. I once used a 25-degree nozzle on a softwood deck, and it worked wonders without stripping too much of the underlying material. Adjust the distance as you work–maintaining at least 12 inches between the nozzle and the surface ensures a gentle touch while still being effective.
Prepping the Surface
Before you begin, clear the area of any furniture or obstacles. I learned the hard way that even small items can interfere with the process and create a mess. Cover nearby plants and delicate surfaces with tarps to protect them from debris and water. Also, ensure the wood is dry; moisture can lead to uneven results, as I discovered during a rainy project where the wet surface absorbed the force unevenly.
Post-Cleaning Care
After stripping the coatings, inspect the surface for any rough patches or splinters. I recommend sanding these areas down to prepare for refinishing. A thorough wash with a mild detergent and water can help remove any residual debris. Lastly, apply a suitable sealant or stain to protect your newly revealed wood. I’ve found that taking this extra step significantly enhances the longevity and appearance of the surface.
Potential Risks of Using a Pressure Washer on Wood
Utilising high-force water to strip surfaces carries inherent dangers, especially with softer materials like timber. I’ve observed firsthand the damage that can occur when the settings are too aggressive or the technique is improper. The most significant risk is causing gouges or splintering, which can ruin the surface. It’s crucial to maintain a safe distance to prevent these issues.
Surface Damage and Structural Integrity
In my experience, even a seemingly minor nick can lead to larger problems. Once the protective outer layer is compromised, moisture can infiltrate, resulting in rot or warping over time. This is particularly problematic for outdoor structures that are exposed to the elements. I once encountered a situation where a client attempted to refresh a deck, and the excessive force led to extensive repairs that could have been avoided with more caution.
Health Hazards
A lesser-known risk is the potential for harmful particles to become airborne. When stripping finishes, dust and chips can contain toxic substances, especially from older coatings. It’s wise to wear appropriate protective gear, such as masks and goggles, to shield against inhalation or eye contact. I learned this the hard way during a project where I didn’t take these precautions, and the aftermath was uncomfortable.
Always consider the environment when operating machinery. Nearby plants or animals can be adversely affected by the runoff. I recommend using biodegradable cleaners when necessary and ensuring that the area is clear of sensitive vegetation. A mindful approach not only protects your project but also the surrounding ecosystem.
To summarise, while using high-force water can be effective, it’s essential to understand the risks involved and take necessary precautions to safeguard both the material and your health. Careful preparation and technique can make a significant difference in achieving satisfactory results without unintended consequences.
Preparing Wood Surfaces Before High-Pressure Cleaning
Before tackling the task, ensure you clear the area of any furniture, plants, and debris. I’ve seen too many projects go awry simply because someone forgot to move a potted plant or a patio set. These items can be damaged or even cause injury if they’re left in the vicinity.
Next, inspect the boards for any loose pieces or damage. I remember a job where a homeowner didn’t check for loose sections; the high-velocity stream of water exacerbated existing issues, leading to more repairs. Replace or securely fasten any problematic sections prior to starting.

Cleaning the surface thoroughly is key. Use a broom or leaf blower to remove dirt, dust, and cobwebs. I often find that even a quick sweep can significantly enhance the outcome. Wetting the surface lightly can also help loosen stubborn grime, but avoid soaking it, as excess moisture can affect the subsequent treatment.
Assess the current finish. If there are remnants of treatments like sealants or stains, these can interfere with results. I once had a client who assumed a light cleaning would suffice, but the presence of a sealant complicated the task. In such cases, a suitable stripping agent may be required, provided it’s compatible with the wood type.
Finally, check the weather forecast. I learned the hard way that trying to work in damp or overly sunny conditions can lead to less than satisfactory results. Aim for a dry day with mild temperatures. It makes a world of difference in how the wood responds to the process.
Post-Washing Care for Wood After Paint Removal
After you’ve stripped the old coating, it’s crucial to attend to the surface promptly. Begin by allowing the timber to dry completely; this can take anywhere from a few hours to a full day, depending on the climate. Moisture trapped in the grain can lead to mould growth if not addressed.
Inspection and Repair
Once dry, inspect the surface for any damage. Look for splinters, cracks, or rot. If you find any imperfections, sand them down to create a smooth finish. For deeper gouges or splits, consider using a wood filler that matches the colour of your timber. This not only restores the appearance but also helps protect against the elements.
Sealing and Finishing
After repairs, sealing is essential. Choose a high-quality wood preservative or sealant suited for outdoor use. Apply it with a brush or sprayer, ensuring even coverage to protect against moisture and UV rays. Allow the sealant to cure fully before adding any stain or finish. If you opt for a stain, test it on a small, inconspicuous area first to ensure it meets your aesthetic expectations.
Regular maintenance is key. Check the surface periodically and reapply sealant as needed, typically every few years, to prolong the life of the timber. By following these steps, you’ll not only enhance the appearance but also ensure the longevity of your wooden surfaces.
FAQ:
Can a pressure washer effectively remove paint from wood surfaces?
Yes, a pressure washer can effectively remove paint from wood surfaces, especially if the paint is old or peeling. However, the effectiveness depends on several factors, such as the type of paint, the age of the paint, and the pressure setting of the washer. It is advisable to start with a lower pressure to avoid damaging the wood and gradually increase if necessary.
What precautions should I take when using a pressure washer to remove paint from wood?
When using a pressure washer for paint removal, it is important to take several precautions. First, ensure you are wearing protective gear, including goggles and gloves, to prevent injury from paint particles and water pressure. Second, test a small, inconspicuous area of the wood to see how it reacts to the pressure before proceeding with the entire surface. Lastly, keep the nozzle at a safe distance from the wood to avoid gouging the surface.
Will using a pressure washer damage my wooden surface?
Using a pressure washer can potentially damage wooden surfaces if not done correctly. High pressure can strip away not only the paint but also the wood fibres, leading to splintering or gouging. To prevent damage, it is recommended to use a lower pressure setting and maintain a safe distance from the surface. Additionally, using a wide spray pattern can help to reduce the risk of damaging the wood.
Are there any alternatives to pressure washing for paint removal on wood?
Yes, there are several alternatives to pressure washing for removing paint from wood. Chemical paint strippers are a common option, as they can effectively dissolve paint without the need for high pressure. Sanding is another method, which can be labour-intensive but allows for greater control over the wood surface. Heat guns can also be used to soften the paint for easier removal. Each method has its pros and cons, so it’s best to choose one that suits your particular project and skill level.
.jpg)


